Page is loading ...

METAL DETECTOR
UX-10MDW
INSTRUCTION MANUAL
Please read this manual carefully before using,
and keep it for future reference.

General Safety 3
Assembly 4
Batteries 5
Headphones 7
Panel and Controller 8
Operation 9
Turning on 9
Testing and using detector 9
Target indications (metals to detect) 10
Tone Sounds 10
Outdoor Use 11
Pinpointing the Target 12
Specification 13
Customer Support Last Page
CONTENTS

3
Read this manual thoroughly before you start using throducte product.
Store this manual, the completed warranty card, your receipt and the product packaging.
The safety precautions instructions reduces the risk of fire, electric shock and injury when
correctly complied to.
Please follow all instructions and take notice of all warnings.
GENERAL SAFETY
CAUTION:
Incorrect usage of batteries may result in battery leakage, overheating, or explosion.
Released battery fluid is corrosive and can be toxic. It can cause skin and eye burns, and is
very harmful if swallowed.
WARNING:
• Do not use the Metal Detector in areas of trac.
• Always obtain permission before searching or digging any site.
• Keep away from regions that may contain electrical lines, or piplines in particular ones full
of flammable gases and liquids.
• When digging, please use a reasonable method and ensure the vegetation where the hole
is created, is properly filled and placed as was its original state.
• When using Headphones, do not set it loud, as detecting an object dramatically increases
in volume and can damage your hearing.
To reduce the risk of injury:
• Keep batteries out of reach of children.
• Do not heat, open, or dispose of batteries in fire.
• Do not mix new and old batteries or different types (for example, carbon-zinc and
alkaline batteries).
• Do not allow metal objects to touch the battery on the device.
• Always remove batteries if they are old, weak or worn-out before storing your device
for an extended period of time. Be sure to promptly recycle or dispose of the batteries in
accordance with Local and National Disposal Regulations.
• If the batteries leak, immediately remove all batteries with care and keep the leaked fluid
from touching your skin or clothes. If fluid comes in contact with your skin, immediately
wash with water.

4
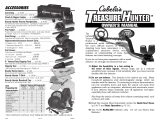
Assembly is easy
1. Insert the latch on the top of the handle into the assembly hole on the bottom
of the control box. Then slightly push the control box in the direction of IN
marked on the handle to fix the latch in place. Secure the contorl box with
fixing screw properly.
2. Unscrew the fixing knob on the search coil and remove the knob connector.
Place the washers into the groove of the lower stem. Then insert the stem
and align the holes on the earch coil bracket and the stem. Push the connector
through the holes and tighten the knob.
ASSEMBLY

5
3. Press the silver button on the middle stem, and slide the stem into
the upper stem.
4. Press the silver button in the lower stem, and slide the stem into the
middle stem.
5. Wind the search coil cable around the stem. Leave enough slack in the cable
and insert the search coil cable into the five pin jack on the control box.
6. Turn the stem’s lock nut on the middle stem clockwide until it loosens. Adjust
the stem to a length you feel is comfortable when you stand upright with the
detector in your hand and the search coil is level with the ground with your arm
relaxed by your side. Then counter clockwise rotate to tighten the lock nut.
ASSEMBLY (Cont.)

6
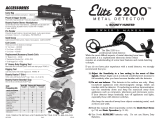
INSTALL THE 2 x 9V BATTERIES
1. Turn off the power before installing the batteries (included)
2. Slide the left and right battery covers off in the direction of the arrow.
3. Place the batteries into the battery compartment matching the polarity
symbols (+ and -) marked inside.
4. Replace the battery covers back to the side they were removed from.
• Reinstall the battery cover, once all batteries are placed the correct way.
• If you dont plan on using the metal detector for a period of time, please remove
the batteries.
• Do not mix new and old batteries.
BATTERIES

7
USING HEADPHONES
- It is recommended to use headphones with volume control.
- Insert the headphones into the PHONE jack. At this time the built-in speaker
will disconnect.
- Set the VOLUME to desired setting.
LISTEN SAFELY
- To protect your hearing, set the volume to the lowest setting, then adjust the
volume to a comfortable level.
- Do not listen at extremely high volume levels. Extended high volume listening
can lead to permanent hearing loss.
- Do not wear headphones while operating your detector near traffic areas.
Pay attention to traffic at all times.
HEADPHONES

8
PANEL AND CONTROLLER
Target
Indicator
DISC/NOTCH
Indicator
TARGET
Numeric
Indicator
POWER
OFF/ON
DISC Numberic
indicator
Battery
Indicator
SENS - Press SENS then + or - button to increase or decrease the
sensitivity. LCD display will show the current level of sensitivity, if
the target depth is beyond the MAX sensitivity of the detector,
the target will not be found.
DISC Numeric Press DISC then + or - buttons to select the desired DISC number.
Range: If the target material is beyond the DISC range, it can’t
be discriminated.
NOTE: The highest DISC numeric setting is 80. If you set the DISC
number to 80, all targets less than this number will not
be detected.
NOTCH: Press NOTCH, then + or - buttons to select the target to be
notched. The curse above the selected target will flash. Press
NOTCH again, the target name below the curser will disappear.

9
DISC/NOTCH
Indicator
TURNING ON THE DETECTOR
1. Press the POWER button to turn on the detector.
2. LCD will display all the symbols and the detector will make sounds low,
medium and high tones respectively. After about 2 seconds the detector enters
into STAND-BY state. At this time the default mode is DISC
3. You are now ready to use the detector.
TESTING AND USING THE DETECTOR
To learn how the detector reacts to different metals, you should test it before you
use it for the first time. You can test detector indoors and outdoors.
TESTING AND USE
1. Turn on the detector.
2. Setting the operating mode:
- DISC: Press the DISC, then + or - to set the DISC numeric value.
If the numeric value is set to 00, the detect can detect all metals. If you
want to find one of the target materials listed on the LCD, you can set the
relative numeric range of DISC by press the DISC button, then adjusting
with + or - buttons.
EXAMPLE of detections:
- IRON (range 0 - 5)
- 5c (range 6 - 17)
- P-TAB (range 18 - 26)
- ZN (range 27 - 38)
- 1c (range 39 - 62)
- 25c (range 63-99)
NOTE: When adjusting numeric value the indicators located above, it will not
detect the metals below the numeric value you have selected.
When detecting the metals, the Target indicator bars above the metals on top
of your screen will light up.
2. NOTCH - Pressing NOTCH then the + or - buttons to select the material you
do not want to detect. it will prevent being detected. If you want to detect the
material again, press NOTCH button again to set back to normal.
OPERATION

10
OPERATION (Cont.)
3. Press the SENS then press + or - button to set the sensitivity. The default level
is of 6 bars. Note: if you dont press the SENS then + or - buttons within
2 seconds the detector will enter back into standby mode.
4. Place the detector on a wooden or plastic table, then remove any watches,
rings, or metal jewelry you are wearing.
5. Adjust the Ring Coil / flat part towards to cieling.
NOTE: Never test the detector on a floor inside the building, most building
have metal of some kind inside the floor, which might interfere with the objects
you are testing or mask the signal completely.
6. Slowly sweep a sample of the material you want the detector to find (such as a
gold ring or coin) within 2-3inches or above the face of the search coil.
When the detector detects any metal, it sounds a tone, and the bars above
the target names will light up according to the metals detected and a tone will
be heard.
TARGET INDICATIONS - Numeric Values of Targets:
- IRON (range 0 - 5) - ZN (range 27 - 38)
- 5c (range 6 - 17) - 1c (range 39 - 62)
- P-TAB (range 18 - 26) - 25c (range 63-99)
NOTE: There are a wide variety of metals and no target can be identified for
certain until unearthed. This table is for general reference only.
TONE SOUNDS
The detector comes with three tones for different types of metals. The built-in
audio identification system sounds a unique tone for each of three categories of
metal. This makes it easier to identify the metal being detected.
LOW TONE - For IRON, foil, bottle cap or nickels.
MEDIUM TONE For P-TAB, ZN, 1c (aluminium pull tabs, zinc or copper items)
HIGH TONE For 25c, brass or silver items.
NOTE:
- When you set the detector to DISC or NOTCH mode, the detector sounds
a medium or high tone when it detects highly oxidized iron.
- Depending on the purity, about 15 percent of gold rings cause the detector
to sound a medium tone.

11
OPERATION (Cont.)
OUTDOOR USE
1. Turn on the metal detector by pressing the power button.
2. Follow the steps described in TESTING AND USE.
3. Once ready, find an area on the ground outside where there is no metal.
4. Place the sample of material you want the detector to find (such as gold ring
or a coin on the ground).
NOTE: If you are using valuable metal such as gold to test the detector, mark
the area where you place the item to help you find it later. Do not place in tall
grass or weeds.
5. Hold the search coil level to the ground about 1-2 inches above the surface,
slowly move the search coil over the area where you place the sample
sweeping the search coil to a side-to-side motion.
- Never sweep the search coil and raise away from the ground at the end of
a sweep as it will cause false readings. Please see below example:
When sweeping search coil side to side (see below), be sure to do it at a slow
pace. If the detector detects an item a tone will sound and the LCD display will
indicate the type of metal found with the numeric range.
Please make sure you are moving the search coil correctly, shown below:
To detect targets that are deeply
buried, you can adjust the SENS sensi-
tivity to a high position.
DO NOT set it to MAX sensitivity, this
will detect other electronic lines and
will be unstable and irregular detection.

12
OPERATION (Cont.)
PINPOINTING THE TARGET
Accurately pinpointing a target makes digging it up easier, but it takes practice.
Follow the below steps to pinpoint a target:
1. When the detector detects a buried target, continue sweeping the search coil
over the detected area in a narrowing side to side motino.
2. Make a visual note of the exact spot on the ground where the detector beeps.
3. Stop the search coil directly over this point in the ground. Then move the
search coil straight away toward you and ahead of you a coiple of times to
pin point the location.
4. Repeat steps 1-3 at the right angle and mark the spot where the sweeping left
to right tone detection, plus the foward and backward motion tone detection
with an X. This is the locations of both moving motions for detections meet.
FACTORS THAT AFFECT DETECTING
- The angle of the target buried in the soil.
- The depth of the target.
- The level of oxidization of the target.
- The size of the target.
- Electro-magnetic and electrical interference surrounding target.
NOTE: In an area of highly mineralised ground or wet sand, the detector will
sound even if there is no metal. In this case, you can lower the sensitivity or
increase the DISC numeric value. Meantime decrease the distance of the
ground and the search coil while sweeping.
In an area with trashy metal, you can set the DISC numeric value to 50. In this
case most nails and small pieces of iron will be eliminated.

13
SPECIFICATIONS
Search Coil: 10 inch Waterproof Search Coil
Search Coil Size: 254mm (10inch)
Headphone Jack: Yes, 3.5mm
Batteries: 2 x 9V Batteries (Included)

14

15

CUSTOMER HELPLINE:
info@ayonz.com
DISTRIBUTED BY:
Ayonz Pty Ltd
/