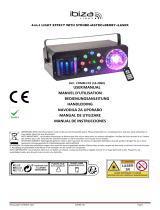
Ibiza Light & Sound COMBI-FX3 Owner's manual

Category
Floodlights
Type
Owner's manual

This manual is also suitable for

MANUAL
FR - Manuel d'Utilisation - p. 7
NL - Handleiding - p. 12
DE - Bedienungsanleitung - S. 17
SI - Navodila za uporabo - p. 22
ES - Manual de Uso - p. 27
RO - Manual de instructiuni - p. 32
4-IN-1 LIGHT EFFECT
with WASH-MOON-STROBE-UV
DMX & REMOTE CONTROL
Ref.
COMBI-FX3
ENGLISH
2
©Copyright LOTRONIC 2019
INSTRUCTIONS FOR USE
4-IN-1 LIGHT EFFECT WASH-MOON-STROBE-UV
Safety Recommendations
Please read the instructions carefully. They contain important information about the installation, operation and
maintenance.
Keep this User Manual for future reference. If you sell the unit to another user, be sure that he also receives this
instruction booklet.
Unpack and check the unit carefully that it has not been damaged during transport before using the unit.
Before operating, ensure that the voltage and frequency of power supply match the power requirements of the
unit.
The unit is for indoor use only in a dry location.
It is essential that the unit is earthed. Only connect to a wall outlet with earth connection.
The unit must be installed in a location with adequate ventilation, at least 0.5m from adjacent surfaces. Be sure
that no ventilation slots are blocked.
Disconnect mains power before fuse replacement or servicing.
Make sure there are no inammable materials close to the unit during operation.
In the event of serious operating problem, stop using the unit immediately.
Never try to repair the unit by yourself. Repair carried out by unskilled people can lead to damage or malfunc-
tion. Please contact the nearest authorized technical assistance center and always use the same type of spare
parts.
Do not touch any wires during operation as high voltage might be causing electric shock.
The light source of this unit is not replaceable. If it is faulty, the unit must be discarded.
The product is for decorative purposes only and not suitable as a household room illumination.
DISCONNECT DEVICE
Where the MAINS plug or an appliance coupler is used as the disconnect device, the disconnect device shall
remain readily operable.
The lightning ash with arrowhead symbol, within an equilateral Triangle, is intended to alert the user to
the presence of not insulated dangerous voltages within the product’s enclosure that may be of sucient
magnitude to constitute a risk of electric shock to persons.
The exclamation point within an equilateral triangle is intended to alert the user to the presence of impor-
tant operating and maintenance (servicing) instructions in the literature accompanying the appliance.
CAUTION
DO NOT OPEN THE HOUSING
SHOCK HAZARD
Installation
The unit should be mounted via its screw holes on the bracket. Always ensure that the unit is rmly xed to
avoid vibration and slipping while operating. Always ensure that the structure to which you are attaching the
unit is secure and able to support a weight of 10 times of the unit’s weight. Also always use a safety cable that
can hold 12 times the weight of the unit when installing the xture.
The equipment must be xed by professionals at a place where is out of the reach of people and where nobody
can pass by or under it.
Fixture Linking
You will need a serial data link to run light shows of one or more xtures using a DMX-512 controller or to run
synchronized shows on two or more xtures set to a master/slave operating mode. The combined number of
channels required by all xtures on a serial data link determines the number of xtures that the data link can
support.
Important: Fixtures on a serial/data link must be daisy chained in one single line. Maximum recommended
serial data link distance: 100 meters (1640 ft.) Maximum recommended number of xtures on a serial data link:
32 xtures
MANUAL - COMBI-FX3
3
www.ibiza-light.com
CABLE CONNECTORS
Cabling must have a male XLR connector on one end and a female XLR connector on the other end.
DMX connector conguration
Termination reduces signal errors. To avoid signal transmission problems and interfe-
rence, it is always advisable to connect a DMX signal terminator.
CAUTION
Do not allow contact between the common and the xture’s chassis ground. Groun-
ding the common can cause a ground loop, and your xture may perform erratically.
Test cables with an ohm meter to check correct polarity and to make sure the pins
are not grounded or shorted to the shield or each other.
Setting up a DMX Serial Data Link
1. Connect the (male) 3 pin connector side of the DMX cable to the output (female) 3 pin connector of the
controller.
2. Connect the end of the cable coming from the controller which will have a (female) 3 pin connector to the
input connector of the next xture consisting of a (male) 3 pin connector.
3. Then, proceed to connect from the output as stated above to the input of the following xture and so on.
DMX address setting
Each xture must have a specic starting address. When receiving signal transmission, every xture will receive
channels control signals for its own starting address.
The user can set several xtures to the same address or set up a separate address for every device.
If more than one xture is set to the same address, all of them receive the same DMX channels signals. All
connected xtures are jointly controlled; the controller can’t control a device separately.
If every device is set to a dierent address, it will receive dierent DMX signals corresponding to its starting
address.
This device has 9 or 17 channels. So, if the device is set to 9CH and the rst device’s starting address is set to
1, second is 10 (1+9), third is 19 (10+9) and so on.
Control Panel
UP
DOWN
MENU ENTER
8.8.8.8.
The control panel is the mechanism for conguring the settings. It has a small LCD
screen and four buttons, which are described below.
Button Function
<MENU>: Scrolls through the rst level of options, or exits from the current menu or
function
<UP>: Navigates upward through the menu list or increases the numeric value when in a function
<DOWN>: Navigates downward through the menu list or decreases the numeric value when in a function
<ENTER>: Enables the currently displayed menu or sets the currently selected value in to the current function
FUNCTION SETTING
DMX address setting
1. Press <MENU>
2. Press <UP/DOWN> to choose, then pres <ENTER> to enter [Addr]
3. Press <Up/Down> to choose address A001~A512
4. Press <ENTER> to conrm, or press «MENU» to exit
Channel Setting
1. Press <MENU>
2. Press <UP/DOWN> to choose [Chnd], press ENTER
3. Press UP/DOWN to choose the channel mode ‘9CH’ or ‘17CH’
ENGLISH
4
©Copyright LOTRONIC 2019
4. Press ENTER to conrm, or press «MENU» to exit
Master-slave setting
1. Press <MENU>
2. Press <UP/DOWN> to choose [SLnd], press ENTER
3. Press <UP/DOWN> to choose Mast/SL1/SL2
4. Press <Enter> to conrm, or press «MENU» to exit.
Sound mode setting
1. Press <MENU>
2. Press <UP/DOWN> to choose [SoUn], press ENTER
3. Select So 0 ….. So7 for the sound programs
Sound sensitivity Setting (before this setting, press MENU, select <SoUn> and save. You must be in Sound
Mode rst, before you can select the sensitivity)
1. Press MENU
2. Press UP/DOWN to choose [Sens], press ENTER
3. Press <Up/Down>, <Enter> to adjust the sound sensitivity from Se99 to Se 0.
4. Press <Enter> to conrm, or press «MENU» to exit.
AUTO mode setting:
1. Press MENU.
2. Press UP/DOWN to choose [AUTO], press ENTER
3. Press<Up/Down> to select an automatic program from Au 0 to Au 7
4. Press enter to set the speed from SP0 to SP9
5. Press <Enter> to conrm, or press «MENU» to exit.
LED display setting: Choose OFF if you want the display to switch o after 30 seconds of non-use.
1. Press MENU.
2. Press UP/DOWN to choose [LED], press ENTER
3. Press<Up/Down> to choose ‘ON’ or ‘OFF’
4. Press <Enter> to conrm, or press «MENU» to exit.
Display reverse setting
1. Press MENU.
2 .Press UP/DOWN to choose [dISP] or [dSIP], press ENTER
Software Version
1. Press < ENTER>
2. Press < UP/DOWN> to select [Ver], then press < ENTER>to check the light’s version information
3. Press <Enter> to conrm, or press «MENU» to exit.
MENU
Addr A001 A512 Address code selection
ChNd 9Ch 17Ch Number of DMX channels
Slnd Mast Sl 1 Sl 2 Choose Master/Slave unit
Soun So 0 So 7 Sound eect
Se99 Se 0 Sound sensitivity
Auto Au 0 Au 7 SP0 Auto eect
MANUAL - COMBI-FX3
5
www.ibiza-light.com
SP 9 Auto eect speed
Led On O LCD display o
dISP dSIP LCD display overturn
Ver V1.0 Current software version
17 DMX CHANNELS
Eect 17 CH Function Value Description
4-in-1
Wash +
UV
1 Dimmer 000-255 0% - 100% Master Dimmer 0-100%
2 Strobe
000-008 Open No Strobe
009-255 Strobe (Speed 0 - 100%) Strobe, Speed (slow to fast)
3 UV 000-255 See Color Table
4 Color1 000-255 See Color Table Micro Color
5 Color2 000-255 See Color Table Micro Color
6 Show 000-255 See Show table Wash eect
7 Show Speed 000-255 Speed slow to fast Wash eect (slow to fast)
5730
Strobe
8 Dimmer 000-255 0% - 100% Master Dimmer 0-100%
9 Strobe
000-008 Open No Strobe
009-255 Strobe (Speed 0 - 100%) Strobe Speed (slow to fast)
10 Show 000-255 See Show table Strobe eect
11 Show Speed 000-255 Speed slow to fast Strobe eect (slow to fast)
Moon
12 Dimmer 000-255 0% - 100% Master Dimmer 0-100%
13 Strobe
000-008 Open No Strobe
009-255 Stroboscope
(Speed 0 - 100%)
Strobe Speed (slow to fast)
14 Color1 000-255 See Color Table Micro Color
15 Color2 000-255 See Color Table Micro Color
16 Show 000-255 See Show table Moon eect
17 Show Speed 000-255 Speed slow to fast Moon eect (slow to fast)
9 DMX CHANNELS
Eect 9 CH Function Value Description
4-in-1
Wash +
UV
1 Show 000-255 See Show table Wash eect
2 Show Speed 000-255 Speed slow to fast Wash eect (slow to fast)
3 Strobe
000-008 Open No Strobe
009-255 Stroboscope
(Speed 0 - 100%)
Strobe, Speed (slow to fast)
5730
Strobe
4 Show 000-255 See Show table Strobe eect
5 Show Speed 000-255 Speed slow to fast Strobe eect (slow to fast)
6 Strobe
000-008 Open No Strobe
009-255 Stroboscope
(Speed 0 - 100%)
Strobe Speed (slow to fast)
Moon
7 Show 000-255 See Show table Moon eect
8 Show Speed 000-255 Speed slow to fast Moon eect (slow to fast)
9 Strobe
000-008 Open No Strobe
009-255 Stroboscope
(Speed 0 - 100%)
Strobe Speed (slow to fast)
ENGLISH
6
©Copyright LOTRONIC 2019
REMOTE CONTROL
1. ON/OFF
2. Automatic mode
3. Music controlled modes
4. Strobe mode
5. Selection of one of the built-in programs
6. Setting of sensitivity and speed of the music controlled mode
7. Setting of sensitivity and speed of the strobe mode
RECOMMENDATIONS FOR BATTERIES
This symbol indicates that used batteries should not be disposed of with household waste but deposited in separate
collection points for recycling.
ATTENTION
Danger of explosion if battery is incorrectly placed. Only replace by the same or equivalent type.
Keep new and old batteries out of the reach of children.
If the battery compartment doesn’t close properly, stop using the product and keep it out of the reach of
children.
WARNING
The supplied remote control contains a button cell. In case of ingestion, it might cause serious internal burns
within only 2 hours that might lead to death.
If you are in doubt whether the batteries have been swallowed or introduced into any other part of the body,
contact immediately a doctor.
Care
Before cleaning the unit, disconnect it if from the mains. Do not use aggressive cleaning agents. Use a clean
cloth to wipe any dust or dirt from the product. We are not liable for damage arising from incorrect handing,
improper use or wear and tear. We reserve the right to make technical modications.
Specications
Power supply ................................................................................................................. 110-240V~50/60Hz
Consumption .........................................................................................................................................50W
Light source ........................................................................................................Wash: 6 x 4W RGBW LEDs
....................................................................................................................... Moon: 2 x 26pcs RGBW LEDs
..................................................................................................................................... UV: 4 x 3W UV LEDs
..................................................................................................................Strobe: 81 pcs. white 5730 LEDs
Dimensions ..................................................................................................................455 x 155 x 165mm
Weight .................................................................................................................................................2.6kg
Correct Disposal of this product
This marking indicates that this product should not be disposed with other household wastes throughout the EU. To
prevent possible harm to the environment or human health from uncontrolled waste disposal, recycle it responsibly to
promote the sustainable reuse of material resources. To return your used device, please use the return and collection
systems or contact the retailer where the product was purchased. They can take this product for environmental safe
recycling.
FRANÇAIS
10
©Copyright LOTRONIC 2019
17 CANAUX DMX
Eet
Canal
Fonction Valeur Description
4-in-1
Wash +
UV
1 Dimmer 000-255 0% - 100% Master Dimmer 0-100%
2 Strobe
000-008 Open Pas de strobo
009-255 Strobe (Speed 0 - 100%) Vitesse strobo lent -> rapide
3 UV 000-255 Voir tableau couleurs
4 Color1 000-255 Voir tableau couleurs Micro Color
5 Color2 000-255 Voir tableau couleurs Micro Color
6 Show 000-255 Voir tableau programmes Eet Wash
7 Show Speed 000-255 Vitesse lent -> rapide Eet Wash (lent -> rapide)
5730
Strobe
8 Dimmer 000-255 0% - 100% Master Dimmer 0-100%
9 Strobe
000-008 Open Pas de strobo
009-255 Strobe (Speed 0 - 100%) Vitesse strobo lent -> rapide
10 Show 000-255 Voir tableau programmes Eet Strobe
11 Show Speed 000-255 Vitesse lent -> rapide Eet Strobe (lent -> rapide)
Moon
12 Dimmer 000-255 0% - 100% Master Dimmer 0-100%
13 Strobe
000-008 Open Pas de strobo
009-255 Stroboscope
(Speed 0 - 100%)
Vitesse strobo lent -> rapide
14 Color1 000-255 Voir tableau couleurs Micro Color
15 Color2 000-255 Voir tableau couleurs Micro Color
16 Show 000-255 Voir tableau couleurs Eet Moon
17 Show Speed 000-255 Vitesse lent -> rapide Eet Moon (lent -> rapide)
9 CANAUX DMX
Eet
Canal
Fonction Valeur Description
4-in-1
Wash +
UV
1 Show 000-255 Voir tableau programmes Eet Wash
2 Show Speed 000-255 Vitesse lent -> rapide Eet Wash (lent -> rapide)
3 Strobe
000-008 Open Pas de strobo
009-255 Stroboscope
(Vitesse 0 - 100%)
Vitesse strobo (lent -> rapide)
5730
Strobe
4 Show 000-255 Voir tableau programmes Eet Strobe
5 Show Speed 000-255 Vitesse lent -> rapide Eet Strobe (lent -> rapide
6 Strobe
000-008 Open Pas de strobo
009-255 Stroboscope
(Vitesse 0 - 100%)
Vitesse strobo (lent -> rapide)
Moon
7 Show 000-255 Voir tableau programmes Eet Moon
8 Show Speed 000-255 Vitesse lent -> rapide Eet Moon (lent -> rapide
9 Strobe
000-008 Open Pas de strobo
009-255 Stroboscope
(Vitesse 0 - 100%)
Vitesse strobo (lent -> rapide)
MANUAL - COMBI-FX3
15
www.ibiza-light.com
17 DMX KANALEN
Eect 17 CH Functie Waarde Omschrijving
4-in-1
Wash +
UV
1 Dimmer 000-255 0% - 100% Master Dimmer 0-100%
2 Strobe
000-008 Open No Strobe
009-255 Strobe (snelheid 0 -
100%)
Strobe, snelheid (traag -> snel))
3 UV 000-255 Zie kleur tabel
4 Color1 000-255 Zie kleur tabel Micro Color
5 Color2 000-255 Zie kleur tabel Micro Color
6 Show 000-255 Zie show tabel Wash eect
7 Show Speed 000-255 snelheid traag -> snel) Wash eect (traag -> snel)
5730
Strobe
8 Dimmer 000-255 0% - 100% Master Dimmer 0-100%
9 Strobe
000-008 Open No Strobe
009-255 Strobe (snelheid 0 -
100%)
Strobe snelheid (traag -> snel))
10 Show 000-255 Zie show tabel Strobe eect
11 Show Speed 000-255 snelheid traag -> snel) Strobe eect (traag -> snel))
Moon
12 Dimmer 000-255 0% - 100% Master Dimmer 0-100%
13 Strobe
000-008 Open No Strobe
009-255 Stroboscope
(Speed 0 - 100%)
Strobe snelheid (traag -> snel))
14 Color1 000-255 Zie kleur tabel Micro Color
15 Color2 000-255 Zie kleur tabel Micro Color
16 Show 000-255 Zie kleur tabel Moon eect
17 Show Speed 000-255 snelheid traag -> snel) Moon eect (traag -> snel))
9 DMX KANALEN
Eect 9 CH Functie Waarde Omschrijving
4-in-1
Wash +
UV
1 Show 000-255 Zie show tabel Wash eect
2 Show Speed
000-255 snelheid traag ->
snel)
Wash eect (traag -> snel))
3 Strobe
000-008 Open No Strobe
009-255 Stroboscope
(snelheid 0 - 100%)
Strobe, snelheid (traag -> snel)
5730
Strobe
4 Show 000-255 Zie show tabel Strobe eect
5 Show Speed
000-255 snelheid traag ->
snel)
Strobe eect (traag -> snel))
6 Strobe
000-008 Open No Strobe
009-255 Stroboscope
(snelheid 0 - 100%)
Strobe snelheid (traag -> snel))
Moon
7 Show 000-255 Zie show tabel Moon eect
8 Show Speed
000-255 snelheid traag ->
snel
Moon eect (traag -> snel)
9 Strobe
000-008 Open No Strobe
009-255 Stroboscope
(snelheid 0 - 100%)
Strobe snelheid traag -> snel
  • Page 1 1
  • Page 2 2
  • Page 3 3
  • Page 4 4
  • Page 5 5
  • Page 6 6
  • Page 7 7
  • Page 8 8
  • Page 9 9
  • Page 10 10
  • Page 11 11
  • Page 12 12
  • Page 13 13
  • Page 14 14
  • Page 15 15
  • Page 16 16
  • Page 17 17
  • Page 18 18
  • Page 19 19
  • Page 20 20
  • Page 21 21
  • Page 22 22
  • Page 23 23
  • Page 24 24
  • Page 25 25
  • Page 26 26
  • Page 27 27
  • Page 28 28
  • Page 29 29
  • Page 30 30
  • Page 31 31
  • Page 32 32
  • Page 33 33
  • Page 34 34
  • Page 35 35
  • Page 36 36

Ibiza Light & Sound COMBI-FX3 Owner's manual

Category
Floodlights
Type
Owner's manual
This manual is also suitable for

Ask a question and I''ll find the answer in the document

Finding information in a document is now easier with AI