20
Advanced Wireless-N Router
Linksys E2000 Chapter 3: Advanced Configuration
Maximum Number of Users Enter the maximum
number of computers that you want the DHCP server to
assign IP addresses to. This number cannot be greater
than 253. The default is 50.
IP Address Range The range of available IP addresses is
displayed.
Client Lease Time
The Client Lease Time is the amount of
time a network user will be allowed connection to the Router
with their current dynamic IP address. Enter the amount of
time, in minutes, that the user will be “leased” this dynamic
IP address. After the time is up, the user will be automatically
assigned a new dynamic IP address, or the lease will be
renewed. The default is 0 minutes, which means one day.
Static DNS 1-3
The Domain Name System (DNS) is how the
Internet translates domain or website names into Internet
addresses or Uniform Resource Locators (URLs). Your ISP will
provide you with at least one DNS Server IP Address. If you wish
to use another, enter that IP Address in one of these fields. You
can enter up to three DNS Server IP Addresses here. The Router
will use these for quicker access to functioning DNS servers.
WINS The Windows Internet Naming Service (WINS)
manages each computer’s interaction with the Internet. If
you use a WINS server, enter that server’s IP Address here.
Otherwise, leave this blank.
Time Setting
Time Setting
Time Zone Select the time zone in which your network
functions from this drop-down menu.
Automatically adjust clock for daylight saving
changes Select this option to have the Router
automatically adjust for daylight saving time.
Click Save Settings to apply your changes, or click Cancel
Changes to clear your changes.
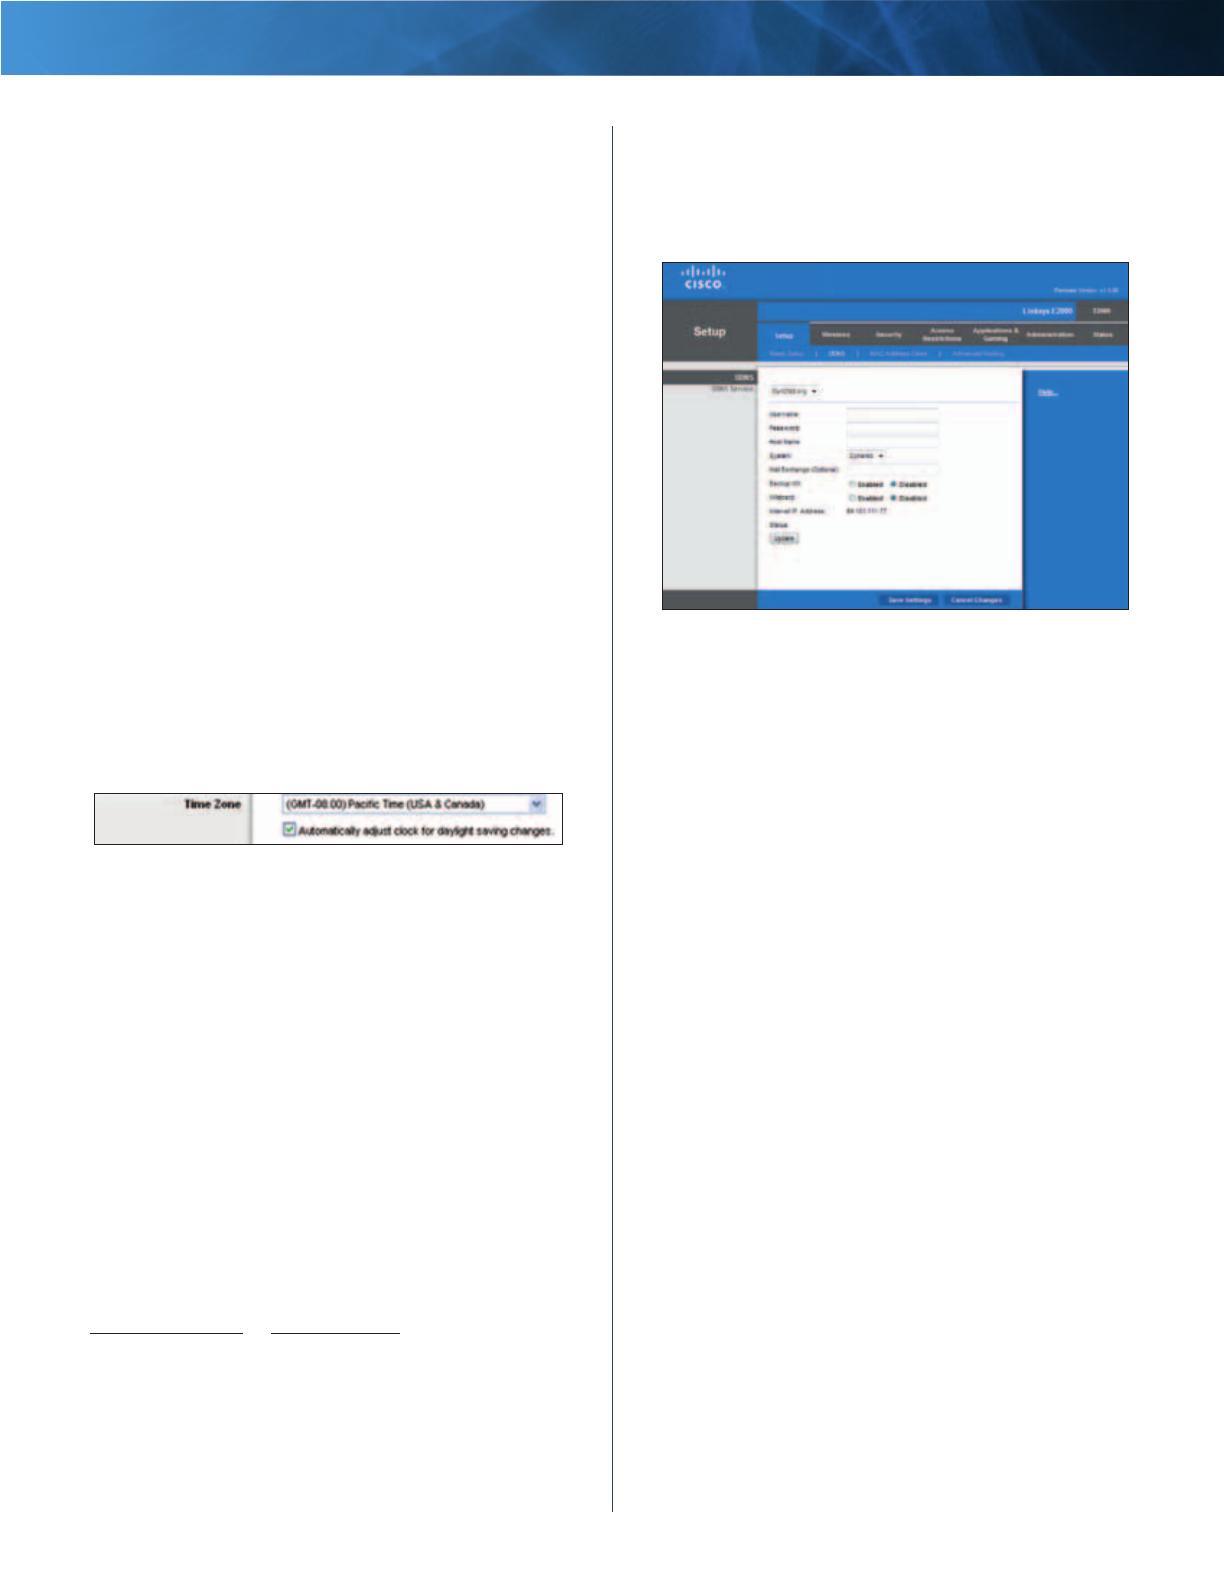
Setup > DDNS
The Router offers a Dynamic Domain Name System (DDNS)
feature. DDNS lets you assign a fixed host and domain
name to a dynamic Internet IP address. It is useful when
you are hosting your own website, File Transfer Protocol
(FTP) server, or other server behind the Router.
Before you can use this feature, you need to sign
up for DDNS service with a DDNS service provider,
www.dyndns.org or www.TZO.com. If you do not want
to use this option, keep the default, Disabled.
DDNS
DDNS Service
If your DDNS service is provided by DynDNS.org, then
select DynDNS.org from the drop-down menu. If your
DDNS service is provided by TZO, then select TZO.com.
The features available on the DDNS screen will vary,
depending on which DDNS service provider you use.
DynDNS.org
Setup > DDNS > DynDNS
Username Enter the Username for your DDNS account.
Password Enter the Password for your DDNS account.
Host Name The DDNS URL assigned by the DDNS service
is displayed.
System Select the DynDNS service you use: Dynamic,
Static, or Custom. The default selection is Dynamic.
Mail Exchange (Optional) Enter the address of your mail
exchange server, so e-mails to your DynDNS address go to
your mail server.
Backup MX This option allows the Mail eXchange (MX)
server to be a backup. To disable this feature, keep the
default, Disabled. To enable the feature, select Enabled. If
you are not sure which setting to select, keep the default,
Disabled.
Wildcard This setting enables or disables wildcards
for your host. For example, if your DDNS address is
myplace.dyndns.org and you enable wildcards, then
x.myplace.dyndns.org will work as well (x is the wildcard).
To disable wildcards, keep the default, Disabled. To
enable wildcards, select Enabled. If you are not sure
which setting to select, keep the default, Disabled.
Internet IP Address The Router’s Internet IP address is
displayed here. Because it is dynamic, it will change.
Status The status of the DDNS service connection is
displayed here.
Update To manually trigger an update, click Update.
Click Save Settings to apply your changes, or click Cancel
Changes to clear your changes.


