Trendnet RB-TE100-MFP1 Installation guide

Category
Print servers
Type
Installation guide

This manual is also suitable for

1-Port Multi-Function USB Print Server
TE100-MFP1
V1.0R/11.21.2011
ŸQuick Installation Guide (1)
Minimum Requirements
USB Port Software Utility Requirements
1
Package Contents
Ÿ1-Port Multi-Function USB Print Server
ŸMulti-Language Quick Installation Guide
ŸCD-ROM (Utility and User's Guide)
ŸNetwork Cable (1.5 m / 5 ft.)
ŸPower Adapter (12V DC, 1A)
1. Before You Start
Ÿ
Ÿ
Ÿ
Computer with an Ethernet port and Web browser
Wired network (e.g. router or switch with DHCP server)
Installed USB multi-function printer or USB printer
Supported Operating Systems CPU
Memory
Windows 7 (32/64-bit)
Windows Vista (32/64-bit)
Windows XP (32/64-bit)
1GHz or above
800MHz or above
300MHz or above
1GB RAM or above
512MB RAM or above
256MB RAM or above
Mac OS X (10.5)
Mac OS X (10.6)
Mac OS X (10.7)
Mac OS X (10.4)
867MHz or above
333MHz or above
1.06GHz or above
1.06GHz or above
512MB RAM or above
256MB RAM or above
1GB RAM or above
2GB RAM or above
Note:
1. Verify that any software required to operate your printer or
multi-function printer is installed before installing the TE100-MFP1.
2. Do not install the TRENDnet USB Control Center utility and connect your
printer to the TE100-MFP1 until instructed to do so.
2. Installation
1. Connect the print server to one of the ports on your wired network with the
provided network cable.
2. Plug in the power adapter and move the power switch to the “On” position.
3. Connect your printer to the USB port on the print server.
4. Power on the printer.
5. Verify that the status LED indicators on the front of the print server to confirm
that the device is active and communicating with your printer (Power, LINK,
and USB port are solid green).
WAN
Internet
2
ON/OFF
3
8. Open utility by double clicking on
the TRENDnet USB Control
Center Utility icon.
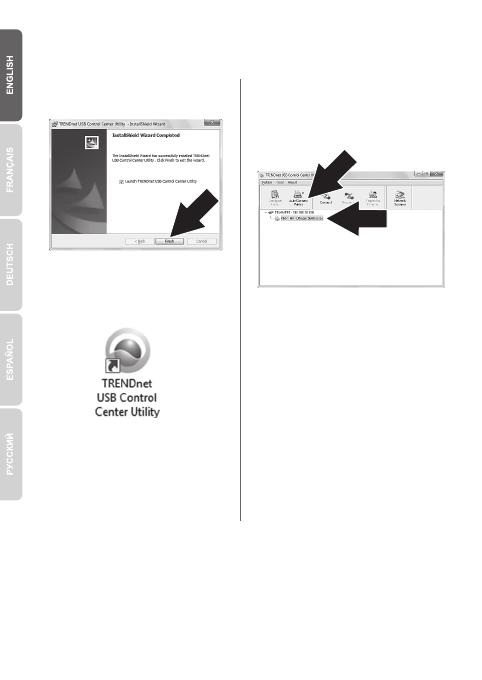
7. Follow the InstallShield Wizard
instructions. Then click Finish.
9. The utility will automatically find the
print server and your printer.
10. If the print server and printer
cannot be detected, verify your
computer's network connection.
11. To save time and avoid manually
connecting for every print request,
select your printer and click
Auto Connect Printer.
Note:
Please refer to the user's guide for
advanced network setting
instructions. In addition, refer to your
printer's user's guide for additional
information on the printer.
6. Install the Control Center utility for each computer that requires access to the
print server by inserting the Utility CD on each computer.
TRENDnet
20675 Manhattan Place
Torrance, CA 90501. USA
Copyright ©2012. All Rights Reserved. TRENDnet.
1 / 1

Trendnet RB-TE100-MFP1 Installation guide

Category
Print servers
Type
Installation guide
This manual is also suitable for

Ask a question and I''ll find the answer in the document

Finding information in a document is now easier with AI

Ask the document