SportDOG TEK-V1LT Operating instructions

Category
Pet care
Type
Operating instructions
GPS TRACKING + E-COLLAR
OPERATING GUIDE
PLEASE READ THIS ENTIRE GUIDE BEFORE BEGINNING
J400-1361 TEK 1.0LT Manual.indd 1J400-1361 TEK 1.0LT Manual.indd 1 11-4-8 12:0011-4-8 12:00
21-800-732-0144
IMPORTANT SAFETY INFORMATION
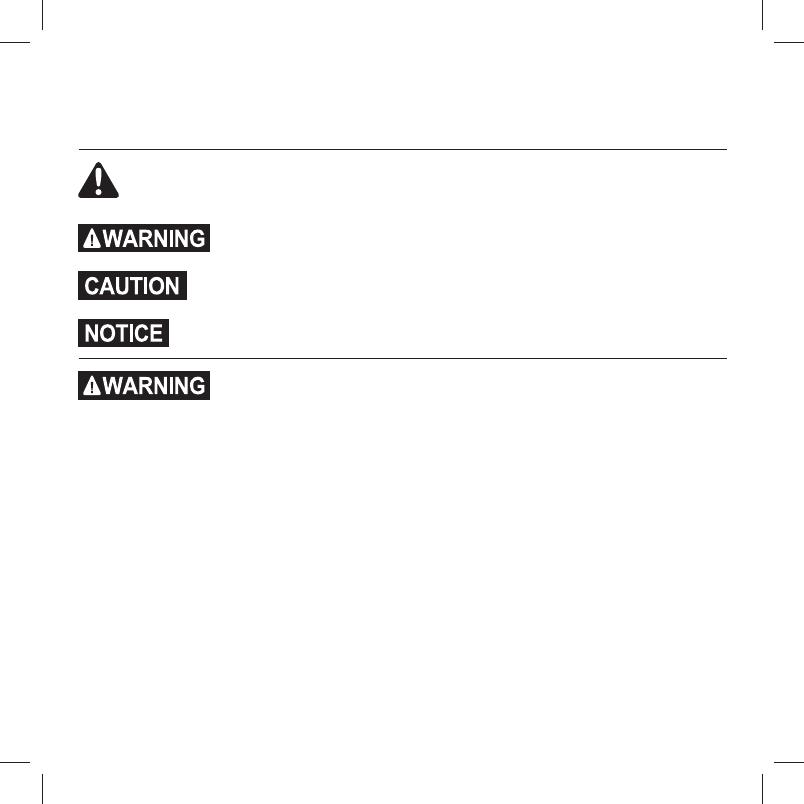
Explanation of Attention Words and Symbols used in this guide
This is the safety alert symbol. It is used to alert you to potential personal injury hazards.
Obey all safety messages that follow this symbol to avoid possible injury or death.
WARNING indicates a hazardous situation which, if not avoided, could result
in death or serious injury.
CAUTION, used without the safety alert symbol, indicates a hazardous situation
which, if not avoided, could result in harm to your dog.
NOTICE is used to address safe use practices not related to personal injury.
• Not for use with aggressive dogs. Do not use this product if your dog is aggressive, or if your dog
is prone to aggressive behavior. Aggressive dogs can cause severe injury and even death to their
owner and others. If you are unsure whether this product is appropriate for your dog, please
consult your veterinarian or a certi ed trainer.
• This device contains Lithium-Ion (Li-Ion) batteries; never incinerate, puncture, deform, short-
circuit, or charge with an inappropriate charger. Fire, explosion, property damage, or bodily harm
may occur if this warning is not followed.
• Risk of explosion if battery is replaced by an incorrect type. Dispose of used batteries according
to the regulations in your area.
• Batteries should never be removed from the battery compartment for charging.
• Taking your product apart can cause damage and void your warranty.
• Do not charge the batteries in areas with high temperature (100°F +).
• Keep batteries away from children.
• Using your TEK
Series Location and Training System while operating a motor vehicle can be
distracting. Always pay full attention to operating your vehicle.
• Always be alert to your surroundings when navigating to a way point. Do not cross dangerous
terrain or obstacles as you move.
J400-1361 TEK 1.0LT Manual.indd 2J400-1361 TEK 1.0LT Manual.indd 2 11-4-8 12:0011-4-8 12:00
3SPORTDOG.COM/TEK
Please read and follow the instructions in this manual. Proper fi t of the collar is important. A collar
worn for too long, or made too tight on the dog’s neck may cause skin damage. This is called bed
sores; it is also called decubitus ulcers or pressure necrosis.
• Avoid leaving the collar on the dog for more than 12 hours per day.
• When possible, reposition the collar on the dog’s neck every 1 to 2 hours.
• Check the fi t to prevent excessive pressure; follow the instructions in this manual.
• Never connect a lead to the GPS Collar with E-Collar Module; it will cause excessive pressure on
the contacts.
• When using a separate collar for a lead, don’t put pressure on the GPS Collar with E-Collar Module.
• Wash the dog’s neck area and the contacts of the collar weekly with a damp cloth.
• Examine the contact area daily for signs of a rash or a sore.
• If a rash or sore is found, discontinue use of the collar until the skin has healed.
• If the condition persists beyond 48 hours, see your veterinarian.
For additional information on bed sores and pressure necrosis, please visit the FAQ section for
remote trainers at www.sportdog.com.
These steps will help keep your dog safe and comfortable. Millions of dogs are comfortable while
they wear stainless steel contacts. Some dogs are sensitive to contact pressure. You may fi nd
after some time that your dog is very tolerant of the collar. If so, you may relax some of these
precautions. It is important to continue daily checks of the contact area. If redness or sores are
found, discontinue use until the skin has fully healed.
• You may need to trim the hair in the area of the contact points or switch to the longer contact
points to ensure consistent contact. Never shave the dog’s neck; this may lead to a rash or
infection.
• You should not make the collar any tighter than is required for good contact. A collar that is too
tight will increase the risk of pressure necrosis in the contact area.
• Your dog should not vocalize or panic when receiving stimulation. If this happens, the stimulation
level is too high and you need to go back to the previous level and repeat the process.
J400-1361 TEK 1.0LT Manual.indd 3J400-1361 TEK 1.0LT Manual.indd 3 11-4-8 12:0011-4-8 12:00
41-800-732-0144
• Taking product apart can cause damage and void your warranty. Contact the Customer Care
Center for battery replacement service.
• Avoid using a high-powered radio (greater than 5 watts) in close proximity to the TEK
Series
Location and Training System. It may cause irreversible damage to the TEK Series Location and
Training System.
• Avoid chemical cleaners and solvents that can damage plastic components.
• Do not store the TEK Series Location and Training System where prolonged exposure to
temperature extremes may occur, because permanent damage may result.
• When storing the device for an extended time, store within the following temperature range: from
32°F to 77°F (from 0° to 25°C).
• Do not leave the device exposed to a heat source or in a high-temperature location, such as in the
sun in an unattended vehicle. To prevent damage, remove the device from the vehicle or store it
out of direct sunlight, such as in the glove box.
J400-1361 TEK 1.0LT Manual.indd 4J400-1361 TEK 1.0LT Manual.indd 4 11-4-8 12:0011-4-8 12:00
5SPORTDOG.COM/TEK
Thank you for choosing SportDOG Brand
®
. Used properly, this product will help you track and train
your dog ef ciently and safely. To ensure your satisfaction, please review this owner’s manual
thoroughly. If you have questions regarding this products operation, please see this manual’s
Frequently Asked Questions or Troubleshooting section, contact our Customer Care Center at
1-800-732-0144, or visit our website at www.sportdog.com/tek.
To get the most protection out of your warranty, please register your product within 90 days at
www.sportdog.com. By registering, and keeping your receipt you will enjoy the product’s full
warranty and should you ever need to call the Customer Care Center, we will be able to help you
faster. Most importantly, SportDOG
will never give or sell your valuable information to anyone.
Complete warranty information is available online at www.sportdog.com.
J400-1361 TEK 1.0LT Manual.indd 5J400-1361 TEK 1.0LT Manual.indd 5 11-4-8 12:0011-4-8 12:00
61-800-732-0144
TABLE OF CONTENTS
COMPONENTS .............................................................................................................................................................................8
HOW THE SYSTEM WORKS.......................................................................................................................................................9
KEY DEFINITIONS ..................................................................................................................................................................... 10
ICON DEFINITIONS .................................................................................................................................................................. 12
MAIN MENU ...............................................................................................................................................................................15
OPERATING THE TEK
SERIES .............................................................................................................................................. 16
PREPARE THE TEK SERIES HANDHELD DEVICE ............................................................................................................... 16
TO CALIBRATE THE COMPASS ............................................................................................................................................. 18
PREPARE THE E-COLLAR MODULE ...................................................................................................................................... 20
TEST LIGHT INSTRUCTIONS.................................................................................................................................................. 22
PREPARE THE GPS COLLAR ................................................................................................................................................... 23
PAIR COLLARS TO THE HANDHELD DEVICE ...................................................................................................................... 26
FIT THE GPS COLLAR WITH E-COLLAR MODULE ............................................................................................................ 27
ADD YOUR DOG ......................................................................................................................................................................... 29
ACQUIRE GPS SATELLITE SIGNALS .................................................................................................................................... 30
TRACK YOUR DOG .................................................................................................................................................................... 31
GENERAL TRAINING TIPS ...................................................................................................................................................... 32
TRAIN YOUR DOG ..................................................................................................................................................................... 33
VIEW DOG STATUS ................................................................................................................................................................. 36
NAVIGATE WITH THE COMPASS AND GPS TOOLS ......................................................................................................... 37
(continued on next page)
J400-1361 TEK 1.0LT Manual.indd 6J400-1361 TEK 1.0LT Manual.indd 6 11-4-8 12:0011-4-8 12:00
7SPORTDOG.COM/TEK
MARK YOUR LOCATION WITH WAY POINTS .................................................................................................................... 37
SETTINGS MENU ...................................................................................................................................................................... 40
CHANGE GENERAL SETTINGS .............................................................................................................................................. 41
CHANGE COMMUNICATION SETTINGS ............................................................................................................................. 44
CHANGE MY COLLARS SETTINGS ....................................................................................................................................... 46
CHANGE MY DOGS SETTINGS .............................................................................................................................................. 47
CHANGE UNIT SETTINGS ....................................................................................................................................................... 50
SET SYSTEM TIME ................................................................................................................................................................... 50
CHANGE DISPLAY SETTINGS................................................................................................................................................ 51
USE VEHICLE MODE ................................................................................................................................................................. 52
RESET HANDHELD DEVICE .................................................................................................................................................... 53
CONVERT GPS COLLAR WITH E-COLLAR MODULE TO TRACKING-ONLY MODE .................................................... 54
FREQUENTLY ASKED QUESTIONS ....................................................................................................................................... 55
T RO UBL E SH OO T ING ................................................................................................................................................................ 58
TERMS OF USE AND LIMITATION OF LIABILITY .............................................................................................................. 61
FCC COMPLIANCE .................................................................................................................................................................... 62
BATTERY DISPOSAL ................................................................................................................................................................ 63
INDEX .......................................................................................................................................................................................... 64
ADD-A-DOG
®
............................................................................................................................................................................. 68
J400-1361 TEK 1.0LT Manual.indd 7J400-1361 TEK 1.0LT Manual.indd 7 11-4-8 12:0011-4-8 12:00
81-800-732-014481-800-732-0144
GETTING STARTED
COMPONENTS
J400-1361 TEK 1.0LT Manual.indd 8J400-1361 TEK 1.0LT Manual.indd 8 11-4-8 12:0011-4-8 12:00
9SPORTDOG.COM/TEK 9SPORTDOG.COM/TEK
GETTING STARTED
HOW THE SYSTEM WORKS
The SportDOG Brand
®
TEK
Series Location and Training System has been proven safe,
comfortable and effective for all dogs over 8 pounds. Consistent, correct use of this product
allows you to track your dog, reinforce commands, and correct misbehavior from up to 7 miles.
The Handheld Device receives your location from its built-in GPS antenna and receives location
updates from the GPS antenna mounted on the collar to track the location of your dog. The
Handheld Device sends a signal, activating the E-Collar Module to deliver a harmless stimulation.
With proper training, a dog will learn to associate the signal with a command. Like all SportDOG
products, this model features adjustable stimulation levels so you can tailor the stimulation level to
your dog’s temperament, eliminating the risk of over-correction.
IMPORTANT: The TEK
SERIES Location and Training System has a range
of up to 7 miles. Depending on the way you hold the Handheld Device, the
maximum range may vary. For consistent results at longer ranges, hold the
Handheld Device in a vertical position away from your body and above your
head. Terrain, weather, vegetation, transmissions from other radio devices,
and other factors will affect the maximum range.
Do not use this product if your dog is aggressive, or if
your dog is prone to aggressive behavior. Aggressive dogs can cause severe
injury or even death to the owner or others. If you are unsure whether this
product is appropriate for your dog, please consult your veterinarian or a
certi ed trainer.
J400-1361 TEK 1.0LT Manual.indd 9J400-1361 TEK 1.0LT Manual.indd 9 11-4-8 12:0011-4-8 12:00
10 1-800-732-014410 1-800-732-0144
GETTING STARTED
KEY DEFINITIONS
BACK
BUTTON
GPS ANTENNA
ON/OFF BUTTON
HANDHELD DEVICE
ANTENNA
TRACKING/
TRAINGING
TOGGLE BUTTON
MENU
SELECTION PAD
DISPLAY
CHARGING
JACK
STIM
BUTTON 1
STIM
BUTTON 2
STIM
BUTTON 3
HANDHELD DEVICE: Receives and displays
location updates from the GPS Collar. It is
waterproof and can be submerged in water to a
depth of 5 feet.
ON/OFF BUTTON: Pressing and releasing this
button turns the Handheld Device on and off, and
also controls the display’s brightness level.
BACK BUTTON: While navigating menus, this
button moves back to the previous menu screen.
TRACKING/TRAINING TOGGLE BUTTON: This
button toggles between the tracking and training
screens at any time and acts as an enter key
when entering information in text entry fi elds.
MENU SELECTION PAD: This pad contains four
arrow keys (up, down, left, and right) for use
when navigating and selecting to menus.
USER-DEFINED STIM BUTTONS: These buttons
(button 1 on top, button 2 in the middle, and
button 3 on the bottom) are used to send signals
for the user-de ned stimulation type when
training your dog.
CHARGING JACK: For connecting the Handheld
Device to the wall charger.
J400-1361 TEK 1.0LT Manual.indd 10J400-1361 TEK 1.0LT Manual.indd 10 11-4-8 12:0011-4-8 12:00
11SPORTDOG.COM/TEK 11SPORTDOG.COM/TEK
GETTING STARTED
GPS
INDICATOR LIGHT
E-COLLAR INDICATOR LIGHT
GPS CHARGING
JACK
E-COLLAR
ON/OFF BUTTON
GPS ON/OFF
BUTTON
E-COLLAR MODULE
CONTACT POINTS
GPS COLLAR
E-COLLAR
CHARGING JACK
GPS
ANTENNA
E-COLLAR MODULE: Receives the radio signal
from the Handheld Device and delivers
stimulation, vibration and/or a tone for
correcting your dog. It is waterproof and can be
submerged in water to a depth of 25 feet.*
CONTACT POINTS: The contacts through which
the E-Collar Module delivers stimulation to your
dog.
E-COLLAR ON/OFF BUTTON: Pressing and
releasing this button turns the E-Collar Module
on, while pressing and holding this button turns
the E-Collar Module off.
E-COLLAR INDICATOR LIGHT: Indicates when
the E-Collar Module has been turned on or off, is
in pairing mode, and also serves as a low-battery
indicator.
E-COLLAR CHARGING JACK: For connecting the
E-Collar Module to the charger.
GPS COLLAR: Receives location from GPS and
transmits location updates to the Handheld
Device. It is waterproof and can be submerged in
water to a depth of 25 feet.*
GPS ANTENNA: Receives GPS satellite signals.
GPS ON/OFF BUTTON: Pressing and releasing
this button turns the collar on and off.
GPS INDICATOR LIGHT: Indicates when the GPS
Collar has been turned on or off, whether a GPS
lock has been attained, is in pairing mode, and
also serves as a low-battery indicator.
GPS CHARGING JACK: For connecting the GPS
Collar to the charger.
*Per NEMA 6P and IP67 standards.
J400-1361 TEK 1.0LT Manual.indd 11J400-1361 TEK 1.0LT Manual.indd 11 11-4-8 12:0011-4-8 12:00
12 1-800 -732-014 412 1-800 -732-014 4
GETTING STARTED
ICON DEFINITIONS
The following icons are used throughout the TEK
SERIES Location and Training software interface.
ICON FUNCTION
GENERAL ICONS
9:40 AM
TIME INDICATOR: Displays the current local time.
BRIGHTNESS INDICATOR: Displays the current brightness level.
BATTERY GAUGE: Displays the battery charge status of the Handheld
Device.
BATTERY GAUGE: Displays the battery charge status of the GPS Collar.
UP / DOWN INDICATORS: Indicates menu choices available. Use the
arrow keys to view additional menu items.
MORE / SELECT INDICATOR: Indicates more information is available. Use
the arrow keys to view additional information.
BACK INDICATOR: Indicates lower menu level. Press the BACK button to
return to the previous screen.
TEXT ENTER/ACCEPT: Select to lock in a new text entry.
J400-1361 TEK 1.0LT Manual.indd 12J400-1361 TEK 1.0LT Manual.indd 12 11-4-8 12:0011-4-8 12:00
13SPORTDOG.COM/TEK 13SPORTDOG.COM/TEK
GETTING STARTED
ICON FUNCTION
TRACKING ICONS
GPS LOCK INDICATOR: Indicates the Handheld Device has a good satellite fi x.
COMPASS NEEDLE: Displays compass heading to magnetic north.
DOG DIRECTION INDICATOR: Displays the direction your dog is traveling.
DOG DIRECTION INDICATOR COMMUNICATION LOST: Displays if
communication to the collar is lost.
DOG STATUS INDICATOR: Indicates the location of your dog when the dog
is either on point or treed.
100 YDS
SCALE INDICATOR: Shows the current scale. Scale is adjustable from 100
yards to 75 miles.
J400-1361 TEK 1.0LT Manual.indd 13J400-1361 TEK 1.0LT Manual.indd 13 11-4-8 12:0011-4-8 12:00
14 1- 800 -732-014 414 1- 800-732-014 4
GETTING STARTED
ICON FUNCTION
TRAINING ICONS
C
CONTINUOUS STIMULATION: You control both when and how long
stimulation is delivered, up to a maximum of 12 seconds. After 12 seconds,
the stimulation will “time out” and a User-De ned Stim button needs
to be released and pressed again before additional stimulation can be
delivered.
V
VIBRATION: The E-Collar Module will vibrate when a User-De ned Stim
button is pressed.
T
TONE: The E-Collar Module will make a rapid beeping noise when a User-
De ned Stim button is pressed.
M
MOMENTARY (NICK) STIMULATION: Stimulation is delivered for 1/10 of a
second, regardless of how long the button is pressed.
R
RISING STIMULATION: While holding this button the stimulation will rise
from your current level to the maximum level.
P1
USER PROGRAMMABLE STIMULATION 1: The E-Collar Module applies a
user-confi gurable stimulation.
P2
USER PROGRAMMABLE STIMULATION 2: The E-Collar Module applies a
user-confi gurable stimulation.
MY DOG: Indicates the current dog. Color is based on the assigned collar
to this dog.
J400-1361 TEK 1.0LT Manual.indd 14J400-1361 TEK 1.0LT Manual.indd 14 11-4-8 12:0011-4-8 12:00
15SPORTDOG.COM/TEK 15SPORTDOG.COM/TEK
GETTING STARTED
M A I N M E N U
When you power on the Handheld Device or press the BACK button, the main menu displays. The
main menu provides the following options:
DOG TRACKING: Views the location of your dogs and way points in relation to you (Page 31).
DOG TRAINING: Send stimulations to command dogs while training or hunting (Page 33).
DOG LIST: Suspend or resume tracking of a particular dog, and set the order of the dogs (Page 35).
STATUS: View a list of all dogs and their current status (Page 36).
COMPASS: View the electronic compass for navigation (Page 37).
SETTINGS: Change confi guration for dogs, collars, units, time, display, and other settings (Page 40).
WAY POINTS: Add, change, or remove way points from the system (Page 37).
SET A START POINT: Set a way point to your starting location (Page 37).
ABOUT: View name, ID number and software/hardware version of your Handheld Device (Page 53).
J400-1361 TEK 1.0LT Manual.indd 15J400-1361 TEK 1.0LT Manual.indd 15 11-4-8 12:0011-4-8 12:00
16 1 -800 -732-0 14416 1- 800 -732-0 144
GETTING STARTED
OPERATING THE TEK
SERIES
The following terms are used throughout this manual:
SELECT: Move the highlighted area on the screen up, down, left, or right with the respective arrow keys
on the Menu Selection Pad to select individual menu items. A selected item is highlighted in orange.
BACK: Press the BACK button on the top right side of the Handheld Device to go to the previous menu.
FIELD: The location on a page where data can be entered.
ENTER: Press the Tracking/Training Toggle button in a text entry fi eld to select a highlighted character.
STEP :: 01
PREPARE THE TEK SERIES HANDHELD DEVICE
You must complete these steps prior to using this device for the fi rst time.
TO CHARGE THE HANDHELD DEVICE:
NOTE: Approximate battery life between charges is 20 hours,
depending on the frequency of use.
1. Lift the rubber cover protecting the charging jack.
2. Connect one of the charger connectors to the charging jack.
3. Plug the charger into a standard 120/240-volt AC wall outlet.
4. Charge the Handheld Device for 2 hours.
5. When charging is complete, indicated by a full green
battery on the screen, replace the rubber cover.
Using Li-Ion technology, the Handheld Device only requires
a 2 hour charge. It is not harmful to let the unit charge more
than 2 hours.
J400-1361 TEK 1.0LT Manual.indd 16J400-1361 TEK 1.0LT Manual.indd 16 11-4-8 12:0011-4-8 12:00
17SPORTDOG.COM/TEK 17SPORTDOG.COM/TEK
GETTING STARTED
TO TURN THE HANDHELD DEVICE ON:
On the top of the unit, fi rmly press and release the On/Off button. The start-up screen will display.
TO TURN THE HANDHELD DEVICE OFF:
Firmly press and hold the On/Off button until the display goes black.
TO ADJUST THE DISPLAY BRIGHTNESS:
The Handheld Device comes with brightness controls to allow
you to adjust the backlight level for the optimum readability in the
current environment.
NOTE: Higher brightness levels will decrease battery life between
charges.
With the Handheld Device powered on, press and release the
On/Off button to increase/decrease brightness levels. There are
5 levels of brightness available. The Brightness Indicator will
display the current level at the top of the display.
J400-1361 TEK 1.0LT Manual.indd 17J400-1361 TEK 1.0LT Manual.indd 17 11-4-8 12:0011-4-8 12:00
18 1-800 -732-014418 1-800 -732-0144
GETTING STARTED
TO CALIBRATE THE COMPASS
In order for the TEK
Series Handheld Device to accurately display your location, you must fi rst
calibrate the electronic compass. You should always calibrate the compass after you arrive at a
new starting location, after periods of storage or after you install new batteries.
NOTE: Always calibrate the compass outdoors. Hold the compass level and away from objects that
may generate magnetic fi elds, such as cars, buildings, or overhead power lines.
1. From the main menu, select COMPASS > CALIBRATE. The compass screen appears.
2. Rotate the Handheld Device 2-3 times in all three dimensions as shown below. Rotate until
the black indicators are as close as possible to the center of the green zone. If successful,
your Handheld Device will beep and vibrate, as well as, display a message that says your
“CALIBRATION DATA HAS BEEN UPDATED SUCCESSFULLY.”
NOTE: If you are unable to get the compass to automatically update your calibration data, follow the
remaining steps.
3. Rotate until the black indicators are as close as possible to the green zone and press the Menu
Selection Pad to continue.
4. At the prompt “DO YOU WANT TO SAVE THE NEW CALIBRATION DATA?” press the arrow keys
to select YES.
5. Press BACK to return to the main menu.
J400-1361 TEK 1.0LT Manual.indd 18J400-1361 TEK 1.0LT Manual.indd 18 11-4-8 12:0011-4-8 12:00
19SPORTDOG.COM/TEK 19SPORTDOG.COM/TEK
GETTING STARTED
TO SET THE MAGNETIC DECLINATION ANGLE:
Magnetic declination is the angle between magnetic north (the direction the north end of a
compass needle points) and true north. The declination is positive when the magnetic north is
east of true north and negative when the magnetic north is west of true north. To fi nd your exact
declination angle go to: www.ngdc.noaa.gov/geomagmodels/Declination.jsp.
NOTE: Incorrect magnetic declination will result in inaccurate compass readings.
1. From the main menu, select SETTINGS > GENERAL > MAG DEC ANGLE.
2. Press the up or down arrows on the Menu Selection Pad to select the amount of declination.
Magnetic declination ranges from -70 to 70. The default is 0.
3. Press the right arrow when fi nished.
4. Press BACK to return to the main menu.
20°
15°
10°
-5°
-10°
-15°
-20°
J400-1361 TEK 1.0LT Manual.indd 19J400-1361 TEK 1.0LT Manual.indd 19 11-4-8 12:0011-4-8 12:00
20 1-80 0-732-014420 1- 800-732-0144
GETTING STARTED
STEP :: 02
PREPARE THE E-COLLAR MODULE
TO CHARGE THE E-COLLAR MODULE:
1. Lift the rubber cover protecting the E-Collar
charging jack located on the bottom of the
E-Collar Module next to the on/off button.
2. Connect one of the charger connectors to the
charging jack.
3. Plug the charger into a standard 120/240-volt
AC wall outlet.
4. Charge the E-Collar Module for 2 hours.
5. When charging is complete, indicated by the
E-Collar Indicator Light blinking green, replace
the rubber cover.
Using Li-Ion technology, the E-Collar Module
only requires a 2 hour charge. It is not harmful to let the unit charge more than 2 hours.
NOTE: Approximate battery life between charges is 20 hours, depending on the frequency of use.
TO TURN THE E-COLLAR MODULE ON:
Press and release the E-Collar On/Off button when the E-Collar Indicator Light comes on green.
The E-Collar Module will beep 1 to 5 times indicating which channel the collar is on.
TO TURN THE E-COLLAR MODULE OFF:
Press and hold the E-Collar On/Off button until the E-Collar Indicator Light comes on solid red and
the E-Collar Module beeps for 2 seconds. To extend the battery life between charging cycles, turn
off the E-Collar Module when it is not in use.
J400-1361 TEK 1.0LT Manual.indd 20J400-1361 TEK 1.0LT Manual.indd 20 11-4-8 12:0011-4-8 12:00
  • Page 1 1
  • Page 2 2
  • Page 3 3
  • Page 4 4
  • Page 5 5
  • Page 6 6
  • Page 7 7
  • Page 8 8
  • Page 9 9
  • Page 10 10
  • Page 11 11
  • Page 12 12
  • Page 13 13
  • Page 14 14
  • Page 15 15
  • Page 16 16
  • Page 17 17
  • Page 18 18
  • Page 19 19
  • Page 20 20
  • Page 21 21
  • Page 22 22
  • Page 23 23
  • Page 24 24
  • Page 25 25
  • Page 26 26
  • Page 27 27
  • Page 28 28
  • Page 29 29
  • Page 30 30
  • Page 31 31
  • Page 32 32
  • Page 33 33
  • Page 34 34
  • Page 35 35
  • Page 36 36
  • Page 37 37
  • Page 38 38
  • Page 39 39
  • Page 40 40
  • Page 41 41
  • Page 42 42
  • Page 43 43
  • Page 44 44
  • Page 45 45
  • Page 46 46
  • Page 47 47
  • Page 48 48
  • Page 49 49
  • Page 50 50
  • Page 51 51
  • Page 52 52
  • Page 53 53
  • Page 54 54
  • Page 55 55
  • Page 56 56
  • Page 57 57
  • Page 58 58
  • Page 59 59
  • Page 60 60
  • Page 61 61
  • Page 62 62
  • Page 63 63
  • Page 64 64
  • Page 65 65
  • Page 66 66
  • Page 67 67
  • Page 68 68

SportDOG TEK-V1LT Operating instructions

Category
Pet care
Type
Operating instructions

Ask a question and I''ll find the answer in the document

Finding information in a document is now easier with AI