5
Appliance Equipment
Appliance EquipmentAppliance Equipment
Appliance Equipment
Appliance Overview
Appliance OverviewAppliance Overview
Appliance Overview
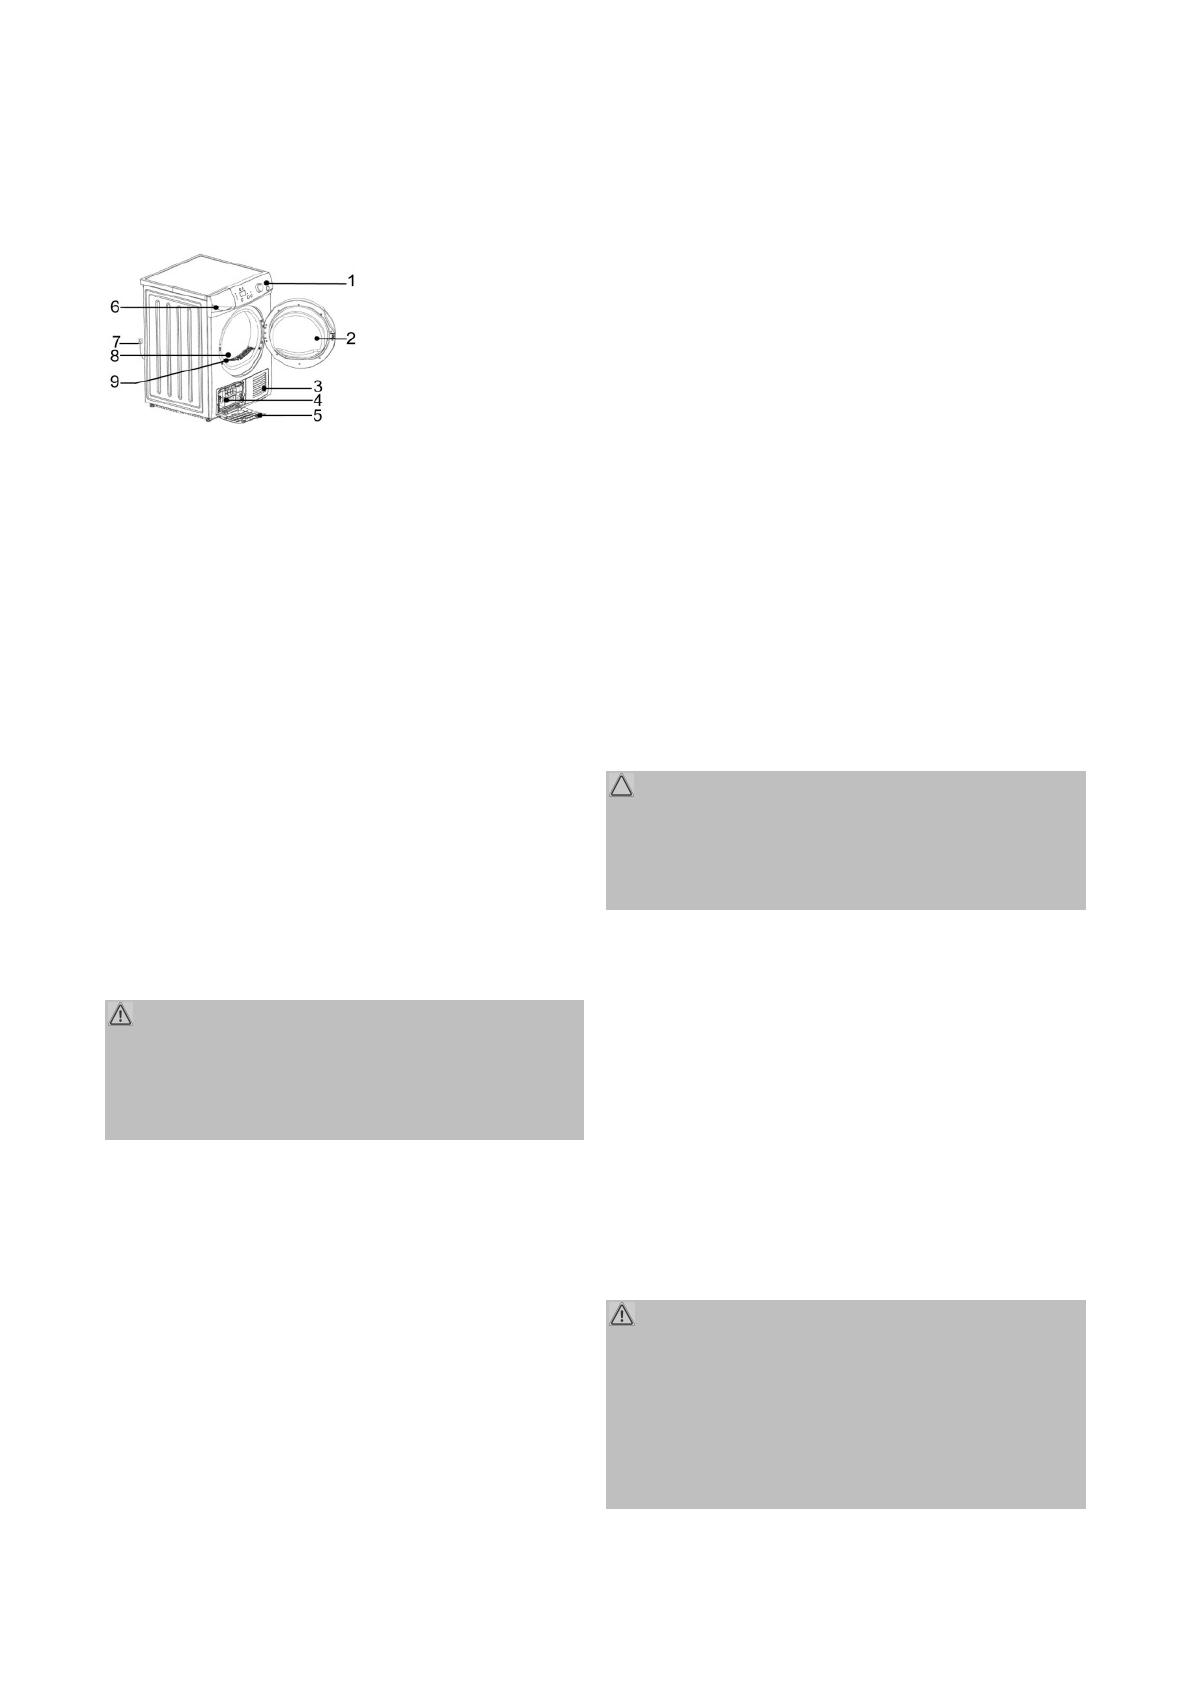
1
11
1
Control panel
2
22
2
Appliance door /
bull’s-eye
3
33
3
Ventilation grid
4
44
4
Filter base
5
55
5
Maintenance flap
6
66
6
Condenser water tank 8
88
8
Drum
7
77
7
Power plug 9
99
9
Lint filter
Working principle
Working principleWorking principle
Working principle
Hot process air flows through the drum and thereby
the therein wet laundry.
The humidity of the laundry is absorbed by the air,
and then discharged in the heat pump. There, the air
is cooled using a refrigerant, which stores the ex-
tracted energy.
Energy is not (hardly) getting lost, because this is
used to warm the cooled air, which is then trans-
ferred to the laundry and thus the circle is closed.
Installation
InstallationInstallation
Installation
WARNING:
WARNING:WARNING:
WARNING:
The appliance must not be connected to the mains
during installing. Otherwise there is da
dada
dan
nn
nger to life
ger to lifeger to life
ger to life or
electric shock hazard
electric shock hazardelectric shock hazard
electric shock hazard!
Appliance location
Appliance locationAppliance location
Appliance location
• The site should be located near a properly
grounded power socket.
• Place the appliance so that all controls are easily
to reach and the appliance door can open without
being impeded.
• Good ventilation around the appliance is required,
in order to dissipate the heat properly. Sufficient
clearance must be created for this purpose.
• Make sure that the floor, on which the appliance is
installed, is even, heat-resistant and clean.
• Take care of a solid and horizontal position of the
appliance. If the appliance is not horizontally lev-
eled, adjust the feet accordingly.
• Avoid the installation:
Avoid the installation:Avoid the installation:
Avoid the installation:
- near heaters, next to a stove, direct sunlight or
any other heat sources;
- at locations with high humidity (e.g. outdoors),
as metal parts would be susceptible to corro-
sion under such circumstances;
- in rooms where the temperature drops below
5°C or above 35°C. Do not expose the appli-
ance any weather.
- near volatile or flammable materials (e.g. gas,
fuel, alcohol, paint, etc.).
Adjusting the feet
Adjusting the feetAdjusting the feet
Adjusting the feet
CAUTION:
CAUTION:CAUTION:
CAUTION:
The feet must never be removed. Do not restrict the
floor clearance through carpets, strips of wood or
similar. Danger of heat accumulation!
Danger of heat accumulation!Danger of heat accumulation!
Danger of heat accumulation!
• Loosen the locknuts with a wrench.
• Turn the feet to the right to let down the appli-
ance; turn to the left to lift it up.
• Tighten the lock nuts with the wrench when the
appliance is properly leveled. The feet must have
solid ground contact.
• Check with a spirit level if the appliance is leveled
horizontally. If the appliance is not in balance, the
feet must be adjusted again.
Electrical connection
Electrical connectionElectrical connection
Electrical connection
WAR
WARWAR
WARNING
NINGNING
NING:
::
:
• The installation to the mains supply must conform
to the local standards and regulations.
• Improper connection may cause to an electric
electric electric
electric
shock
shockshock
shock!
• Do not use multiple sockets.


