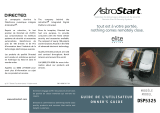
AstroStart AF-RFS5325 Owner's manual
- Category
- Remote starters
- Type
- Owner's manual
This manual is also suitable for

Congratulations
Congratulations on the purchase of your state-of-the-art security and
remote start system. Reading this Owner’s Guide prior to using your
system will help maximize the use of your system and its many fea-
tures. For any additional questions please contact your authorized
AstroStart dealer.
Important information
Government Regulations and Safety information
Read the Government Regulations and Warning! Safety
First sections of this manual prior to operating this system.
Warning! Failure to heed this information can result in
death, personal injury or property damage and may also
result in the illegal use of the system beyond its intended
purpose.
Your Warranty
Your system comes with a warranty. The warranty terms are detailed at
the end of this guide. Make sure that you receive the proof of purchase
from your dealer, indicating the product was installed by an autho-
rized AstroStart dealer.
Replacement remote controls
Please see your authorized dealer. Remote control part numbers are
found on the back of the device.


Contents
Getting Started .................................................................................................... 4
Charging the remote control: ................................................................. 4
Keys to using this manual ...................................................................... 5
5325-TX Remote Control ...................................................................................... 6
Antenna ............................................................................................................. 7
Status Screen Icons .............................................................................................. 8
Using your System ............................................................................................. 10
Commands and Confirmations ............................................................ 10
Performing Commands ....................................................................... 10
5325-TX Command table .................................................................... 11
Fault Condition Alerts ......................................................................... 11
Basic Commands (Direct Access) ........................................................................ 12
Lock/Arm ......................................................................................... 12
Unlock/Disarm .................................................................................. 12
Remote Start ...................................................................................... 13
Advanced Commands: (Level 1) ......................................................................... 14
Utility 1 ............................................................................................ 14
Advanced Commands: (Level 2) ......................................................................... 15
Utility 3 ............................................................................................ 15
Utility 4 ............................................................................................ 15
Temperature Request .......................................................................... 15
Advanced Commands: (Level 3) ......................................................................... 17
Silent Lock......................................................................................... 17
Silent Unlock ..................................................................................... 17
Low Temperature Mode ...................................................................... 18
Advanced Commands: (Level 4) ......................................................................... 19
Timer Start Mode ............................................................................... 19
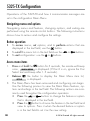
5325-TX Configuration ...................................................................................... 20
Navigating menus and options ............................................................ 20
Button operation ................................................................................ 20
Access menu items ............................................................................ 20
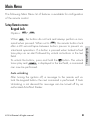
Main Menu ....................................................................................................... 21
Setup Remote menu: ........................................................................... 21
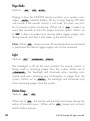
Light ................................................................................................. 22
Button Beep....................................................................................... 22
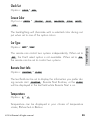
Clock Set .......................................................................................... 23
Screen Color ..................................................................................... 23
Car Type .......................................................................................... 23
Remote Start Info ............................................................................... 23
Temperature ...................................................................................... 23
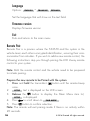
Language ......................................................................................... 24
Firmware version ............................................................................... 24
Exit .................................................................................................. 24

Remote Pair:...................................................................................... 24
Exit: ................................................................................................. 25
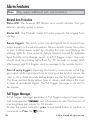
Alarm Features ................................................................................................. 26
Normal Arm Protection ....................................................................... 26
Full Trigger Messages ......................................................................... 26
Trigger Zone Fault Report.................................................................... 27
Alarm Report when disarming ............................................................. 27
Alarm Report when requested ............................................................. 28
Nuisance Prevention (NPC) ................................................................. 28
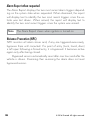
Remote Start Features ........................................................................................ 29
Key Takeover..................................................................................... 29
Remote Start Safe-lock ........................................................................ 29
Disabling Remote Start ....................................................................... 29
Advanced Start ................................................................................. 30
Continuous Mode .............................................................................. 31
Safety Sequence Mode ....................................................................... 32
Turbo Timer Mode .............................................................................. 33
Remote Start Error .............................................................................. 34
Remote and System Operations .......................................................................... 35
Passive Arming* ................................................................................ 35
Auto Re-arming* ................................................................................ 35
Valet Mode ....................................................................................... 36
Power Save ....................................................................................... 36
Rapid Resume ................................................................................... 36
Automatic Remote Updates ................................................................. 36
Out of Range .................................................................................... 37
No Remote Output ............................................................................. 37
Feature not Available ......................................................................... 37
Car Select (LCD 2-way) ...................................................................... 38
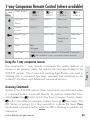
1-way Companion Remote Control (where available) ........................................... 39
Accessing Commands ........................................................................ 39
Button Auto Lock ................................................................................ 40
1-way Remote Control Configuration .................................................... 41
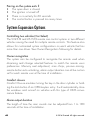
System Expansion Options ................................................................................. 44
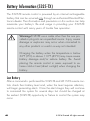
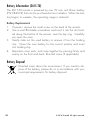
Battery Information (5325-TX) ............................................................................ 46
Low Battery ....................................................................................... 46
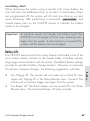
Battery Life ........................................................................................ 47
Battery Information (2615-TX) .............................................................. 48
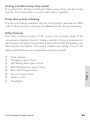
Battery Disposal ................................................................................ 48
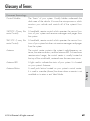
Glossary of Terms .............................................................................................. 49
Patent Information ............................................................................................. 50
Government Regulations .................................................................................... 51
Warning! Safety First ......................................................................................... 53

Installation ........................................................................................ 53
Remote Start Capable ........................................................................ 53
Manual Transmission Vehicles ............................................................. 53
Interference ....................................................................................... 55
Upgrades and Batteries ...................................................................... 55
Water/Heat Resistance ...................................................................... 55
Limited lifetime consumer warranty ..................................................................... 56

4
© 2016 Directed. All rights reserved.
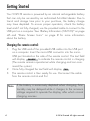
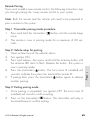
Getting Started
Your 5325-TX remote is powered by an internal rechargeable battery
that can only be serviced by an authorized AstroStart dealer. Due to
transit and storage time prior to your purchase, the battery charge
may have depleted. To ensure proper operation, check the battery
level and if not fully charged, use the provided cable to connect to the
USB port on a computer. See “Battery Information (5325-TX)” on page
46 and “Status Screen Icons” on page 8 for more information
about the battery.
Charging the remote control:
1. Plug the USB end of the provided USB cable into the USB port
on a computer. Insert the micro-USB connector into the micro-
USB port located on the side of the remote control. The text field
will display
CHARGE
to indicate the remote control is charging
(The remote remains operational while charging and can com-
mand the system).
2. Once fully charged the text field will display
FULL
.
3. The remote control is then ready for use. Disconnect the cable
from the remote control end first.
Note
If the battery is excessively depleted when charging, func-
tionality may be delayed while it charges to the minimum
voltage required to operate the display, after which normal
charging resumes.

5
© 2016 Directed. All rights reserved.
At a Glance
5
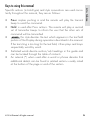
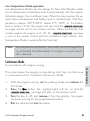
Keys to using this manual
Specific actions (in bold type) and style conventions are used consis-
tently throughout this manual, they are as follows:
• Press: implies pushing in and the remote will play the transmit
beep to send the command.
• Hold: is used after Press actions. The remote will play a second
set of transmitter beeps to inform the user that the other sets of
command will be transmitted
•
ARMED
this style denotes the text which appears in the text field
portion of the Display during operations described in the manual.
If the text string is too long for the text field, it then plays and loops
sequentially word by word.
• Italicized words denote section/sub headings in this guide and
can be located through the table of contents.
• An asterisk (*) when used after a word or phrase denotes that
additional details can be found in related sections usually noted
at the bottom of the page or end of the section.

6
© 2016 Directed. All rights reserved.
6
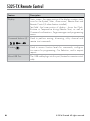
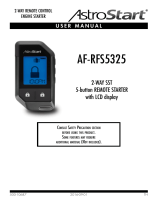
5325-TX Remote Control
Feature Description
Display Status screen - the upper portion of the display contains status
icons for the System, Siren, Alarm zones, Remote Start and
Remote Control (if alarm feature installed).
Text field - the lower portion of display - shows the Clock,
Runtime or Temperature during Remote Start, as well as
Command confirmations, Page messages and programming
menus
Command buttons (4)
Used to perform arming, disarming, utility channel and
remote start commands
P button
Used to access function levels for commands, configura-
tion menus for programming, Car Selection, and to request
reports.
Micro-USB Port The USB cable plugs into this port (located on remote control
side).

7
© 2016 Directed. All rights reserved.
At a Glance
7
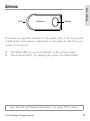
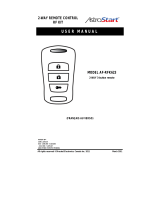
Antenna
AntennaLED Button
The antenna, typically located on the upper part of the front wind-
shield sends and receives commands or messages to and from your
system. It consists of:
• The Status LED, as a visual indicator of the system’s status.
• The Antenna button, for placing the system into Valet Mode*.
* See “Remote and System Operations” on page 35 for details.

8
© 2016 Directed. All rights reserved.
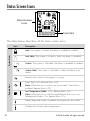
Status Screen Icons
1
ALL
Text Field
Status Screen
Icons
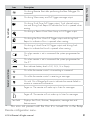
The table below describes all the status screen icons.
Icon Description
System Status
ALL
Lock: The system is Locked, the alarm is enabled if installed.
ALL
Lock Valet: The system is Locked in Valet, the alarm is disabled.
ALL
Unlock: The system is Unlocked, the alarm is disabled if installed.
ALL
Unlock Valet: The system is Unlocked in Valet, the alarm is dis-
abled.
Remote Start
ALL
Remote start is active, the engine is running.
ALL
+
ALL
Timer Start is On; Remote Start is On.
Note: When the icon is without an arrow head: Timer Start is
enabled: Remote Start is Off
ALL
+
ALL
Low Temperature Mode: is On; Remote Start is On.
Note: When the icon is with the small Remote Start icon, Low
Temperature Mode is On; Remote Start is On.
ALL
Safety Sequence mode is enabled, the engine can be started
ALL
Displays the vehicle interior temperature

9
© 2016 Directed. All rights reserved.
At a Glance
9
Icon Description
ALL
On during Remote Start after performing the Rear Defogger On
command
Zone Status
ALL
On during Warn-away and Full Trigger message output
ALL
On during Trunk Zone Full Trigger output, Trunk channel activa-
tion and during Fault Report to indicate the Trunk is opened when
arming.
ALL
On during a Sensor Zone Warn Away or Full Trigger output
ALL
On during the Door Zone Full Trigger output and during Fault
Report to indicate a Door is opened when arming
ALL
On during a Hood Zone Full Trigger output and during Fault
Report to indicate the Hood is opened when arming
Remote Control Status
ALL
On when remote is set to command the system programmed as
Car 1*
ALL
On when remote is set to command the system programmed as
Car 2*
ALL
Bars indicate battery level is Full, ¾,½,¼ or Empty
ALL
On while the remote control is transmitting a command
ALL
On while the remote control is receiving a message
ALL
On with Out of Range fault tone to indicate the remote failed to
receive a command confirmation
ALL
Pager on: The remote will wake up to listen for messages
ALL
Pager off: The remote will not wake up to listen for messages
Text field Displays the Clock, Runtime, Temperature, message text and
feature menus
* This icon not present until the Car 2 is turned On in the Setup
Remote configuration menu.

10
© 2016 Directed. All rights reserved.
10
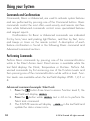
Using your System
Commands and Confirmations
Commands, Basic or Advanced, are used to activate system features
and are performed by pressing one of the Command buttons. Basic
commands control the most often used security and remote start fea-
tures while Advanced commands control more specialized features
and request reports.
Confirmations for Basic or Advanced commands are indicated
first by horn/siren and parking light flashes, and then by Text, Icons
and beeps or tones on the remote control. A description of each
feature confirmation is found in the following Basic command and
Advanced command sections.
Performing Commands
Perform Basic commands by pressing one of the command buttons
while in the Direct Access level. Direct access is available while the
text field displays the Clock, Temperature or Runtime. Perform Ad-
vanced commands by first accessing one of the Function Levels and
then pressing one of the command buttons while within a level. Func-
tion Levels are available when the text field displays LEVEL 1,2,3 or
4.
Advanced command example: Silent Lock
1. Press the
button three times to access Function Level 3, the
text field will display
LEVEL 3
.
2. Press the
button while
LEVEL 3
text is still on to perform the
Silent Lock command.
3. The 5325-TX remote will display
LOCK
in the text field and
update the status screen icons.

11
© 2016 Directed. All rights reserved.
Commands
11
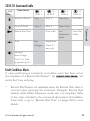
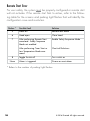
5325-TX Command table
Button
Level
Direct Access
x 1
LEVEL 1
x 2
LEVEL 2
x 3
LEVEL 3
x 4
LEVEL 4
Arm/Lock (Panic) Utility 1 Utility 3 Silent Lock Car finder
Disarm/Unlock Utility 2 Utility 4 Silent Unlock
Remote Start/Stop Alarm Valet Low
Temperature
Mode
Timer Start
Mode
Trunk Rear
Defogger
Temperature
Check (2-
way only)
Advance
Level Change
Car (1.5s), Enter
programming (5s)
Fault Condition Alerts
If, when performing a command, a condition exists that does not al-
low activation of a Remote Start feature*, the
REMOTE START ERROR
text
and a fault tone will play.
* Remote Start feature not available when the Remote Start status is
incorrect upon receiving the command. (Example: Remote Start
attempt while Safety Sequence mode was not complete). Refer
to the notes included in the command descriptions that address
these faults or go to “Remote Start Error” on page 34 for more
details.

12
© 2016 Directed. All rights reserved.
12
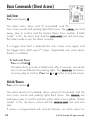
Basic Commands (Direct Access)
Lock/Arm
Press and release
The alarm arms, doors lock (if connected), and the
horn/siren sounds and parking lights flash once. The
LOCK
text and
beeps play to confirm and the System Status Icons update. If Valet
mode* is On, the doors lock and the
LOCK VALET
text and tone play.
Exit Valet mode to arm the alarm normally.
If a trigger zone fault is detected the siren chirps once again and
the Trigger Zone Fault report** plays. (Applicable only when alarm
feature is installed)
To Lock and Panic
Press and hold
The alarm Arms (or Locks in Valet) and, after 3 seconds, sounds the
horn/siren and flashes the parking lights. The
PANIC ON
text and si-
ren tones play to confirm. Press the
or button to stop the output.
Unlock/Disarm
Press and release
The alarm disarms (if installed), doors unlock (if connected), and the
horn/siren sounds and parking lights flash twice. The
UNLOCK
text
and beeps play to confirm and the system status icons update. If Valet
mode* is On, the doors unlock and the
UNLOCK VALET
text and tone
play.
If system is programmed with security features, an alarm report re-
1
ALL
1
ALL
level 1
1
ALL
level 2
1
ALL
level 3
1
ALL
level 4
1
ALL
6:30
6:30

13
© 2016 Directed. All rights reserved.
Commands
13
places the disarm output if the alarm was triggered. The siren chirps
four times and the
UNLOCK
text is then followed by the Alarm report.**
Status
Press and release
The remote will update System Status icons on display and beep once
to confirm the system current status update.
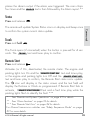
Trunk
Press and hold
The Trunk opens (if connected) when this button is pressed for 4 sec-
onds. The
TRUNK
text and tones play to confirm.
Remote Start
Press and release
Activates (or if On, deactivates) the remote starter. The engine and
parking lights turn On and the
REMOTE START ON
text and tones play,
or the engine and parking lights turn Off and the
REMOTE START OFF
text and tones play to confirm, the Remote Start status icons update.
The
AUX
AUX
icon will display in the status screen and the text field will
display the Runtime or Clock as programmed. If Remote Start fails to
activate,
REMOTE START ERROR
text and a fault tone play while the
parking lights flash to identify the fault.***
* See “Remote and System Operations” on page 35 for details.
** See “Alarm Features” on page 26 for details.
*** See “Remote Start Error” on page 34 for details.
For Manual transmission vehicles see “Safety Sequence Mode” on page
32 for more details.

14
© 2016 Directed. All rights reserved.
14
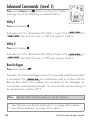
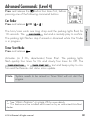
Advanced Commands: (Level 1)
Press and release the button one time first, before
pressing one of the following command buttons.
Utility 1
Press and release
Activates (or if On, deactivates) the Utility 1 output. The
AUX 1 ON
or
AUX 1 OFF
text and On tones or Off tones play to confirm.
Utility 2
Press and release
Activates (or if On, deactivates) the Utility 2 output. The
AUX 2 ON
or
AUX 2 OFF
text and On tones or Off tones play to confirm.
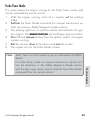
Rear Defogger
Press and release
Activates the vehicle Defogger circuit (if connected) while Remote Start
is activated. The
DEFOG ON
text and beeps play to confirm and the
Remote Start status icons update. For convenience, the Defogger cir-
cuit will also automatically activate 10 seconds after remote starting if
the temperature is below 55°F.
Note
Remote Start must be active to use this feature.
* See “Remote and System Operations” on page 35 for details.
** See “Alarm Features” on page 26 for details.
1
ALL
1
ALL
level 1
1
ALL
level 2
1
ALL
level 3
1
ALL
level 4
1
ALL
6:30
6:30

15
© 2016 Directed. All rights reserved.
Commands
15
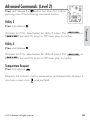
Advanced Commands: (Level 2)
Press and release the button two times first, before
pressing one of the following command buttons.
Utility 3
Press and release
Activates (or if On, deactivates) the Utility 3 output. The
AUX 3 ON
or
AUX 3 OFF
text and On tones or Off tones play to confirm.
Utility 4
Press and release
Activates (or if On, deactivates) the Utility 4 output. The
AUX 4 ON
or
AUX 4 OFF
text and On tones or Off tones play to confirm.
Temperature Request
Press and release
Requests the vehicle’s interior temperature and temporarily displays it
via status screen icon
ALL
and text field.
1
ALL
1
ALL
level 1
1
ALL
level 2
1
ALL
level 3
1
ALL
level 4
1
ALL
6:30
6:30

16
© 2016 Directed. All rights reserved.
16
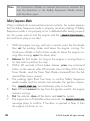
Alarm Valet
Press and release
Enters (or if On, exits) Valet Mode. The
VALET
text plays to confirm,
plays asceding melody for On, descending melody for Off and the
System Status icons update and the Antenna LED turns On and Off
accordingly. See Valet Mode for more details.
* See “Advanced Start” on page 30 for more details.

17
© 2016 Directed. All rights reserved.
Commands
17
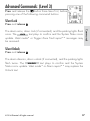
Advanced Commands: (Level 3)
Press and release the button three times first, before
pressing one of the following command buttons.
Silent Lock
Press and release
The alarm arms, doors lock (if connected), and the parking lights flash
once. The
LOCK
text plays to confirm and the System Status icons
update. Valet mode* or Trigger Zone Fault report** messages may
be received.
Silent Unlock
Press and release
The alarm disarms, doors unlock (if connected), and the parking lights
flash twice. The
UNLOCK
text plays to confirm and the System
Status icons update. Valet mode* or Alarm report** may replace the
Unlock text.
1
ALL
1
ALL
level 1
1
ALL
level 2
1
ALL
level 3
1
ALL
level 4
1
ALL
6:30
6:30

18
© 2016 Directed. All rights reserved.
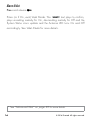
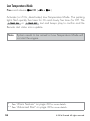
18
Low Temperature Mode
Press and release OR ( + )
Activates (or if On, deactivates) Low Temperature Mode. The parking
lights flash quickly five times for On and slowly five times for Off. The
L-TEMP ON
or
L-TEMP OFF
text and beeps play to confirm and the
Remote start status icons update.
Note
System needs to be armed or Low Temperature Mode will
not start the engine.
* See “Alarm Features” on page 26 for more details.
** See “Advanced Start” on page 30 for more details.
Page is loading ...
Page is loading ...
Page is loading ...
Page is loading ...
Page is loading ...
Page is loading ...
Page is loading ...
Page is loading ...
Page is loading ...
Page is loading ...
Page is loading ...
Page is loading ...
Page is loading ...
Page is loading ...
Page is loading ...
Page is loading ...
Page is loading ...
Page is loading ...
Page is loading ...
Page is loading ...
Page is loading ...
Page is loading ...
Page is loading ...
Page is loading ...
Page is loading ...
Page is loading ...
Page is loading ...
Page is loading ...
Page is loading ...
Page is loading ...
Page is loading ...
Page is loading ...
Page is loading ...
Page is loading ...
Page is loading ...
Page is loading ...
Page is loading ...
Page is loading ...
Page is loading ...
Page is loading ...
-
 1
1
-
 2
2
-
 3
3
-
 4
4
-
 5
5
-
 6
6
-
 7
7
-
 8
8
-
 9
9
-
 10
10
-
 11
11
-
 12
12
-
 13
13
-
 14
14
-
 15
15
-
 16
16
-
 17
17
-
 18
18
-
 19
19
-
 20
20
-
 21
21
-
 22
22
-
 23
23
-
 24
24
-
 25
25
-
 26
26
-
 27
27
-
 28
28
-
 29
29
-
 30
30
-
 31
31
-
 32
32
-
 33
33
-
 34
34
-
 35
35
-
 36
36
-
 37
37
-
 38
38
-
 39
39
-
 40
40
-
 41
41
-
 42
42
-
 43
43
-
 44
44
-
 45
45
-
 46
46
-
 47
47
-
 48
48
-
 49
49
-
 50
50
-
 51
51
-
 52
52
-
 53
53
-
 54
54
-
 55
55
-
 56
56
-
 57
57
-
 58
58
-
 59
59
-
 60
60


AstroStart AF-RFS5325 Owner's manual
- Category
- Remote starters
- Type
- Owner's manual
- This manual is also suitable for
Ask a question and I''ll find the answer in the document
Finding information in a document is now easier with AI
Related papers
-
 AstroStart DSP5325 Owner's manual
-
 AstroStart DSP621 Owner's manual
-
 AstroStart 5204U User manual
-
 AstroStart 502 User manual
-
 AstroStart AF-RFK5225 Owner's manual
-
 AstroStart 903U User manual
-
 AstroStart RSS-2524 User manual
-
 AstroStart AF-RFS5325_RSR FULL Owner's manual
-
 AstroStart AF-RFK623 User manual
-
 AstroStart RS-414 Owner's manual


