Lifetime 90274 Owner's manual

Type
Owner's manual
DOUBLE SLIDE
DELUXE PLAYSET
Icon Legend................................3
Warnings and Notices..................4
Safety Information.....................5
Safe Play Area.............................9
A-Frame Assembly....................10
Monkey Bar Assembly...............13
Slide Assembly..........................21
Fire Pole Assembly...................25
Deck Support Assembly.............29
Deck Assembly..........................40
Parts Identifi er.........................i-iv
Climbing Wall and Chalkboard
Assembly................................. 50
Roof Assembly..........................57
Slide and Accessories Assembly ....
...............................................63
Swing Assembly........................70
Maintenance Instructions..........75
Registration..............................77
Warning Sticker........................78
Warranty...................................82
TOOLS REQUIRED (NOT INCLUDED—UNLESS INDICATED OTHERWISE) TABLE OF CONTENTS
(2, included)
1/2" (≈13 mm)
(2)
(1)
Lifetime’s assembly experts offer quick responses and great customer service.
Call: 1-800-225-3865
Monday–Friday 7:00 am–5:00 pm (MST)
and Saturday 9:00–1:00 pm (MST)
Web: www.lifetime.com/instructions
Live Chat: www.lifetime.com/instructions
NEED HELP? TALK TO US!
MODEL# AND PRODUCT ID (you will need both when contacting us)
Model Number: Product ID:
90274
Lifetime
®
playgrounds are designed to be strong
and durable. We strive to make assembly as easy
as possible without compromising quality.
Prepare the Area
Before you start, prepare a level surface with the
proper Safety Zone (see page 6).
Recruit Friends and Family
Assembly should take 2 people about 6–8
hours.
Inspect all parts and hardware. Ensure all are
included using the Parts Identifi er in the middle
of these instructions. The Parts Identifi er, in
yellow, can be removed from the instructions for
quick reference.
3/16" (≈5 mm)
(1)
(1)
5/16" (≈8 mm)
(1)
1/4" (≈6 mm)
(1)
(1)
(1)
(2)
(1)
᪥ᮏㄒࡣ࣮࣌ࢪࢆཧ↷ࠋ
IMPORTANT, RETAIN FOR FUTURE REFERENCE: READ CAREFULLY
ASSEMBLY INSTRUCTIONS
MODEL #60091
MODEL
COPY
3
1208813
4/21/2020
Indicates the parts to be used for a section.
͌ ࢭࢡࢩ࡛ࣙࣥᚲせ࡞㒊ရࢆ♧ࡋࡲࡍࠋ
Indicates special heed should be taken when reading
͌ ㄞࡴ㝿࡟≉ู࡞ὀពࡀᚲせ
Indicates the hardware to be used for a section.
͌ ࢭࢡࢩ࡛ࣙࣥᚲせ࡞㔠ලࢆ♧ࡋࡲࡍࠋ
Indicates the tools to be used for a section.
͌ ࢭࢡࢩ࡛ࣙࣥᚲせ࡞ᕤලࢆ♧ࡋࡲࡍࠋ
Indicates no hardware required for a specifi c page.
͌ ヱᙜࡍࡿ࣮࣌ࢪ࡛㔠ලࡀᚲせ࡞࠸ࡇ࡜ࢆ♧ࡋࡲࡍࠋ
Indicates no parts required for a specifi c section.
͌ ヱᙜࡍࡿࢭࢡࢩ࡛ࣙࣥ㒊ရࡀᚲせ࡞࠸ࡇ࡜ࢆ♧ࡋࡲࡍࠋ
Indicates to use/not to use an electric drill for a specifi c step.
͌ ≉ᐃࡢࢫࢸࢵࣉ࡛㟁Ẽࢻࣜࣝࢆ౑⏝୙౑⏝ࡍࡿࡇ࡜ࢆ♧ࡋࡲࡍࠋ
ICON LEGEND / ࢔࢖ࢥࣥซ౛
• Indicates the use of a centerlock nut. A nut with this marking will require some effort to
tighten. This hardware was designed with this feature in order to prevent loosening later.
ɀġġġࡇࢀࡽࡢࢼࢵࢺࡣࢭࣥࢱ࣮ࣟࢵࢡࢼࢵࢺ࡛ࡍࠋࡋࡗ࠿ࡾ⥾ࡲࡿࡼ࠺タィࡉࢀ࡚࠸ࡿࡓࡵࠊ⥾ࡵ
ࡿࡢࡀࡼࡾ㞴ࡋࡃ࡞ࡗ࡚࠸ࡲࡍࠋ㔠ᒓࡲࡓࡣࣉࣛࢫࢳࢵࢡ࡜ྠࡌ㧗ࡉ࡟࡞ࡿࡲ࡛⥾ࡵ࡚ࡃࡔࡉ࠸ࠋ
ࡈ⮬ศࡢ㈐௵࡛౑⏝ࡋ࡚ࡃࡔࡉ࠸㸟
࣎ࣝࢺࢆ⥾ࡵࡿ㝿ࡣࢻࣜࣝࢆ౑ࢃ࡞࠸࡛ࡃࡔࡉ࠸ࠋ
ࢫࢡ࣮ࣜࣗࢆ⥾ࡵࡿሙྜࡣࢥ࣮ࢻࣞࢫࢻࣜࣝࢆ౑⏝࡛ࡁࡲࡍ
ࡀࠊ⥾ࡵࡍࡂࡓࡾࠊࡡࡌᒣࡀࡘࡪࢀࡓࡾࡋ࡞࠸ࡼ࠺࡟Ẽࢆ௜ࡅ
࡚ࡃࡔࡉ࠸ࠋ
A cordless drill can be used for driving screws;
however, care should be taken not to over-tighten or strip screws.
USE AT YOUR OWN RISK!
USING A DRILL IS NOT RECOMMENDED FOR DRIVING BOLTS.
!
Use caution when using the mallet not to get skin or fi ngers pinched.
͌ᮌᵔࢆ౑⏝ࡍࡿ㝿ࡣࠊ⓶⭵ࡸᣦࡀࡣࡉࡲࢀ࡞࠸ࡼ࠺࡟ὀពࡋ࡚ࡃࡔࡉ࠸ࠋ
4
WARNINGS & NOTICES / ㆙࿌࡜࿌▱
Most injuries are caused by misuse and/or not following instructions. Use caution when using this product.
To ensure safety, do not attempt to assemble this product without following the instructions carefully. Check entire box and inside all packing
material for parts and/or additional instruction material. Before beginning assembly, read the instructions and identify parts using the hardware
identifi er and parts list in this document. Proper and complete assembly, use and supervision are essential for proper operatation and to reduce the
risk of accident or injury. A high probability of serious injury exists if this product is not installed, maintained, and operated properly.
FAILURE TO FOLLOW THESE WARNINGS MAY RESULT IN SERIOUS INJURY OR PROPERTY DAMAGE AND WILL VOID WARRANTY.
Owner must ensure that all players know and follow these rules for safe operation of the system.
If using a ladder during assembly, use extreme caution.
Three capable adults are recommended for this operation.
Be aware that parts can be damaged by overtightening the screws.
All who participate in the assembly process should wear safety glasses throughout the assembly.
SAFETY INSTRUCTIONS
Ᏻ඲࡟㛵ࡍࡿㄝ᫂
ăǹăǀĆǕĄǟĄĎĐ
ˤ
ɀ⤌ࡳ❧࡚᫬࡟ࡣࡋࡈࢆ౑⏝ࡍࡿሙྜࡣ≉࡟ࡈὀពࡃࡔࡉ࠸ࠋ
͌኱ேே࡛సᴗࡍࡿࡇ࡜ࢆ᥎ዡࡋࡲࡍࠋ
͌ࢫࢡ࣮ࣜࣗࢆ⥾ࡵࡍࡂࡿ࡜ࠊ㒊ရࡀᦆയࡍࡿྍ⬟ᛶࡀ࠶ࡿⅬ࡟␃ពࡋ࡚ࡃࡔࡉ࠸ࠋ
͌⤌ࡳ❧࡚࡟ཧຍࡍࡿேࡣ඲ဨࠊᡭ㡰ࢆ⾜࠺㛫ࠊᏳ඲ࡵࡀࡡࢆ╔⏝ࡋ࡚ࡃࡔࡉ࠸ࠋ
ከࡃࡢࢣ࢞ࡣㄗ౑⏝ࡸㄝ᫂᭩࡟ᚑࢃ࡞࠸ࡇ࡜ࡀཎᅉ࡛Ⓨ⏕ࡋࡲࡍࠋࡇࡢ〇ရࢆ౑⏝ࡍࡿ㝿ࡣὀពࡋ࡚ࡃࡔࡉ࠸ࠋ
௨ୗࡢ㆙࿌ࢆᛰࡗࡓሙྜࠊ㔜യࡸ≀ရࡀ◚ᦆࡍࡿྍ⬟ᛶࡀ࠶ࡾಖドࡢᑐ㇟እ࡜࡞ࡾࡲࡍࠋ
ᮏయᡤ᭷⪅ࡣࡍ࡭࡚ࡢ฼⏝⪅ࡀᏳ඲࡟ࢩࢫࢸ࣒ࢆ౑࠺ࡓࡵ࡟௨ୗࡢ࣮ࣝࣝࢆᏲࡿࡇ࡜ࢆ☜ㄆࡋ࡚ࡃࡔࡉ࠸ࠋ
Ᏻ඲☜ಖࡢࡓࡵࠊࡇࡢ〇ရࢆ௨ୗࡢㄝ᫂࡟ᚑࢃࡎ࡟⤌ࡳ❧࡚ࡿࡇ࡜ࡣ㑊ࡅ࡚ࡃࡔࡉ࠸ࠋ㒊ရࡸ㏣ຍࡢㄝ᫂㛵㐃≀࡞࡝⟽࡟ྠᑒ
ࡉࢀ࡚࠸ࡿࡍ࡭࡚ࡢࡶࡢࢆ☜ㄆࡋ࡚ࡃࡔࡉ࠸ࠋ⤌ࡳ❧࡚ࢆጞࡵࡿ๓࡟ྲྀࡾᢅ࠸ㄝ᫂᭩ࢆㄞࡳࡇࡇ࡟グ㍕ࡉࢀ࡚࠸ࡿ㔠ල㆑ูࢥ
࣮ࢻࡸ㒊ရࣜࢫࢺࢆ฼⏝ࡋ࡚㒊ရࢆ☜ㄆࡋ࡚ࡃࡔࡉ࠸ࠋ㐺ษ࠿ࡘ᏶⎍࡞⤌❧࡚ࠊ౑⏝ࠊ࠾ࡼࡧ⟶⌮ࡣ㐺ษ࡞౑⏝࡟୙ྍḞ࡛ࠊ
஦ᨾࡸࢣ࢞ࡢࣜࢫࢡࢆᢚ࠼ࡲࡍࠋࡇࡢ〇ရࡢ⤌ࡳ❧࡚ࠊ⥔ᣢࠊࡲࡓࡣ౑⏝ࢆ㐺ษ࡟⾜ࢃ࡞ࡅࢀࡤࠊ㔜യࢆ㈇࠺ྍ⬟ᛶࡀ㧗ࡲࡾ
ࡲࡍࠋ
5
**IMPORTANT SAFETY INFORMATION**
INSTALLATION & GROUND PREPARATION INSTRUCTIONS
OPERATING INSTRUCTIONS
PLEASE READ BEFORE BEGINNING ASSEMBLY:
Observing the following instructions and warnings reduces the likelihood of serious or fatal injury:
The maximum number of occupants that may safely use the entire playset is ten with a maximum weight of 1000 pounds
(454 kg).
On-site adult supervision should be provided for children of all ages.
Instruct children not to walk close to, in front of, behind, or between moving items.
Do not move the equipment while it is in use.
Instruct children not to twist swing chains or ropes or loop them over the top support bar since this may reduce the
strength of the chain or rope.
Instruct children to avoid swinging empty seats.
Teach children to sit in the center of the swings with their full weight on the seats.
Instruct children not to use the equipment in a manner other than intended.
Instruct children not to get off the equipment while it is in motion.
To prevent entanglement and strangulation, dress children appropriately using well-fi tting shoes and avoiding ponchos,
scarves, jackets with neck drawstrings, cord-connected items, helmets with straps, and other loose-fi tting clothing that is
potentially hazardous while using equipment. These items can cause death by strangulation.
Instruct children not to play when the equipment is wet.
Instruct children not to attach items to the playground equipment that are not specifi cally designed for use with the
equipment, such as, but not limited to, jump ropes, clothesline, pet leashes, cables and chain as they may cause a
strangulation hazard.
Dress children with well-fi tting and full foot enclosing footwear. Examples of inappropriate foot ware are clogs, fl ip ops, and
sandals.
• Instruct children to remove their bike or other sports helmet before playing on the playground equipment. These items can cause
death by strangulation.
Check that suspended climbing ropes, chain, or cable are secured at both ends
Place the equipment no less than 2.0 m (6.6 ft.) from any structure or obstruction such as a fence, garage, house,
overhanging branches, laundry lines, or electrical wires.
Impact surfacing needs to cover the entire recommended play area.
Never add extra length to chain or rope. The chains or ropes provided are the maximum length designed for the swinging
element(s). EN71 Standard requires the swings’ minimum clearance to be 350 mm (≈13.78 in.) from the ground.
Place the equipment on level, well-drained ground, not less than 6.6 ft (2.0 m) from any structure or obstruction such
as a fence, garage, house, overhanging branches, laundry lines, or electrical wires.
Provide enough room so that children can use the equipment safely. For example, for structures with multiple play
activities, a slide should not exit in front of a swing.
Separate active and quiet activities from each other. For example, locate sandboxes away from swings or use a
guardrail or barrier to separate the sandbox from the movement of the swings.
Do not install home playground equipment over concrete, asphalt, packed earth, grass, carpet, or any other hard surface.
A fall onto a hard surface can result in serious head injury or death. (see page 7).
To prevent serious injury, warn children that they must not use the equipment until properly installed.
Create a site free of obstacles that could cause injuries – such as low overhanging tree branches, overhead wires, tree
stumps and/or roots, large rocks, bricks, and concrete.
Choose a level location for the equipment. This can reduce the likelihood of the playset tipping over and loose-fi ll
surfacing materials washing away during heavy rains.
For any questions call our Customer Service Department at 1-800-225-3865 for more information.
6
CONSUMER INFORMATION SHEET FOR PLAYGROUND SURFACING MATERIALS*
The maximum fall height for this product is 236,2 cm (93 in).
We recommend using a minimum depth of 23 cm (9 in) of Wood Mulch.
*This information has been extracted from the CPSC publication “Outdoor Home Playground Safety Handbook”. A copy of
this publication can be obtained by contacting U.S. Consumer Product Safety Commission at www.cpsc.gov or calling the
toll-free hotline: 1-800-638-2772
**Shredded/recycled rubber loose-fi ll surfacing does not compress in the same manner as other loose-fi ll materials. However,
care should be taken to maintain a constant depth as displacement may still occur. This information has been extracted from the
CPSC publication “Public Playground Safety Handbook”. A copy of this publication can be obtained at www.cpsc.gov or calling
the toll-free hotline: 1-800-638-2772. Protective surfacing requirements can be found in ASTM F1292, Standard Specifi cation
for Impact Attenuation of Surfacing Material within the Use Zone of Playground Equipment. These standards can be ordered
from ASTM International at www.astm.org.
TABLE 1 — Depth of Surfacing Material Required Based on Fall Heights
Material / Fall Height
Wood Mulch
Wood Chips
Fine Sand
Fine Gravel
Shredded Rubber**
(152 cm) (183 cm)
(213 cm)
(244 cm) (274 cm) (305 cm)
(15 cm) (23 cm)
(15 cm)
(23 cm)
(15 cm)
(15 cm)
(23 cm)
(15 cm)
5 ft 6 ft 7 ft 8 ft 9 ft 10 ft
6 in
9 in
6 in
9 in
6 in
6 in
9 in
6 in
(122 cm)
4 ft
(23 cm)
9 in
(23 cm)
9 in
(23 cm)
9 in
(23 cm)
9 in
(23 cm)
9 in
(23 cm)
9 in
(15 cm)
6 in
(15 cm)
6 in
(15 cm)
6 in
(15 cm)
6 in
(15 cm)
6 in
(15 cm)
6 in
-- --
----
-- ----------
-- -- -- -- --
Select Protective Surfacing—One of the most important things you can do to reduce
the likelihood of serious head injuries is to install shock-absorbing protective
surfacing under and around your play equipment. The protective surfacing should
be applied to a depth that is suitable for the equipment height in accordance with
ASTM Specification F1292. There are different types of surfacing to choose from;
whichever product you select, follow these guidelines:
Loose-fill Materials—Maintain a minimum depth of 23 cm (9 inches) of loose-fill
materials such as wood mulch/chips, engineered wood fiber (EWF), or shredded/
recycled rubber mulch for equipment up to 8 feet (244 cm) high; and 23 cm (9
inches) of sand or pea gravel for equipment up to 152 cm (5 feet) high. NOTE:
An initial fill level of 30 cm (12 inches) will compress to about a 23 cm (9 inches)
depth of surfacing over time. The surfacing will also compact, displace, and settle,
and should be periodically refilled to maintain at least a 23 cm (9 inches) depth.
Use a minimum of 15 cm (6 inches) of protective surfacing for play equipment less
than 122 cm (4 feet) in height. If maintained properly, this should be adequate. (At
depths less than 15 cm (6 inches), the protective material is too easily displaced or
compacted.)
NOTE: Do not install home playground equipment over
concrete, asphalt, or any other hard surface. A fall onto a hard surface can result in
serious injury to the equipment user. Grass and dirt are not considered protective
surfacing because wear and environmental factors can reduce their shock-absorbing
effectiveness. Carpeting and thin mats are generally not adequate protective
surfacing. Ground level equipment – such as a sandbox, activity wall, playhouse or
other equipment that has no elevated play surface – does not need any protective
surfacing.
Use containment, such as digging out around the perimeter and/or lining the
perimeter with landscape edging. Don’t forget to account for water drainage.
Check and maintain the depth of the loose fill surfacing material. To
maintain the right amount of loose fill materials, mark the correct level on play
equipment support posts. That way you can easily see when to replenish and/
or redistribute the surfacing.
Do not install loose-fill surfacing over hard surfaces such as concrete or asphalt.
Poured-In-Place Surfaces or Pre-Manufactured
Rubber Tiles—You may be interested in using surfacing other than loose fill materials –
like rubber tiles or poured-in-place surfaces.
Installation of these surfaces generally requires a professional and is not a“do-it-
yourself” project.
Review surface specifications before purchasing this type of surfacing. Ask the
installer/manufacturer for a report showing that the product has been tested to
the following safety standard: ASTM F1292 Standard Specification for Impact
Attenuation of Surfacing Materials within the Use Zone of Playground Equipment.
This report should show the specific height for which the surface is intended to
protect against serious head injury. This height should be equal to or greater than the
fall height – vertical distance between a designated play surface (elevated surface
for standing, sitting, or climbing) and the protective surfacing below – of your play
equipment.
Check the protective surfacing frequently for wear.
Placements—Proper placement and maintenance of protective surfacing is essential.
Be sure to:
Extend surfacing at least 2 m (6.6 feet) from the equipment in all directions.
For to-fro swings, extend protective surfacing in front of and behind the swing to a
distance equal to twice the height of the top bar from which the swing is suspended.
For tire swings, extend surfacing in a circle whose radius is equal to the height of the
suspending chain or rope, plus 2 m (6.6 feet) in all directions.
9
㐟ලࡢᑍἲ㸸
18.7"(5,7m)x20'(6m)
᥎ዡࡉࢀࡿࣉࣞ࢖࢚ࣜ࢔㸸
30.7"(9,3 m)x32'(9,8m)
SAFE PLAY AREA / Ᏻ඲࡞ࣉࣞ࢖࢚ࣜ࢔
SAFETY ZONE — Place the equipment no less than 6.6 ft. (2.0 m) from any structure or obstruction
such as a fence, garage, house, overhanging branches, laundry lines, or electrical wires. Make sure
the clearance in front of and behind the swings is at least twice the height of the swing bar. The impact
surfacing needs to cover the entire recommended play area. Refer to the example below.
Playset dimensions:
18.7" (5,7 m) x 20' (6 m)
Recommended play area:
30.7" (9,3 m) x 32' (9,8 m)
6.6' (2,0 m)
6.6' (2,0 m)
14' (4,25 m)
14' (4,25 m)
6.6' (2,0 m)
32' (9,8 m)
30' 7" (9,3 m)
6.6'
(2,0 m)
6.6'
(2,0 m)
6.6' (2,0 m)
6.6'
(2,0 m)
CAUTION /
Slide can get hot in direct sunlight. It is not recommended that a slide be installed facing the sun.
!
Ᏻ඲ࢰ࣮ࣥ㸸㐟ලࡣࠊࣇ࢙ࣥࢫࡸ࣮࢞ࣞࢪࠊᐙࠊᙇࡾฟࡋࡓᯞࠊ≀ᖸࡋ⥘ࠊ㟁⥺ࡢ
ࡼ࠺࡞ᵓ㐀≀ࡸ㞀ᐖ≀࠿ࡽ࣓࣮ࢺࣝ㸦ࣇ࢕࣮ࢺ㸧௨ୖ㞳ࡋ࡚㓄⨨ࡋ࡚ࡃࡔࡉ
࠸ࠋࣈࣛࣥࢥࡢ๓ᚋࡢࢫ࣮࣌ࢫࡣࠊࣈࣛࣥࢥࡢࣂ࣮ࡢ㧗ࡉࡢಸ௨ୖ࠶ࡿࡇ࡜ࢆ☜
ㄆࡋ࡚ࡃࡔࡉ࠸ࠋ⾪ᧁ྾཰⾲㠃⣲ᮦ࡛ࠊ᥎ዡࡉࢀࡿࣉࣞ࢖࢚ࣜ࢔඲యࢆそ࠺ᚲせࡀ
࠶ࡾࡲࡍࠋ௨ୗࡢ౛ࢆཧ↷ࡋ࡚ࡃࡔࡉ࠸ࠋ
10
HARDWARE REQUIRED / ᚲせ࡞㔠ල
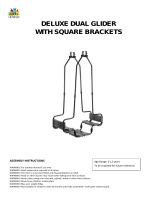
A-FRAME ASSEMBLY / $ࣇ࣮࣒ࣞࡢ⤌ࡳ❧࡚
1
FOB
Hardware blister pack / 㔠ලࣈࣜࢫࢱ࣮ࣂࢵࢢ
EBX
DSA (x4)
BTS (x4)
EEO (x2)
AAN (x6)
DZR (x6)
DZQ (x6)
PARTS REQUIRED / ᚲせ࡞㒊ရ
CB0 (x1)
TOOLS REQUIRED / ᚲせ࡞ᕤල
3/16 in/po (≈5 mm)
1/2 in/po (≈13 mm)
(1)
CONTENTS OF BOX 1 / ⟽ࡢෆᐜ
CONTENTS OF BOX 2 / ⟽ࡢෆᐜ
FJS (x1)
CBE (x1)
(2)
Hardware bag / 㔠ලࣂࢵࢢ
WARNING
Lifetime Products, Inc
P.O. Box 160010
Clearfield, UT 84016-0010
3/7/
2
www.lifetime.com
ADVERTENCI
A
AVERTISSEMENT
Observing the following statements and warnings reduces the likelihood
of a serious or fatal injury:
• On-site adult supervision should be provided for children of all
ages.
• Children should not walk close to, in front of, behind, or between
moving items.
• Instruct children not to twist swing chains or ropes or loop them
over the top support bar since this may reduce the strength of the
chain or rope.
• Instruct children to avoid swinging empty seats.
• Teach children to sit in the center of the swings with their full
weight on the seats. Never stand or kneel on the swing seat.
• Instruct children not to use the equipment in a manner other
than intended.
• Instruct children not to get off equipment while it is in motion.
• To prevent entanglement and strangulation
appropriately avoiding loose-fitting clothing s
u
hood and neck drawstrings, helmets, scarve
s
capes, and ponchos. These items can cause
• Instruct children to remove their bike or ot
h
playing on the playground equipment. These
by strangulation.
• Dress children with well-fitting and full foot
e
Examples of inappropriate foot ware are clog
s
• Instruct children not to climb when the eq
u
• Instruct children not to attach items to the
p
that are not specifically designed for use with
but not limited to, jump ropes, clothesline, p
e
and chains as these may cause a strangulati
o
ESTE PRODUCTO ES PARA NIÑOS DE 3
A
ESTE PRODUCTO ES SÓLO PARA USO R
E
el equipo de patio de recreo sobre con
c
apisonada, pasto, alfombra, o cualquie
r
Una caída sobre una superficie dura p
o
lesiones en la cabeza o muerte.
Si se presta atención a los siguientes enuncia
do
se reduce la probabilidad de producirse lesion
e
Los niños de todas las edades deben
e
de un adulto durante el juego.
• Los niños no deben caminar cerca, en
entre las piezas móviles.
• Indicar a los niños no torcer las caden
a
columpios ni pasarlas por encima de la
b
superior, ya que puede reducirse la resi
s
o sogas, según sea el caso.
• Indicar a los niños evitar balancear col
• Enseñar a los niños a sentarse en el c
e
con todo su peso en los asientos. Nunc
a
hincarse en el asiento del columpio.
• Indicar a los niños no usar el equipo d
diferente a la indicada.
• Indicar a los niños no bajarse del equi
p
movimiento.
• Para evitar el enredo y la estrangulaci
ó
adecuadamente evitando la ropa holgad
limitado a, capuchas de cordón, cascos
con cordones cerca del cuello, bufanda
s
con cordón, capas, y ponchos. Estos art
muerte por estrangulación.
• Enseñar a los niños a quitar sus casco
deportivos antes de jugar en el equipo d
pueden causar la muerte por estrangula
• Vestir a los niños con el calzado bien
a
completamente cerrado. Unos ejemplos
son los zuecos, chancletas, y sandalias.
• Indicar a los niños no subirse cuando
e
• Indicar a los niños no adherir al equip
o
objetos no diseñados específicamente p
a
de saltar, cuerdas de tendedero de ropa
cables y cadenas, ya que podrían causa
estrangulación.
CE PRODUIT EST CONÇU POUR L’USAGE PAR DES ENFANTS ÂGÉS
DE 3 À 12 ANS. CE PRODUIT EST RÉSERVÉ SEULEMENT À UN USAGE
PERSONNEL. Ne pas installer de l’équipement de terrain de jeu
résidentiel sur du béton, de l’asphalte, un sol tassé, du gazon,
tapis ou toute autre surface dure. Une chute sur une surface
dure peut entraîner des blessures graves à la tête ou mortelles.
L’observation des déclarations et des avertissements suivants réduit
les risques de blessures graves ou fatales:
La présence d’un adulte surveillant les enfants de tous âges
doit être assurée.
• Veiller à ce que les enfants ne marchent pas près, devant,
derrière ou entre les éléments en mouvement.
• Veiller à ce que les enfants ne tordent pas les chaînes ou
cordes de la balançoire. De même, veiller à ce que les enfants ne
bouclent pas les chaînes ou les cordes au-dessus de la barre de
support supérieure, car cela pourrait en réduire leur solidité.
• Veiller à ce que les enfants ne balancent pas les sièges vides.
• Veiller à ce que les enfants s’assoient au centre des sièges de
la balançoire, avec leur plein poids sur le siège. Ne jamais rester
debout ou se mettre à genoux sur le siège de la balançoire.
• Veiller à ce que les enfants n’utilisent pas l’équipement à
d’autres fins que pour l’usage prévu.
• Veiller à ce que les enfants ne descendent pas de l’équipement
lorsqu’il est encore en mouvement.
• Pour éviter l’enchevêtrement et l’étranglement, veiller à habiller
les enfants correctement évitant des vêtements amples tels que,
mais sans s’y limiter, les capuchons à cordon, casques de vélo
, capes, et ponchos. Ces articles peuvent entraîner la mort par
étranglement.
• Expliquer aux enfants to enlever leur casques de vélo ou autres
casques sportifs avant de jouer sur l’équipement de jeu. Ces
articles peuvent entraîner la mort par étranglement.
• Veiller à habiller les enfants avec des chaussures bien ajustées et
entièrement fermées. Les exemples des chaussures inappropriées
sont les sabots, tongs, et sandales.
• Veiller à ce que les enfants ne grimpent pas sur l’équipement
quand celui-ci est mouillé.
• Veiller à ne pas attacher d’objets sur l’équipement de jeu non
spécifiquement conçus pour cet équipement, tels que, mais sans
s’y limiter, cordes à sauter, cordes à linge, laisses d’animaux,
câbles et chaînes. Ceux-ci posent un risque d’étranglement.
THIS PRODUCT IS INTENDED FOR USE BY CHILDREN FROM AGES 3 TO 12 AND IS FOR RESIDENTIAL USE O
N
playground equipment over concrete, asphalt, packed earth, grass, carpet, or any other hard surface. A
fa
can result in serious head injury or death.
!
! !
Warning Sticker /嬎⏲ͱ;ͻͣΰ
11
TOOLS AND HARDWARE REQUIRED / ᚲせ࡞ᕤල࡜㔠ල
X SECTION 1 (CONTINUED) / ࢭࢡࢩࣙࣥ㸦⥆ࡁ㸧
DZR (x6)
• Attach the pendulums (DZQ) to the swing bar (CB0) using the hardware indicated. Do this for each set of brackets on
the swing bar.
͌ᣦᐃࡉࢀ࡚࠸ࡿ㔠ලࢆ౑࠸ࠊ᣺ࡾᏊ㸦'=4㸧ࢆࣈࣛࣥࢥࡢࣂ࣮&%㸧࡟ྲྀࡾ௜ࡅࡲࡍࠋࣈࣛࣥࢥࡢࣂ࣮࡛ࣈ
ࣛࢣࢵࢺࡢྛࢭࢵࢺࢆ౑࠸ࠊࡇࢀࢆ⧞ࡾ㏉ࡋࡲࡍࠋ
1.1
AAN
DZR
DZQ
CBO
1/2 in/po (≈13 mm)
AAN (x6)
DZQ (x6)
(1)
3/16 in/po (≈5 mm)
(1)
12
TOOLS AND HARDWARE REQUIRED / ᚲせ࡞ᕤල࡜㔠ල
X SECTION 1 (CONTINUED) / ࢭࢡࢩࣙࣥ㸦⥆ࡁ㸧
6
DSA (x4)
1.2
BTS (x4)
3/16 in/po (≈5 mm)
(2)
• Attach an A-frame pole (CBE) to the swing bar (CBO) in the location indicated.
͌ᅗ♧ࡉࢀ࡚࠸ࡿሙᡤ࡛$ࣇ࣮࣒࣏࣮ࣞࣝ㸦&%(㸧ࢆࣈࣛࣥࢥࡢࣂ࣮㸦&%2㸧࡟ྲྀࡾ௜ࡅࡲࡍࠋ$ࣇ࣮࣒ࣞࡢ
࣏࣮ࣝ࡟ࡃࡰࡳࡀ࠶ࡿሙྜࡣࠊࡃࡰࡳࡀࣈࣛࣥࢥࡢࣂ࣮࡜ࡣ཯ᑐഃ࡟ྥࡃࡼ࠺࡟ࡋ࡚ࡃࡔࡉ࠸ࠋ
BTS
DSA
BTS
DSA
CBE
CBO
1.3
!
If your A-frame pole has a dimpled hole, make sure the dimpled
hole faces away from the swing bar.
͌
$ࣇ࣮࣒ࣞࡢ࣏࣮ࣝ࡟ࡃࡰࡳࡀ࠶ࡿሙྜࡣࠊࡃࡰ
ࡳࡀࣈࣛࣥࢥࡢࣂ࣮࡜ࡣ཯ᑐഃ࡟ྥࡃࡼ࠺࡟ࡋ࡚
ࡃࡔࡉ࠸ࠋ
Repeat step 1.2 to attach the remaining A-frame pole (FJS) to the swing bar (CBO).
͌ࢫࢸࢵࣉࢆ⧞ࡾ㏉ࡋࠊṧࡾࡢ$ࣇ࣮࣒ࣞࡢ࣏࣮ࣝ㸦)-6㸧ࢆࣈࣛࣥࢥࡢࣂ࣮㸦&%2㸧࡟ྲྀࡾ௜ࡅࡲࡍࠋ
BTS
BTS
DSA
DSA
FJS
CBE
Hole
̐̽̀
Hole
̐̽̀
8
1/2 x 5 1
/2
WARNING
010
3/
7
/
2
01
8
w
w
w.lifetim
e
.c
o
m
ADVER
AVERTISSEMENT
O
bs
e
r
v
in
g
t
he
f
o
ll
owi
ng
st
a
t
emen
t
s
and
w
ar
n
in
g
s
re
d
u
ce
s
th
e
likelih
o
o
d
of
a ser
ious
o
r fa
t
a
l i
n
jury:
O
n-site ad
u
l
t s
upe
r
vision s
h
ou
l
d
b
e p
rovi
d
e
d
f
o
r ch
i
ld
r
e
n
of
a
ll
ag
e
s.
• Ch
ildren
sh
ou
ld no
t w
alk clo
s
e
to, i
n
fr
o
n
t o
f
, b
e
h
i
n
d, or betw
e
en
m
ovin
g i
tem
s.
• In
s
t
r
u
c
t ch
i
ldren
n
ot
to
tw
ist
sw
i
n
g
ch
a
i
n
s
or rop
e
s
or l
o
op
th
em
ov
e
r
th
e
to
p sup
port bar
s
i
n
ce th
i
s ma
y red
u
c
e th
e
s
tr
e
n
gth
o
f th
e
c
h
a
in
or
r
o
p
e
.
• Ins
tru
ct chi
ld
r
e
n
to avo
i
d
s
wi
n
g
i
n
g emp
ty seats.
T
eac
h
ch
i
ldren
to si
t
i
n t
he c
e
n
te
r of
th
e
s
w
i
n
gs w
i
th
their full
w
e
i
ght on
the
seats. N
ever stan
d
or kn
eel
on
th
e s
w
i
n
g se
at.
• In
s
tru
ct ch
i
ldren
n
ot to use th
e eq
u
i
p
m
e
n
t in a man
ner oth
e
r
t
h
a
n int
e
n
d
e
d
.
• In
struc
t c
hild
ren
no
t to g
et o
ff eq
uipm
e
n
t while i
t is in m
otion.
To pre
ven
t entanglem
a
p
p
r
o
p
ri
ately av
o
id
ing
l
o
hoo
d
an
d
n
eck drawstrin
c
ape
s, an
d
p
o
n
ch
os
.
T
h
e
In
stru
ct c
h
i
ldren
to
r
e
m
p
l
ayi
n
g
o
n
t
he pl
aygrou
n
d
by
stran
gu
lati
on
.
• Dress child
ren w
ith
w
ell-fi
E
xam
ples of in
ap
p
ro
pr
iate
f
• I
n
stru
ct
chi
l
d
r
e
n
no
t to
cli
m
In
struct chi
ldre
n not to atta
tha
t ar
e
n
o
t sp
e
c
i
cally
d
e
sig
b
u
t no
t
l
imite
d
to, jum
p
rop
e
s
and c
h
a
ins as th
ese m
a
y
c
a
u
s
ESTE
PR
O
DUCTO
ES
PARA
N
E
S
TE
PR
ODUCTO
E
S
LO
PA
el
equipo de patio
d
e recreo
apisonada
, p
asto,
alfomb
ra
,
o
U
na
caí
da
sobre una
super
c
l
esiones en
l
a
cabeza o
muer
S
i
se pres
t
a a
te
n
c
ión a los s
ig
uien
tes
s
e reduc
e l
a
pro
b
abilidad de pr
oduc
ir
L
o
s
niños
d
e
t
o
d
a
s
las
e
d
a
de
s
d
d
e u
n
a
d
u
l
t
o
d
u
r
a
nte e
l
j
u
e
g
o
.
L
o
s
n
i
ñ
o
s
n
o deben
caminar
c
e
r
e
n
t
re
la
s
p
i
e
z
a
s
m
óvil
e
s
.
I
nd
i
c
a
r
a
los
n
i
ño
s
n
o
t
o
r
c
e
r
la
s
c
c
o
l
u
m
pi
o
s ni p
a
s
a
rlas
p
o
r
e
nc
i
ma
d
s
u
per
io
r
,
y
a
q
u
e
p
ue
de re
du
c
irse
l
a
o
s
o
g
a
s
,
s
e
g
ún s
e
a
e
l ca
so.
I
n
d
ica
r
a
los
niño
s
e
v
it
a
r
ba
l
a
ncea
r
E
n
s
e
ñar
a
lo
s
n
iños
a
s
e
nt
a
r
se e
n
e
c
on t
o
d
o
su p
e
s
o
e
n l
o
s
a
s
ie
n
t
o
s
.
N
un
hinc
a
r
se
e
n
e
l
a
sien
t
o
d
e
l
c
o
lum
p
i
o
.
I
n
d
i
c
ar
a
los niño
s no
u
s
a
r
e
l
e
q
uip
o
d
if
e
r
e
nte
a la i
n
dicada.
I
nd
i
c
a
r
a
l
o
s
ni
ño
s
n
o
ba
ja
r
s
e
de
l
e
qu
movi
mie
nt
o.
P
a
r
a
e
v
it
a
r
e
l
e
n
r
e
do
y
l
a
e
s
t
ran
gu
l
a
c
i
ó
ad
ec
u
a
d
a
me
n
t
e
e
v
it
a
nd
o
l
a
r
o
pa
h
o
l
g
a
da
li
m
i
t
a
d
o
a
,
c
a
p
uc
h
a
s
d
e
c
o
r
d
ó
n
,
c
a
sc
o
s
d
c
o
n c
o
r
d
o
n
e
s
c
e
rca
d
e
l
c
ue
l
lo
,
b
uf
a
n
d
a
s
,
co
n c
o
r
d
ó
n
,
c
a
pa
s
,
y
p
o
nc
h
o
s.
E
s
t
o
s
a
r
t
íc
u
m
u
e
r
t
e
p
o
r
e
s
t
r
a
ng
u
la
c
n.
E
n
s
e
ñ
a
r
a
l
o
s
n
o
s
a
q
u
it
a
r
s
us
c
a
s
c
o
s
d
e
de
po
rt
i
vo
s
a
nt
e
s
de
jug
ar
e
n
e
l
e
q
u
i
p
o
de
pa
p
ue
d
en
c
a
u
sar
la m
ue
r
t
e
p
o
r
e
s
t
r
ang
ula
c
i
ó
n
Ve
s
t
i
r
a
l
os
niño
s
c
o
n
e
l
c
a
l
zad
o b
i
e
n
a
ju
s
t
a
c
o
m
p
le
ta
me
nt
e
c
e
r
r
a
d
o
.
Un
o
s
e
je
m
p
l
o
s
d
e
ca
s
o
n
los
z
ue
c
o
s
,
c
ha
nc
le
t
a
s
,
y
s
a
nd
a
l
ia
s
.
I
n
d
i
c
ar
a
lo
s
n
i
ñ
o
s
n
o
s
ubi
r
s
e
c
ua
n
do
e
s
t
é
h
I
n
dic
a
r
a
lo
s
n
i
ñ
o
s
no
a
d
h
e
rir
a
l
e
q
u
i
p
o
d
e
pa
o
bje
tos
no
d
i
s
e
ña
do
s
e
spe
c
í
c
a
me
nt
e
p
a
ra
é
s
te
de
s
a
l
t
a
r
,
cu
erd
a
s
d
e
t
e
nd
e
d
e
ro
d
e
ro
p
a
,
c
o
r
r
e
a
c
a
b
l
e
s
y
c
a
d
e
n
a
s
,
y
a
q
ue
po
dría
n
c
a
u
s
a
r
un
p
e
l
e
st
r
a
ng
ul
a
c
i
ó
n.
C
E
P
R
O
D
UI
T EST
C
ON
ÇU
POUR
L’US
A
G
E
PAR
DES E
N
FANTS
ÂG
É
S
E
3 À
1
2
ANS. CE
PR
O
DU
I
T EST R
É
S
E
R
V
É SEU
LEMEN
T
À
UN U
S
A
G
E
E
R
S
O
N
N
E
L
.
Ne pas i
ns
tal
l
e
r d
e
l
équ
i
pemen
t
de terra
i
n
d
e
j
eu
si
d
enti
e
l sur du
b
é
t
o
n,
de
l
a
sphalte,
un
sol
t
a
s
s
é,
du gazon,
i
s ou toute au
t
re surfa
c
e
d
ure.
U
n
e
chute
s
ur u
n
e surfa
c
e
epeut
e
n
tra
în
e
r
d
es bless
ur
es
g
raves
à
l
a
te
ou
m
ortel
l
es
.
er
v
atio
n
de
s
cl
ar
ations et d
es
avertis
s
e
ments s
ui
va
nts
réduit
s
q
u
es
d
e
b
l
e
s
s
ures
grav
es
ou
fa
t
ales
:
se
n
c
e
d
’un
a
d
u
l
t
e
surv
e
illa
n
t
les e
n
f
a
n
t
s
de
to
u
s
â
g
e
s
e
a
s
surée
.
r
à
c
e
q
ue le
s
e
n
fa
n
ts
n
e
m
a
r
c
h
e
n
t
p
a
s
pr
è
s
,
devan
t,
o
u
e
n
t
re
le
s
é
ments
e
n
mo
u
v
eme
n
t
.
à
c
e
q
u
e
le
s
e
n
fa
n
t
s
n
e
to
rdent p
a
s les ch
a
în
e
s
o
u
e
la
ba
la
n
ç
o
ire
.
D
e
même,
veille
r
à
ce
q
u
e
les
e
n
f
ants
n
e
p
a
s
l
e
s
c
h
a
în
e
s
o
u
le
s
c
ord
e
s
a
u
-
d
e
s
s
u
s de la barre
d
e
u
p
é
r
ie
u
r
e
,
c
a
r
ce
la
p
o
u
rrait e
n
d
uire
l
e
ur so
lidité
.
c
e
q
u
e le
s enfan
ts
n
e
bal
an
ce
n
t p
a
s les s
i
è
g
e
s vi
d
e
s.
ce
q
u
e
les e
nf
a
n
ts s’
a
s
so
ie
n
t au
c
en
tr
e d
e
s siège
s
d
e
e,
avec leur p
le
i
n
po
id
s su
r
le
si
è
g
e
. N
e j
am
a
is r
ester
e
m
et
t
r
e à g
e
n
ou
x su
r
l
e
siège d
e l
a
b
a
l
a
n
ç
oire.
eq
u
e
le
s e
n
f
a
nts
n
’utilise
n
t
p
a
s
l’é
q
u
ip
e
m
e
n
t
à
q
u
e
p
o
u
r
l’usa
ge
p
révu
.
q
u
e
le
s
e
n
fa
n
t
s ne
desce
n
dent pa
s
d
e
l’é
q
u
ipe
m
e
nt
n
c
o
r
e en mouve
m
e
nt
.
e
n
c
h
e
v
ê
t
r
e
me
n
t
e
t
l’
é
tr
a
n
g
le
m
e
n
t
,
ve
i
l
ler
à
h
a
b
i
l
le
r
r
e
ct
e
m
e
n
t
é
vit
a
n
t
d
e
s
t
e
m
e
n
ts
a
m
p
le
s
te
ls
q
u
e
,
m
it
e
r
,
le
s
c
a
p
u
c
h
o
n
s
à
c
o
r
d
o
n
,
c
a
s
q
u
e
s
d
e
l
o
h
o
s.
C
e
s
a
rtic
le
s
p
e
u
ve
n
t
e
n
t
ra
în
e
r la
m
o
r
t
p
a
r
e
n
fa
n
t
s
to
enl
e
v
er
le
u
r ca
sq
u
e
s
d
e
v
é
l
o
o
u
a
u
t
re
s
a
va
n
t
de
jo
u
e
r
sur
l
’équ
ip
e
me
n
t
d
e je
u
.
C
e
s
ntra
în
er
la
m
o
r
t
pa
r
é
t
r
a
n
g
l
e
m
e
n
t
.
es e
n
fan
t
s
a
v
e
c d
es
c
h
au
s
s
u
r
e
s b
ien
a
j
us
es e
t
e
s
.
Le
s e
x
e
m
p
l
e
s
de
s ch
au
ssu
r
e
s
i
n
ap
p
r
o
p
ri
é
es
gs
, et san
d
a
l
e
s
.
s
e
n
f
a
n
t
s
n
e
g
r
im
p
e
n
t p
a
s
s
u
r
l’
éq
uip
e
m
e
n
t
o
u
illé
.
a
c
h
e
r
d
’o
b
je
ts
s
u
r
l’é
q
u
ip
e
m
e
n
t de
je
u
n
o
n
u
s
p
o
u
r
c
e
t
é
q
u
ipe
m
e
n
t
, t
e
ls qu
e
,
m
a
is
sa
n
s
u
t
e
r,
c
o
rd
e
s à
l
i
n
g
e
,
la
is
s
e
s
d
’a
n
im
a
ux
,
u
x
-
c
i p
o
s
e
n
t
u
n
r
isq
ue
d
’é
t
ra
n
g
le
m
e
n
t.
THIS PRO
DU
CT IS I
N
TEND
ED
FOR USE
B
Y
C
HILDR
EN
FR
O
M
AGES 3
TO 12
A
N
D I
S
FO
R
pl
ayground equipment over
c
oncrete,
asph
alt,
pac
k
ed
ea
rth,
grass,
ca
r
pe
t
,
or
any
o
can
resul
t
i
n
ser
i
ous
head injury or
dea
th.
!
!
13
HARDWARE REQUIRED / ᚲせ࡞㔠ල
MONKEY BAR ASSEMBLY / ࣮ࣔࣥ࢟ࣂ࣮ࡢ⤌ࡳ❧࡚
2
FOD
Hardware blister pack / 㔠ලࣈࣜࢫࢱ࣮ࣂࢵࢢ
DSA (x22)
BTS (x22)
AAN (x2)
DZR (x2)
DZQ (x2)
PARTS REQUIRED / ᚲせ࡞㒊ရ
BZK (x10)
CSB (x4)
CSA (x4)
CSD (x5)
FPJ
Parts bag / 㒊ရࣂࢵࢢ
EBX
Hardware bag / 㔠ලࣂࢵࢢ
EMB
EMC
Parts bag / 㒊ရࣂࢵࢢ
Parts bag / 㒊ရࣂࢵࢢ
15
TOOLS AND HARDWARE REQUIRED / ᚲせ࡞ᕤල࡜㔠ල
X SECTION 2 (CONTINUED) / ࢭࢡࢩࣙࣥ㸦⥆ࡁ
DZR (x2)
• Attach the pendulums (DZQ) to the trapeze swing bar (CRR) using the hardware indicated.
͌ᣦᐃࡉࢀ࡚࠸ࡿ㔠ලࢆ౑࠸ࠊ᣺ࡾᏊ㸦'=4㸧ࢆ✵୰ࣈࣛࣥࢥࡢࣂ࣮㸦&55㸧࡟ྲྀࡾ௜ࡅࡲ
ࡍࠋ
2.1
1/2 in/po (≈13 mm)
AAN (x2)
DZQ (x2)
(1)
AAN
AAN
DZQ
DZQ
DZR
DZR
CRR
2.2
• Attach the end cap (CSD) to the trapeze swing bar (CRR). Secure the end cap with two (2) cap plugs (BZK).
͌࢚ࣥࢻ࢟ࣕࢵࣉ㸦&6'㸧ࢆ✵୰ࣈࣛࣥࢥࡢࣂ࣮㸦&55㸧࡟ྲྀࡾ௜ࡅࡲࡍࠋᮏࡢ࢟ࣕࢵࣉࣉࣛࢢ㸦%=.㸧࡛
࢚ࣥࢻ࢟ࣕࢵࣉࢆᅛᐃࡋࡲࡍࠋ
CSD
BZK
BZK
CRR
BZK (x2)
3/16 in/po (≈5 mm)
(1)
16
TOOLS AND HARDWARE REQUIRED / ᚲせ࡞ᕤල࡜㔠ල
X SECTION 2 (CONTINUED) / ࢭࢡࢩࣙࣥ㸦⥆ࡁ
6
DSA (x8)
2.3
BTS (x8)
3/16 in/po (≈5 mm)
• Attach the round foot caps (CSB) to the re pole ladder (CRX) and slide ladder (CRY) at the locations shown. Secure the
round foot caps with cap plugs (BZK).
͌ᅗ♧ࡉࢀ࡚࠸ࡿሙᡤ࡛୸࠸ࣇࢵࢺ࢟ࣕࢵࣉ㸦&6%㸧ࢆࣇ࢓࢖࢔࣏࣮ࣝࡢࡣࡋࡈ㸦&5;㸧࡜⁥ࡾྎࡢࡣࡋ
ࡈ㸦&5<㸧࡟ྲྀࡾ௜ࡅࡲࡍࠋ࢟ࣕࢵࣉࣉࣛࢢ㸦%=.㸧࡛୸࠸ࣇࢵࢺ࢟ࣕࢵࣉࢆᅛᐃࡋࡲࡍࠋ
ࡑࢀࡒࢀࡢ
࢟ࣕࢵࣉࡢ✰ࢆྛࡣࡋࡈࡢࢳ࣮ࣗࣈࡢ✰࡟ࡑࢁ࠼࡚ࡃࡔࡉ࠸ࠋ
Attach two (2) monkey bar gussets (CWV) to one end of the re pole ladder (CRX) using the hardware indicated.
Make sure the lip on the gusset faces inward as illustrated. Repeat this step to attach the remaining two (2)
monkey bar gussets to the slide ladder (CRY).
͌ᣦᐃࡉࢀ࡚࠸ࡿ㔠ලࢆ౑࠸ࠊᯛࡢ࣮ࣔࣥ࢟ࣂ࣮ࡢ࢞ࢭࢵࢺ㸦&:9㸧ࢆࣇ࢓࢖࢔࣏࣮ࣝࡢࡣࡋࡈ㸦&5;㸧
ࡢࡑࢀࡒࢀࡢ➃࡟ྲྀࡾ௜ࡅࡲࡍࠋᅗࡢࡼ࠺࡟࢞ࢭࢵࢺࡢ⦕ࡀෆഃࢆྥࡃࡼ࠺࡟ࡋ࡚ࡃࡔࡉ࠸ࠋࡇࡢࢫࢸ
ࢵࣉࢆ⧞ࡾ㏉ࡋࠊṧࡾࡢᯛࡢ࣮ࣔࣥ࢟ࣂ࣮ࡢ࢞ࢭࢵࢺࢆ⁥ࡾྎࡢࡣࡋࡈ㸦&5<㸧࡟ྲྀࡾ௜ࡅࡲࡍࠋ
BZK (x8)
CRX
CRY
CSB
CSB
CSB
CSB
BZK
BZK
BZK
BZK
BZK
BZK
BZK
BZK
!
Make sure the holes in each cap line up
with the holes in the tubes of each ladder.
͌
ࡑࢀࡒࢀࡢ࢟ࣕࢵࣉࡢ✰ࢆྛࡣࡋ
ࡈࡢࢳ࣮ࣗࣈࡢ✰࡟ࡑࢁ࠼࡚ࡃࡔ
ࡉ࠸ࠋ
2.4
CRX
CRY
CWV
CWV
CWV
CWV
DSA
DSA
DSA
DSA
BTS
BTS
BTS
BTS
DSA
DSA
DSA
DSA
BTS
BTS
BTS
BTS
(2)
17
TOOLS AND HARDWARE REQUIRED / ᚲせ࡞ᕤල࡜㔠ල
X SECTION 2 (CONTINUED) / ࢭࢡࢩࣙࣥ㸦⥆ࡁ
6
2.5
• Attach the saddle caps (CSA) to the re pole ladder (CRX) and the slide ladder (CRY), then attach the ladders to the
monkey bars (CSC) using the hardware indicated. Make sure the saddle caps are oriented as shown, with the
monkey bars resting in the saddle.
͌ࢧࢻࣝ࢟ࣕࢵࣉ㸦&6$㸧ࢆࣇ࢓࢖࢔࣏࣮ࣝࡢࡣࡋࡈ㸦&5;㸧࡜⁥ࡾྎࡢࡣࡋࡈ㸦&5<㸧࡟ྲྀࡾ௜ࡅࠊᣦᐃࡉ
ࢀ࡚࠸ࡿ㔠ලࢆ౑ࡗ࡚ࠊࡣࡋࡈࢆ࣮ࣔࣥ࢟ࣂ࣮㸦&6&㸧࡟ྲྀࡾ௜ࡅࡲࡍࠋࢧࢻࣝ࢟ࣕࢵࣉࡀᅗࡢࡼ࠺࡟ྥ
࠸࡚࠾ࡾࠊ࣮ࣔࣥ࢟ࣂ࣮ࡀࢧࢻࣝ࡟஌ࡗ࡚࠸ࡿࡇ࡜ࢆ☜ㄆࡋ࡚ࡃࡔࡉ࠸ࠋ
3/16 in/po (≈5 mm)
(2)
DSA (x8)
BTS (x8)
CRX
DSA
DSA
DSA
DSA
BTS
BTS
BTS
BTS
CRY
DSA
DSA
DSA
DSA
BTS
BTS
BTS
BTS
CSA
CSA
CSA
CSC
18
TOOLS AND HARDWARE REQUIRED / ᚲせ࡞ᕤල࡜㔠ල
X SECTION 2 (CONTINUED) / ࢭࢡࢩࣙࣥ㸦⥆ࡁ
2.6
• Insert the end caps (CSD) into the openings at each end of the poles on the monkey bars assembly.
͌࢚ࣥࢻ࢟ࣕࢵࣉ㸦&6'㸧ࢆ࣮ࣔࣥ࢟ࣂ࣮ࡢ࣏࣮ࣝࡢ୧➃࡟࠶ࡿ㛤ཱྀ㒊࡟ᤄධࡋࡲࡍࠋ
ࡑࢀࡒࢀ
ࡢ࢟ࣕࢵࣉࡢ✰ࢆ࣮ࣔࣥ࢟ࣂ࣮ࡢࢳ࣮ࣗࣈࡢ✰࡟ࡑࢁ࠼࡚ࡃࡔࡉ࠸ࠋ
CSD
CSD
CSD
CSD
!
Make sure the holes in each cap line up with the holes in the tubes of the monkey bars.
͌
ࡑࢀࡒࢀࡢ࢟ࣕࢵࣉࡢ✰ࢆ࣮ࣔࣥ࢟ࣂ࣮ࡢࢳ࣮ࣗࣈࡢ✰࡟ࡑࢁ࠼࡚ࡃࡔࡉ࠸ࠋ
19
TOOLS AND HARDWARE REQUIRED / ᚲせ࡞ᕤල࡜㔠ල
X SECTION 2 (CONTINUED) / ࢭࢡࢩࣙࣥ㸦⥆ࡁ
2.7
Stand the assembly on its feet. Using a ladder, attach the the trapeze swing bar (CRR) to the monkey bars
Assembly with the hardware indicated. Install the hardware nearest to the pendulums fi rst.
͌⤌ࡳ❧࡚ࡓ㒊ရࢆ❧ࡓࡏࡲࡍࠋᣦᐃࡉࢀ࡚࠸ࡿ㔠ලࢆ౑࠸ࠊ⤌ࡳ❧࡚ࡓ࣮ࣔࣥ࢟ࣂ࣮࡟✵୰ࣈࣛࣥࢥࡢࣂ
࣮㸦&55㸧ࢆྲྀࡾ௜ࡅࡲࡍࠋ᣺ࡾᏊ࡟᭱ࡶ㏆࠸㒊ศ࡟㔠ලࢆ᭱ึ࡟タ⨨ࡋࡲࡍࠋ
⤌ࡳ❧࡚ᡭ㡰࡛ᚋ࡯࡝ᣦ
♧ࡉࢀࡿࡲ࡛ࠊ㔠ලࡣ᏶඲࡟⥾ࡵ࡞࠸࡛ࡃࡔࡉ࠸ࠋ
3/16 in/po (≈5 mm)
(2)
DSA (x4)
BTS (x4)
CRR
DSA
BTS
BTS
BTS
BTS
Pendulum
᣺ࡾᏊ
!
Do not completely tighten the hardware until instructed later in the assembly.
͌
⤌ࡳ❧࡚ᡭ㡰࡛ᚋ࡯࡝ᣦ♧ࡉࢀࡿࡲ࡛ࠊ㔠ලࡣ᏶඲࡟⥾ࡵ࡞
࠸࡛ࡃࡔࡉ࠸ࠋ
20
TOOLS AND HARDWARE REQUIRED / ᚲせ࡞ᕤල࡜㔠ල
X SECTION 2 (CONTINUED) / ࢭࢡࢩࣙࣥ㸦⥆ࡁ
2.8
Have one person hold the A-frame swing assembly in position. Standing carefully on a ladder, attach the the
A-frame assembly to the monkey bar assembly using the hardware indicated. Tighten all hardware from this
section before continuing to the next section.
͌ேࡀ⤌ࡳ❧࡚ࡓ$ࣇ࣮࣒ࣞࡢࣈࣛࣥࢥࢆࡋࡗ࠿ࡾಖᣢࡋࡲࡍࠋὀពࡋ࡚ࡣࡋࡈࡢୖ࡟❧ࡕࠊᣦᐃࡉࢀ࡚࠸
ࡿ㔠ලࢆ౑ࡗ࡚ࠊ⤌ࡳ❧࡚ࡓ$ࣇ࣮࣒ࣞ࡟⤌ࡳ❧࡚ࡓ࣮ࣔࣥ࢟ࣂ࣮ࢆྲྀࡾ௜ࡅࡲࡍࠋ
ḟࡢࢭࢡࢩࣙࣥ࡟㐍
ࡴ๓࡟ࡇࡇ࡛ࡍ࡭࡚ࡢ㔠ලࢆ⥾ࡵࡲࡍࠋ
BTS
BTS
DSA
DSA
DSA (x2)
BTS (x2)
3/16 in/po (≈5 mm)
(2)
!
Tighten all hardware now.
͌
ࡇࡇ࡛ࡍ࡭࡚ࡢ㔠ලࢆ⥾ࡵ࡚ࡃࡔࡉ
࠸ࠋ
WARNING /
Use extreme caution when standing on ladders to
perform assembly steps. Follow all warnings and
cautions on the ladder. Failure to follow all of these
instructions and warnings could lead to serious
personal injury or property damage.
!
21
HARDWARE REQUIRED / ᚲせ࡞㔠ල
SLIDE ASSEMBLY / ⁥ࡾྎࡢ⤌ࡳ❧࡚
3
FOF
Hardware blister Pack / 㔠ලࣈࣜࢫࢱ࣮ࣂࢵࢢ
BTS (x11)
PARTS REQUIRED / ᚲせ࡞㒊ရ
DXY (x2)
CVZ (x12)
DSA (x4)
BEK (x1)
CRQ (x2)
CRU (x1)
TOOLS REQUIRED / ᚲせ࡞ᕤල
3/16 in/po (≈5 mm)
1/2 in/po (≈13 mm)
(1)
(2)
CONTENTS OF BOX 2 / ⟽ࡢෆᐜ
LARGE PLASTIC PARTS / ኱ࡁ࠸ࣉࣛࢫࢳࢵࢡ〇㒊ရ
5/16 in/po (≈8 mm)
(1)
(1)
CONTENTS OF BOX 5 / ⟽ࡢෆᐜ
CONTENTS OF BOX 6 / ⟽ࡢෆᐜ
6
DXX (x2)
DWX (x3)
BEO (x1)
22
TOOLS AND HARDWARE REQUIRED / ᚲせ࡞ᕤල࡜㔠ල
X SECTION 3 (CONTINUED) / ࢭࢡࢩࣙࣥ㸦⥆ࡁ㸧
• Attach a slide rail (CRQ) to the slide ladder in the position shown. Repeat this step for the other slide rail.
͌ᅗ♧ࡉࢀ࡚࠸ࡿሙᡤ࡛⁥ࡾྎࡢ࣮ࣞࣝ㸦&54㸧ࢆ⁥ࡾྎࡢࡣࡋࡈ࡟ྲྀࡾ௜ࡅࡲࡍࠋࡶ࠺∦᪉ࡢ࣮࡛ࣞࣝ
ࡶࠊࡇࡢࢫࢸࢵࣉࢆ⧞ࡾ㏉ࡋࡲࡍࠋ
⤌ࡳ❧࡚ᡭ㡰࡛ᚋ࡯࡝ᣦ♧ࡉࢀࡿࡲ࡛ࠊ㔠ලࡣ᏶඲࡟⥾ࡵ࡞࠸࡛ࡃࡔ
ࡉ࠸ࠋ
3.1
BTS (x4)
DSA (x4)
DSA
DSA
BTS
BTS
CRQ
!
Do not completely tighten the hardware until instructed later in the assembly.
͌
⤌ࡳ❧࡚ᡭ㡰࡛ᚋ࡯࡝ᣦ♧ࡉࢀࡿࡲ࡛ࠊ㔠ලࡣ᏶඲࡟⥾ࡵ࡞
࠸࡛ࡃࡔࡉ࠸ࠋ
3/16 in/po (≈5 mm)
(2)
23
TOOLS AND HARDWARE REQUIRED / ᚲせ࡞ᕤල࡜㔠ල
X SECTION 3 (CONTINUED) / ࢭࢡࢩࣙࣥ㸦⥆ࡁ㸧
6
3.2
3/16 in/po (≈5 mm)
(2)
• Secure the deck support (CRU) to the slide rails using the hardware indicated. Tighten this hardware and the
hardware from Sec 3.1.
͌ᣦᐃࡉࢀ࡚࠸ࡿ㔠ලࢆ౑࠸ࠊࢹࢵ࢟ࢧ࣏࣮ࢺ㸦&58㸧ࢆ⁥ࡾྎࡢ࣮ࣞࣝ࡟ᅛᐃࡋࡲࡍࠋࡇࡢ㔠ල࡜ࢭ
ࢡࢩࣙࣥࡢ㔠ලࢆ⥾ࡵࡲࡍࠋ
ࡇࡇ࡛ࡍ࡭࡚ࡢ㔠ලࢆ⥾ࡵ࡚ࡃࡔࡉ࠸ࠋ
• Place the slide deck (BEO) onto the deck support and secure with the hardware indicated.
͌⁥ࡾྎࡢࢹࢵ࢟㸦%(2㸧ࢆࢹࢵ࢟ࢧ࣏࣮ࢺ࡟㓄⨨ࡋࠊᣦᐃࡉࢀ࡚࠸ࡿ㔠ල࡛ᅛᐃࡋࡲࡍࠋ
3.3
BTS (x4)
DXY (x2)
CVZ (x6)
DXY
DXY
BTS
BTS
CRU
CVZ
CVZ
CVZ
CVZ
!
Tighten all hardware now.
͌
ࡇࡇ࡛ࡍ࡭࡚ࡢ㔠ලࢆ⥾ࡵ
࡚ࡃࡔࡉ࠸ࠋ
DXX
BTS
BEO
DXX
BTS
CVZ
CVZ
DXX (x2)
(1)
Drill here.
ࡇࡇ࡛ࢻࣜࣝࡋࡲࡍࠋ
Do not drill here.
ࡇࡇ࡛ࢻࣜࣝ
ࡋ࡞࠸࡛ࡃࡔ
ࡉ࠸ࠋ
24
TOOLS AND HARDWARE REQUIRED / ᚲせ࡞ᕤල࡜㔠ල
X SECTION 3 (CONTINUED) / ࢭࢡࢩࣙࣥ㸦⥆ࡁ㸧
6
3.4
• Attach the slide (BEK) to the deck (BEO) in the location indicated with the hardware indicated.
͌ᣦᐃࡉࢀ࡚࠸ࡿ㔠ලࢆ౑࠸ࠊᅗ♧ࡉࢀ࡚࠸ࡿሙᡤ࡛⁥ࡾྎ㸦%(.㸧ࢆࢹࢵ࢟㸦%(2㸧࡟ྲྀࡾ௜ࡅࡲࡍࠋ
3/16 in/po (≈5 mm)
(2)
CVZ (x6)
Top View / ᶲ“
Bottom View / ୗഃ
DWX
DWX
DWX
CVZ
CVZ
CVZ
CVZ
CVZ
CVZ
BTS
BTS
BTS
CAUTION /
Slide can get hot in direct sunlight. It is not recommended that a slide be installed facing the sun.
!
5/16 in/po (≈10 mm)
(1)
(1)
BTS (x3)
DWX (x3)
• Drill here.
͌ࡇࡇ࡛ࢻࣜࣝࡋ
ࡲࡍࠋ
  • Page 1 1
  • Page 2 2
  • Page 3 3
  • Page 4 4
  • Page 5 5
  • Page 6 6
  • Page 7 7
  • Page 8 8
  • Page 9 9
  • Page 10 10
  • Page 11 11
  • Page 12 12
  • Page 13 13
  • Page 14 14
  • Page 15 15
  • Page 16 16
  • Page 17 17
  • Page 18 18
  • Page 19 19
  • Page 20 20
  • Page 21 21
  • Page 22 22
  • Page 23 23
  • Page 24 24
  • Page 25 25
  • Page 26 26
  • Page 27 27
  • Page 28 28
  • Page 29 29
  • Page 30 30
  • Page 31 31
  • Page 32 32
  • Page 33 33
  • Page 34 34
  • Page 35 35
  • Page 36 36
  • Page 37 37
  • Page 38 38
  • Page 39 39
  • Page 40 40
  • Page 41 41
  • Page 42 42
  • Page 43 43
  • Page 44 44
  • Page 45 45
  • Page 46 46
  • Page 47 47
  • Page 48 48
  • Page 49 49
  • Page 50 50
  • Page 51 51
  • Page 52 52
  • Page 53 53
  • Page 54 54
  • Page 55 55
  • Page 56 56
  • Page 57 57
  • Page 58 58
  • Page 59 59
  • Page 60 60
  • Page 61 61
  • Page 62 62
  • Page 63 63
  • Page 64 64
  • Page 65 65
  • Page 66 66
  • Page 67 67
  • Page 68 68
  • Page 69 69
  • Page 70 70
  • Page 71 71
  • Page 72 72
  • Page 73 73
  • Page 74 74
  • Page 75 75
  • Page 76 76
  • Page 77 77
  • Page 78 78
  • Page 79 79
  • Page 80 80
  • Page 81 81
  • Page 82 82
  • Page 83 83
  • Page 84 84
  • Page 85 85
  • Page 86 86
  • Page 87 87
  • Page 88 88

Lifetime 90274 Owner's manual

Type
Owner's manual

Ask a question and I''ll find the answer in the document

Finding information in a document is now easier with AI