Page is loading ...

USER MANUAL
MANUAL DE INSTRUCCIONES
MANUEL UTILISATEUR
BEDIENUNGSANLEITUNG
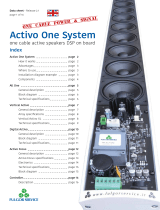
MASS1015P
DPM3003
.amiclab-m3

2

3
USER MANUAL
1. IMPORTANT NOTE 004
2. INTRODUCTION: CONCEPT AND DEFINITION OF A LINE ARRAY SYSTEM 005
3. THE LINE ARRAY BET ACOUSTICS MASS1015P 010
4. ASSEMBLY AND CONNECTIONS 013
5. ABOUT DPM3003 018
6. SOFTWARE INSTALLATION 020
7. GRAPHIC USER INTERFACE 021
8. DIAGRAMS 036
9. TECHNICAL CHARACTERISTICS 139
10. BLOCK DIAGRAM 141
All numbers subject to variation due to production tolerances. BET ACOUSTICS reserves the right to make changes or
improvements in manufacturing or design which may affect specifications.

4
1. IMPORTANT NOTE
Congratulations! You have just become the owner of the result of careful design and painstaking
manufacturing. We thank you for placing your confidence in us by selecting our Line Array MASS1015P
system.
To obtain maximum use and performance it is VERY IMPORTANT that you read this manual
carefully before using the system and that you take notice of the indications presented in it.
To ensure optimum functioning of the system we recommend that maintenance be carried out by
technical service personnel authorised by us.
1.1. Precautions and recommendations
The Line Array BET ACOUSTICS MASS1015P system is capable of delivering levels of sound
pressure that are capable of damaging the human ear. Protect your hearing when working with high
sound levels near the system.
All BET ACOUSTICS products are tested and checked before leaving the factory and should
therefore be in perfect condition on delivery.
Carefully unpack the product and observe its condition. If it has been damaged during transport
please check the damage so that you can send a report to the haulage contractor and return the product
immediately. Only consignees can initiate a claim against a haulage contractor if damage has been
caused during transport. The claimant is responsible for keeping all packaging parts for later inspection.
This apparatus must be earthed through its mains cable.
Should any connection / disconnection task be done, always disconnect the unit from the mains
supply.
There are no user serviceable parts inside the unit.
Please ensure that the system is not exposed to sunlight or rain.
Ground Loops
Care should be taken, so that the different mechanical and electrical grounds, as well as the
chassis and ground connections arriving to the device, to be independent from each other.
Ground loops can be easily detected through a low frequency hum noise (50Hz). Depending on
the level of this noise, it can interfere on the music quality.
Audio connections
Usually, many people do not care enough about the quality of cables. Many times, because of a
bad connection or bad quality cables, there can be important problems during the music reproduction.
Cleaning
The control panel must not be cleaned with any dissolvent, abrasive or petroleum derived
substance else paint and silk-printing could be damaged. Whenever cleaning should be necessary use a
soft cloth slightly wet with water and neutral liquid soap. Be careful that no liquid gets into the unit
through its orifices. Never use sharp or erosive objects to scratch the control panel.

5
2. INTRODUCTION: CONCEPT AND DEFINITION OF A LINE ARRAY SYSTEM
LINE ARRAY: “A group of emitting elements placed close together in a straight line, emitting with
the same phase and amplitude”. As per Harry F. Olson in his work “Acoustical Engineering and
Dynamical Analogies” (New York, 1940
Currently the advantages of line array systems over conventional sound equipment are common
knowledge: greater control of auditive coverage level, increased performance, greater projection,
optimisation of frontal emission and also lower weight and volume to handle.
The purpose of the following sections of this user manual is to provide a simplified view of the
behaviour of line array systems and familiarise the user with the basic concepts of acoustics and
electroacoustics.
2.1. Historical introduction
Although the commercial development of Line Array systems began to expand in the 90s, the
acoustic principles that govern the behaviour of line array systems date back to observations made and
parallelisms introduced more than 150 years ago in the field of acoustics after the study of the behaviour
of polarised light.
The analogy between the behaviour of both types of radiation, light and sound, makes it possible
to establish the basic theories on which are based the minimum requirements that define the behaviour
of sound amplification systems such as the line array.
To understand the advantages of a line array system over a conventional sound system it is
important to keep in mind how sound behaves from the point of view of propagation.
2.2. Sound propagation
There are three basic natural forms of propagation of sound in air, each of which has its own
characteristics as regards form and pressure level attenuation as a function of the distance of the
listener from the sound source:
a) Spherical waves
These are emitted by a point source of sound which sends out a
spherical wave front, which therefore obey the inverse square law:
In this case, the level of sound pressure is attenuated by 6dB SPL for
each doubling of the distance between the listener and the sound
source in open air.
b) Cylindrical waves
These are emitted by a line of juxtaposed sound sources. The sound
emission of the group behaves as a cylindrical wave front with
attenuation with respect to the sound source of 3dB SPL.
Basically with a line array system the behaviour of the wave front for
a given range of frequencies follows this type of propagation so long
as the listener is located within the so-called near field (see section
2.3.).
The propagation of cylindrical waves is clearly advantageous as compared with the type of
propagation of spherical waves.

6
c) Plane waves:
These are generated, for example, in the interior of pipes with a given length and diameter in which
the acoustics are maintained independently of distance covered by the wave front with respect to the
source of sound emission.
In this case the level of sound pressure is not attenuated with distance. This type of wave is
synthesised in the so-called Kundt tubes, but are infrequent in nature.
2.3. LINE ARRAY systems as sources of cylindrical waves
As was shown in the previous section the conditions under which a line array behaves as a
source of cylindrical sound waves depend on factors such as array length and the frequency used, and
can be expressed in a simplified way with the following formula:
D<H
2
f/2c
Where
H: array length (determined by the number of sound enclosures
used)
f: frequency
c: sound speed
D: frontal distance between the near region (Fresnel region) and the
far region (Fraunhofer region)
For distances greater than D the wave front emitted by a line array ceases to be cylindrical and
tends to become spherical, with a consequent attenuation of the sound pressure level of 6dB SPL on
doubling the distance from the array.
It is important to keep in mind that the behaviour in the near field of a line array system is in
actual fact qualitatively more complex given that each point located in this region is affected by the
pressure level contributions related to the distance to each one of the components that constitute each
of the acoustic enclosures that make up a line array.
This is why line arrays require suitably adjusted sound signal equalization and processing.
2.4. Directivity of LINE ARRAY systems
The efficiency of line array systems is based on constructive and destructive interference. The
pattern of any sound wave front begins to behave directive when the wavelength () of the sound is
comparable with the dimensions of the emitting surface.
If two acoustic boxes that emit the same frequency, phase and amplitude (see section 2) are
grouped, the resulting pattern of sound emission is different than when they emit separately:
At points along the axis between them there will be constructive interference with a resultant sound
level 6dB greater than with only one sound source.
At points outside the axis between them the difference in the distance travelled by the wave fronts
will cause cancellations, resulting in a lowered sound pressure level. This is the so-called
phenomenon of destructive interference or combing.

7
The graphs included below depict the sound pressure level maps resulting from grouping 8
generic point sources of sound, the centres of each separated by 56 cm.
As can be seen, the directivity of the group of 8 sources differs as compared to that of one single
source, varying as a function of frequency.
Eight point sources of sound emitting in phase with the same amplitude.
Comparison of the vertical coverage as compared with one single point source as a function of frequency.

8
Eight point sources of sound emitting in phase with the same amplitude.
Comparison of the vertical coverage as compared with one single point source as a function of frequency.

9
Eight point sources of sound emitting in phase with the same amplitude.
Comparison of the vertical coverage as compared with one single point source as a function of frequency.

10
As is to be expected, each of the acoustic enclosures that make up the line array consists of
different transducers, each of which is perfectly adapted to a range of frequencies to be reproduced and,
in general, with directive behaviour that varies with frequency and differs notably from the directional
behaviour of a point source.
The vertical directivity of a line array is determined using the following mathematical expression:
According to this mathematical function, the vertical response of a line array group is more
directive as frequency increases, low frequencies being almost omnidirectional.
The number of acoustic enclosures in a line array is related to resultant vertical directivity and is
therefore an important parameter on designing equipment for specific applications.
BET ACOUSTICS makes available to you the simulation program EASE FOCUS with the
corresponding library for predicting the behaviour of the MASS1015P system. EASE FOCUS allows
rapid and efficient determination of the number of acoustic enclosures needed as well as the optimum
angle between them to obtain sufficient and homogeneous sound pressure levels in the entire audience
area.
EASE FOCUS can be downloaded free from www.betacoustics.com
3. THE LINE ARRAY BET ACOUSTICS MASS1015P
3.1. General description of the system
The BET ACOUSTICS MASS1015P is a three-way line array system consisting of:
1 15" bass loudspeaker
1 10" middle frequency loudspeaker
2 1" compression motors for treble frequencies equipped with waveguides and a 90º diffusor for
horizontal coverage
The system is capable of reproducing an extensive bandpass range, (35 Hz – 18.000 Hz)
sufficient to make it a full range system which makes it possible to do without woofer or subwoofer
support systems. In this manner, a more coherent wave front is obtained as the entire information
bearing frequency range (80–18.000Hz), in addition to the most dense mass motion range (35–80 Hz),
proceed from the same source.
The acoustic enclosures that constitute the system are made from 18-mm thick laminated
phenolic birch wood with sufficient internal reinforcements to prevent undesirable mechanical vibrations,
providing the required robustness for the intended type of application.
With a textured black paint finish, each acoustic enclosure contains a flying system, 4 lateral
handles for transport as well as a frontal protective grille with acoustically transparent foam that protects
loudspeakers from splatter and against entry of foreign objects that occasionally can damage them.

11
The components and architecture used for each of the ways of the system are described below:
BASS FREQUENCIES
The MASS1015P system uses a 15" bass frequency loudspeaker. As is shown in the diagram,
the loudspeaker is inclined. Thus the distance between the axes of the various stacked acoustic
enclosures is reduced, achieving a greater resultant sound pressure level.
By means of the aperture in the central partition wall of the enclosure the volumetric space is
optimized as regards loudspeaker rear load, creating a labyrinth that creates backward motion for
maximum improvement of the in-phaseness of front and rear emissions.
If access to the loudspeaker is required for maintenance purposes, the protective grille is
removed and the loudspeaker removed from the front of the enclosure.

12
MIDDLE FREQUENCIES
For middle frequencies the system is equipped with a 10" loudspeaker with a neodymium magnet
that is hermetically sealed in its own rear chassis, which provides increased pressure that translates into
greater performance at middle frequencies. To support these pressures, the loudspeaker is equipped
with a curvilinear carbon-fibre cone.
As shown in the diagram, the system includes a corrector to reduce the distance between the
axes of the middle frequency wave fronts.
If access to the loudspeaker is required for maintenance purposes, the protective grille is
removed and the loudspeaker removed from the front of the enclosure. The corrector is fastened with
two screws to the loudspeaker itself, which maintains the cases separated.

13
TREBLES FREQUENCIES
For the trebles 2 compression motors are combined as an optimum solution with a neodymium
magnet with waveguides, thus obtaining maximum coupling between both transducers. Both waveguides
are loaded with a diffuser with 90º horizontal coverage, projecting a wave front that is 10" high.
If the mobile treble motor groups need to be replaced, the protective grille is removed so that they
can be removed from the front of the system.
4. ASSEMBLY AND CONNECTIONS
The acoustic enclosures of the MASS1015P system have been carefully studied and designed
for rapid, efficient and secure assembly, disassembly and storage of a line array:
Handling and operation of the BET ACOUSTICS MASS1015P system is simple owing to the 4
transport handles.
All of the units can be stacked together, forming easily handled, stored and transported clusters.
The reduced weight and compact size of each unit facilitates their handling.
The configurations can be kept assembled after events, both for transport as well as storage.
The flying system between enclosures contains only one type of connecting rod for easy
disassembly of units.
All fastenings are made with pins with magnetic heads for rapid handling.
The elevation mechanism is easily disassembled.
One single pin is used for all necessary functions as regards interconnection of units.

14
TRANSPORT, STORAGE
The most practical and usual way of transporting the BET ACOUSTICS MASS1015P system is in
configured clusters. In this way the configuration of the vertical coverage of the system can be
maintained in addition to enabling transport of the iron elevation fittings installed in the same cluster.
CALIBRATION OF VERTICAL COVERAGE
The calibration of vertical coverage of the system is easily carried out prior to being flown. The
positions of the pins are altered as indicated on the silk-screen print on the lateral, frontal iron fitting, the
intervals of the positions being 1º.
The positions of the pins of the rear laterals are not changed as the rear mechanism is only
intended to serve as a hinge.
DESCRIPTIVE DIAGRAMS
The following diagrams describe each of the acoustic enclosures of the BET ACOUSTICS
MASS1015P system as well as its various flying parts.
1- The system includes four handles, two on each side, both strategically placed for maintaining
equilibrium during individual transport. The orifices of the two handles on the right side of the system act
as bass resonators.
2- There are four rabbets at the top of each unit which serve to accommodate the skids of the unit
stacked on top.
3- At the bottom of each unit there are four skids that are inserted in the unit stacked below.
4- The lateral iron fittings together with the "strut" connecting rods serve as hinges.
5- The lateral, front iron fittings calibrated degree for degree determine the vertical angle between each
of the units.
6- Connecting rod that serves as a strut.
7- 9.8 mm diameter pin with magnetic head.
FRONT
LATERAL
5º-
4º-
3º-
2º-
1º-
0º-
REAR
3
4
5
6
2
1
7

15
ASSEMBLY
1- MASS1015P units.
2- Elevation system.
3– Wheel transport system.
4– Lateral elevation system plate.
5– Central elevation system plate.
6– Beam for connecting the elevation cord.
7– Union beam for the lateral and central plates.
8– Rivet for fastening lateral plates to the beam.
9– Drill holes for lateral plates.
5º-
4º-
3º-
2º-
1º-
0º-
5º-
4º-
3º-
2º-
1º-
0º-
1
2
3
4
5
6
7
8
9
1

16
1– Rear, bottom fastening pin of a unit for the connecting rod that functions as a strut between it and the
next unit below.
2– Top, rear pin to the connecting rod to avoid swaying of the system.
3– Fastening pin of the top rear of a unit that serves as a strut between it and the next unit above.
4– Fastening pin of the bottom front of a unit to the connecting rod that functions as a strut between it
and the next unit below.
5– Fastening pin of the top front of a unit that functions as a strut between it and the next unit above.
The position of pin no. 5 determines the angle of the opening between units (lower and upper) as
indicated by the silk print inscribed in the lateral, front iron fittings.
The maximum angular opening between two contiguous units is five degrees. It is possible to
calibrate this opening in intervals of one degree.
5º-
4º-
3º-
2º-
1º-
0º-
REAR
FRONT
1
2
3
4
5

17
1– Cluster assembly of 3 units.
2– Cluster assembly of 3 units, with the “Bumper”.
3– The cluster is elevated and the wheel transport unit removed.
4– After elevating cluster no. 1, cluster no. 2 is positioned below it (cluster without “Bumper”).
5– After the skids of the lower unit cluster no. 2 have been inserted in the accommodations of the upper
unit cluster no. 1, the two are fastened with the connecting rods by inserting the magnetic pins.
6– After all of the units have been connected the system is elevated and removed from the wheel
transport system.
5º-
4º-
3º-
2º-
1º-
0º-
5º-
4º-
3º-
2º-
1º-
0º-
5º-
4º-
3º-
2º-
1º-
0º-
5º-
4º-
3º-
2º-
1º-
0º-
5º-
4º-
3º-
2º-
1º-
0º-
5º-
4º-
3º-
2º-
1º-
0º-
5º-
4º-
3º-
2º-
1º-
0º-
5º-
4º-
3º-
2º-
1º-
0º-
5º-
4º-
3º-
2º-
1º-
0º-
5º-
4º-
3º-
2º-
1º-
0º-
5º-
4º-
3º-
2º-
1º-
0º-
5º-
4º-
3º-
2º-
1º-
0º-
5
º
-
4
º
-
3
º
-
2
º
-
1
º
-
0
º
-
5
º
-
4
º
-
3
º
-
2
º
-
1
º
-
0
º
-
5º-
4º-
3º-
2º-
1º-
0º-
5
º
-
4
º
-
3
º
-
2
º
-
1
º
-
0
º
-
5
º
-
4
º
-
3
º
-
2
º
-
1
º
-
0
º
-
5º-
4º-
3º-
2º-
1º-
0º-
5º-
4º-
3º-
2º-
1º-
0º-
5º-
4º-
3º-
2º-
1º-
0º-
5º-
4º-
3º-
2º-
1º-
0º-
5
º
-
4
º
-
3
º
-
2
º
-
1
º
-
0
º
-
5
º
-
4
º
-
3
º
-
2
º
-
1
º
-
0
º
-
5
º
-
4
º
-
3
º
-
2
º
-
1
º
-
0
º
-
5º-
4º-
3º-
2º-
1º-
0º-
5
º
-
4
º
-
3
º
-
2
º
-
1
º
-
0
º
-
5
º
-
4
º
-
3
º
-
2
º
-
1
º
-
0
º
-
1
2
3
4
5
6

18
5. ABOUT DPM3003
The DPM3003 includes an one input, three outputs .amic DSP processor and three class D
amplifiers (see chapter 9 for full characteristics).
This .amic card is a powerful and fully programmable digital signal processor with one high
quality audio input channel and three output channels (each one routed to the input of one out of the
three amplifiers), as well as a USB computer link.
The available connections on the surface of the module are
One XLR audio input
One STACK (link) audio output
Two PowerCon® sockets: connect one of them to the AC mains and use the other one to
link and deliver AC voltage to the next DPM3003 used in the chain (usually a line array
set of cabinets).
One USB port.
There are also 7 LED indicators available:
ON
STANDBY / THERMAL PROTECTION (it will be lit during stand by mode or if a thermal
protection is activated while the module is in the ON mode)
PROTECT (protection activated)
CLIP HIGH, CLIP MID, CLIP LOW (clipping warning for each amplifier)
SIGNAL PRESENT (an audio signal is detected at the input stage)
The DPM3003 operates with alternate current (AC) between 100 and 264V at 47 to 63Hz. This
device features an oversized power supply which adapts itself to any mains voltage around the world,
without the need of manual adjustment.
It is important not to place the module next to electrical noise sources such as transformers,
voltage dimmers, motors, etc. or their mains supply cables. The metal cover of the device should never
be removed under any circumstance for that same reason.
The cooling system is a back-to-back design, forced ventilation with variable speed fan. However,
it is advisable not to expose the unit to extreme temperatures as well as ensure a dry and dust-free
operating environment.
It is always advisable to follow this power up sequence: signal sources, mixing unit, processor
and, finally, power amplifiers. The power down sequence must follow exactly a reverse order. By closely
following this sequences, all peaks or transients produced by switching on and off devices do not affect
the next devices in the chain and, of course, never reach the loudspeakers, which are extremely
sensitive about this.

19
5.1. About .amiclab-m3
.amiclab-m3 is a graphic editor
software for Windows® allowing easy and
friendly interactive control of all the
DPM3003 processor functionalities.
Its interface looks like hardware
equipment, but has all software benefits as
curve graphic editing, presets loading and
saving as files, etc.
5.2. Features
DPM3003 hardware has one audio
input and one audio Stack (link) output, both
with professional XLR3 connector. It also
has 3 internal outputs for feeding the 3-way
amps system.
Firmware is the code used to operate
DPM3003 hardware, giving it audio
processing features described in the
following block diagram:
There are three of such processing chains in DPM3003, one per audio way. Each of these chains
will be named "processing channel".
.amiclab-m3 offers a powerful and easy to use graphic user interface to control and edit all
parameters related to DPM3003 firmware's features in real time.

20
6. SOFTWARE INSTALLATION
6.1. System requirements
.amiclab-m3 needs a PC with Windows® 98SE/ME/2000/XP/VISTA/7 x32 x64 (a Pentium III
600MHz or more with 128 MB of RAM or greater is recommended), a USB port (1.1 or 2.0), and a VGA
video card with a minimum 800x600 resolution (1024x768 recommended). The computer doesn't act
upon audio processor efficiency, since all processing is done inside DPM3003 DSP. It is only used to
graphically edit parameters.
Before being able to use .amiclab-m3 to communicate with DPM3003, you have to install the
USB driver. This driver allows the PC to recognize DPM3003, and gives .amiclab-m3 a method to
communicate with the hardware.
6.2. USB driver installation
In order to install the USB driver, you'll need "amicusb.inf" and "amicusb.sys" files from
.amiclab-m3 CD-ROM:
1. Connect the USB cable between DPM3003 and the computer. A "Found New Hardware Wizard"
window will appear.
2. Select "Install from a list or specific location" and browse to the right files path.
The wizard will automatically install the driver.
6.3. Graphic editor installation
1. Run the "setup_amiclab_m3.exe" file and follow installer instructions.
2. .amiclab-m3 will be installed in a folder named "\Program Files\amiclab-m3" in the hard disk.
During the installation, you can choose a different location (folder) for the software.
3. Confirm each installation process window by clicking on "Next" button. Installation may be
cancelled at any time by clicking on "Cancel" button.
4. When the installation is complete, click "Finish" to go back to Windows® desktop or to
automatically launch .amiclab-m3 if "Launch .amiclab-m3" option has been chosen.
/