7
English
NEVER LEAVE THE HEATER UNATTENDED WHILE BURNING!NEVER LEAVE THE HEATER UNATTENDED WHILE BURNING!NEVER LEAVE THE HEATER UNATTENDED WHILE BURNING!
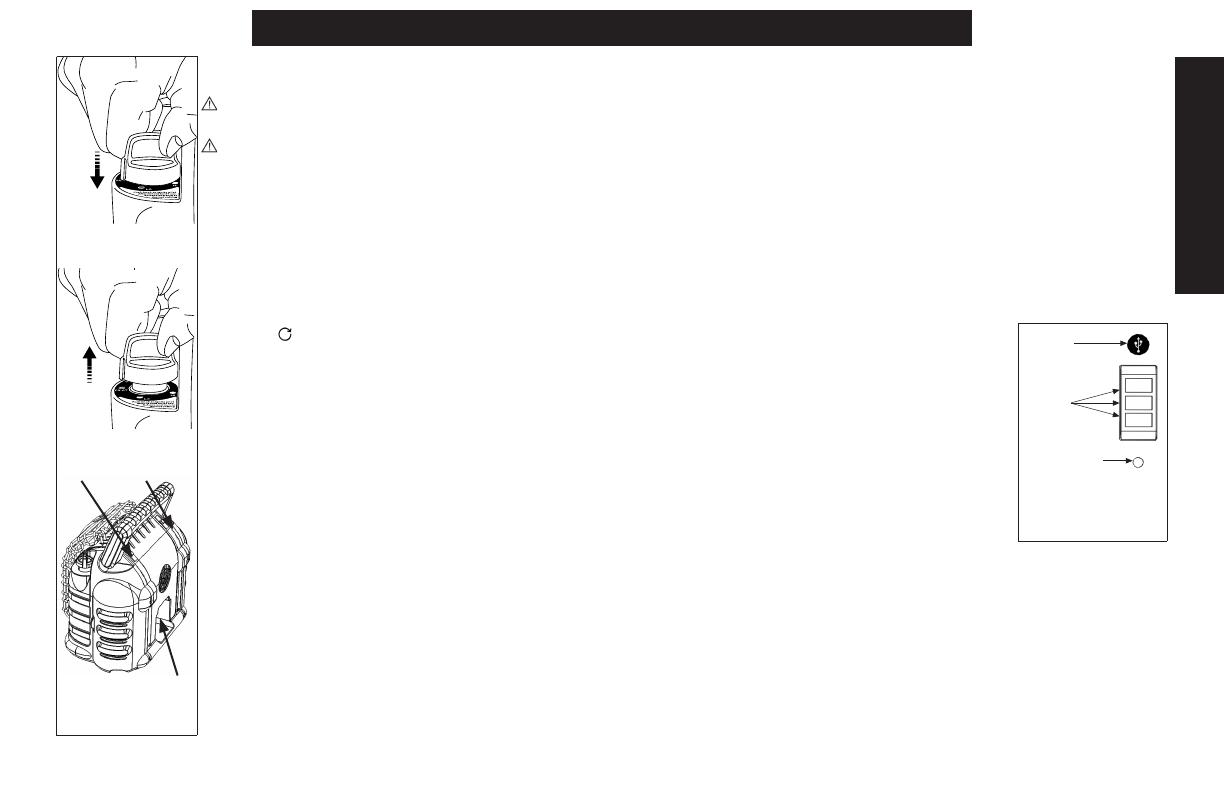
Figure 4: Depressed
Control Knob
Figure 5: Released
Control Knob
USE WITH HOSE CONNECTION(S) TO REMOTE PROPANE
CYLINDER(S), MAXIMUM SIZE 20 LB.: START (continued)
CAUTION: Do not try to adjust heating levels by using the
propane tank shut off valve.
WARNING: DO NOT OPERATE HEATER UNLESS CONTROL
KNOB IS LOCKED IN A POSITION MARKED “HI”, “LO” OR
“PILOT”. NEVER SET CONTROL KNOB BETWEEN LOCKED
POSITIONS. POOR COMBUSTION AND HIGHER LEVELS OF
CARBON MONOXIDE MAY RESULT.
USE WITH HOSE CONNECTION(S) TO REMOTE PROPANE
CYLINDER(S), MAXIMUM SIZE 20 LB.: STOP
• To shut off heater, shut off propane at supply tank
• Allow the heater to use up propane in supply line until the
heater shuts off, then slightly push down control knob and turn
clockwise to “OFF” position
• CAUTION: After turning heater off, wire guard will remain hot.
Allow to thoroughly cool before storing.
• When not in use, the gas must be turned off at the LP-gas
supply cylinder. As stated before allow heater to use up propane
in supply line until heater shuts off. When the LP-gas supply
cylinder is not disconnected from the heater, the heater and the
cylinder must be stored outdoors, in a well ventilated space,
out of reach of children, and must not be stored in a building,
garage, or any other enclosed area.
Electronic Operation
Figure 6:
Back Controls
LIGHTS
BATTERY DOCK
FAN
Fan
Toggling the Fan control button on the back of the heater activates/deactivates the fan.
Using the fan while the heater is active enhances the heaters convective heating ability.
Using the fan while the heater is inactive will make the heater into a fan, meaning that you
may enjoy the DXH12B no matter the season!
USB Power Outlets
Inside the USB Compartment which houses the pulse igniter are also 3 USB Power Outlets,
a power button, and a status light. Toggling the power button will activate/deactivate the
USB Power Outlets with 5 Volts of DC current at 2 amps rating, signal by illumination of the
status light. The USB Power Outlets facilitate the charging or powering of up to three USB
devices. NOTICE: The USB power should be shut off when not in use. Failure to do so may
cause battery to drain.
Status Light Diagnostics: Steady On/Off Blinking
If the Status Light is blinking on and off steadily this is an indication that the DeWALT battery
is low on charge. See Battery Charging Precautions and Instructions, starting on page 9.
The battery must be removed from the heater in order to charge.
Status Light Diagnostics: Double Flash
(2 Blinks, 1 Pause)
If the Status Light is “Double Flashing” (repetition of 2 rapid blinks
followed by a pause) this is an indication that the battery is outside
of its operating temperature range.
Maintenance
Always keep the heater area clear and free from combustible
materials, gasoline and other flammable vapors and liquids.
Keep the vent areas (slots in the bottoms and the top at the front
and rear of heater) clear at all times.
Visually inspect the pilot flame and burner periodically during
use. The pilot flame should be blue in color (not yellow) and will extend beyond the
thermocouple. The flame will surround the thermocouple just below the tip, see Figure 8.
A slight yellow flame may occur where the pilot flame and main burner flame meet. The
burner should be bright orange (with a slight blue color around the border, a red-orange
haze that is visible on the ceramic tile is acceptable) and without a noticeable flame. A blue
flame that rolls out at the top of the ceramic tile indicates an accumulation of dust, lint or
spider webs inside the casing assembly and main burner assembly. If the pilot is yellow or
the burner has a noticeable flame, cleaning may be required. Use the following procedure
to inspect the casing assembly and main burner assembly. It is necessary to periodically
check the burner orifice and burner venturi tube to make sure they are clear of insects/
nests or spider webs that may accumulate over time. A clogged tube can lead to a fire.
When a charged DeWALT battery is inserted into the battery dock,
Figure 6, the heater may activate the following electronic features.
The battery inserts into the battery dock upright, with contacts
facing the roof of the dock. These Electronic features may be used
individually or simultaneously. When any of them are in use the
status light, Figure 7, will illuminate with a steady green glow to
visually signal that an electronic feature is active. If the status light is
blinking see the diagnostics section below.
Lights
Toggling the Light control button on the back of the heater
activates/deactivates the lights in the handle bar. The Lights
operate with any orientation of the heater and handle.
Figure 7:
Electronic Status LED,
USB Power Button,
USB Power Outlets
STATUS LIGHT
USB
Power
Outlets
USB
Power
Button


