Page is loading ...

Gm&Uktb!!
Contents
Appliance Registration
2
Automatic Ignition 4
Care and Cleaning
6
Cleaning Guide ‘?
Controls
4,5
Cookware 5
Model and Serial Numbers
2
Problem Solver
7
Repair Service
7
Safety Instructions
2,3
Using Your Cooktop
4,5
Warranty
Back Cover
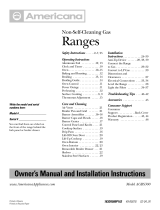
GEAmwvarCk?M?@
/MfM2E2m
Models JGP600EH
JGP600AEH
GElhalHy Rmduct
%-4994
I
I
I I
I

IMPORTANT
SAFETY
INSTRUCTIONS
Help
us help you. ● ●
Read this book carefully.
It is intended to help you operate
and maintain your new cooktop
properly.
Keep it handy for answers to your
questions.
If you don’t understand something
or need more help, write (include
your phone number):
Consumer Affhirs
GE Appliances
Appliance Park
Louisville, KY 40225
W~~@
down the model
and serial numbers.
Mu’11find them on a label located
in the burner lxx under the
Cooktop.
These numbers
arealso onthe
Consumer Product Ownership
Registration Card that came with
your, cooktop. Before sending in
this card, please write these
numbers here:
Mode{ Number
Serial Number
Use these numbers in any
correspondence or service calls
concerning your cooktop.
If you received
a damaged cooktop...
Immediately contact the dealer (or
builder) that sold you the cooktop.
Save time and money.
Before you request
service...
Check the Problem Solver on
page 7. It lists causes of minor
operating problems that you can
correct yourself.
FOR YOURSAFETY
If you smell gas: -
1. Open windows.
2. Don’t touch
electrical switches:
3. Extinguish any
open flame.
4. Immediately call
your gas supplier.
“Don’t turn electric switches
on or off because sparks may
ignite the gas.
FOR YOURSAFETY
Donot store or use
gasoline or other
flammable vapors and
liquids in the vicinity
of this or any other
appliance.
.-
.7
Read ail instructions
before using this
appliance. -
IMPORTANT
SAFEIT NOTICE
The California SafeDrinking
Waterand ToxicEnforcement
Actrequires the Governorof
Califo&ia to publish a list of
substancesknownto the state
to cause cancer and requires
businesses to warncustomers
ofpotential exposure to such
substances.
Gas appliances can cause
minor exposure tothree ofthese
i.
substances, namelybenzene,
formaldehydeand soot, caused -
primarily by the incomplete
combustion ofnatural
gasor LP
fuels. Properly adjusted burners,
indicated by a bluish rather than
a yellowflame, will minimize
incompletecombustion.Exposure
to these substancescan be
minimized further byventing
with an open windowor using
a ventilation fanor hood.
Whenyouget yourcooktop,
havethe installershowyouthe
location of the gas cut-off vzdve
and howto shutit off if
necessary.
● Haveyourcooktopinstalled
and properlygroundedbya
quaiified installer,
in accordance
with the Installation Instructions.
Anyadjustment and service
;
shouid be performed only by .
qualified gas rangeinstallers
or service technicians.

,
● Phxgyourcooktopintoa
120-voMgroundedoutletonly.
Do not removethe round
grounding prong from the plug.
If in doubt about the groundingof
the homeelectrical system,it is
your personal responsibility and
obligation to havean ungrounded
outlet replaced with a properly-
grounded three-prong outlet in
accordance with the National
13ectricaiCode. Do not use an
extension cord with this
appliance.
● Be sureall packing materials
are removedfrom the cooktop
beforeoperating it, to prevent
fire or smokedamage should
the packing material ignite.
*Be sureyourcooktopis
correctly adjustedbya
qualified service technician
or installer for the type ofgas
(Naturaior LP) on which it is
to beused. Cooktop can be
converted for either type ofgas.
See Installation Instructions.
using Your Cooktop
8Don’tleavechikiren alone or
unattendedwhere a cooktopis
hot or in operation. Theycou~d
be seriously burned.
oCAUT~ON:~TE~fS OF
INTERESTTOCHILDREN
SHOULDN~ BE STORED
INCABINETSABOW THE
COOKTOI?-CHILDREN
CLIMINNGON THE C.00KTX)P
TOREACHITEMS COULD BE
SERIOUSLYINJURED.
● Letburner grates andother
surfacescool beforetouching
them or leavingthem where
children can reachthem.
● Neverwearloose fitting or
hanginggarmentswhile using
theappliance. Flammable
material could be ignited if
brought in contact with flame
or hot surfaces and maycause
severeburns.
● lNeveruseyourappliance for
warmingor heatingtheroom.
Prolongeduseof the cooktop
withoutadequate ventilationcan
be hazardous.
● Donotuse wateron grease
fires. Neverpickup a flaming
pan. Turn offburner, then
smother flamingpan bycovering
pan completely with well fitting
lid, cookie sheet or flat tray.
Flaming grease outside a pan can
be put out bycoveringwith
bakingsoda or, if available,a
multi-purpose dry chemical or
foam-typeextinguisher.
gDonotstoreflammabie
materiak near the cooktop.
● Do not let cooking grease or
otherflammablematerials
accumulatein or nearthe
cooktop.
● Alwaysusethe IJT’13position
whenigniting topburnersand
makesuretheburnershaveignited.
● Neverleavesurface burners
unattendedat HIGH flame
settings. i30i.lovercauses
smokingand greasy spillovers
that maycatch on fire.
● Adjusttop burnerflame size
soit doesnot extendbeyondthe
edge ofthecookingutensil.
Excessiveflame is hazardous.
● Useonly dry potholders—
moist or damp potholders on hot
surfacesmayresult in bums from
steam. Do not let pot holders
come near open flames when
lifting utensils. Do not use a towel
or other bulky cloth in place of a
pot holder.
● Tominimize burns, ignition of
flammablematerials, and spillage,
turn the handle of a container
towardthe side or back of the
cooktop without extendingover
adjacent burner.
● Alwaysturnsurface burnerto
OFFbeforeremovingutensil.
● Watchfoodsbeing friedat
HIGH flamesetting.
● Whencooking pork, follow
the directions exactlyand always
cook the meat to at least 1’70”F.
This assuresthat, in the remote
possibility that trichina maybe
present inthe meat, it will be
killed and meat will be safeto eat.
● Do notuse a wokon the
cookingsurfaceif the wokhas
around metal ringwhichis
placedoverthe burner grateto
supportthe wok.This ring acts
as a heat trap which maydamage
the burner grate and burner head.
Also, it may cause the burner to
work improperly. This maycause
a carbon monoxidelevel above
current standards, resulting in
a health hazard.
c Cleanonly partslisted in this
U9eand (Me Book.
If YouNeed Service
● Read “The problem Solver”
onpage 7 of this book.
● Don’tattempttorepair or
replace anypart ofyour
cooktopuniessit isspecifically
recommendedin this book. All
other servicing should be referred
to a qualified technician.
SAW THESE
INSTRUCTIONS
3

Using your Cooktop
Model JGP600EH with Brushed Chrome Ftih
Model JGP6MAEH (notshown) with PorceIainEnamel Ftish
Automatic
Pilotless Ignition
ToLight a Burner
Your surface burners are lighted by
● Always have a cooking utensil on
electric ignition, eliminating the
the grate before turning on a burner.
need for pilot lights.
The finish on the grate may chip
In
case of a power outage, you can
light the surface burners on your
range with a match. Hold
a lighted
match to the burner, then turn the
knob to the LITE position. Use
extreme caution when lighting
burners this way.
.
8
I
[AT’ (-I
without a utensil to absorb the heat.
=\YfY //
● Check to be sure the burner you
turned on is the one you want to use.
● Be sure the burners and grates are
cool before you place your hand, a
I
.
J
potholder, cleaning cloths or other
Push the control knob in and turn
it to LITE. You will hear a little
clicking noise—the sound of the
burner lighting.
After the burner ignites, turn the
knob to adjust the flame size.
materials on them.
I
f
r
i
4
...- -
1

--
How to Select Flame Size
The flame size on a gas burner
should match the cookware you
are using,
.“. -
.
L J
NEVER LET THE FLAME
EXTEND UP THE SIDES OF
THE COC)KWARE. Any flame
larger than the bottom of the
cookware is wasted heat and only
serves to heat the handles.
When using aluminum or
aluminum-clad stainless steel
pots and pans, adjust the flame so
the circle it makes is about 1/2 inch
smaller than the bottom of the
cookware.
When boiling, use this same flame
size—1/2 inch smaller than the
bottom of the cookware—no matter
what the cookware is made of. Foods
cook just as quickly at a gentle boil
as they do at a furious roiling boil.
A high boil only creates steam and
cooks away moisture, flavor and
nutrition. Avoid it except for the
few cooking processes which need
a vigorous boil.
When frying or warming foods
in stainkss steeI, cast iron or
enamelware, keep the flame down
lower—to about 1/2 the diameter
of the pan.
When frying in gk.iss or ceramic
cookware, lower the flame even
more.
Air Adjustment
An air adjustment shutter for each
surface burner regulates the flow of
air to the flame.
When the right amount of air
flows into the burner, the flame
will be steady, relatively quiet and
have approximately 3/4 inch sharp
blue cones. This usually results
when the shutter is about halfway
open.
Whh too much air, the flame will
be unsteady, possibly won’t burn all
the way around, and will be noisy,
sounding like a blowtorch.
With not enough air, you won’t
see any sharp blue cones in the
flame, you may see yellow tips, and
soot may accumulate on cookware.
Loosen
Ai; adjustment shutter
To adiust the flow of air to the
burn&s, loosen the Phillips head
screws and rotate the shutters to
allow more or less air into the
burner tubes as needed.
Cookware
Aluminum: Medium-weight
cookware is recommended because
it heats quickly and evenly. Most
foods brown evenly in an aluminum
skillet. Minerals in food and water
will stain but will not harm
aluminum. A quick scour with a
soap-filled wool pad ailer each use
keeps aluminum cookware iooking
shiny new. Use saucepans with
tight-fitting lids for cooking with
minimum amounts of water.
Cast Iron: If heated slowly, most
skillets will give satisfactory
results. ,
Enamelware: Under some
conditions, the enamel of some
cookware may melt. Follow cookware
manufacturer’s recommendations
for cooking methods.
Glass: There are two types of glass
utensils—those for oven use only
and those for top-of-range cooking
(saucepans, coffee and teapots).
Glass conducts heat very slowly.
Heatproof Glass Ceramic: Can
be used for either surface or oven
cooking. It conducts heat very
slowly and cools very slowly.
Check cookware manufacturer’s
directions to be sure it can be used
on gas ranges.
Stainkss Steel: This metal alone
has poor heating properties,
and is usually combined with
copper, aluminum or other metals
for improved heat distribution.
Combination metal skillets generally
work satisfactorily if used at
medium heat as the manufacturer
recommends.
5
I

Care and Cleaning
..
Proper care and cleaning are
important so your cooktop will
give you efficient and satisfactory
service. Follow these directions
~arefidly in caring for it to help
assure safk and proper maintenance.
BE SURE ELECTRIC POWER
IS OFF BEFORE CLEANING
ANY Pm OFYOURCOOICKX?
When the cooktop is cool, wash
the outer finish with warm, soapy
water, rinse the surface with clean
water, and dry it with a soft cloth.
You can use any liquid household
detergent.
Brushed Chrome Finish
(Model JGP600EH)
To remove stubborn soil, use a
paste of baking soda and water.
Never use steel wool, scouring
powder, oven cleaners or other
abrasive cleaners. To restore luster,
spread a thin film of baby oil on the
sur%we, let it stand for about five
minutes, and wipe away any excess
oil with a damp cloth.
Outer Enamel Finish
(ModelJGP600AEH)
Occasionally apply a thin coat of
mild ckaning wax, if you wish, to
help protect the enamel ftish. If
you spill foods with a lot of acid
(tomatoes, sauerkraut, fruit juices,
etc.) or fds with high sugar
content, clean them up as soon as
possible. If allowed to set, these
fti could cause a dull spot.
Control Mel
It’s a good idea to wipe the control
panel clean after each use of the
cooktop. For a more thorough
cleaning, the knobs can be removed
by pulling them off the knob stems.
Cle~ with mild soap and water,
rinse with clean water and polish
dry with a soft cloth.
Do not use abrasive cleansers,
strong liquid cleaners or oven
cleaners
onthe control panel—
they will damage the finish.
Burner Grates
Grates should be washed regularly
and, of course, afier spillovers.
Wash them in hot, soapy water and
rinse with clean water. To get rid of
burned-on food, soak the grates in
a slightly diluted liquid cleanser.
Dry the grates with a cloth-don’t
put them back on the cooktop wet.
When replacing the grates, be sure
they’re locked into position over
the burners.
Although they’re durable, the
grates will gradually lose their
shine, regardless of the care you
take of them. This is due to their
exposure to high temperatures.
To preserve the grates’ porcelain
finish as long as possible, have a
pan on the grate before you turn on
the burner, and lower the flame when
fd reaches the desired temperature.
Drip I%ns
Remove the grates and lift out the
chrome drip pans. Wash them in
hot, soapy water. Rinse them with
clean hot water and polish them dry
with a cloth. Never use abrasive
cleaner or steel wool-they’ll scratch
the surface. Instead, soak the drip
pans for about 20 minutes in slightly
diluted liquid cleanser or mild
solution of ammonia and water (1/2
cup of ammonia to one gallon of
water). After soaking, wash them
in hot, soapy water. Rinse with
clean water and polish with a cloth.
Do not clean in self-cleaning oven.
Lift-up Top
Clean the area under the cooktop
often. Built-up soil, especially
grease, may catch fire.
To make cleaning easier, the entire
cooktop maybe lifted up.
f ~.
j
Be sure all burners are turned off
before raising the cooktop. Then
remove grates, drip pans and knobs,
grasp front of cooktop and lift.
After cleaning under the top with
hot, mild soapy water and a clean
cloth, put the top back in place.
Be carefhl not to pinch your fingers.
Replace drip pans, grates and knobs.
Burners
The holes in the burners of your
cooktop must be kept clean at all
times for proper ignition and an
even, unhampered flame.
Clean the burners routinely and
especially afier bad spillovers
which could clog these holes.
Burners lift right out for cleaning.
Note: A screw holds each of the
burners in place to keep them from :
wobbling around during shipment.
TWSindicate their location. Remove
the screw, lift the burner, tilt it to
~
one side at the end closest to the
I
igniter and move it toward the back
,
of the range. This disengages it
from the gas valves at the front of
the range, and it lifts out easily.
To remove burned-on food, soak
the burner in a solution of a product
I
used for cleaning the inside of coffee
+
makers. Soak the burner for 20 to
30 minutes. If the food doesn’t
rinse off completely, scrub it with
soap and water or a mild abrasive
cleanser and a damp cloth. ,;”’-
Before putting the burner back, dry “-”=
it thoroughly by setting it in a warm
i
oven for 30 minutes. Then place it
b
back in the range, making sure it is
]
properly seated and level.
/
6

CleaningGuide
-r
Note: Letcooktop parts cool before cleaning,
,
-
.“’
PART MATERIALSTOUSE
GENERALDIRECTIONS
Control Knobs
● Mild Soap and Water
Pull off knobs. Wash gently but do not soak. Dry and return controls to cooktop,
making sure to match tlat area on the knob and shaft.
Brushed Chrome
● Soap and Water When cooktop is cool, wash with warm, soapy water. Polish dry with a soft cloth. To
Finish
● Paste of Baking Soda and Water
remove stubborn soil, use a paste of baking soda and water. NEVER USE STEEL
WOOL, OVEN CLEANER, SCOURING POWDER OR ~HER ABRASIVE
CLEANERS. To restore luster, spread a thin tilm of baby oil on the surface and let it
stand five minutes. Remove excess oil with a clean cloth.
Porcelain Enamel
. Paper Towel
Avoid cleaning powders or harsh abrasives which may scratch the enamel. If acids
Finish
● Dry Cloth
should spill on the cooktop while it is hot, use a dry paper towel or cloth to wipe up
● Soap and Water
right away. When the surface has cooled, wash and rinse. For other spills, such as fat
smatterings, etc., wash with soap and water when cooled and then rinse. Polish with
dry cloth.
Grates
● Soap and Water
Lift out when cool. Soak 5 to 10minutes if desired in warm solution of dishwasher
● Soap-Filled Scouring Pad
detergent. Scour with materials mentioned here to remove burned-on food particles.
(Non-metallic)
DO NOT CLEAN IN SELF-CLEANING OVEN.
Chrome-Plated
● Soap and Water
Wash at’ter each cooking so unnoticed spatter will not burn on next time you cook.
Drip Pans
● Stiff Bristled Brush
To remove burned-on spatters, use any or all cleaning materials mentioned. Rub
● Soap-Filled Scouring Pad
lightly with scouring pad to prevent scratching of the surface. DO NOT CLEAN IN
(Non-metallic)
SELF-CLEANING OVEN.
Burners
● Solution for Cleaning
Wipe off burner heads. If heavy spillover occurs, remove burners from range (see
Inside of Coffee Makers
page 6) and soak them for 20 to 30 minutes in solution of hot water and product for
● Soap and Water
cleaning inside of coffee makers, such as Dip-It brand. If soil does not rinse off
● Mild Abrasive Cleanser
completely, scrub burners with soap and water or a mild abrasive cleanser and a damp
● Damp Cloth
cloth. Dry burners in a warm oven for 30 minutes before returning them to the range.
Questions?
Use This Problem Solver
If YouNeed Service
To obtain service, see your warranty
on the back page of this book.
We’re proud of our service and
want you to be pleased. If for some
reason you are not happy with the
service you receive, here are three
steps to follow for further help.
FIRST, contact the people who
FINALLY, if your problem is still
serviced your appliance. Explain
not resolved, write:
why you are not pleased. In most
Major Appliance
cases, this will solve the problem.
Consumer Action Panel
NEXT, if you are still not pleased,
20 North Wacker Drive
write ail the details-including Chicago, Illinois 60606
your phone number—to:
Manager, Consumer Relations
General Electric
Appliance Park
Louisville, Kentucky 40225
7

YOUR BUILWNCOOKTOP
WARRANTY
Save proof of original purchase date such as your salessliporcancelledchecktoestablishwarrantyperiod.
-II
WHAT IS COVERED
FULL ONE-YEAR WARRANTY
This warranty is extended to
For one year from date of original
the original purchaser and
any
purchase, we will provide, free of
succeeding owner for products
charge, parts and service labor
purchased for ordinary home use
in your home to repair or replace
in the
48 mainland states, Hawaii
any part of the cookfop that fails
and Washington, D.C. In Alaska the
because of a manufacturing defect.
warranty is the same except that it is
LIMITED because you must pay to
ship the product to the service shop
or for the service technician’s travel
costs to your home.
All warranty service will be provided
by our Factory Service Centers or
by our authorized Customer Care@
servicers during normal working
hours.
Look in the White or Yellow Pages
of your telephone directory for
GENERAL ELECTRIC COMPANY,
GENERAL ELE~RIC FACTORY
SERVICE, GENERAL ELECTRIC-
HOTPOINT FACXORY SERVICE or
GENERAL ELECTRIC CUSTOMER
CARE@ SERVICE.
WHAT S NU’r COVERED
● Service trips to your home to
teach you how to use the product.
Read your Use and Care material.
If you then have any questions
about operating the product,
please contact your dealer or our
Consumer Affairs office at the
address below, or call, toll free:
GE Answer CenteP
800.626.2000
consumer information service
. Improper installation.
● Replacement of house fuses or
resetting of circuit breakers.
● Failure of the product if it is used
for other than its intended purpose
or used commercially.
● Damage to product caused
by accident, fire, floods or acts
of God.
WARRANTOR IS NOT RESPONSIBLE
FOR CONSEQUENTIAL DAMAGES.
If you have an installation problem,
contact your dealer or installer.
You are responsible for providing
adequate electrical, gas, exhausting
and other connecting facilities.
Some states do not allow the exclusion or limitation of incidental or consequential damages, so the above limitation or exclusion
may not apply to you. This warranty gives you specific legal rights, and you may also have other rights which vary from state to state.
To know what your legal rights are in your state, consult your local or state consumer affairs office
Or your state’s Attorney General.
Warrantor: General Electric Company
II
If further help is needed concerning this warranty, write:
1[
Manager—Consumer Affairs, GE Appliances, Louisville, KY 40225
~
JGP600EH
JGP600AEH
[
P/N 560 S1-18;; 4
3-89
/