Char-Broil 12301672 User manual

Category
Barbecues & grills
Type
User manual

This manual is also suitable for

12301672
CHARCOAL GRILL
800
08/19/13 • 42805099
(Las herramientas no previstas)
(Outils non prévus)
during assembly, please call 1-800-241-7548.
l’assemblage, S’il vous plaît appelez 1-800-241-7548
durante el Ensamblado, llámenos Al 1-800-241-7548
Tools needed for assembly:
Phillips Screwdriver
Adjustable wrench
Outils nécessaires pour l’assemblage:
tournevis cruciforme
clé à molette
Herramientas necesarias para el montaje:
Destornilladao Phillips
Llave inglesa ajustable
(not supplied)
Read and follow all safety statements, assembly
instructions, and use and care directions before
attempting to assemble and cook.
Some parts may contain sharp edges! Wear
protective gloves if necessary.
THIS UNIT IS HEAVY! DO NOT attempt to
assemble without a helper.
CAUTION
WARNING
CARBON MONOXIDE HAZARD
Burning charcoal inside can kill you. It gives off carbon
monoxide, which has no odor. NEVER burn charcoal
inside homes, vehicles, or tents.
WARNING
Failure to follow all manufacturer’s instructions
could result in serious personal injury and/or
property damage.
CAUTION
CAUTION
TABLE OF CONTENTS
WARNING
WARNING: Indicates a potentially hazardous
situation which, if not avoided, could result in death
or serious injury.
CAUTION
CAUTION: Indicates a potentially hazardous
situation or unsafe practice which, if not avoided,
may result in minor or moderate injury.
Safety Symbols
The symbols and boxes shown below explain what each
heading means. Read and follow all of the messages
found throughout the manual.
This instruction manual contains
important information necessary for the
proper assembly and safe use of the
appliance.
Follow all warnings and instructions when
using the appliance.
Ce manuel d'instructions renferme des
renseignements importants pour vous aider à
assembler l'appareil correctement et à l'utiliser en
toute sécurité.
Respectez toutes les mises en garde et instructions
lorsque vous utilisez l'appareil.
Symboles de sécurité
Vous trouverez ci-dessous une explication de la
signification de chaque symbole. Lisez et respectez
toutes les consignes qui apparaissent partout dans le
présent guide.
AVERTISSEMENT
AVERTISSEMENT : indique une situation
potentiellement dangereuse qui, si elle n'est pas évitée,
pourrait entraîner la mort ou des blessures graves.
ATTENTION
ATTENTION : indique une situation potentiellement
dangereuse ou une pratique à risque qui, si elle
n'est pas évitée, pourrait entraîner des blessures
mineures ou modérément graves.
AVERTISSEMENT
DANGER DE MONOXYDE DE CARBONE
La combustion de charbon de bois à l'intérieur peut
causer la mort. Cela dégage du monoxyde de
carbone, qui est un gaz inodore. NE BRÛLEZ JAMAIS
de charbon à l'intérieur d'une maison, d'un véhicule ou
d'une tente.
AVERTISSEMENT
Omettre de suivre toutes les instructions du fabricant
pourrait causer des blessures graves ou des
dommages matériels.
ATTENTION
ATTENTION
ATTENTION
Lisez et respectez toutes les consignes de sécurité,
les instructions d'assemblage et les directives
d'emploi et d'entretien avant d'essayer d'assembler
cet appareil ou de l'utiliser pour la cuisson.
Certaines pièces peuvent présenter des bords
coupants! Portez des gants de protection au besoin.
CET APPAREIL EST LOURD! NE PAS essayer de
l'assembler sans aide.
TABLE DES MATIÈRES
Símbolos de seguridad
Los símbolos y las casillas ilustradas más adelante
explican lo que significa cada encabezado. Lea y cumpla
todo lo indicado en los mensajes que se encuentran en
el manual.
ADVERTENCIA
ADVERTENCIA: Indica una situación
potencialmente peligrosa que, de no evitarse,
podría causar la muerte o lesiones graves.
ADVERTENCIA
ADVERTENCIA: Indica una situación potencialmente
peligrosa o una práctica insegura que, de no evitarse,
podría causar lesiones leves o menores.
Este manual de instrucciones contiene
información importante, necesaria para
armar el aparato adecuadamente y usarlo
de manera segura.
Cuando use el aparato, siga todas las
advertencias y las instrucciones.
ÍNDICE
ADVERTENCIA
ADVERTENCIA
ADVERTENCIA
ADVERTENCIA
ADVERTENCIA
PELIGRO DE MONÓXIDO DE CARBONO
La combustión de carbón en interiores puede ser
fatal. Despide monóxido de carbono, que es inodoro.
NUNCA queme carbón dentro de las casas, de los
vehículos ni de las carpas.
El no cumplir con todas las instrucciones del
fabricante puede ocasionar lesiones graves y/o
daños materiales.
Antes de empezar a armar la parrilla y cocinar, lea
y siga todas las indicaciones de seguridad, las
instrucciones de armado y las instrucciones de uso
y mantenimiento.
Ciertas partes pueden tener bordes afilados. Si es
necesario, use guantes protectores.
¡ESTA UNIDAD ES PESADA! NO intente
armarla sin la ayuda de otra persona.
Leave this manual with consumer.
Keep this manual for future reference.
INSTALLER/ASSEMBLER:
CONSUMER:
INSTALLATEUR / ASSEMBLEUR :
A LA PERSONA QUE INSTALE
O ARME ESTA PARRILLA:
Vous devez laisser le présent manuel au client.
CLIENT :
Conservez ce manuel pour pouvoir le consulter
ultérieurement.
Deje este manual al cliente.
AL CONSUMIDOR:
Conserve este manual para que lo pueda
consultar en el futuro.
FOR OUTDOOR USE ONLY
POUR USAGE EN MILIEU
EXTÉRIEUR UNIQUEMENT.
ESTE JUEGO SÓLO SE PUEDE
USAR EN EXTERIORES
Product Record Information . . . . . . . . . . . . . . . . . . . . . . . 1
Safety Symbols. . . . . . . . . . . . . . . . . . . . . . . . . . . . . . . . . 2
Preparing to use your Grill . . . . . . . . . . . . . . . . . . . . . . . . 4
Grill Maintenance . . . . . . . . . . . . . . . . . . . . . . . . . . . . . . . 4
Cooking Tips . . . . . . . . . . . . . . . . . . . . . . . . . . . . . . . . . . .4
Limited Warranty. . . . . . . . . . . . . . . . . . . . . . . . . . . . . . . . 5
Parts List . . . . . . . . . . . . . . . . . . . . . . . . . . . . . . . . . . . . 10
Parts Diagram . . . . . . . . . . . . . . . . . . . . . . . . . . . . . . . . .13
Assembly . . . . . . . . . . . . . . . . . . . . . . . . . . . . . . . . . .14-27
Hardware List . . . . . . . . . . . . . . . . . . . . . . . . . . . . . . . . . 28
Registration Card . . . . . . . . . . . . . . . . . . . . . . . . . . . . . . 31
Información de inscripción de la garantía . . . . . . . . . . . .1
Símbolos de seguridad . . . . . . . . . . . . . . . . . . . . . . . . . .2
Preparativos para usar su parrilla . . . . . . . . . . . . . . . . . .8
Mantenimiento de la parrilla . . . . . . . . . . . . . . . . . . . . . . 8
Consejos para cocinar . . . . . . . . . . . . . . . . . . . . . . . . . . 8
Garantía limitada . . . . . . . . . . . . . . . . . . . . . . . . . . . . . . .9
Lista de piezas . . . . . . . . . . . . . . . . . . . . . . . . . . . . . . . 12
Diagrama de piezas . . . . . . . . . . . . . . . . . . . . . . . . . . . 13
Ensamblar. . . . . . . . . . . . . . . . . . . . . . . . . . . . . . . . .14-27
Lista de hardware. . . . . . . . . . . . . . . . . . . . . . . . . . . . . 30
Tarjeta de inscripción . . . . . . . . . . . . . . . . . . . . . . . . . . 31
Renseignements relatifs à la garantie . . . . . . . . . . . . . . . 1
Symboles de sécurité . . . . . . . . . . . . . . . . . . . . . . . . . . . . 2
Préparation à l’utilisation de votre grill . . . . . . . . . . . . . . . 6
Entretien du fumoir . . . . . . . . . . . . . . . . . . . . . . . . . . . . . ..6
Conseils culinaires. . . . . . . . . . . . . . . . . . . . . . . . . . . . . . . 6
Garantie limitée. . . . . . . . . . . . . . . . . . . . . . . . . . . . . . . . . 7
Liste des pièces. . . . . . . . . . . . . . . . . . . . . . . . . . . . . . . . 11
Schéma des pièces . . . . . . . . . . . . . . . . . . . . . . . . . . . . .13
Assemblaga . . . . . . . . . . . . . . . . . . . . . . . . . . . . . . . . 14-27
Liste du matériel. . . . . . . . . . . . . . . . . . . . . . . . . . . . . . . .29
Carte d’enregistrement . . . . . . . . . . . . . . . . . . . . . . . . . . 31
2
WARNING
All surfaces can be hot during use. Use protection
as required to prevent burning.
Do not use this unit on or near combustible
surfaces or structures such as wood decks, dry
leaves or grass, vinyl or wood siding, etc.
SEE OWNERS MANUAL FOR IMPORTANT SAFETY
INFORMATION.
WARNING
FAILURE TO READ AND FOLLOW INSTRUCTIONS
FOR LIGHTING CHARCOAL MAY RESULT IN
SERIOUS PERSONAL INJURY AND OR PROPERTY
DAMAGE.
ALWAYS USE CAUTION WHEN HANDLING HOT
COALS TO PREVENT INJURY.
ALWAYS LIGHT THE FIRE WITH THE GRILL LID
OPEN.
WARNING
Most surfaces on this unit are hot when in use. Use
extreme caution. Keep others away from unit Always
wear protective clothing to prevent injury.
Keep children and pets away.
Do not move this unit during operation.
Never substitute gasoline, kerosene or alcohol for
charcoal starter. In some states, the use of charcoal
starter is prohibited by law. In this case, paraffin-based
starter cubes can be substituted for charcoal starter.
Never use charcoal starter fluid with an electric starter.
WARNING
CALIFORNIA PROPOSITION 65
1. Combustible by-products produced when
using this product contains chemicals known to
the State of California to cause cancer, birth
defects, or other reproductive harm.
2. This product contains chemicals, including
lead and lead compounds, known to the State of
California to cause cancer, birth defects or other
reproductive harm.
Wash your hands after handling this product.
CAUTION
For residential use only. Do not use for
commercial cooking.
Pour utilisation domestique uniquement. Ne pas
utiliser à des fins commerciales.
PROPOSITION 65 DE CALIFORNIE
1. Les sous-produits de combustion libérés lors
de l'utilisation de ce produit sont reconnus dans
l'État de Californie comme étant susceptibles de
causer le cancer, des anomalies congénitales,
ou autres dangers relatifs à la reproduction.
2. Ce produit contient des produits chimiques, y
compris du plomb et des composés au plomb,
reconnus dans l'État de Californie comme étant
susceptibles de causer le cancer, des anomalies
congénitales, ou autres dangers relatifs à la
reproduction.
Lavez-vous les mains après avoir manipulé cet
appareil.
Les surfaces peuvent devenir chaudes pendant
l'utilisation de l'appareil. Portez des gants de
cuisine pour vous protéger contre les brûlures.
N'utilisez pas cet appareil sur ou près des
surfaces et des matières combustibles telles que
les terrasses en bois, les feuilles et les herbes
sèches, les parements en vinyle ou en bois, etc.
CONSULTEZ LE MANUEL DU PROPRIÉTAIRE
POUR PRENDRE CONNAISSANCE DES
CONSIGNES DE SÉCURITÉ IMPORTANTES.
La plupart des surfaces de cet appareil
deviennent chaudes pendant l'utilisation.
Soyez extrêmement prudent. Gardez les
autres personnes à l'écart de l'appareil. Portez
toujours des vêtements de protection pour
éviter les blessures.
Tenez les enfants et les animaux de
compagnie à l'écart de l'appareil.
Ne déplacez pas cet appareil pendant son
fonctionnement.
Ne remplacez jamais l'allume-feu liquide par
de l'essence, du kérosène ou de l'alcool. Dans
certains États, l'usage d'allume-feu liquide est
interdit par la loi. Dans un tel cas, les allume-
feu à base de cubes de paraffine peuvent être
utilisés à la place de l'allume-feu liquide.
N'utilisez jamais d'allume-feu liquide avec un
allume-feu électrique.
ATTENTION
AVERTISSEMENT
AVERTISSEMENT
AVERTISSEMENT
Sólo para uso particular. No la use para fines
comerciales.
Todas las superficies pueden estar calientes
durante el uso. Protéjase debidamente para no
sufrir quemaduras.
No use esta unidad en superficies ni en
estructuras combustibles, ni cerca de ellas, tales
como terrazas de madera, hojas o césped secos,
revestimientos de vinilo o de madera, etc.
LEA EN EL MANUAL DEL PROPIETARIO
INFORMACIÓN IMPORTANTE SOBRE MEDIDAS
DE SEGURIDAD.
EL NO LEER Y SEGUIR LAS INSTRUCCIONES
PARA ENCENDER EL CARBÓN, PUEDE
OCASIONAR LESIONES GRAVES Y DAÑOS
MATERIALES.
PARA EVITAR LESIONES, MANIPULE SIEMPRE
CON PRECAUCIÓN LOS CARBONES
CALIENTES.
ENCIENDA SIEMPRE EL FUEGO CON LA TAPA
DE LA AHUMADOR ABIERTA.
• La mayoría de las superficies de esta
unidad están calientes cuando está en
uso. Sea sumamente cuidadoso. No deje
que las demás personas se acerquen a la
unidad. Use siempre ropa protectora para
evitar lesionarse.
• No deje a los niños ni a las mascotas
acercarse a la unidad.
• No la mueva mientras esté en uso.
• Nunca use gasolina, queroseno ni alcohol
para encender el carbón. En algunos
estados, la ley prohíbe el uso de líquido
para encender carbón. En estos casos,
puede usar cubos a base de parafina en
lugar del líquido para encender carbón.
Nunca use líquido para encender carbón
con un encendedor eléctrico.
PROPOSITION 65 DEL ESTADO DE CALIFORNIA
1. En el estado de California se sabe que los
subproductos de la combustión en este
aparato, contienen substancias químicas que
causan cáncer, defectos congénitos u otras
lesiones al aparato reproductor.
2. Este producto contiene substancias químicas
como el plomo y sus compuestos que, en el
estado de California, se sabe que causan
cáncer, defectos congénitos u otras lesiones al
aparato reproductor.
Lávese las manos después de manipular este
producto.
ADVERTENCIA
ADVERTENCIA
ADVERTENCIA
ADVERTENCIA
LE FAIT DE NE PAS LIRE ET RESPECTER LES
INSTRUCTIONS POUR ALLUMER LE CHARBON
PEUT ENTRAÎNER DE GRAVES BLESSURES, DES
DOMMAGES MATÉRIELS OU LES DEUX.
SOYEZ TOUJOURS PRUDENT LORS DE LA
MANIPULATION DE BRIQUETTES CHAUDES AFIN
D'ÉVITER LES BLESSURES.
LE COUVERCLE DU GRIL DOIT TOUJOURS ÊTRE
OUVERT LORSQUE VOUS ALLUMEZ VOTRE GRIL.
AVERTISSEMENT
ADVERTENCIA
After a charcoal fire appears extinguished,
unconsumed embers can retain heat for up to 24
hours, and if exposed to fresh air, can burst into
flame unexpectedly. Any such embers outside the
firebox of the grill pose a fire hazard and can ignite
combustible surfaces such as wooden decks.
WARNING
Después de un fuego de carbón parece extinguirse,
brasas consumidas pueden retener el calor durante un
máximo de 24 horas, y si se expone al aire libre,
pueden estallar en llamas inesperadamente. Cualquier
brasas fuera de la caja de fuego de la parrilla
representan un peligro de incendio y pueden encender
superficies combustibles tales como terrazas de
madera.
Après un feu de charbon de bois semble éteint, les
braises non consommés peuvent retenir la chaleur
pour un maximum de 24 heures, et si elle est exposée
à l'air frais, peuvent s'enflammer de manière
inattendue. Toutes ces braises en dehors de la
chambre de combustion de la grille présentent un
risque d'incendie et peuvent s'enflammer surfaces
combustibles tels que les ponts en bois.
AVERTISSEMENT
ADVERTENCIA
3
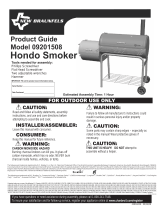
PREPARING TO USE YOUR GRILL
Before cooking with your grill, the following steps should
be closely followed to both cure the finish and season the
interior steel. Failure to properly follow these steps may
damage the finish and/or impart metallic flavors to your
first foods.
Brush all interior surfaces including grills and grates
with vegetable cooking oil.
Build a small fire on the charcoal grate or pan, being
sure not to lay coals against the walls.
Close lid, position dampers at approximately one
quarter turn open. This burn should be sustained for at
least two hours. Begin increasing the temperature by
opening the dampers halfway and adding more
charcoal. Your grill is now ready for use.
Rust can appear on the inside of your grill. Maintaining a
light coat of vegetable oil on the interior surfaces will aid
in the protection of your grill. Exterior surfaces of the grill
may need occasional touch up. We recommend the use
of commercially available black high temperature spray
paint. NEVER PAINT THE INTERIOR OF THE GRILL!
Please see information regarding Uncoated Cast Iron
Grates below.
First Time Use:
Before using a cast iron grate or other cast iron cooking
tool, wash it thoroughly with a mild dishwashing liquid to
remove the protective wax coating applied for shipping.
Rinse with hot water and dry completely with a soft cloth
or paper towel. NEVER ALLOW TO DRAIN DRY OR
WASH IN A DISHWASHER. Now season the grates to
prevent rust and sticking.
Seasoning:
A solid vegetable shortening is recommended for the
initial seasoning. Spread a thin coating of solid vegetable
shortening over the entire surface, including all corners,
with a paper towel. Do not use salted fats such as butter
or margarine.
Preheat grill for 15 minutes; carefully place grates in the
grill. Allow the grill to heat grates for 1 to 1 ½ hours. Allow
the fire to burn out on its own, and leave cooking grates
in grill until they are cool. Your cast iron cooking grates
are now ready to use.
To Prevent Rusting:
Re-season your grates frequently, particularly when new.
If rust occurs, it is an indication that the grates have not
been seasoned enough or the seasoning has been
burned off. Clean with a heavy brush. Reapply vegetable
shortening and heat as indicated above to re-season the
grates.
Maintenance:
Do not do a burn-off after you grill, but rather leave the
cooking residues on the grates to keep a protective
coating on the cast iron. Do a burn-off just before you
grill. The more you use your cast iron grates, the easier
the maintenance will be.
Store in a dry place. If you store your grates for an
extended period of time, apply a light coating of vegetable
shortening, then wipe dry with a paper towel.
Always open lid BEFORE opening the ash door
to check fire or fuel.
Always open the ash door slowly. Never attempt
to look inside the grill while opening the ash
door when the grill is in use.
Failure to follow these instructions could result
in injury.
Unburned gas can accumulate and cause a
flash fire if the lid is not opened first.
WARNING
Building Your Fire
1. Stack charcoal briquettes or wood into a pyramid-
shaped pile on top of the charcoal grate. We
recommend using 2 pound (approximately 30
briquettes) to start your fire, adding more as needed.
2. If using lighter fluid, a chimney starter, electric starter,
or other type of fire starter, light your fire according to
the manufacturer's instructions.
3. Always light the fire with the grill lid open.
Leave lid open until briquettes are fully lit. Failure to do
this could trap fumes from charcoal lighter fluid in grill
and may result in a flash fire when lid is opened.
4. Never add charcoal lighter fluid to hot or warm coals as
flashbacks may occur causing injury.
5. You are ready to begin cooking when the pile of
briquettes ashes over and produces a red glow
(approximately 12 – 15 minutes).
6. Depending on your cooking method, either leave the
briquettes in a pile or spread evenly across the
charcoal grate using a long-handled poker.
COOKING TIPS
Know When Your Fire is Ready
Successful charcoal grilling depends on a good fire. The
general rule for knowing when your coals are ready for
grilling is to make sure that 80 percent or more of the
coals are ashy gray. Using caution, arrange the hot coals
on your charcoal grate based on your desired method of
cooking. Here are a few steps you can take to adjust the
temperature of your fire:
-If it is too hot, spread the coals out a bit more, which
makes the fire less intense.
-Raise or lower the adjustable charcoal grate.
-Partially close the vents in the grill, which reduces the
amount of oxygen that feeds the fire.
-Use the indirect grilling method, with coals to either side
of drip pan and the food over the pan rather than directly
over the coals.
-In the event of a severe flare-up, spray the flames with
water from a squirt bottle. Be careful, spraying with water
tends to blow ashes around and make a mess.
-Add briquettes 2 or 3 at a time to increase the burn time.
Allow 10 minutes for coals to ash over before adding
more.
GRILL MAINTENANCE
Frequency of clean up is determined by how often the
grill is used. Make sure coals are completely extinguished
before cleaning inside of the unit. Thoroughly rinse with
water and allow to air dry before using again. Wipe out
the interior of the unit with a cloth or paper towels.
When finished cooking, and the unit has adequately
cooled, clean out all remaining ashes. Ashes collect
moisture, which can lead to premature rusting and decay.
Periodically coating the interior surfaces with vegetable
oil will aid in the protection of your unit. Also, occasional
touch up of the exterior paint will be required. Black, high-
temperature spray paint is recommended. NEVER PAINT
THE INTERIOR OF THE UNIT.
Cooking Surface: If a bristle brush is used to clean any
of the grill cooking surfaces, ensure no loose bristles
remain on cooking surfaces prior to grilling. It is not
recommended to clean cooking surfaces while grill is hot.
Direct and Indirect Grilling
Direct Grilling - For most grilling, the ignited coals are
spread in a single layer under the food. This is called
direct grilling and is appropriate for relatively quick-
cooking items such as hamburgers, steaks and most
seafood. The single layer of coals emits even, steady
heat, whether the grill lid is open or closed, and
represents the way most people grill. For more control,
pile some of the coals on one side of the grill where they
will emit intense heat. You can move the food around on
the grill, setting it over the very hot coals when you want
to sear it or when a thick piece needs to cook a little more
quickly. You can also use the adjustable charcoal grate
and dampers to control the temperature in your grill.
Indirect Grilling - For items that take longer to cook, you
will want to use indirect grilling. This method is for long,
slow cooking in a covered grill. For indirect cooking, the
coals are piled two or three coals deep on one side of the
grill, or divided and piled on two sides. This leaves an
empty space next to the coals or between them. Food
cooked over indirect heat is often started over direct heat
and then moved to the cooler (empty) part of the grill for
even, slow cooking. To make the heat as even as
possible, construct two piles of coals. It is common to
place a metal drip pan in the empty space beside or
between the coals, which is filled with water, wine, beer,
broth, or a combination. Place the food directly over the
drip pan. This injects a little extra moisture into the
cooking environment and also catches dripping juices,
which makes clean-up a little easier and reduces the
possibility of flare-ups. (Remember to keep a spray bottle
filled with water on hand to extinguish any flare-ups.)
Once you get used to the indirect method, you may prefer
to use it for more grilling tasks. Although it may take a
little longer, it is an excellent cooking method and a sure
way to prevent the food from burning and to promote
even cooking.
Grilling with Wood Chips/Wood Chunks
For a more robust smoke flavor while using charcoal
briquettes or lump charcoal, try adding wood chips or
several wood chunks to the fire. Wood chunks are
available in a variety of natural flavors, and can be used
alone or in addition to charcoal. As a general rule, any
hardwood that bears a fruit or nut is suitable for cooking.
However, different woods have very different tastes.
Experiment with different woods to determine your
personal favorite, and always use well-seasoned wood.
Green or fresh-cut wood can turn food black, and tastes
bitter.
Our Recommendations:
Chicken - Alder, Apple, Hickory, Mesquite
Beef - Hickory, Mesquite, Oak
Pork - Fruitwoods, Hickory, Oak
Lamb - Fruitwoods, Mesquite
Veal - Fruitwoods, Grapevines
Seafood - Alder, Mesquite
Vegetables – Mesquite
Ground Meat
Beef, Pork, Veal, Lamb..................................160°F
Turkey, Chicken.............................................165°F
Fresh Beef, Veal, Lamb
Medium Rare...................................................145°F
(let stand 3 minutes before cutting)
Medium............................................................160°F
Well Done.........................................................170°F
Poultry
Chicken & Turkey, whole..................................165°F
Poultry Parts.....................................................165°F
Duck & Goose..................................................165°F
Fresh Pork
Medium Rare...................................................145°F
(let stand 3 minutes before cutting)
Medium............................................................160°F
Well Done........................................................170°F
Internal Cooking Temperatures
USDA Recommended
4
This warranty only applies to units purchased from an authorized retailer. Manufacturer warrants to the original consumer-purchaser only that this
product shall be free from defects in workmanship and materials after correct assembly and under normal and reasonable home use for the periods
indicated below beginning on the date of purchase*. The manufacturer reserves the right to require that defective parts be returned, postage and or
freight pre-paid by the consumer for review and examination.
*Note: A dated sales receipt WILL be required for warranty service.
The original consumer-purchaser will be responsible for all shipping charges for parts replaced under the terms of this limited warranty.
This limited warranty is applicable in the United States and Canada only, is only available to the original owner of the product and is not transferable.
Manufacturer requires proof of your date of purchase. Therefore, you should retain your sales slip or invoice. Registering your product is not a
substitute for proof of purchase and the manufacturer is not responsible for or required to retain proof of purchase records.
This limited warranty applies to the functionality of the product ONLY and does not cover cosmetic issues such as scratches, dents, corrosions or
discoloring by heat, abrasive and chemical cleaners or any tools used in the assembly or installation of the appliance, surface rust, or the
discoloration of stainless steel surfaces. Paint is not warranted and will require touch up. RUST is not considered a manufacturing or materials defect.
This limited warranty will not reimburse you for the cost of any inconvenience, food, personal injury or property damage.
ITEMS MANUFACTURER WILL NOT PAY FOR:
1. Shipping cost, standard or expedited, for warranty and replacement parts
2. Service calls to your home.
3. Repairs when your product is used for other than normal, single-family household or residential use.
acts of God, improper installation or maintenance, installation not in accordance with electrical or plumbing codes, or use
of products not approved by the manufacturer.
5. Any food loss due to product failures or operating difficulties.
6. Replacement parts or repair labor costs for units operated outside the United States or Canada.
7. Pickup and delivery of your product.
8. Repairs to parts or systems resulting from unauthorized modifications made to the product.
9. The removal and/or reinstallation of your product.
DISCLAIMER OF IMPLIED WARRANTIES and LIMITATION OF REMEDIES
Repair or replacement of defective parts is your exclusive remedy under the terms of this limited warranty. In the event of parts availability issues,
Manufacturer will not be responsible for any consequential or incidental damages arising from the breach of either this limited warranty or any
applicable implied warranty, or for failure or damage resulting from acts of God, improper care and maintenance, grease fire, accident, alteration,
replacement of parts by anyone other than Manufacturer, misuse, transportation, commercial use, abuse, hostile environments (inclement weather,
acts of nature, animal tampering), improper installation or installation not in accordance with local codes or printed manufacturer instructions.
THIS LIMITED WARRANTY IS THE SOLE EXPRESS WARRANTY GIVEN BY THE MANUFACTURER. NO PRODUCT PERFORMANCE
SPECIFICATION OR DESCRIPTION WHEREVER APPEARING IS WARRANTED BY MANUFACTURER EXCEPT TO THE EXTENT SET
FORTH IN THIS LIMITED WARRANTY. ANY IMPLIED WARRANTY PROTECTION ARISING UNDER THE LAWS OF ANY STATE,
INCLUDING IMPLIED WARRANTY OF MERCHANTABILITY OR FITNESS FOR A PARTICULAR PURPOSE OR USE, IS HEREBY
LIMITED IN DURATION TO THE DURATION OF THIS LIMITED WARRANTY.
Neither dealers nor the retail establishment selling this product has any authority to make any additional warranties or to promise remedies
in addition to or inconsistent with those stated above. Manufacturer's maximum liability, in any event, shall not exceed the purchase price of the
product paid by the original consumer.
NOTE: Some states do not allow an exclusion or limitation of incidental or consequential damages, so some of the above limitations or exclusions
may not apply to you. This limited warranty gives you specific legal rights as set foth herein. You may also have other rights which vary from state
to state. In the state of California only, if refinishing or replacement of the product is not commercially practicable, the retailer selling this product or
the Manufacturer will refund the purchase price paid for the product, less the amount directly attributable to use by the original consumer-purchaser
prior to discovery of the nonconformity. In addition, in the state of California only, you may take the product to the retail establishment selling this
product in order to obtain performance under this limited warranty.
If you wish to obtain performance of any obligation under this limited warranty, you should
write to:
Consumer Relations
P. O. Box 1240
Columbus, GA 31902-1240
Consumer returns will not be accepted unless a valid Return Authorization is first acquired. Authorized returns are clearly marked on the outside of
the package with an RA number and the package is shipped freight/postage pre-paid. Consumer returns that do not meet these standards will be
refused.
LIMITED WARRANTY
WS_1 Rev05
4. Damage, failures, or operating difficulties resulting from accident, alteration, careless handling, misuse, abuse, fire, flood,
the manufacturer reserves the right to substitute like or similar parts that are equally functional.
SCOPE OF COVERAGE PERIOD OF COVERAGE TYPE OF FAILURE COVERAGE
PERFORATION, MANUFACTURING,
AND MATERIAL DEFECTS ONLY
All Parts
1 year from date of purchase*
5
Key Qty Description
A 1 Lid Assembly
B 1 Swing-Away Grate
C 3 Cooking Grate
D 1 Handle, F/Clean Out Door w/Latch
E 2 Air Damper
F 1 Charcoal Pan w/Adjust Assembly
G 2 Hinge Assembly
H 1 Left Front Leg
I 1 Tool Hook
J 1 Left Rear Leg
K 1 Firebox Front Panel
L 1 Firebox Rear Panel
M 1 Axle
N 1 Handle, F/Ash Pan
O 1 Right Front Leg
P 1 Bottom Shelf
Q 2 Wheel
R 2 Firebox Side Panel
S 1 Clean Out Door
PARTS LIST
Key Qty
Description
T 1 Smokestack
U 1 Adjuster Crank Handle
V 1 Lid Handle
W 2 Handle Seat
X 2 Caster, Locking
Y 1 Ash Pan
Z 1 Right Rear Leg
AA 1 Left Side Shelf
BB 1 Right Side Shelf
CC 1 Logo Plate
DD 1 Temperature Gauge
EE 1 Frame, F/Clean Out Door
FF 1 Damper, F/Smokestack
GG 1 Charcoal Pan
HH 1 Spring F/Smokestack Damper
II 1 Cooking Grate Lifter
Not Pictured
... 1 Assembly Manual, English,
French, Spanish
... 1 Hardware Pack
... 1 Caster Wrench
10
ASSEMBLY ASSEMBLAGE ENSAMBLAR
1
FIRST, GET A HELPER! This unit is heavy and requires a second person for lifting and moving. NEXT, pick a suitable
location to work. Open the carton and slit the corners so that the carton lays flat. This will give you a protective surface
during assembly.
Note: For ease of assembly this step performed with parts upside down. See figure below.
To begin assembly, Attach Firebox Side Panels to Front/Rear Firebox Panels using (8) 1/4-20x1/2” Screws and (8) 1/4-20
Flange Nuts.
Firebox Side Panel
Rear Firebox Panel
Firebox Side Panel
Front Firebox Panel
1/4-20 Flange Nuts
1/4-20x1/2” Screws
D'abord, obtenir une aide! Cet appareil est lourd et nécessite une deuxième personne pour soulever et déplacer. Ensuite,
choisissez un endroit approprié pour le travail. Ouvrez le carton et les coins fente de sorte que le carton à plat. Cela vous
donnera une surface de protection lors de l'assemblage.
Note: Pour faciliter le montage de cette étape réalisée avec des pièces à l'envers. .Pour commencer l'assemblage,
fixez le panneau d'extrémité foyer à l'avant / arrière à l'aide de panneaux foyer (8) 1/4-20x1/2 "vis et écrous (8)1/4-
20 bride.
panneau d’extrémité foyer
panneau avant du foyer
1/4-20 écrou à bride
panneau arrière du foyer
1/4-20x 1/2” vis
panel trasero del fogón
caja de fuego panel de extremo
panel frontal del fogón
1/4-20 brida de la tuerca
1/4-20x1/2” tornillos
Nota: Para facilitar el montaje realizado este paso con las piezas al revés. Ver la figura abajo. Para empezar el
montaje, Una el panel frontal de la caja de fuego final y paneles traseros con cámara de combustión (8) 1/4-20x1/2"
tornillos y tuercas de (8) 1/4-20 brida.
PRIMERO, consiga un ayudante! Esta unidad es pesada y requiere de una segunda persona para levantar y mover. A
continuación, elija un lugar adecuado para trabajar. Abra la caja y le cortó las esquinas para que el cartón esté plano.
Esto le dará una superficie de protección durante el montaje.
caja de fuego panel de extremo
1/4-20x1/2” Screws
1/4-20x 1/2” vis
1/4-20x1/2” tornillos
1/4-20x1/2” Screws
1/4-20x 1/2” vis
1/4-20x1/2” tornillos
14
4
Turn grill upside down. Screw (2) Casters into Front/Rear Legs and tighten with Flat Wrench provided with grill.
Leg
Attach Bottom Shelf to Legs using (4) 1/4-20x2 3/8” Screws.
1/4-20x2 3/8” Screws
5
Attacher la tablette inférieure aux jambes à l'aide (4) 1/4-20x2 3/8 vis.
Tour grill à l'envers. vis (2) roulettes en avant gauche/arrière des jambes et serrer avec la clé plate fournie avec le gril.
la jambe
1/4-20x2 3/8” vis
1/4-20x2 3/8” vis
1/4-20x2 3/8” tornillos
Coloque el estante inferior a las patas con (4) 1/4-20x2 3/8" tornillos.
la pierna
Gire a la parrilla al revés. El tornillo (2) ruedas en la parte delantera hacia la derecho o las patas traseras y apriete con
una llave plana provista de parrilla.
Caster
roulette
rueda
Caster
roulette
rueda
Leg
la jambe
la pierna
17
8
1/4-20x1/2
Screws
1/4-20x1/2” Screw
Handle
1/4-20x1/2” Screw
Firebox
Attach the Handle to the front of Ash Pan with (2) 1/4-20x1/2” Screws. Slide the Ash Pan into the bottom of the Firebox.
9
1/4-20x1/2
Screws
Attach Lid Handle and Handle Seats to the Lid using (2) 1/4-20x1/2” Screws.
Flat WasherLock Washer
1/4-20x1/2” Screw
Lid
Lid Handle
Handle Seats
1/4-20x1/2” Screw
1/4-20x1/2” vis
poignée
1/4-20x1/2” vis
foyer
Fixer la poignée à l'avant du tiroir à cendres avec (2) 1/4-20x1/2 "vis. Faites glisser le tiroir à cendres dans le fond de la
chambre de combustion.
1/4-20x1/2” vis
couvercle
la poignée du couvercle
poignée de sièges
1/4-20x1/2” vis
Fixer le couvercle de la poignée et la poignée de sièges à couvercle à l'aide (2) 1/4-20x1/2 "vis.
1/4-20x1/2” tornillos
manejar
1/4-20x1/2” tornillos
Instale la manija al frente del cenicero con (2) 1/4-20x1/2 " tornillos. Deslice el cenicero en la parte inferior de la caja de fuego.
caja de fuego
1/4-20x1/2” tornillos
tapa
mango de la tapa
manejar los asientos
1/4-20x1/2” tornillos
Coloque la tapa mango del asiento a la tapa usando (2) 1/4-20x1/2 " tornillos.
20
HARDWARE LIST
Hardware is shown actual size. You may have spare hardware after assembly is complete.
1/4-20 x 2 3/8” Machine Screw Qty. 4
1/4-20 x 1 5/8” Machine Screw Qty. 4
1/4-20 x 1 3/8” Machine Screw Qty. 4
1/4-20 x 5/8” Shoulder Screw Qty. 8
1/4-20 x 1/2” Machine Screw Qty. 25
Hair Pin Clip Qty. 5
5mm Flat Washer Qty. 2
10mm Flat Washer Qty. 2
#10-24 Reversible Lock Nut Qty. 2
Air Damper Wheel
1/4-20 x 1/2” Hex Bolt Qty. 4
#10-24 x 3/8” Machine Screw Qty. 2
1/4-20 Flange Nut Qty. 14
28
  • Page 1 1
  • Page 2 2
  • Page 3 3
  • Page 4 4
  • Page 5 5
  • Page 6 6
  • Page 7 7
  • Page 8 8
  • Page 9 9
  • Page 10 10
  • Page 11 11
  • Page 12 12
  • Page 13 13
  • Page 14 14
  • Page 15 15
  • Page 16 16
  • Page 17 17
  • Page 18 18
  • Page 19 19
  • Page 20 20
  • Page 21 21
  • Page 22 22
  • Page 23 23
  • Page 24 24
  • Page 25 25
  • Page 26 26
  • Page 27 27
  • Page 28 28
  • Page 29 29
  • Page 30 30
  • Page 31 31

Char-Broil 12301672 User manual

Category
Barbecues & grills
Type
User manual
This manual is also suitable for

Ask a question and I''ll find the answer in the document

Finding information in a document is now easier with AI