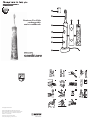
Philips HX6311 User manual
- Category
- Electric toothbrushes
- Type
- User manual

Sonicare For Kids
rechargeable
sonic toothbrush
4235.020.7393.1
www.philips.com/Sonicare
©2013 Koninklijke Philips N.V. (KPNV). All rights reserved.
PHILIPS and the Philips shield are registered trademarks of KPNV.
Sonicare and the Sonicare logo are trademarks of Philips Oral
Healthcare, Inc. and/or KPNV.
Protected by U.S. and international patents.
Other patents pending. Reg. U.S. Pat. & Tm. Off.
2 3 4 5
6
7 8 9
10 11 12 13
14 15 16

ENGLISH
Introduction
Congratulations on your purchase and welcome to Philips! To fully
benet from the support that Philips offers, register your product at
www.philips.com/welcome.
General description (Fig. 1)
A Hygienic travel cap
B Brush head
C Handle with soft grip
D Power on/off button with battery charge indicator
E Removable panel with replaceable stickers
F Brushing mode button with mode lights
G Charger
H Panel
I Sticker
Important
Read this user manual carefully before you use the appliance and save it
for future reference.
Danger
- Keep the charger away from water. Do not place or store it over or near
water contained in a bathtub, washbasin, sink etc. Do not immerse the
charger in water or any other liquid. After cleaning, make sure the charger
is completely dry before you connect it to the mains.
- This appliance is not a toy. Check brush heads regularly for cracks.
Cracked brush heads may present a choke hazard.
Warning
- The mains cord cannot be replaced. If the mains cord is damaged, discard the
charger. Always have the charger replaced with one of the original type in
order to avoid a hazard.
- If the appliance is damaged in any way (brush head, toothbrush handle
and/or charger), stop using it.
- This appliance contains no serviceable parts. If the appliance is damaged,
contact the Consumer Care Centre in your country (see chapter ‘Guarantee
and service’).
- Do not use the charger outdoors or near heated surfaces.
- This appliance is not intended for use by persons (including children)
with reduced physical, sensory or mental capabilities, or lack of experience
and knowledge, unless they have been given supervision
or instruction concerning use of the appliance by a person responsible
for their safety.
- Children should be supervised to ensure that they do not play with
the appliance.
Caution
- If you have had oral or gum surgery in the previous 2 months, consult
your dentist before you use the toothbrush.
- Consult your dentist if excessive bleeding occurs after using this toothbrush
or if bleeding continues to occur after 1 week of use.
- If you have medical concerns, consult your doctor before you use the
Sonicare.
- The Sonicare toothbrush complies with the safety standards for
electromagnetic devices. If you have a pacemaker or other implanted device,
contact your physician or the device manufacturer of the implanted device
prior to use.
- This appliance has only been designed for cleaning teeth, gums and tongue.
Do not use it for any other purpose. Stop using the appliance and contact
your doctor if you experience any discomfort or pain.
- Do not use other brush heads than the ones recommended by the
manufacturer.
- If your toothpaste contains peroxide, baking soda or other bicarbonate
(common in whitening toothpastes), thoroughly clean the brush head and the
handle with soap and water after each use. Otherwise the plastic may crack.
- Do not clean brush heads, handle, charger, charger cover or replaceable
panels in the dishwasher or a microwave.
This Philips appliance complies with all applicable standards and regulations
regarding exposure to electromagnetic elds.
Preparing for use
Applying the replaceable panel
The Sonicare For Kids comes with 1 replaceable panel.
1 Remove the adhesive backing from the panel.
2 Apply the panel to the white section on the front of the handle (Fig. 2).
Note: Make sure you line up the cut-out areas on the panel with the buttons on the
front of the handle.
3 Apply your favorite sticker to the panel as shown on the sticker
sheet (Fig. 3).
Reapplying a panel that has been removed
1 Rinse the panel in warm water; you may also use a mild detergent to clean it.
2 Let the panel air dry.
3 Reapply the panel to the white section on the front of the handle.
Attaching the brush head
1 Align the brush head so the bristles point in the same direction as the front
of the handle (Fig. 4).
2 Firmly press the brush head onto the metal shaft until it stops.
Note: There is a small gap between the brush head and the handle.
Charging the Sonicare
1 Put the mains plug of the charger in the wall socket.
2 Place the handle on the charger (Fig. 5).
, The battery charge indicator in the power on/off button ashes to indicate
that the toothbrush is charging.
, When the Sonicare is fully charged, the battery charge indicator stops
ashing and remains on.
Note: If the battery charge of the Sonicare is low, you hear 3 beeps and the battery
charge indicator ashes rapidly for 30 seconds after the brushing cycle.
Note: To keep the battery fully charged at all times, you may keep the Sonicare on the
charger when not in use. When the battery is fully charged, the charger uses a minimal
amount of energy. It takes at least 24 hours to fully charge the battery.
Using the Sonicare For Kids
Brushing instructions
For children under age 8, it is recommended that a parent or adult caregiver
perform toothbrushing.
1 Wet the bristles and apply a small amount of toothpaste.
2 Place the toothbrush bristles against the teeth at a slight angle towards the
gumline (Fig. 6).
3 Press the power on/off button to switch on the Sonicare.
4 Apply light pressure to maximise Sonicare’s effectiveness and let the
Sonicare toothbrush do the brushing for you.
5 Gently move the brush head slowly across the teeth in a small back and
forth motion so the longer bristles reach between the teeth. Continue this
motion throughout the brushing cycle.
Note: To make sure you brush evenly throughout the mouth, divide the mouth into 4
sections using the KidPacer feature (see chapter ‘Features’).
6 Begin brushing in section 1 (outside top teeth) until a tune indicates it is
time to move to section 2 (inside top teeth). At the next tune, move to
section 3 (outside bottom teeth). The next tune indicates it is time to move
to section 4 (inside bottom teeth). The toothbrush automatically switches
off at end of the brushing cycle (Fig. 7).
7 After you have completed the brushing cycle, you can spend additional
time brushing the chewing surfaces of your teeth and areas where staining
occurs. You may also brush your tongue, with the toothbrush switched on
or off, as you prefer (Fig. 8).
The Sonicare For Kids is safe to use on:
- Braces (brush heads wear out sooner when used on braces)
- Dental restorations (llings, crowns, veneers)
Brushing modes
The toothbrush automatically starts in the default high mode.
1 Press the brushing mode button to toggle between modes (Fig. 9).
, The green mode light indicates the selected mode.
- High mode: Full-strength mode designed for older/independent brushers.
- Low mode: Reduced power mode used for training and introducing younger
children to the sonic experience.
Features
KidTimer
- The KidTimer plays a congratulatory tune at the end of the pre-determined
brushing time. Additionally, the KidTimer automatically switches off the
Sonicare when the brushing cycle is complete.

Removing the rechargeable battery
Please note that this process is not reversible.
To remove the rechargeable battery, you need a at-head (standard) screwdriver.
Observe basic safety precautions when you follow the procedure below. Be sure
to protect your eyes, hands, ngers and the surface on which you work.
1 To deplete the rechargeable battery of any charge, remove the handle from
the charger, switch on the Sonicare and let it run until it stops. Repeat this
step until you can no longer switch on the Sonicare.
2 Insert a screwdriver into the slot located in the bottom of the handle and
turn anticlockwise until you see a gap between the bottom cap and the
handle (Fig. 14).
3 Insert the screwdriver into the gap and pry the bottom cap out of the
handle (Fig. 15).
4 Hold the handle upside down and push down on the shaft to release the
internal components of the handle (Fig. 16).
5 Insert the screwdriver under the circuit board, next to the battery
connections, and twist to break the connections. Remove the circuit board
and pry the battery from the plastic carrier (Fig. 17).
Guarantee and service
If you need service or information or if you have a problem, please visit the Philips
website at www.philips.com or contact the Philips Consumer Care Centre in your
country (you nd its phone number in the worldwide guarantee leaet). If there is
no Consumer Care Centre in your country, go
to your local Philips dealer.
Guarantee restrictions
The terms of the international guarantee do not cover the following:
- Brush heads
- Replaceable panels
- Damage caused by misuse, abuse, neglect, alterations or
unauthorised repair
- Normal wear and tear, including chips, scratches, abrasions, discolouration
or fading
- Replaceable stickers
DEUTSCH
Einführung
Herzlichen Glückwunsch zu Ihrem Kauf und willkommen bei Philips! Um das
Kundendienstangebot von Philips vollständig nutzen zu können, sollten Sie Ihr
Produkt unter www.philips.com/welcome registrieren.
Allgemeine Beschreibung (Abb. 1)
A Hygienische Schutzkappe
B Bürstenkopf
C Handstück mit weicher Griffäche
D Ein-/Ausschalter mit Akkuladestandsanzeige
E Abnehmbare Blende mit austauschbaren Aufklebern
F Taste für Putzmodus mit Beleuchtung
G Ladegerät
H Display
I Aufkleber
Wichtig
Lesen Sie diese Bedienungsanleitung vor dem Gebrauch des Geräts aufmerksam
durch, und bewahren Sie sie für eine spätere Verwendung auf.
Gefahr
- Halten Sie das Ladegerät von Wasser fern! Stellen Sie es nicht über oder nahe
einer mit Wasser gefüllten Badewanne bzw. einem Waschbecken ab. Tauchen
Sie das Ladegerät nicht in Wasser oder andere Flüssigkeiten. Schließen Sie
das Ladegerät nach dem Reinigen erst wieder an das Stromnetz an, wenn es
vollkommen trocken ist.
- Dieses Gerät ist kein Spielzeug. Überprüfen Sie die Bürstenköpfe
regelmäßig auf Bruchstellen. Brechen Bürstenköpfe ab, besteht
Erstickungsgefahr.
Warnhinweis
- Das Netzkabel kann nicht ausgetauscht werden. Wenn das Netzkabel
beschädigt ist, muss das Ladegerät entsorgt werden. Ersetzen Sie ein defektes
Ladegerät stets durch ein Original-Ersatzteil, um Gefährdungen
zu vermeiden.
- Benutzen Sie das Gerät nicht, wenn es beschädigt ist (Bürstenkopf, Handstück
und/oder Ladegerät).
- When in high mode, the KidTimer is set at 2 minutes.
- When in low mode, the KidTimer is set at 1 minute and slowly increases to 2
minutes over time. This slow increase in brushing time helps young children
reach the dentist recommended 2 minutes of brushing.
Note: Instruct your child to brush until they hear the congratulatory tune and the
toothbrush switches off.
KidPacer
The KidPacer uses a short series of tones to alert the brusher to move to the next
brushing quadrant of the mouth. This ensures that the teeth get a thorough, overall
clean, see section ‘Brushing instructions’ in chapter ‘Using the Sonicare For Kids’.
Easy-start
- The Sonicare For Kids comes with the Easy-start feature activated.
- The Easy-start feature gently increases the power over the rst
14 brushings.
Note: Each of the rst 14 brushings must be at least 1 minute in length
to properly advance through the Easy-start ramp-up cycle.
Deactivating or activating the Easy-start feature
1 Attach the brush head to the handle.
2 Place the handle in the plugged-in charger.
- To deactivate Easy-start:
Press and hold the power on/off button for 2 seconds. You hear 1 beep to
indicate that the Easy-start feature has been deactivated.
- To activate Easy-start:
Press and hold the power on/off button for 2 seconds. You hear 2 beeps to
indicate that the Easy-start feature has been activated.
Note: Using the Easy-start feature beyond the initial ramp-up period is not
recommended and reduces Sonicare’s effectiveness in removing plaque.
Cleaning
Do not clean brush heads, handle, charger, charger cover or replaceable
panels in the dishwasher or a microwave.
Toothbrush handle
1 Remove the brush head and rinse the metal shaft area with warm
water (Fig. 10).
Do not push on the rubber seal on the metal shaft with sharp objects, as this
may cause damage.
2 Use a damp cloth to wipe the entire surface of the handle.
Brush head
1 Rinse the brush head and bristles after each use (Fig. 11).
2 Remove the brush head from the handle and rinse the brush head
connection at least once a week with warm water.
Charger
1 Unplug the charger before you clean it.
2 Use a damp cloth to wipe the surface of the charger.
Storage
- If you are not going to use the Sonicare for an extended period of time,
unplug the charger, clean it and store it in a cool and dry place away from
direct sunlight.
- You can store a brush head on the brushing head holder at the back of
the charger.
Replacement
Brush head
- Replace Sonicare brush heads every 3 months to achieve optimal results.
- Use only Sonicare For Kids replacement brush heads.
Environment
- Do not throw away the appliance with the normal household waste at the
end of its life, but hand it in at an ofcial collection point for recycling. By
doing this, you help to preserve the environment (Fig. 12).
- The built-in rechargeable battery contains substances that may pollute the
environment. Always remove the battery before you discard and hand in the
appliance at an ofcial collection point. Dispose of the battery at an ofcial
collection point for batteries. If you have trouble removing the battery, you
can also take the appliance to a Philips service centre. The staff of this centre
will remove the battery for you and will dispose of it in an environmentally
safe way (Fig. 13).
Page is loading ...
Page is loading ...
Page is loading ...
Page is loading ...
Page is loading ...
Page is loading ...
Page is loading ...
Page is loading ...
Page is loading ...
Page is loading ...
-
 1
1
-
 2
2
-
 3
3
-
 4
4
-
 5
5
-
 6
6
-
 7
7
-
 8
8
-
 9
9
-
 10
10
-
 11
11
-
 12
12
-
 13
13


Philips HX6311 User manual
- Category
- Electric toothbrushes
- Type
- User manual
Ask a question and I''ll find the answer in the document
Finding information in a document is now easier with AI
in other languages
- italiano: Philips HX6311 Manuale utente
- français: Philips HX6311 Manuel utilisateur
- Deutsch: Philips HX6311 Benutzerhandbuch
- Nederlands: Philips HX6311 Handleiding
Related papers
-
Sonicare HX6392/02 User manual
-
Sonicare HX9362/67 User manual
-
Sonicare HX3130/00 User manual
-
Sonicare Sonicare DiamondClean Electric Toothbrush HX9391/92 User manual
-
Sonicare HX 5581 User manual
-
Philips HX6311 User manual
-
-
-
Sonicare HX6829/74 User manual
-
Other documents
-
Sonicare HX6381/02 User manual
-
Sonicare HX3110/02 User manual
-
Sonicare HX6311/02 User manual
-
-
Panasonic EW-DL82 Owner's manual
-
-
Sonicare HX6322/04 User manual
-
Remington SFT-150 Owner's manual
-
-