Page is loading ...

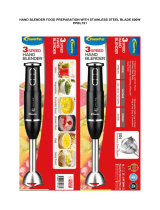
3-In-1 Immersion Blender
USER GUIDE
Model ME250IB

Thank you for choosing a Calphalon 3-In-1 Immersion Blender.
The Calphalon Kitchen Electrics collection offers quality construction
and premium finishes. Plus, they operate with ease, so you can count on
them to handle your daily kitchen tasks.
We know you are excited to begin using your immersion blender; this User
Guide is designed to help you make the most of your new appliance.
Be sure to carefully review this guide before using your immersion blender
and keep it handy for future reference should you have any questions about
your immersion blender’s operation.
TABLE OF CONTENTS
Safety Instructions ..................................................................................................page 1
Getting to Know Your 3-In-1 Immersion blender .......................................page 5
Parts & Features .................................................................................................................
Operating Your 3-In-1 Immersion blender ....................................................page 6
Before the First Use ...........................................................................................................
Choosing an Attachment ..................................................................................................
Tips for Successful Operation .............................................................................page 7
Blending Wand .................................................................................................................
Whisk
Chopper
Cleaning and Care ................................................................................................page 12
Storage ......................................................................................................................page 12
Frequently Asked Questions ............................................................................page 13
Warranty ................................................................................................................. page 14
Recipes .......................................................................................................................page 16
NOTE: If you have additional questions or concerns, or wish to return
product(s), please contact Calphalon Customer Service at
1-800-809-7267. Please do not return this product to the store.

SAFETY INSTRUCTIONS
The safety instructions appearing in this guide are not meant to cover
all possible situations that may occur. Caution must be exercised when
installing, maintaining or operating this appliance. Contact your dealer,
distributor, service agent or manufacturer with any issues you do not
understand.
Recognize Safety Messages
Always read and obey the safety messages included in this guide. Look for
the following safety symbols, which will alert you to potential hazards.
WARNING – Hazards or unsafe practices which COULD result in severe
personal injury or death.
CAUTION – Hazards or unsafe practices which COULD result in minor
personal injury.
1
WARNING
CAUTION

IMPORTANT SAFEGUARDS
When using electrical appliances, basic safety precautions should always be
observed, including the following:
1.
READ ALL INSTRUCTIONS in this guide before attempting to operate
your appliance.
2. This product is designed for household use only. Do not use appliance
for other than its intended purpose.
3. To protect against risk of electrical shock do not put motor body, cord or
electrical plug of this immersion blender in water or other liquid.
4. Do not place on or near a hot gas or electric burner, or where it could
touch any other heat source.
5. This appliance is not intended for use by children or other persons,
without assistance or supervision, if their physical, sensory or mental
capabilities prevent them from using it safely.
6. Do not allow children to use the appliance as a toy.
7. Unwind the power cord fully before use.
8. Make sure the plug is free from dust and fully inserted into the socket.
Do not use if the plug is loose in the socket or deformed.
9. Do not allow the power cord to hang over the edge of a table or
counter, touch hot surfaces, including the stove, or become knotted.
Do not twist or put heavy objects on the power cord.
10. Always make sure the appliance is completely and properly assembled
before operation.
11. Always ensure that the attachments are securely fitted onto the motor
body before operation. Follow the instructions for Operating Your
Immersion Blender on page 6.
12. Be certain cover is securely locked in place before operating appliance.
13. Do not touch moving parts with your hand or utensils when appliance is
plugged in or operating.
14. Do not move around when immersion blender is operating.
15. Do not use appliance on unstable surfaces, in steamy environments,
near fire or anywhere appliance may get wet or oily.
16. When removing the plug from an outlet, pull it out by the plug rather
than the cord.
17. Unplug from outlet when left unattended or not in use, before putting on
or taking off parts, and before cleaning and storing.
2

3
18. Do not operate any appliance with a damaged cord or plug or after
the appliance malfunctions or has been dropped or damaged in any
manner. Do not operate if the appliance is deformed or damaged.
Contact Calphalon Customer Service at 1-800-809-7267 for
examination, repair, or adjustment.
19. Do not disassemble, repair or modify this appliance.
20. The use of accessory attachments not recommended or sold by the
appliance manufacturer may cause fire, electric shock or injuries.
21. When mixing liquids, especially hot liquids, use a tall container or
make several small quantities to reduce spillage.
22. Discontinue use if the immersion blender stops operating or becomes
jammed with food. Contact Calphalon Customer Service at
1-800-809-7267 for examination, repair, or adjustment.
23. Keep hands, utensils or inedible objects out of the container while
blending to prevent the possibility of severe injury to persons or
damage to the unit. A scraper may be used, but must be used only
when the unit is not plugged in.
24. Blades are sharp. Handle carefully. Do not touch blades.
25. Do not heat the chopper bowl in a microwave oven or otherwise warm
it over 120˚F.
26. Do not operate appliance without any ingredients.
27. Do not use appliance for purposes other than food preparation.
28. Do not use hand blender or whisk in a glass container.
29. Carefully follow the Cleaning and Care instructions on page 12
when cleaning your immersion blender to avoid risk of injury or
shock hazards.
30. This appliance should not be used by children and care should be
taken when used near children.
31. Do not use outdoors.
NOTE: If this immersion blender malfunctions during use, immediately
unplug the power cord from the electrical outlet. Do not use or attempt to
repair the immersion blender. Contact Calphalon Customer Service
at 1-800-809-7267 for examination, repair, or adjustment.
SAVE THESE INSTRUCTIONS
FOR FUTURE REFERENCE.

4
ELECTRICAL REQUIREMENTS
Avoid Electric Shock
This appliance has a polarized plug with one blade wider than the other.
To reduce the risk of electric shock, this plug is intended to fit into a polarized
outlet only one way. If the plug does not fit into the outlet completely, reverse
the plug. If it still does not fit, contact a qualified electrician. Do not attempt
to modify the plug in any way.
Short Cord Instructions
Your Calphalon immersion blender has a short power supply cord as a
safety precaution to prevent personal injury or property damage resulting
from becoming entangled with a longer cord. Do not allow children to be
near this appliance without adult supervision. Longer detachable extension
cords are available and may be used if care is exercised in their use.
If an extension cord is used:
1. The marked electrical rating of the cord set or extension cord should be
at least as great as the electrical rating of the appliance.
2. The cord should be arranged so that it will not drape over the countertop
or tabletop where it can be pulled on by children or tripped over
unintentionally.
SAVE THESE INSTRUCTIONS
FOR FUTURE REFERENCE.
CAUTION

GETTING TO KNOW YOUR
3-IN-1 IMMERSION BLENDER
Parts and Features
1. Comfortable, Contoured Main Body – Durable and sleek Power/Turbo buttons
conveniently located at the top of the main body.
2. Power Button – Turns the immersion blender on at the speed selected on the variable
speed dial.
3. Turbo Button – Immediately increases the speed of the immersion blender to the
highest setting.
4. Variable Speed Dial – Offers 5 speeds for all your blending needs.
5. Blending Wand and Removable Nonstick Safe Guard – Comes complete
with a guard for safe blending in nonstick pans.
6. Whisk – Turns your immersion blender into a powered whisk, ideal for whipping foods
such as eggs or cream
7. Chopper Bowl, Lid and Blade – Attaches to the main body and efficiently chops a
variety of fruits, vegetables and meats
8. 20 oz. Measuring Cup – Allows for easy measuring and blending in the same cup
5
6
1
7
8
5
2
4
3

OPERATING YOUR
3-IN-1 IMMERSION BLENDER
Before the First Use
1. Place immersion blender on a dry, level, stable surface such as
a countertop.
2. Remove all packing material and prepare parts for cleaning.
3. Never immerse the main body in water. If needed, wipe with a damp
cloth that has been dipped in a watered down mild detergent or soap.
4. Wash blending wand and blade protector, wire whisk, chopper bowl,
chopper blade, and measuring cup in warm, sudsy water. Rinse and
dry thoroughly.
5. Continue with steps for Tips for Successful Operation.
To avoid the risk of electrocution or severe disfiguring electrical burns, do
not let children handle or put electrical cords or plugs in their mouths.
Choosing an Attachment
Your immersion blender is equipped with the following attachments
and accessories:
•Blending Wand – Chose this option for pureeing foods such as soups,
smoothies and mashing potatoes.
•Whisk – Select this option for whipping air into ingredients such as egg
whites or whipping cream.
•Chopper – Use this option for chopping fruits, vegetables and meats.
•20 oz. Measuring Cup – Use for mixing or storage
6
CAUTION

TIPS FOR SUCCESSFUL OPERATION
Blending Wand
Step 1: MAKE SURE BLENDER IS UNPLUGGED
Step 2: ATTACH MAIN BODY TO BLENDING WAND
Be sure attachment is fully engaged to the main body by rotating the
attachment clockwise until the units click together. The tick mark on the
wand should be lined up with the line on the side of the main body.
Step 3: ADD NONSTICK SAFE GUARD ATTACHMENT (Optional)
Attach the nonstick safe guard attachment to prevent damage while
blending in nonstick pans.
To attach, align the nonstick safe guard and the opening at the end of
the blending wand (near the blade), being careful not to touch the blade.
Slowly press the nonstick safe guard onto the end of the blending wand.
To detach, push in both tabs of the nonstick safe guard and slowly pull
it off of the blending wand, being careful not to place fingers inside the
blade housing. The nonstick safe guard is dishwasher safe, or can be hand
washed.
Step 4: PLACE INGREDIENTS IN MIXING BOWL
Choose a deep mixing bowl or container. Mixture will swell slightly as it
mixes, especially on higher speed settings, so allow extra room in the mixing
bowl to prevent spatters.
Step 5: INSERT THE POWER PLUG
Choose a suitable electrical outlet by referring to Electrical
Requirements on page 4.
7

Step 6: BEGIN BLENDING
Insert the blending wand into the mixing bowl until it touches the bottom.
Turn the Variable Speed Dial to select the desired blending speed. Press the
Power button to start.
NOTE: Blender should be under the surface of the food mixture before
turning it on. Move the blender up and down slightly and around the bowl
to puree all the ingredients thoroughly.
Step 7: RELEASE POWER BUTTON
To stop the immersion blender, release the Power button. Disconnect the
power plug from the outlet.
Step 8: REMOVE ATTACHMENT
Rotate the attachment counter clockwise to remove after use.
Notes for Blending:
• Thebladesareverysharp.Handlewithextremecare.
• Alwaysunplugtheappliancewhenitisleftunattended.
• Coolhotfoods,suchassoups,slightlybeforepureeingtopreventburns.
• Donotlifttheblenderoutofthefoodbeingblendeduntiltheblade
completely stops.
• Unplugtheappliancebeforeyoucleantheblender.
• Removepansfromheatbeforeblendinginthemtopreventdamageto
the nonstick guard.
Whisk
Step 1: MAKE SURE BLENDER IS UNPLUGGED
Step 2: ATTACH MAIN BODY TO WHISK ADAPTER BODY
Be sure attachment is fully engaged to the main body by rotating the
attachment clockwise until the units click together. The tick mark on the
wand should be lined up with the line on the side of the main body.
8

Step 3: PLACE INGREDIENTS IN MIXING BOWL
Choose a deep mixing bowl or container. Mixture will increase in volume as
air is incorporated by the whisk, so allow extra room in the mixing bowl.
Step 4: INSERT THE POWER PLUG
Choose a suitable electrical outlet by referring to Electrical
Requirements on page 4.
Step 5: BEGIN WHISKING
Insert the whisk into the mixing bowl until the beater touches the bottom.
Turn the Variable Speed Dial to select the desired beating speed. Press the
Power button to start.
NOTE: Remember to place the beater into the liquid before turning on.
Keep the main body in the upright position and slowly circulate the beater
around the mixing bowl or container.
Step 7: RELEASE POWER BUTTON
To stop the whisk, release the Power button. Disconnect the plug from
the outlet.
Step 8: REMOVE ATTACHMENT
Rotate the attachment counter clockwise to remove after use. The whisk
can be removed from its housing for cleaning by pulling on the base of the
whisk. To reassemble simply insert metal end of whisk back into the housing.
Notes for Whisking:
• Useadeepmixingbowlorcontainertopreventspattering.
• Thetimeneededtowhipcreamvariesdependingonthetemperatureof
the cream and the amount being whipped.
• Coldwhippingcreambeateninachilledmixingbowlwillthicken
quicker than when beaten at room temperature.
• Ontheotherhand,roomtemperatureeggwhitestendtowhiptoa
slightly higher volume than chilled egg whites.
9

Chopper
Step 1: MAKE SURE BLENDER IS UNPLUGGED
Step 2: INSERT CHOPPER BLADE
Carefully insert the chopper blade over the pin at the center of the
chopper bowl.
Step 3: INSERT FOOD
If chopping a large amount of ingredients, divide the food into
smaller batches.
Step 4: ATTACH CHOPPER LID TO BOWL
Place lid on chopper bowl, fitting securely over pin at the center.
Step 5: ATTACH MAIN BODY TO LID
Insert the main body into the chopper attachment point on top of lid.
Step 6: INSERT THE POWER PLUG
Choose a suitable electrical outlet by referring to Electrical
Requirements on page 4.
Step 7: BEGIN CHOPPING
Turn the Variable Speed Dial to select the desired chopping speed. Hold the
bowl and press the Power switch to start chopping. When chopping, it often
works best to pulse the chopper on and off in short bursts.
Step 8: RELEASE POWER BUTTON
To stop the chopper, release the Power button. Disconnect the plug from
the outlet.
Step 9: DISCONNECT MAIN BODY FROM CHOPPER LID
Rotate the attachment counter clockwise to remove after use.
10

Step 10: REMOVE LID AND CHOPPER BLADE
Remove the chopper lid and carefully lift out the chopper blade. Remove the
food contents from the chopper bowl.
Notes for Chopping:
• Thebladesareverysharp.Handlewithextremecare.
• Donottakeoutthechopperbladeuntilitstopsrotatingcompletely.
• Whenchopping,itoftenworksbesttopulsethechopperonandoffin
short bursts.
• Ifchoppingmeat,cutitintocubesbeforeinsertingintochopper.
Refer to the following chart as a guide for choosing the proper settings.
11
Attachment Hand Blender Whisk Chopper
Food
Mashed
Potatoes
Soup
Egg
Whites
Whipped
Cream
Onion
Beef
10.5 oz.
(300g)
MAX
Setting 2–3 1–2 4–5 4–5 3–4 Turbo
Time within
1 min.
within
1 min.
within
3 min.
within
3 min.
15
pulses
10 -15
seconds
Tips Blend warm potatoes
with milk and butter
for added moisture.
Process soup while
still warm, making
sure there is enough
broth or other liquid
to achieve the desired
consistency.
Choose a deep
bowl or container for
whisking to prevent
spattering. Slowly
move the wire whip
around the bowl or
container to evenly
beat the mixture.
Pulse the chopper on
and off in short bursts
for best results.
When chopping beef,
dice it into cubes
before chopping and
hold the turbo button
down for 10 to 15
seconds.

12
CLEANING AND CARE
Before Cleaning
• Beforedisconnectingtheblendingwandorwhiskfromtheelectrical
outlet, consider dipping the end of the attachments in a container of
warm, watered down mild detergent. Process under the soapy water to
release food residue.
• Carefullyunplugtheimmersionblender’spowercordfromtheelectrical
outlet by firmly grasping the plug.
• Removeanyfoodfromthechopperbowlandcleanassoonaspossible
after chopping.
Do Not Immerse These Parts
Never immerse the main body, chopper lid, whisk housing, cord or plug
in water. If needed, wipe with a damp cloth that has been dipped in a
watered down mild detergent or soap.
Tips for Cleaning the Immersion Blender
• Theblendingwand,chopperbowlandblade,mixingcup,nonsticksafe
guard and whisk (detached from housing) are top rack dishwasher safe.
• Thechopperlidandwhiskhousingarenotdishwashersafeandshould
never be put in the dishwasher.
• Iftheblenderjointsaccidentlygetwet,drywellassoonaspossible.
•Anyotherservicingshouldbeperformedbyanauthorizedservice
representative.
STORAGE
The cord wraps around the immersion blender for storage. Store the
chopper blade inside the chopper bowl. NOTE: Blades are sharp. Handle
carefully when storing or taking out the parts from the chopper bowl.

13
FREQUENTLY ASKED QUESTIONS
How do I know which attachment to use? Think about the texture
and consistency you are trying to achieve. The chopper will cut food into
small bits. The blending wand purees foods until they are smooth, and
the whisk beats air into ingredients such as egg whites or cream. Refer to
Choosing an Attachment on page 6 for more information.
When using my own mixing bowl, how will I know when the
volume of mixture might be too large? The tip of the hand blender
or whisk should be able to rest on the bottom of the bowl without the food
mixture coming up over the joint on the attachment. This protects the joint
from being exposed to moisture.
I accidentally overstuffed my chopper and now the blade is
jammed and will not move. What should I do? Remove the plug
from the electrical outlet. Carefully remove blade and empty food from
container. Replace blade and fill container back with food. Discontinue
use if the immersion blender stops operating. Contact Calphalon
Customer Service at 1-800-809-7267 for examination, repair or
adjustment.

WARRANTY
Register your Immersion Blender - It’s Easy!
Please register your product to ensure that we have the correct information
in our system for any warranty inquiries. Retain the original sales
receipt. Without registering your product or having the
original sales receipt, we will consider the warranty start date
to be the date of manufacture.
Taking a few moments to register your product greatly expedites warranty
inquiries and helps us continue to develop new products and services that
make your culinary experience even better. Please visit
www.calphalon.com for complete details.
Limited One Year Warranty
Calphalon will repair or replace any immersion blender found
defective in material or workmanship within one year of the original
purchase with the original sales receipt. This warranty applies when
the immersion blender is put to normal household use and is operated
and cared for according to the instructions. This excludes damage
from misuse or abuse, such as improper cleaning, neglect, accident,
alteration, fire, theft, or use in a commercial establishment. Minor
imperfections, surface markings as a result of shipping, and slight
color variation are normal. This warranty excludes all incidental and
consequential damages, except in those states that do not allow the
exclusion or limitation of these damages. Without an original sales
receipt or having registered your product with Calphalon, the warranty
start date will be considered the date of manufacture. This warranty
gives you specific legal rights, and you may have other rights that vary
from state to state.
14

Customer Service
We at Calphalon want to hear from you. If you have a question, comment,
or a recommendation that will help us help you, please contact us via our
web site, phone, fax or mailing address.
Please do not return the product to the store. Please contact
us directly with questions or comments about your immersion
blender. Thank you!
Web site
www.calphalon.com
Write Us
Calphalon Customer Service
PO Box 583
Toledo, Ohio 43697-0583
(Please, DO NOT send returns to this address)
Toll Free Phone
1-800-809-7267
(Monday-Friday 8:00am – 5:00pm EST)
Fax
419-666-2859
15

RECIPES
Butternut Squash and Apple Soup
Ingredients:
2 Tbsp. olive oil
1 medium onion, chopped
1 large butternut squash, peeled, seeded and cut into 2-inch pieces
1 golden delicious apple, peeled, seeded and cut into 8 pieces
4 c. chicken stock
Salt and pepper, to taste
2 Tbsp. maple syrup
1 c. half and half
Chopped toasted Marcona almonds and chopped scallions, garnish
Method:
Heat oil in a Calphalon soup pot or Dutch oven over medium heat. Add
onion, squash and apple and sauté until onions are translucent, about 3
to 5 minutes. Add chicken stock and season with salt and pepper. Bring
to a boil, reduce heat to a simmer, cover with lid and simmer for 20 to 25
minutes or until the squash is very tender.
Remove pot from heat. Using a Calphalon 3-in-1 Immersion Blender fitted
with the blending wand attachment, carefully blend on low speed until
the soup is smooth. Add maple syrup and half and half and blend until
smooth. Reseason soup with salt and pepper. Serve soup with chopped
toasted Marcona almonds and scallions.
16
Serves 6
Creamy Lemon Meringue Pie
Ingredients:
For the crust –
1 c. crushed ginger snap cookie crumbs
½ c. graham cracker crumbs
2 tablespoons sugar
1/3 c. butter, melted
Makes one 9-inch pie
For the meringue –
4 large egg whites
Pinch of salt
¼ c. confectioners’ sugar
½ c. granulated sugar
½ tsp. pure vanilla extract

17
For the meringue –
4 large egg whites
Pinch of salt
¼ c. confectioners’ sugar
½ c. granulated sugar
½ tsp. pure vanilla extract
For the filling –
8 large egg yolks
¾ c. sugar
1/8 tsp. salt
Zest of 2 lemons
2/3 c. fresh lemon juice, strained
¼ c. fresh tangerine or orange juice, strained
8 Tbsp. butter, chilled and cut into small pieces
¾ c. heavy cream
Method:
For crust, preheat oven to 350 degrees F. Lightly butter a 9-inch pie pan. In
a mixing bowl, combine crumbs, sugar and butter. Transfer crumb mixture to
pie pan and firmly press mixture into bottom and up the sides of pie pan. Bake
for 8 to 10 minutes and cool before filling.
To make filling, bring about 2-inches of water to a simmer in a large saucepan.
Place egg yolks in a heatproof bowl (that will fit into the saucepan, but not
touch the water) and whisk them until smooth. Gradually whisk in the sugar
and beat until mixture is creamy. Add salt, zest, and juices and mix until
smooth. Place bowl over the simmering water and whisk mixture by hand until
it is very thick, about 10 to 15 minutes. The mixture should coat the back of a
spoon. Carefully remove bowl from heat. Whisk in butter and continue to stir
until butter is fully incorporated. Strain filling, cover and chill until cold, about
1 hour. Pour heavy cream into the Calphalon measuring cup, using Calphalon
3-in-1 Immersion Blender with whisk attachment, beat cream on low speed
for about 20 seconds or until fully whipped. Fold cream into cooled lemon
filling and spoon mixture into prepared piecrust.
For meringue, preheat oven to 375 degrees F. Add egg whites to the
Calphalon measuring cup, using the whisk attachment, beat egg whites
on medium speed until foamy. Add confectioners’ sugar and beat on low
speed for 1 minute. Transfer egg mixture to a large bowl. Using low speed,
gradually add granulated sugar. Increase speed to high and beat for
3 minutes or until appropriate consistency is reached. The meringue should be
very thick and hold a firm peak. Either pipe or spread meringue over lemon
filling. Bake pie on middle rack of oven for 8 to 12 minutes or until meringue is
golden brown. Transfer pie to a wire rack and cool completely. Chill pie for 2
hours before serving. This pie is best served the day it is prepared.

© 2011
/