Page is loading ...

ES - MANUAL DE INSTRUCCIONES
PT - MANUAL DE INSTRUÇÕES
EN - INSTRUCTIONS FOR USE
FR - MANUEL D’UTILISATION
DE - GEBRAUCHSANWEISUNG
IT - MANUALE DI ISTRUZIONI
EL - ENTY¶√ √¢∏°πøN
HU - HASZNÁLATI ÚTMUTATÓ
CS - NÁVOD K POUŽITÍ
SK - NÁVOD NA POUŽITIE
PL - INSTRUKCJA OBSŁUGI
BG- ИНСТРУКЦИЯ ЗА УПОТРЕБА
RU -
ИНСТРУКЦИЯ ПО ЭКСПЛУАТАЦИИ
N.I.F. F-20.020.517 - Bº. San Andrés, nº 18 • Apartado 49 - 20500 MONDRAGON (Guipúzcoa) ESPAÑA
Diciembre 2004
N.I.F. F-20.020.517 - Bº. San Andrés, nº 18 •
Apartado 49 - 20500 MONDRAGON (Guipúzcoa) ESPAÑA
El fabricante se reserva los derechos de modificar los modelos descritos en este Manual de Instrucciones.
O fabricante, reserva-se os direitos de modificar os modelos descritos neste Manual de Instruções.
The manufacturer reserves the right to modify the models described in this User’s Manual.
Le fabricant se réserve le droit de modifier les modèles décrit dans le présente notice.
Der Hersteller behält sich das Recht vor, die in dieser Gebrauchsanweisung beschrieben Modelle zu verändern.
Il fabbricante si riserva il diritto a modificare i modelli descritti in questo Manuale d’Istruzioni.
O k·t·ÛkÂv·Ût‹ç ‰È·tËp› ·okÏÂÈÛtÈk¿ to ‰Èk·›ˆÌ· v· tpoooÈ‹Û› t· Ìovt¤Ï· ou ÂpÈyp¿ºovt·È Ûto ·pfiv Evtuo O‰ËyÈÒv
A gyártó fenntartja magának a jogot a használati útmutatóban közölt műszaki adatok megváltoztatására.
Výrobce si vyhrazuje právo modifikovat modely popsané v tomto uživatelském návodu.
Výrobca si vyhradzuje právo modifikovať modely opísané v tomto užívateľskom návode.
Producent zastrzega sobie prawo do modyfikowania modeli opisanych w niniejszej instrukcji obsługi.
Производителя си запазва правото променя моделите описани в този наръчник.
Производитель оставляет за собой право замены модели, описанные в данном Руководстве пользователя.
MOD.:
CG-806 CG-810 CG-810V CG-812 CG-1100
CAFETERA / CAFETEIRA / COFFEE MAKER /
KAFFEEAUTOMATEN / MACCHINA DA CAFFÉ / CAFETERIE /
MHXANH KAºE / KÁVÉFŐZŐ / KÁVOVAR /
/ EKSPRES DO KAWY / КАФЕМАШИНА / КОФЕВАРКА
portada.qxd 10/12/04 18:20 Página 1

9
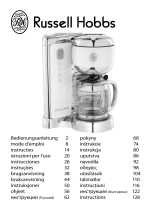
EN
1. Water deposit lid.
2. Water deposit.
3. Permanent filter.
4. Filter-holder.
5. Water level indicator.
6. Anti-drip valve.
7. Jug lid.
8. Jug.
9. Heater plate.
10. On/Off switch/pilot light.
3. IMPORTANT WARNINGS
• After removing the packaging, check
that the appliance is in perfect condition.
If in doubt, do not use and contact an
authorised Technical Assistance Centre.
• The packaging materials (plastic bags,
polystyrene foam etc.) should be kept
out of the reach of children, as they
could constitute a safety hazard.
• In the event of the socket and plug
being incompatible, have a qualified
electrician replace the socket.
• The use of adapters and/or extension
leads is not advised. In the event of their
use being absolutely necessary, always
ensure that they conform to current
safety standards, and take care not to
exceed the indicated maximum voltage
level.
• If the appliance fails to work, contact an
authorised Technical Assistance Centre.
• The appliance is designed for domestic
use only. It should be used as described
in this manual. Any other use is
considered unsuitable and therefore
dangerous. The manufacturer accepts no
responsibility for damage resulting from
improper or irresponsible use, and/or
from repairs carried out by unqualified
personnel.
Certain fundamental rules must be
respected in the use of any electric
appliance in order to reduce the risk of
fire, electric shocks and/or physical
harm:
In particular
• Read all instructions carefully and keep
them for future reference.
• The electrical safety of your appliance is
only guaranteed if it is connected to an
efficient earth installation, as stipulated in
current electrical safety regulations. The
manufacturer accepts no responsibility
for any damage resulting from the
appliance not being connected to an
earth installation. If in doubt, contact a
qualified professional.
• Before using the appliance for the first
time, make sure that the mains voltage in
your home corresponds to that indicated
for the coffeemaker.
• In order to avoid electric shocks, do not
submerge the appliance, cable or plug in
water or any other liquid.
• Do not let children or the handicapped
use the appliance without supervision.
• Unplug the appliance when not in use
and before cleaning. Leave to cool before
handling parts and before cleaning.
• Do not leave the appliance open to the
elements (rain, sun, frost, etc.).
• Do not use or place any part of this
appliance on or near hot surfaces (gas or
electric hobs, ovens, etc.)
• Do not let the cable hang over the edge
of the surface on which the appliance is
placed. Select the minimum cable length
2. TECHNICAL DETAILS
This appliance conforms to EEC
regulations regarding materials in contact
with food products.
1. GENERAL DESCRIPTION (Fig.1)
CG-806 CG-810 CG-812
CG-810V
CG-1100
Voltage/Frequency 230V/50Hz.
Wattage 700W 1100W 1000W
Deposit capacity 0,6L 1,2L 1,8L
Num. cups 6 de 100 cm
3
10 de 120 cm
3
2 de 150 cm
3
interior 13/12/04 12:28 Página 8

10
4. BEFORE USING FOR
THE FIRST TIME
required to plug the appliance into your
mains supply.
• Do not touch hot surfaces. Use the
handles or grips provided.
• If the cable becomes damaged, have it
replaced by an authorised Technical
Assistance Service.
• Do not use any electrical appliance if the
cable or plug are damaged, if it is not
working properly or if it is damaged in
any way. Take it to an authorised
Technical Assistance Service to be
examined, repaired or modified.
• In the event of technical failure or
improper working, switch the machine off
and do not try to repair it. Repairs should
only be carried out by an authorised
Technical Assistance Service. Always
demand the use of original spare parts.
• If you decide never to use the appliance
again, it is a good idea to cut the cable,
first ensuring that the appliance is
unplugged.
The liquid that drips into the jug is hot
and may cause burns if the jug is
accidentally broken. To avoid breakage,
take the following safety precautions:
•
Do not allow all the liquid to evaporate.
Do not heat the jug when empty.
• Do not use a broken jug or a jug whose
handle is loose or weak. Replace if any
signs of damage are detected. A tiny
crack or breakage of a small piece of
the glass may cause the jug to shatter
and to contaminate the liquid with
splinters of glass.
• Do not clean the jug with an abrasive
scourer or any cleaning products that
may scratch or otherwise weaken the
glass.
• The jug is designed for use with this
appliance. Do not place it on or near hot
surfaces (heaters, burners, hobs, hot
ovens, microwaves, etc.).
• Do not place the jug on wet or cold
surfaces.
• Handle gently and avoid knocking.
Before using for the first time, familiarise
yourself with all the components. Read all
instructions carefully.
Remove the filter-holder (4) (fig. 2) and the
jug lid (7) (fig. 3) and clean along with the
jug itself and the permanent filter (3) in
warm soapy water. Dry thoroughly and
replace, fitting the filter-holder into its place
and the lid onto the jug.
To clean the inside of the appliance, run a
coffee-making cycle twice without adding
ground coffee to the filter. To do this, follow
the instructions given in the section entitled
"Making coffee".
5. MAKING COFFEE
With the appliance unplugged:
• Place the coffeemaker on a flat, stable
surface.
• Open the deposit lid (1) and make sure
that the deposit is empty. Fill with clean,
cold water to the required level. Do not
exceed the indicated maximum level
mark.
• Fill the filter (3) with the required
quantity of ground coffee and close the
lid. We recommend one dessertspoon of
coffee per cup. After using the
coffeemaker a few times, you may wish
to adjust the amount of coffee used
according to individual taste.
• Make sure the lid of the jug (7) is
properly fitted, and place the jug (8) on
the heater plate (9). Ensure that the jug
lid opens the anti-drip value (6),
otherwise the filtered coffee will not drip
down into the jug and will overflow from
the filter.
• Plug the appliance into the mains and
press the start/stop switch (10). The
switch pilot light will indicate that the
appliance is ON.
• Water will begin to filter down through
interior 13/12/04 12:28 Página 9

11
the coffee into the jug. When the filtering
process is completed, the heater plate
will keep the coffee warm.
• If you wish to pour a cup of coffee
before the filtering process has finished,
remove the jug from the heater plate,
pour and then replace immediately.
• When the jug is empty, turn the
start/stop switch off (the pilot light will go
out), unplug the appliance leave to cool
for 10 minutes before repeating the
coffee-making operation or cleaning.
Precautions to be taken while using the
appliance
•
Do not use warm or hot water. Always
use cold water. Do not use any other
liquid except water.
• To prevent the water in the filter from
overflowing the jug lid should be
correctly fitted in order to ensure that the
anti-drip value is opened, enabling the
water to pass through to the jug.
• Leave the coffeemaker to cool before
refilling the deposit. If the deposit is filled
while hot, steam may be generated that
could cause burns.
Do not move the coffeemaker while in
use.
Anti-drip valve
The anti-drip value is located underneath the
filter-holder and is activated when the jug is
removed from the heater plate. It enables the
jug to be removed to pour a cup of coffee
during the filtering process. Make sure that
the equivalent of at least two cups of coffee
has filtered into the jug before removing
during the filtering process.
Warning: replace the jug immediately
after pouring the cup of coffee
to enable
the filtering process to continue. If the jug is
not returned immediately, the filter may
overflow.
6. HOW TO MAKE A PERFECT
CUP OF COFFEE
For an even more delicious taste and
aroma, use freshly ground coffee.
Use medium, not fine ground coffee.
Store coffee in a dry place. Once the
packet has been opened, close firmly and
store in the refrigerator in order to
conserve its aroma.
The heater plate will keep the freshly
made coffee warm, but it tastes better if
drunk immediately after filtering.
7. CLEANING AND MAINTENANCE
Always leave the appliance to cool before
cleaning and make sure that the
start/stop switch has been turned off and
the coffeemaker unplugged from the
mains.
Clean the filter-holder, jug and jug lid in
warm soapy water. Rinse well and dry
thoroughly before replacing.
Clean the outside of the coffeemaker with
a damp cloth. Do not use detergent or
abrasive cleaning products.
Do not submerge the appliance in
water or place under an open tap.
Filters
The coffeemaker is supplied with a
permanent filter. However, if you prefer
disposable filters, use cone filters:
• 1x2 mod CG-806.
• 1x4 mod CG-810, CG-810V, CG-812,
CG-1100.
interior 13/12/04 12:28 Página 10

12
8. DECALCIFICATION
Depending on the hardness of the water
in your area and the frequency of use, the
appliance’s tubes may become
obstructed by lime. You will know that this
has occurred when the filtering process
starts taking longer than normal. To
prevent this, you should decalcify your
coffeemaker by either using a commercial
decalcifying agent specially designed for
coffeemakers, or by following the
instructions given below:
Fill the jug with a 1/4 vinegar 3/4 water
solution.
Pour the solution into the deposit and
switch the coffeemaker on. Allow the
solution to drip down into the jug.
Repeat this process 2 or 3 times,
depending on the extent of calcification.
After the lime has been removed, run an
empty filtering process (with water but no
coffee) 2 or 3 times to remove any
remains of the water/vinegar solution.
We recommend that you decalcify your
coffeemaker once every 4 weeks.
interior 13/12/04 12:28 Página 11

20
Durchlaufprozesses entnehmen, um
bereits eine Tasse Kaffee zu servieren.
Um die Kanne während des
Durchlaufprozesses zu entnehmen,
müssen mindestens zwei Tassen Kaffee
durchgelaufen sein.
Achtung: Nach demServieren des
Kaffees muss die Kanne umgehend
wieder auf die Heizplatte gestellt
werden,
damit der Durchlaufvorgang
fortgesetzt werden kann. Anderenfalls
läuft das im Filter angesammelte Wasser
über.
Filter
Der Kaffeeautomat wird mit einem
Dauerfilter geliefert; sollten Sie jedoch die
handelsüblichen Einwegfilter vorziehen,
können Sie die kegelförmigen Filter der
Größe verwenden.
• 1x2 mod CG-806
• 1x4 mod CG-810, CG-810V, CG-812,
CG-1100.
6. RATSCHLÄGE FÜR EINEN
GUTEN KAFFEE
Damit der Kaffee einen besseren
Geschmack und ein edleres Aroma
erhält, empfehlen wir, frisch gemahlenen
Kaffee zu verwenden.
Der Kaffee sollte mit mittlerer Stärke
gemahlen sein, nicht zu fein.
Bewahren Sie den Kaffee an einem
trockenen Ort auf. Sobald das Paket
Kaffee geöffnet wurde, bewahren Sie es
gut verschlossen im Kühlschrank auf,
damit der Kaffee sein Aroma bewahrt.
Die Heizplatte hält den Kaffee warm, am
besten schmeckt jedoch immer frisch
zubereiteter Kaffee.
7. PFLEGE UND REINIGUNG DES
KAFFEEAUTOMATEN
Bevor Sie Ihren Kaffeeautomaten
reinigen, schalten Sie den Ein-
/Ausschalter aus und unterbrechen Sie
8. ENTKALKUNG
Je nach dem Härtegrad des Wassers und
der Häufigkeit der Verwendung ist es
möglich, dass sich die Leitungen
aufgrund des Kalkgehaltes des Wassers
zusetzen. Dies lässt sich feststellen,
wenn der Durchlaufvorgang länger als
gewöhnlich dauert. Um dies zu
vermeiden, muss der Kaffeeautomat
entkalkt werden. Zu diesem Zwecke
können spezifische handelsübliche
Kaffeemaschinen-Entkalker verwendet
werden. Sie können jedoch auch
folgendermaßen vorgehen:
• Füllen Sie die Kanne mit einem Teil
Essig und drei Teilen Wasser.
• Gießen Sie diese Wasser-Essig-
Mischung in den Behälter und nehmen
Sie den Kaffeeautomaten in Betrieb.
Warten Sie, bis die gesamte Lösung in
die Kanne gelaufen ist.
• Wiederholen Sie diesen Vorgang 2
oder 3 Mal, je nach Verkalkungsgrad.
• Nach dem Entkalken der
Kaffeemaschine lassen Sie bitte 2 bis
3 Mal nur Wasser durchlaufen, um die
Essigreste zu entfernen.
• Wir empfehlen, den Kaffeeautomaten
alle 4 Wochen zu entkalken.
den Netzanschluss. Warten Sie dann, bis
der Kaffeeautomat abgekühlt ist.
Reinigen Sie Filterträger, Filter, Kanne
und Kannendeckel mit lauwarmem
Seifenwasser und spülen Sie dann mit
klarem Wasser nach. Bevor Sie die Teile
wieder einsetzen, trocknen Sie sie gut.
Das Äußere des Kaffeeautomaten kann
mit einem feuchten Tuch gereinigt
werden. Verwenden Sie keine
Reinigungs- oder Scheuermittel.
Das Gerät darf unter keinen
Umständen in Wasser getaucht oder
unter fließendes Wasser gehalten
werden.
interior 13/12/04 12:28 Página 19
/