
INTRODUCTION
M50 is Amplicomms’s new smartphone for seniors, offering an amplified
handsfree base. Its many features include:
1 - Easy-to-use interface, with two modes to choose from (Simple and light Android)
2 - Text <=>Speech support for messages, dialling, etc
3 - SOS button
4 - Base: desk top easy-charging base and Bluetooth handsfree device
A- SMARTPHONE DESCRIPTION
1 - Turn ON/OFF the screen;
Power ON/OFF ( Long press )
2 - Volume up key
3 - Volume down key
4 - Front camera
5 - Receiver
6 - Touch screen
7 - Task manager key (Android mode)
8 - Home key
9 - Back key
B- BASE DESCRIPTION
PACKAGE CONTENT
1. M50 smartphone
2. Base
3. Power adaptor with USB cable
4. Instructions manual
GET STARTED
Insert the SIM card (required) and the memory card (optional)
- With the SIM card golden contacts facing down, insert the SIM card into one
of the available slots until it stops as illustrated
- To expand the internal storage memory, you can insert a microSD memory
card (maximum capacity of 64 GB / not included). Insert the memory card into
the slot until it stops as illustrated
Note: Both card slots (SIM1=Micro, SIM2=Micro) support LTE (4G). If nano SIM card is
used, a SIM card adaptor is required ( provided by operator )
ATTENTION:
• Risk of swallowing small objects! The SIM card & memory card can be removed.
Small children can swallow them
• Do not bend or scratch the SIM card. Prevent any contact with water, dirt, or
electrical charges
• Turn off the phone and disconnect the charger before removing the battery cover
Insert the battery
- Insert the battery into battery compartment with golden contacts of the
battery pointing to the top right of the phone
- Press lightly on the bottom end of the battery until it snaps into place
Replace the battery cover
Replace and secure the battery cover until it clicks into place
5. Battery
6. Battery cover
7. Earphones
8. Lanyard
Charging your phone / using the base speaker
- Place the base on a flat surface. Plug provided USB cable to the base and to a
wall mains socket.
- To charge your phone, simply place it on the charger as depicted. M50 can
also be charged as a regular smartphone by plugging the USB cable directly
on the USB connector (Figure A, 12)
- When placed on the cradle, your phone will connect with the base via
Bluetooth. You can answer handsfree calls or listen to music on the base
loudspeaker.
(**A valid Bluetooth pairing between M50 and base is required)
ATTENTION:
• Only use battery, charger and accessories that have been approved for using
with this model. Connecting other accessories may be dangerous and may
invalidate the warranty.
Getting started guide
**Please read this “Getting Started guide” CAREFULLY before start using your
Amplicomms M50. Also check the Instructions Manual for more details.
**Google account is required for your phone to receive software updates. Please sign
in during phone set up or later.
** Pairing the phone with the base (step 8) is mandatory.
1. Insert the SIM card, battery and replace the battery cover.
2. Power up the base (use provided adaptor and USB cable).
3. Long press ON/OFF button to power up the phone.
4. The display will be lighted up.
5. Enter the SIM PIN code (Optional : Service provider dependent)
6. Select the desired language
7. Follow the setup wizard steps on the screen
8. Pair the phone with the base (mandatory step) to be able to answer a call in
handsfree mode and listen to audio sources (radio, music files). When the smartphone
is on its base but not paired, battery will charge but base keys (including the base’s
“Phone” button) will not be working.
• Swipe with your finger on the touch screen and press Settings icon on page 2,
then Connected devices > Pair new device.
• Place your M50 on the base charging cradle.
• Tap on M50 Smart Base when it appears in the device list, then click on “PAIR”
(“Allow access to your contacts and call history” is displayed. Tap on the square
to accept, then on “Pair”)
When the base is well paired, a sharp sound is emitted, and base led will turn to
steady blue. By pressing either or base keys you can check that base and
M50 are well paired:
icon will be displayed on the right side.
If base led still flashes in red, repeat step 8.
9. When completed, swipe with your finger on the touch screen and press
Select Home icon on page 2, to choose between Simple Smartphone and light
Android modes.
Simple Smartphone mode offers an extremely easy to use
interface, specifically designed for senior users. Check next
chapter to learn about phone operation in this mode.
Light Android mode presents the user with a simplified
version of a regular smartphone. If you chose this mode,
please read “USING YOUR M50 IN LIGHT ANDROID MODE”.
USING M50 IN SIMPLE SMARTPHONE MODE
When Simple smartphone mode is selected, your M50 will look simpler and easier
to use than a regular smartphone.
Setup Wizard
The first time you select Simple Smartphone mode, you will have the choice to
be guided along the most relevant settings by a Setup Wizard. These are:
a. Click Duration (sets click duration for alphanumeric keyboard and other keys**)
b. Wifi setup (if Wifi internet access is available)
c. Google Account
d. Copy Contacts
e. New Contacts
f. SOS and Support
g. Speed Dial
h. Favorite Contacts
i. WhatsApp
j. Advanced Settings
k. Exit Setup
Once you “Exit Setup”, the wizard is always available under Settings.
** Note all touch-screen clicks are by default long click when using Simple Smartphone
mode. A valid key press should have a confirmation vibration.
Click duration can be changed anytime through the wizard or in Advanced Settings.
Home Screen
1 - Silent / Vibrate only / Normal mode
2 - One Touch Speed Dials
3 - Calls Center
4 - Message Center - SMS, missed calls, WhatsApp, etc.
5 - Pictures Center - View photos and videos, use the camera
6 - Other functions such as Whatsapp, phonebook, applications, settings, etc
7 - Battery level
Turn the Phone ON/OFF
- Long press ON/OFF button (1 in the figure A)
- The display will be lighted up. (To turn off the phone: Power Off > Turn off)
Call from the 3 One-Touch speed dials
- Press one of the 3 One-Touch speed dials directly (2 in the figure)
- Press to end the call
Make a call
- Press Call > Dial number > Enter the number 0......9 (Press Del to delete)
- Press to dial
- Press to end the call
Call from phonebook
- Press Call > to search and select the number OR
- Press Call > Search > enter the 1st character of the contact > Search > select
the number
- Press to dial
- Press to end the call
Call Log
- Press Call > Call Log or Phonebook > Call Log to view the call log
- To call back the incoming call number, press the number
Receive a call
- Press to answer
- Press to end the call
- When the phone is on the base, you can use button to answer and end the
call in handsfree mode. You can also control the base loudspeaker volume
with and keys.
Adjust the earpiece loudness
- During a call, press Volume up/Volume down keys - to adjust the loudness
Ringer mode
- In idle mode, press > select the ringer mode between Sound / Silent / Vibrate
Message
- All types of messages (SMS, WhatsApp, missed call, etc...) are consolidated in
Message
- When there is a new message, the button will be highlighted with
a new indication
- To read the message, press on the new items to read the details or press
Read old message......
Write new message
- Message > Write a new message
- Input the sending number by Dial number > Next OR
- Select from existing phonebook with
- Input from Keyboard > Send OR
- Select the pre-defined simple message by Next
Pictures
- Pictures > View Pictures > move to the next......
(Press All images to see all pictures > / to scroll throught them)
Camera
- Pictures > Take a picture > Camera > Capture to take photo or Record to take video
- Remeber to Save or Save and Send the photo......
Phone Book
Options in this menu:
1. View
2. Edit
3. New Contact
4. Call Log
ADD New contact
- Phone Book > New Contact (or Settings > Contacts > New)
- Name > input the name > Next
- Number > input the number > Next......
- Save
- You will be asked if you wish to Add a photo from Images or from Camera.
Press Yes or No and follow the instructions on the screen
EDIT Contact
- Phone Book > Edit (or Settings > Contact > Update)
- Select a contact for editing
- Name > Edit the name > Next
- Number > Edit the number > Next......
- Save (To associate a photo to a contact, go to Settings > Contacts > Photo)
Settings
- Settings > ......
- Under the Settings menu, the following options can also be accessed:
1. Contacts
2. Speed Dial
3. Language
4. Advanced Settings
5. Setup Wizard
6. Premium Service
Edit the 3 One-Touch Speed Dial buttons
- Settings > Speed Dial
- Select the empty button
- Choose the number from contact list ( to next page)
- Add contact to list (Add speed dial photo...... Go to Settings > Contacts > Photo)
Add new contact to Favorite contacts in CALL button
- Settings > Contacts > Favorite
- Select the empty button
- Choose the number from contact list ( to next page)
- Add contact to list (Favorite contacts can be selected by pressing Call)
Click duration
Long press duration for menu buttons and text keyboard can be adjusted to be
faster or slower: Settings > Setup Wizard > Click Duration
Advanced Settings
- Settings > Advanced Settings
- Under the Advanced Settings menu, the following options can also be accessed:
1. Initial setting
2. Contacts
3. Personal Info
4. SOS and Support
5. Android settings
- Ringer melody and Volume
- Wifi
6. Medication Reminder
7. Display & Sound settings
8. .....
Talking Dialling Digits
- While pressing the numeric buttons, M50 will announce the corresponding
number (except when in silent mode)
(To disable this feature, go to Advanced Settings menu > Display & Sound
Settings > Sound Settings......)
SOS Assistance button
- Long press SOS button (Fig. A, 17) for 3 seconds to dial out assistance numbers
- M50 will enter handsfree mode automatically
- In parallel, an SMS with geolocation information will be sent to the recipient of this
assistance call and up to other 5 recipients. (To stop the SOS action: Long press CANCEL)
Set SOS number
Make sure the desired phone number exists in the phonebook.
- Settings > Advanced Settings > SOS and Support > SOS number > Select the
numbers...... Save
- An SMS will be sent to the selected numbers to inform them
ATTENTION:
• Remember to set the SOS number and inform the recipient
• To have SOS function working normally, the network service must be active
• Sending SMS may require additional cost!
Torch
To switch on/off the flashlight, slide up or down the torch switch (Fig. A,10)
located on the left-hand side of the phone.
USING YOUR M50 IN LIGHT ANDROID MODE
When light Android mode is selected, your M50 will show a simplified smartphone
interface, with large icons and easy-to-navigate pages.
1 7
2
3
4
5
6
1
2
3
5
4
10 - Torch sliding switch
11 - Charging contacts
12 - USB connector
13 - Flashlight LED
14 - Headset jack
15 - Main camera
16 - Flash
17 - SOS button
18 - Speaker
19 - Lanyard hole
1
10
2
3
9
12
11
4
7
5
6
8
13
15
16
17
18
19
14
1 - Charging cradle and contacts
2 - Phone button (answer incoming call
when smartphone on the base)
3 - Volume - key
4 - Volume + key
5 - Usb connector (at the back)
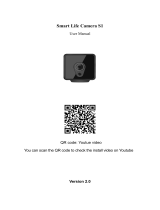
Instructions Manual
M50
1
5
2
3 4
1

• Use approved handsfree equipment and appropriate holder while driving. It is
essential to observe the applicable national laws and regulations.
• Always maintain a distance of at least 15 cm to implanted heart pacemakers
to prevent interference. Do not carry the phone in a chest pocket when
switched on. Always hold the phone to the ear furthest away from the
pacemaker during calls. Switch the phone off immediately if you notice or
suspect any adverse effects. Consult your doctor if you have any question.
• This phone is hearing aid compatible. If you wear a hearing aid, please
contact your doctor or the hearing aid manufacturer to inquire about any
possible impairments through mobile communication equipment.
• Do not rely on the mobile phone as a safeguard for emergencies. For a variety
of technical reasons, it is not possible to guarantee a reliable connection under
all circumstances.
• Ensure access to the power adapter plug is not obstructed by furniture or such.
ENVIRONMENT
This symbol means that your inoperative electronic appliance must be
collected separately and not mixed with the household waste. The
European Union has implemented a specific collection and recycling
system for which producers are responsible
Help us protect the environment in which we live!
DECLARATION OF CONFORMITY
The logo printed on the products indicates the conformity with all essential
requirements ( RED directive : 2014/53/EU ). You can download the Declaration
of Conformity from our website - www.amplicomms.com
WARRANTY
Please read carefully the instructions manual included in this box. M50 is an
approved equipment in accordance with the European regulations, attested by
the CE marking. The product you just bought is a technological product, it must
be handled with care.
Note: You have a legal warranty on this product in accordance with the
regulations applicable to the sale of consumer goods in the country in which
you made this purchase.
For any information regarding this legal warranty, please contact your dealer.
Without prejudice to the legal guarantee of the products, ATLINKS guarantees
that the product in this box conforms to its technical specifications contained
in the user guide included in the this box, and this during a warranty period,
counted from the date of purchase of the new product, the date on your
invoice or ticket checkout where is indicated the name of your reseller, and
equal to: Twenty four (24) months for the telephone, excluding consumables,
accessories and batteries. For any claim under this warranty during the warranty
period, you must return the entire Product to your dealer, together with the
proof of purchase, the invoice or receipt issued by your dealer, indicating
the place of purchase and the serial number of the Product, following the
appearance or discovery of the defect. ATLINKS undertakes to repair any
defective item due to a defect in design, material or workmanship, at its
expense, or to replace, at its expense, by an identical or at least equivalent
element in terms of functionalities and performance. If the repair or
replacement is impossible under normal commercial conditions, the Product
will be refunded or replaced by a Product equivalent. Within the maximum
limit allowed by the applicable law, the product or element replacement, which
may be new or reconditioned, is warranted during a period of ninety (90) days
from the date of repair or until the end date of the initial warranty period,
whichever is the earlier greater than ninety (90) days, it being specified that any
period of immobilization of the Product of at least seven (7) days will be added
to the warranty period remaining to run. This warranty does not apply in the
following cases:
- Installation or use not in accordance with the instructions in the guide of the user,
- Incorrect connection or abnormal use of the Product, especially with non-
compatible accessories, as indicated in the user guide,
- Product opened, modified or replaced by means of non-approved parts, serial
number deleted, illegible, damaged,
- Normal wear, including normal wear and tear on accessories, batteries and displays,
- Failure to comply with the technical and safety standards in force in the area
geographical use,
- Product having suffered a shock or a fall,
- Product damaged by lightning, electrical surge, heat source or radiation,
water damage, exposure to conditions of temperature, humidity or other
excessive ambient conditions or any other cause external to the product,
- Negligence or faulty maintenance,
- An intervention, a modification or a repair carried out by a not authorized by ATLINKS.
If the returned Product is not covered by the warranty, you will receive a quote
from repair that will mention the cost of analysis and transportation costs that
you will be charged if you want the Product returned to you. This guarantee is
valid in the country in which you regularly purchased the Product, provided that
the country is a member of the European Union. Subject to the legal provisions in
force, all warranties other than described herein are expressly excluded.
TO THE MAXIMUM EXTENT PERMITTED BY APPLICABLE LAW,
A) THIS WARRANTY IS EXCLUSIVE TO ALL OTHER WARRANTIES EXPRESS
OR IMPLIED, INCLUDING, BUT NOT LIMITED TO, WARRANTIES OF
MERCHANTABILITY OR FITNESS FOR A PARTICULAR PURPOSE PARTICULAR;
B) ATLINKS DISCLAIMS LIABILITY FOR LOSS OR DETERIORATION OF DATA, LOSS OF
USE LOST TO WIN, LOSS OF CHANCE, DEREVENUES OR INCOME, LOSS OF OPERATION,
DAMAGES INDIRECT, CONSEQUENTIAL, CONSEQUENTIAL OR INCIDENTAL;
(C) ATLINKS LIABILITY IS LIMITED TO THE VALUE OF PURCHASE OF PRODUCT
EXCEPT HEAVIL OR UNINTENTIONAL FAULT AND EXCEPT DAMAGE BODY.
1 - Google search
2 - Messages
3 - Chrome
4 - Apps area, swipe right/left for more pages
5 - Notification area, drag down to see more details or open configuration
Make a call
• Tap on Phone icon on the applications menu
• Click on the dial pad icon at the bottom of the screen
• Enter the phone number and then click the dial key
• Press and hold 0 key if you need to add a (+) sign for international calls prefix
(See Contacts section to dial phonebook entries)
• While on communication you can use the icons to activate handsfree, mute,
get the keypad to dial an extension or add another call
• To end the call, press on
Answer a call
• When a call is received, a pop up window will be shown
• Press green ANSWER button to accept or DECLINE to reject
• When the phone is on the base, you can use button to answer and end the
call in handsfree mode. You can also control the base loudspeaker volume
with and keys.
Call Logs
• To access recent calls: Phone > Recents tab
• To access full call log: Phone > > Call History
• To dial a number in the call log, click the dial icon
• To get more options, click on the number
• Long click on the number to copy or delete the record
• To clear the call logs, from Call History press the menu key > Clear
Contacts
To enter, tap on Contacts icon on the applications screen
• All contacts (SIM card, google account, phone contacts) will be displayed by
default, and in alphabetical order
• Click on Search icon to enter the contact search interface
• Click on Menu icon to access other functions (help, create labels, manage
contacts settings)
Add New Contact
• Contacts > (Or, from Phone > Contacts, press on Create new contact)
• Choose to save the contact to your Google Account, SIM, or phone
• You may enter different contact details which include adding a picture, name,
telephone number, group, address, and email among other options
• Click Save
Delete Contact
• Long press on the contact. You can choose multiple contacts to delete. Press
• You may also search for an individual contact in the phonebook, click to select,
press menu key , and Delete
Call one of your contacts
• Enter Contacts app (or Phone app > Contacts tab)
• Browse or search your contact, click on it
• Then click again on the phone icon
Import / Export Contacts
You can import and export contacts to synchronize information between
different storage types (SIM card, Google account and your phone).
To import or export contacts:
1. Enter Contacts app
2. Press the menu icon and select Settings, go down to Import / Export
3. Select the source you want to copy the contacts from, then click next and select
the destination. Then select the desired contacts to be copied
Messages
Exchange text and multimedia messages with your family and friends. Messages
to and from the same phone number will be saved into a single conversation.
Send an SMS
• Enter Messages > Start chat
• Enter a contact name or number, or select from the list
• Compose Text Message and click send icon
Send an MMS
• Start by writing a regular SMS
• Click the attachment icon in the messaging interface
• Click to add attachments and create an MMS message
Notifications Bar
The notification bar located on the top of the screen contains information
regarding your phone and installed apps.
The notification settings window provides shortcuts to different phone settings
for quick access. Click on any of the shortcut notification icons
( ) to power on or off.
Drag the notification bar down with your finger to display any pending
notifications or actions.
To clear, drag to your right.
Power on Bluetooth
• Drag down the notification bar and click on Bluetooth icon to enable
• Or Settings > Connected devices > Connection preferences > Bluetooth
and switch Bluetooth on. Bluetooth icon will appear in the notification bar
• Click on “Pair new device” to see a list of available devices within the phone’s
range. You can pair with an available device by clicking on it
• Settings > Connected devices will list available devices
Power on Wi-Fi
• Drag down the notification bar and click on Wifi icon to enable
• Or Settings > Network & Internet > Wi-Fi and select ON to power on Wi-Fi
• Click on the desired Wi-Fi network to be connected
Note: Secured networks require a password or credentials prior to connection.
Camera
Optional: You may want to insert an SD card before using the camera or video
camera for larger storage capacity.
Take Pictures
• Camera > press the Shutter on the screen to capture image
• To view your picture, click on the Preview box button or go to Gallery >
Camera folder
• Click on Picture/Video icons to switch capture mode
• Tap on to switch between normal and selfie modes
• Tap on to open flash mode selection interface
Gallery
Gallery is your image center. With Gallery you can view, organize, edit, and share
your pictures and videos.
Google folder > Gallery > Tap on any image. Then use the bottom menu to edit or share
to your contacts.
Settings
Settings gives access to phone configuration parameters. For a comprehensive list,
check the full user guide.
Change language
• Settings > System > Language and input > Language
Change sound settings
• Settings > Sound
Use this menu to configure volume and melodies for calls, notifications, multimedia, etc.
Some of the settings include vibration, volume, ring tones, ring tones notification,
dial touch pad, and haptic feedback and tones.
Torch
To switch on/off the flashlight, slide up or down the torch switch (Figure A, 10)
located on the left-hand side of the phone.
SOS Assistance button
• Long press the SOS button (Figure A, 17) for 3 seconds to dial out assistance
numbers
• M50 will enter handsfree mode automatically
• In parallel, an SMS with geolocation information will be sent to the recipient
of this assistance call and up to other 5 recipients
(To stop the SOS action: Long press CANCEL)
Set SOS number
• Make sure the desired phone number exists in the phonebook
• From the applications screen, tap on SOS Numbers icon
• Select the numbers...... Save
An SMS will be sent to the selected numbers to inform them
ATTENTION:
• Remember to set the SOS number and inform the recipient
• To have SOS function working normally, the network service must be active
• Sending SMS may require additional cost!
Video calls with Duo
Duo is Google’s app for video calls.
To video call a contact: Google folder > Duo > Click on a contact > Video call.
SWITCHING M50 MODE
Switch from Android to Simple Smartphone mode
• From Android, click on Select Home app
• Press Simple Smartphone button
Switch from Simple Smartphone to Android mode
• From Home screen, go to Tools > Exit System
• Click on Select Home app
• Press Android button
PAIRING M50 WITH THE BASE
Android mode:
• Settings > Connected devices > Pair new device
• Place your M50 on the base charging cradle
• Tap on M50 Smart Base when it appears in the device list, then click
on PAIR
Simple Smartphone mode:
• Tools > Exit System and then follow same steps as above
TECHNICAL DATA
Dual SIM cards SIM + 4G USIM; dual standby
HAC M4/T4
Processor
MTK6739WA (1.3GHz Quad core Arm Cortex-A7)
OS Android 10Go
Memory RAM: 1GB
ROM: 16GB
Camera Rear: 5 Mpx
Front: 2Mpx
Mobile data 2G GPRS, 3G: WCDMA, 4G:FDD-LTE
Battery Li-Ion, 2700mAh / 4.35V
Talk time Up to 8h
Standby time Up to 300h
Dimensions / Weight Approx 145x70x5mm /160g
USB jack Micro USB
Headset connection 3.5 mm
Network bands (MHz) /
Maximum power (dBm):
- GSM 2G: 850/ 33, 900/ 33, 1800/30, 1900/ 30
- 3G: 1 [2100]/ 24, 8 [900]/ 24
- 4G : 1 [2100]/ 24, 3 [1800]/ 24, 7 [2600]/ 24, 20 [800]/ 24
- Bluetooth: 2400 – 2480 / 10
- WiFi IEEE802.11b/n/g 2412 – 2472 / 20
SAR Values Max. (W/Kg)
2G: Head: 0.224; Body: 0.525; Limb: 1.265
3G: Head: 0.130; Body: 0.502; Limb: 1.045
4G: Head: 0.097; Body: 0.670; Limb: 2.226
WiFi: Head: 0.190; Body: 0.058; Limb: 0.891
PROBLEMS AND SOLUTIONS
Problems Solutions
The mobile phone cannot be switched on No battery inserted; Battery is not charged.
The phone is requesting a PUK when I
switch on the phone
If you do not have the PUK for your SIM card,
please contact your service provider.
No signal quality is displayed No network connection. The mobile phone is
in a location where there is no network service,
please move to a different location or contact
your service provider
A message appears in the display for
some functions, indicating execution/
use is not possible
Some functions can only be used after the
respective service has been applied for. Contact
your service provider.
Screen frozen or no response when
pressing keys
Remove the battery for 3 minutes and try again
No connection to the mobile
telecommunication network
Contact your service provider
The “Insert SIM“ message appears in
the display
Ensure that the SIM card has been installed
correctly. Contact your service provider.
The battery cannot be charged or is
empty within a short time
Battery is defective; Place the phone correctly
in the charging unit or connect the charging
unit properly; Clean the charging contact of the
mobile phone and charging unit with a dry soft
cloth; Charge the mobile phone for 4 hours.
The mobile phone has accidentally
got wet
Switch off the phone Immediately, remove the
battery and allow the unit to dry completely
before powering it on again.
TIPS ON THE BATTERY
• Only use batteries, cables and charging unit approved by the manufacturer,
otherwise the battery could be damaged.
• Do not short circuit the battery. Always leave the battery in the phone to
avoid accidentally short circuiting the battery contacts.
• Keep the battery contacts clean and free of dirt.
• The battery can be charged/discharged hundreds of times but its service life is
limited. Replace the battery when the battery power has decreased noticeably.
NETWORK SERVICES AND COSTS
M50 is designed for use when connected to a mobile phone network. Using
network services and SMS may result in traffic costs.
AREA OF USE
• Do not use the phone in prohibited areas.
• Switch the phone off without affecting nearby medical equipment (e.g. in
hospitals).
• Do not use the phone in petrol stations or near fuels and chemicals.
SAFETY
• Prevent exposure to smoke, dust, vibration, chemicals, moisture, heat and
direct sunlight.
• The phone is not waterproof, please keep it dry.
• Only use original accessories and battery. Never attempt to connect other products.
• Never attempt to connect incompatible products.
• Repairs to this device must be completed by qualified service personnel.
• Keep the phone and accessories out of the reach of children.
• The SIM card can be removed. Caution! Small children can swallow them.
• The ringing tone is issued via the loudspeaker. Take an incoming call first and
then hold the phone to your ear. This prevents any possible hearing damage.
Model : Amplicomms M50
A/W No. : 10002356 Rev.1 (EN)
Printed in China
Atlinks Europe
147 Ave Paul Doumer
92500 Rueil-Malmaison France
RCS Nanterre 508 823 747
www.amplicomms.com
©Copyright ATLINKS 2020 - Reproduction prohibited
The Manufacturer reserves the right to modify the specifications of its products
to make technical improvements or comply with new regulations.
AMPLICOMMS and ATLINKS are registered trademarks.
Google, Android, and Google Play are trademarks of Google LLc.
-
 1
1
-
 2
2


Ask a question and I''ll find the answer in the document
Finding information in a document is now easier with AI
Related papers
Other documents
-
 Jayol S1 User manual
-
 Neoi 909 User manual
-
SwissVoice G50 User manual
-
Sharper Image Smartphone Battery Backup Owner's manual
-
Denver BAS-18300M User manual
-
Okayo AT 100 Tour Guide System User guide
-
Siemens M50 User manual
-
Infiniton F1 BLACK Owner's manual
-
Pyle PWPBT30 User manual
-

