Page is loading ...

SOFTWARE USER’S GUIDE

i
Table of contents
1
Using the machine as a printer ...........................................1-1
Using the Brother printer driver.........................................1-1
How to print your document..............................................1-2
Simultaneous printing and faxing......................................1-3
Two-sided printing (Duplex Printing)...........................1-3
Automatic Duplex Printing (For MFC-8640D,
MFC-8840D, MFC-8840DN and DCP-8045D)...1-3
Manual Duplex Printing ..........................................1-4
Face-down output tray................................................1-4
Printing on plain paper................................................1-5
The manual feed tray
(For MFC-8440 and DCP-8040).........................1-5
The MP tray (For MFC-8640D, MFC-8840D,
MFC-8840DN and DCP-8045D).........................1-6
Printing on thicker paper and card stock ....................1-7
The manual feed tray
(For MFC-8440 and DCP-8040).........................1-7
The multi-purpose tray (MP tray)
(For MFC-8640D, MFC-8840D, MFC-8840DN
and DCP-8045D)................................................1-9
Printing on envelopes...............................................1-11
Printer operation keys.....................................................1-16
Job Cancel................................................................1-16
Secure key................................................................1-16
Setting the Emulation Selection................................1-17
Printing the Internal Font List....................................1-18
Printing the Print Configuration List..........................1-18
Restoring factory default settings .............................1-18
2
Printer driver settings (Windows
®
Only) ............................2-1
Printer driver settings........................................................2-1
How to access the printer driver settings..........................2-1
Features in the Brother Native Driver ...............................2-3
Basic tab.....................................................................2-3
Paper Size..............................................................2-4
Multiple Page..........................................................2-4
Orientation..............................................................2-4
Copies ....................................................................2-5
Collate ....................................................................2-5
Media Type.............................................................2-5
Advanced tab..............................................................2-6

ii
Print Quality............................................................2-6
Duplex Printing.......................................................2-8
Watermark..............................................................2-9
Page Setting.........................................................2-11
Device Options.....................................................2-12
Secure Print..............................................................2-12
Accessories tab....................................................2-16
Support tab...........................................................2-17
Features in the PS printer driver (For Windows
®
) ..........2-18
Ports tab ...................................................................2-18
Device Settings tab...................................................2-19
Layout tab.................................................................2-20
Booklet (For MFC-8640D, MFC-8840D,
MFC-8840DN and DCP-8045D) (For Windows
®
2000/XP) ..........................................................2-20
Paper / Quality tab....................................................2-21
Advanced Options ....................................................2-22
3
How to scan using Windows
®
.............................................3-1
Scanning a document (For Windows
®
XP only) ...............3-2
WIA compliant ............................................................3-2
How to access the scanner ........................................3-2
Scanning a document into the PC..............................3-3
Scanning a document using the ADF.....................3-3
PreScanning to crop a portion you want to
scan using the scanner glass.............................3-5
Brother Scanner Utility ...........................................3-7
TWAIN compliant scanner driver for
Windows
®
XP.....................................................3-7
Scanning a document ......................................................3-8
TWAIN compliant........................................................3-8
How to access the Scanner........................................3-9
Scanning a document into the PC............................3-10
Scanning a whole page........................................3-10
PreScanning to crop a portion you want to scan
.....3-11
Settings in the Scanner window ...............................3-13
Image Type ..........................................................3-13
Resolution ............................................................3-13
Scan Type ............................................................3-14
Brightness ............................................................3-14
Contrast................................................................3-14
Document Size.....................................................3-15

iii
Using the scan key (For USB or Parallel interface
cable users).................................................................3-17
Scan to E-mail ..........................................................3-18
Scan to Image ..........................................................3-18
Scan to OCR.............................................................3-19
Scan to File...............................................................3-19
Using ScanSoft
®
PaperPort
®
9.0SE and
OmniPage
®
OCR.........................................................3-20
Viewing items............................................................3-21
Organizing your items in folders...............................3-22
Quick links to other applications...............................3-22
ScanSoft
®
OmniPage
®
OCR lets you convert
image text into text you can edit...........................3-23
You can Import items from other applications..........3-23
You can Export items in other formats......................3-24
Exporting an image file.........................................3-24
How to Uninstall PaperPort
®
9.0SE and
ScanSoft
®
OmniPage
®
OCR ................................3-25
4
Using ControlCenter2.0 (For Windows
®
) ...........................4-1
ControlCenter2.0 ..............................................................4-1
How to turn off the AutoLoad feature in
ControlCenter2.0....................................................4-2
SCAN..........................................................................4-3
CUSTOM SCAN.........................................................4-3
COPY .........................................................................4-4
PC-FAX (For MFC-8440, MFC-8640D, MFC-8840D
and MFC-8840DN only)..........................................4-4
DEVICE SETTING (For MFC-8440, MFC-8640D,
MFC-8840D and MFC-8840DN only).....................4-4
SCAN................................................................................4-5
Image (example: Microsoft Paint)...............................4-5
OCR (Word Processing program)...............................4-7
E-mail..........................................................................4-8
File attachments .........................................................4-9
File............................................................................4-10
CUSTOM SCAN .............................................................4-11
Customizing a user-defined button...........................4-12
Scan to Image: .....................................................4-12
Scan to OCR: .......................................................4-13
Scan to E-mail: .....................................................4-14
Scan to File:..........................................................4-15
COPY..............................................................................4-16

iv
PC-FAX (For MFC-8440, MFC-8640D, MFC-8840D
and MFC-8840DN only)...............................................4-18
Send.........................................................................4-18
Receive / View Received..........................................4-19
Address Book...........................................................4-20
Setup........................................................................4-20
DEVICE SETTING (For MFC-8440, MFC-8640D,
MFC-8840D and MFC-8840DN only)..........................4-21
Remote Setup...........................................................4-21
5
Using MFC Remote Setup (For Windows
®
)
(For MFC-8440, MFC-8640D, MFC-8840D and MFC-8840DN only)
....5-1
MFC Remote Setup..........................................................5-1
6
Using Brother PC-FAX software (For Windows
®
)
(For MFC-8440, MFC-8640D, MFC-8840D and MFC-8840DN only)
6-1
PC-FAX sending...............................................................6-1
Setting up user information.........................................6-2
Sending setup.............................................................6-3
Outside line access ....................................................6-3
Include header............................................................6-3
User interface.............................................................6-4
Simple style............................................................6-4
Facsimile style........................................................6-4
Address Book.............................................................6-5
Speed-Dial setup..............................................................6-6
Brother Address Book ................................................6-7
Setting up a Member in the Address Book.................6-8
Setting up a Group for Broadcasting..........................6-9
Editing Member information......................................6-10
Deleting a Member or Group....................................6-10
Exporting the Address Book.....................................6-10
Importing to the Address Book.................................6-12
Setting up a Cover Page ..........................................6-14
Entering Cover Page Information.............................6-15
Sending a file as a PC-FAX using the Facsimile
style user interface ...............................................6-16
Redial ...................................................................6-17
Sending a file as a PC-FAX using the Simple
style user interface ...............................................6-17
Setting up PC-FAX receiving..........................................6-19
Running PC-FAX Receiving.....................................6-19
Setting up your PC ...................................................6-19
Viewing new PC-FAX messages..............................6-20

v
7
Using your machine with a Macintosh
®
.............................7-1
Setting up your USB-equipped Apple
®
Macintosh
®
..........7-1
Using the Brother printer driver with your Apple
®
Macintosh
®
(Mac OS
®
8.6 - 9.2)....................................7-2
Using the Brother Printer Driver with Your Apple
®
Macintosh
®
(Mac OS
®
X)...............................................7-5
Choosing page setup options.....................................7-5
Specific settings..........................................................7-6
Using the PS driver with your Apple
®
Macintosh
®
............7-7
For Mac OS
®
8.6 to 9.2 users.....................................7-7
For Mac OS
®
X users ...............................................7-11
Sending a fax from your Macintosh
®
application
(For MFC-8440, MFC-8640D, MFC-8840D and
MFC-8840DN only)......................................................7-14
For Mac OS
®
8.6 - 9.2 users ....................................7-14
For Mac OS
®
X users ...............................................7-16
Drag a vCard from the Mac OS
®
X Address Book
application ........................................................7-18
Using the Brother TWAIN scanner driver with your
Macintosh
®
...................................................................7-20
Accessing the scanner..............................................7-20
Scanning an image into your Macintosh
®
.................7-21
Scanning a whole page ........................................7-21
PreScanning an image .............................................7-22
Settings in the Scanner window................................7-23
Image....................................................................7-23
Scanning Area......................................................7-25
Business Card Size ..............................................7-25
Adjusting the Image..............................................7-26
Using Presto!
®
PageManager
®
.......................................7-27
Highlights..................................................................7-27
System requirements................................................7-28
Technical Support.....................................................7-28
Using ControlCenter2.0
(For Mac OS
®
X 10.2.1 or greater)..............................7-29
How to turn off the AutoLoad feature in
ControlCenter2.0..................................................7-30
SCAN........................................................................7-31
CUSTOM SCAN.......................................................7-31
COPY .......................................................................7-32
DEVICE SETTINGS (For MFC-8440, MFC-8640D,
MFC-8840D and MFC-8840DN only)...................7-32
SCAN........................................................................7-33
Image (example: Apple PreView).........................7-33

vi
OCR (Word Processing program) ........................7-35
E-mail ...................................................................7-36
File attachments...................................................7-37
File........................................................................7-38
CUSTOM SCAN.......................................................7-39
Customizing a user-defined button.......................7-40
Scan to Image: .....................................................7-40
Scan to OCR: .......................................................7-41
Scan to E-mail:.....................................................7-42
Scan to File: .........................................................7-43
COPY .......................................................................7-44
DEVICE SETTINGS (For MFC-8440, MFC-8640D
MFC-8840D and MFC-8840DN only)...................7-46
Remote Setup ......................................................7-46
MFC Remote Setup (Mac OS
®
X) (For MFC-8440,
MFC-8640D, MFC-8840D and MFC-8840DN only) ....7-47
8
Network Scanning (Windows
®
98/98SE/Me/
2000 Professional and XP only) .........................................8-1
Network License.........................................................8-1
Registering your PC with the machine .......................8-2
Using the Scan key...........................................................8-5
Scan to E-mail (PC)....................................................8-5
Scan to E-mail (E-mail server)
(For MFC-8440,
MFC-8640D, MFC-8840D and MFC-8840DN only)
.......8-6
Scan to Image ............................................................8-7
Scan to OCR ..............................................................8-8
Scan to File.................................................................8-9
9
Brother Network PC-FAX software (For MFC-8440,
MFC-8640D, MFC-8840D and MFC-8840DN only) .............9-1
Enable Network PC-FAX............................................9-1
Sending setup ........................................................9-1
Extra options in Address Book...............................9-3
Using the Brother Network PC-FAX software.............9-4
Quick Tips: .............................................................9-4
Sending a Network PC-FAX from your Macintosh
®
application ..............................................................9-5
For Mac OS
®
8.6-9.2 users ....................................9-5
For Mac OS
®
X users.............................................9-5
I
Index ......................................................................................I-1

1 - 1 USING THE MACHINE AS A PRINTER
1
Using the Brother printer driver
A Printer Driver is software that translates data from the format used
by a computer into the format required by a particular printer, using
a printer command language or page description language.
The printer drivers are on the CD-ROM we have supplied. Install the
drivers first by following the Quick Setup Guide. Also, the latest
printer driver can be downloaded from the Brother Solutions Center
at:
Windows
®
Printing
The dedicated printer driver and TrueType
™
compatible fonts for
Microsoft
®
Windows
®
98/98SE/Me/2000 Professional/XP and
Windows NT
®
workstation 4.0 are available on the CD-ROM
supplied with your machine. You can install them easily into your
Windows
®
system using our installer program. The driver supports
our unique compression mode to enhance printing speed in
Windows
®
applications, and allows you to set various printer
settings, including economy printing mode and custom paper size.
Popular Printer Emulation Support
The machine supports HP LaserJet (PCL level 6) and BR-Script 3
(PostScript
®
3
™
) printer emulation mode. If you use DOS application
software, you can use HP LaserJet (PCL level 6) and BR-Script 3
(PostScript
®
3
™
) emulation mode for printer operations.
Using the machine as a
printer
http://solutions.brother.com

USING THE MACHINE AS A PRINTER 1 - 2
How to print your document
When the machine receives data from your computer, it begins
printing by picking up paper from the paper tray. The paper tray can
feed many types of paper and envelopes.
1
From your computer select the Print command.
If your computer is also connected to any other printers, select
Brother MFC-XXXX or DCP-XXXX (USB) Printer (Where
XXXX is your model name) as your printer driver from the Print
or Print Settings menu in your software application, and then
click on OK to begin printing.
2
Your computer sends a print command and data to the machine.
3
The LED blinks in yellow and the machine starts to print.
If your application software does not support your custom paper size,
select the next largest paper size.
Then adjust the print area by changing the right and left margins in
your application software.
You can select the paper size and orientation in your application
software.

1 - 3 USING THE MACHINE AS A PRINTER
Simultaneous printing and faxing
Your machine can print from your computer while scanning the
document into the computer, or while sending/receiving a fax in
memory. (MFC-8440, MFC-8640D, MFC-8840D and MFC-8840DN
only) Fax sending will not be stopped during PC printing.
Two-sided printing (Duplex Printing)
The supplied printer driver supports duplex printing. (For more
information, see Duplex Printing on page 2-8.)
Automatic Duplex Printing
(For MFC-8640D, MFC-8840D, MFC-8840DN and
DCP-8045D)
In this mode, the machine prints on both sides of A4, Letter or
Legal paper automatically.
1
Open the Properties dialog box in the printer driver.
2
Select Duplex Printing mode in the Advanced tab, make sure
that ‘Use Duplex Unit’ has been selected, and then click the OK
button. (See Duplex Printing on page 2-8.) The printer will print
on both sides of the paper automatically.
■ When you select Use Duplex Unit, HQ 1200 is not
available.
■ If you also want to use Duplex Printing for fax and copy
operations, see To use Automatic Duplexing for fax, copy
and print operations (For MFC-8640D, MFC-8840D,
MFC-8840DN and DCP-8045D) in the User’s Guide.

USING THE MACHINE AS A PRINTER 1 - 4
Manual Duplex Printing
The machine prints all the
even-numbered pages on one
side of the paper first.
Then, the Windows
®
driver
instructs you (with a pop-up
message) to reinsert the paper.
Before reinserting the paper,
straighten it well, or you may get
a paper jam. Very thin or very
thick paper is not recommended.
We recommend 20 to 24 lb (75 to 90 g/m
2
) paper.
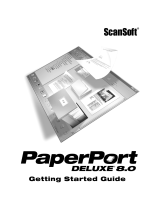
Face-down output tray
The machine ejects paper with printed surfaces face down into the
output tray in the front of the machine. Unfold the support flap to
support the printed pages.
When printing transparencies, remove each one from the
support flap after it exits the machine.
Support Flap
with Extension

1 - 5 USING THE MACHINE AS A PRINTER
Printing on plain paper
The manual feed tray (For MFC-8440 and DCP-8040)
1
Select the Paper Size, Media Type, Paper Source, and other
settings in the printer driver.
Media Type: Plain Paper
Paper Source: Manual
2
Send the print data to the machine.
3
Open the manual feed tray. Slide the paper guides to fit the
paper size.
4
Using both hands put paper in the manual feed tray until the
front edge of the paper touches the paper feed roller and the
machine grips the paper.
5
After the printed page comes out of the machine, put in the next
sheet of paper as in Step 4 above. Repeat for each page that
you want to print.
The machine automatically turns on the Manual Feed mode
when you put paper in the manual feed tray.
■ Make sure that the paper is straight and in the proper
position on the manual feed tray. If it is not, the paper may
not be fed properly, resulting in a skewed printout or a paper
jam.
■ Do not put more than one piece of paper in the manual feed
tray at any one time, or it may cause a jam.

USING THE MACHINE AS A PRINTER 1 - 6
The MP tray
(For MFC-8640D, MFC-8840D, MFC-8840DN and
DCP-8045D)
1
Select the Paper Size, Media Type, Paper Source, and other
settings in the printer driver.
Media Type: Plain Paper
Paper Source: MP Tray
2
Open the MP tray and lower it gently.
3
Pull out the MP tray support flap.
4
When loading paper in the MP tray, make sure it touches the
back of the tray.
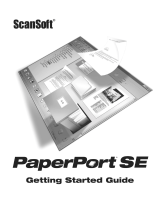
5
While pressing the paper-guide release lever, slide the paper
guide to fit the paper size.
6
Send the print data to the machine.
Make sure that the paper is straight and in the proper position
on the MP tray. If it is not, the paper may not be fed properly,
resulting in a skewed printout or a paper jam.
When you put paper in the MP tray, please remember the
following:
■ The side to be printed on must be face up.
■ During printing, the inside tray rises to feed paper into the
machine.
■ Put the leading edge (top of the paper) in first and push it
gently into the tray.
Paper-guide
Release Lever

1 - 7 USING THE MACHINE AS A PRINTER
Printing on thicker paper and card stock
When the back output tray is pulled down, the machine has a straight
paper path from the manual feed tray or the MP tray through to the
back of the machine. Use this paper feed and output method when
you want to print on thicker paper or card stock.
The manual feed tray (For MFC-8440 and DCP-8040)
1
Select the Paper Size, Media Type, Paper Source, and other
settings in the printer driver.
Media Type: Thick paper or Thicker paper
Paper Source: Manual
2
Open the back output tray.
3
Open the manual feed tray. Slide the paper guides to fit the
paper size.
4
Using both hands put the paper in the manual feed tray until the
front edge of the paper touches the paper feed roller and the
machine grips the paper.
5
Send the print data to the machine.
■ Make sure that the paper is straight and in the proper
position in the manual feed tray. If it is not, the paper may not
be fed properly, resulting in a skewed printout or a paper
jam.
■ Do not put more than one piece of paper in the manual feed
tray at any one time, or it may cause a jam.

USING THE MACHINE AS A PRINTER 1 - 8
6
After the printed page comes out of the machine, put in the next
sheet of paper as in Step 4 above. Repeat for each page that
you want to print.
7
When you have finished the print job, close the back output tray.
Caution
Remove each sheet immediately after printing. If you allow the
sheets to stack, you may cause the machine to jam or curl the paper.

1 - 9 USING THE MACHINE AS A PRINTER
The multi-purpose tray (MP tray)
(For MFC-8640D, MFC-8840D, MFC-8840DN and
DCP-8045D)
1
Select the Paper Size, Media Type, Paper Source, and other
settings in the printer driver.
Media Type: Thick paper or Thicker paper
Paper Source: MP Tray
2
Open the back output tray, and then unfold the face-up output
tray support if necessary.
3
Open the MP tray and lower it gently.
4
Pull out the MP tray support flap.
5
When putting paper in the MP tray, make sure it touches the
back of the tray.
6
While pressing the paper-guide release lever, slide the paper
guide to fit the paper size.
Make sure that the paper is straight and in the proper position in
the MP tray. If it is not, the paper may not be fed properly,
resulting in a skewed printout or a paper jam.

USING THE MACHINE AS A PRINTER 1 - 10
7
Send the print data to the machine.
8
When you have finished the print job, close the back output tray.
Caution
Remove each sheet immediately after printing. Stacking the sheets
may cause a paper jam or the paper to curl.
When you put paper in the MP tray, please remember the
following;
■ During printing, the inside tray rises to feed paper into the
machine.
■ The side to be printed on must be face up.
■ Put the leading edge (top of the paper) in first and push it
gently into the tray.

1 - 11 USING THE MACHINE AS A PRINTER
Printing on envelopes
To print on envelopes use manual feed tray or multi-purpose tray.
1
Select the Paper Size, Media Type, Paper Source, and other
settings in the printer driver.
Media Type: Envelope, Env.thin or Env.thick
For MFC-8440 and DCP-8040:
2
Open the back output tray.
3
Open the manual feed tray. Slide the paper guides to fit the
envelope size.
■ The machine automatically turns on the Manual Feed mode
when you put paper in the manual feed tray.
■ All sides should be properly folded without any wrinkles or
creases.
If envelopes are creased after they have been printed:
At the back of the machine, open the back output tray and push
down the blue tabs at the left and right hand sides (as shown in
the figure on the next page). When you have finished printing
your envelopes, close the back output tray to reset the two blue
tabs back to their original position.

USING THE MACHINE AS A PRINTER 1 - 12
4
Using both hands put the envelope in the manual feed tray until
the front edge of the envelope touches the paper feed roller.
Hold the envelope in this position until the machine
automatically feeds it in for a short distance, and then let go of
the envelope.
■ Make sure the envelope is straight as you insert it in the
manual feed tray. If it is not, the envelope may not be fed
properly, resulting in a skewed printout or a jam.
■ Do not put more than one envelope in the manual feed tray
at any one time, or it may cause a jam.
■ Put the envelope in the manual feed tray, making sure that
the side to be printed on is face up in the tray.

1 - 13 USING THE MACHINE AS A PRINTER
5
After the printed envelope comes out of the machine, the
machine will wait until you put in the next envelope. Repeat Step
4 for each envelope you want to print.
6
Send the print data to the machine.
7
After you finish the print job, close the back output tray.
For MFC-8640D, MFC-8840D, MFC-8840DN and DCP-8045D:
2
Open the back output tray, and then unfold the face-up output
tray support if necessary.
3
Open the MP tray and lower it gently.
4
Pull out the MP tray support flap.
If envelopes are creased after they have been printed:
At the back of the machine, open the back output tray and push
down the blue tabs at the left and right hand sides (as shown in
the figure on the next page). When you have finished printing
your envelopes, close the back output tray to reset the two blue
tabs back to their original position.
/