Page is loading ...

Powered Water Filtration System
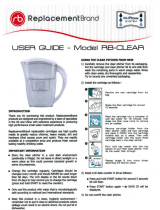
Set Up Instructions
Quick Start
• Insert filter before using
• Flush system one full cycle before drinking
• Enjoy delicious, Aquasana filtered water!
Please read entire set up instructions before using.
We’re here to help!
Our experts can guide you through
your new system questions or concerns.
Contact us directly at
..

System Set-up
Please read entire installation guide before using the filter system and ensure all parts listed are
present. If any part is missing or damaged, do not attempt to operate the filter. Please contact
Customer Service for replacement parts at (866) 662-6885.
Not all purchases include both pitcher and dispenser. Additional pitchers and dispensers are
optional. Extra pitchers and dispensers can be purchased at aquasana.com.
Contents
AQPWFSRB, AQPWFSRB, AQPWFSRBW, AQPC, AQPCBK
AQPWFSPW, AQPWFSPB AQPWFSDW, AQPWFSDB
Filtration Dock
Filtration
Dock
Filtration
Dock
Dispenser with Lid Pitcher with Lid
Pitcher
with Lid
Dispenser
with Lid
Claryum
®
Filter
Claryum
®
Filter
Claryum
®
Filter
Welcome to the Aquasana experience. You are about to enjoy
clean, healthy water and the peace of mind that comes from
knowing award-winning filter technology is working for you.

Easy to install
IMPORTANT
Flush system one
cycle before drinking
Drop the filter cartridge into the
opening on the dock as shown (male
end up). Next, place the top cover back
on the dock. Pressing down firmly,
rotate the top cover back to the left
until it is fully closed and locked in.
With filtration dock
facing forward, use
grooves on the left
hand side of the top
cover to slide the top
cover to the right
until it lifts up and o.
Pitcher
• New filters must be flushed (1 full pitcher) before drinking.
Note: Filtering may take up to 2 minutes to begin on the initial run.
• Place lid on pitcher.
• Fill center reservoir with cold water through drop-shaped opening.
• Place pitcher with lid onto the filtration dock until fully locked in.
Dispenser
• New filters must be flushed (1 full dispenser) before drinking.
Note: Filtering may take up to 2 minutes to begin on the initial run.
• Place lid on dispenser.
• Fill dispenser with cold water through drop-shaped opening.
• Attach dispenser with lid onto the filtration dock until fully locked in.
SYSTEM WILL NOT RUN
WITHOUT WATER
SYSTEM WILL NOT RUN WITHOUT LID
SECURED ON PITCHER OR DISPENSER
Prepare the filtration dock
• Unpack and unwrap contents of box
and remove plastic wrapping from
smart filter cartridge.
• Install smart filter.
Once pitcher is attached to the filtration
dock, it will automatically begin filtering.
There will be a 5-10 second delay before
the outer reservoir starts to fill.
The system will run until the center reservoir is completely empty. Do not refill center reservoir with
unfiltered water if there is still filtered water left in the outer reservoir. System will overflow.
Please wait for the front light to turn o before removing the pitcher from the dock.
To dispense filtered water, push
button on reservoir lid. There will
be a 5-10 second delay for water
to filter through.
Please wait for system to finish
filtering before removing the dispenser from the dock.
Once dispenser is removed there may be residual water left on the dock; this is normal.
Indicator Light Key: Lights will be on only while the system is running.
(reset)
Please note:
Water may leak
from circular
valve when
inserting pitcher
or dispenser onto
dock.
(grooves)
SOLID BLUE
FILTER IS AT
OPTIMAL PERFORMANCE
BLINKING RED
FILTER IS AT 90% CAPACITY
SOLID RED
FILTER REACHED 100% CAPACITY
CHANGE FILTER
Once filter is installed, plug the filtration dock into an electrical outlet.

Use and Care Guide
To clean your filter unit, wipe down the exterior with a damp cloth.
Both the pitcher body and dispenser body are dishwasher safe. The lids are NOT dishwasher safe
and should be hand washed only. DO NOT use the heat cycle of the dishwasher for drying your
pitcher body and dispenser body.
Replacing your Claryum
®
smart filter
When the blue light changes to a red blinking light, your filter
has reached a 90% capacity.
When the blinking red light changes to a solid red light your
filter has reached a 100% capacity and needs to be replaced.
Your old filter can be removed and discarded.
Failure to replace the filter when needed can cause damage to your system.
Press reset button when you replace your smart filter (see replacement cartridge instructions).
Troubleshooting Guide
What should I do if my system won’t run?
• Make sure the system is plugged into a power source.
• Ensure that the pitcher or dispenser is fully attached to
the filtration dock — remove pitcher/dispenser and place
it back onto the filtration dock.
• Make sure the center reservoir (pitcher) or dispenser
contains water. System will not run without water.
• Dry up any excess water that may be on the base of the filtration dock.
• Make sure lid is attached to pitcher or dispenser. System will not run without lid being attached
to pitcher or dispenser correctly.
What if water is leaking from bottom of pitcher when attached to the base?
• Ensure that the pitcher or dispenser is fully attached to the filtration dock
— remove pitcher/dispenser and place it back onto the filtration dock.
What should I do if my system is leaking between the top cover and filtration dock?
• Remove top cover from filtration dock.
(Refer to “Easy to Install” section on how to remove the cover.)
• Ensure that the black rubber “o-ring” is in place on the bottom connection point of the lid.
• Ensure the cartridge is installed correctly. (Refer to “Easy to Install” section.)
My water is cloudy.
• Cloudy water is just microscopic air bubbles, and should dissipate within a few minutes of filling
outer reservoir.
• If cartridge was flushed through 1 full cycle and you continue to see cloudiness, this is normal for
the first few days of use on new cartridge installations.
The circular valve at the base of the dock leaks when I put the pitcher or dispenser on the dock.
• Ensure you insert the pitcher or dispenser squarely on top of the circular valve to avoid
depressing the valve plunger that releases water.
• Small amounts of water on the base will not disrupt the filter system.
Precautions:
• Do not operate without the filter cartridge installed.
• Filter is only to be used with cold water.
• Children and persons whose physical, sensory or mental capabilities
or lack of experience and knowledge using the system safely without
instruction should have supervision while using the filtration system.
• Do not use with water that is microbiologically unsafe or of unknown
quality without adequate disinfection before or after the system.
• Systems certified for cyst reduction may be used on disinfected waters
that may contain filterable cysts.
Product Specs:
Pitcher (Complete System):
Height: 11 ⁄”
Length: 17 ½”
Width: 4 ½”
Volume: 8 cups (½ Gallon)
Operating temp range:
40-90° F (4.44-32.2° C)
Rated flow rate:
0.5 gpm (1.8 lpm)
Capacity of filter:
320 gallons (1,211 l)
Min-Max Working Pressure:
20-70 psi (137-482 kPa)
Voltage:
100-240
Dispenser (Complete System):
Height: 11 ⁄”
Length: 20 ¼
Width: 4 ½”
Volume: 16 cups (1 Gallon)
Operating temp range:
40-90° F (4.44-32.2° C)
Rated flow rate:
0.5 gpm (1.8 lpm)
Capacity of filter:
320 gallons (1,211 l)
Min-Max Working Pressure:
20-70 psi (137-482 kPa)
Voltage:
100-240
Pitcher:
Height: 9 ⁄”
Length: 11 ¼”
Width: 4 ½”
Dispenser:
Height: 9 ⁄”
Length: 12”
Width: 4 ½”
Filtration Dock:
Height: 11 ⁄”
Length: 16 ¼”
Width: 4 ½”
THE INDICATOR
LIGHTS WILL BE ON
ONLY WHILE
THE SYSTEM IS
RUNNING
FLUSH FILTER CARTRIDGE AND SYSTEM
ONE FULL CYCLE BEFORE CONSUMING.
SYSTEM MAY TAKE UP TO TWO MINUTES
DURING THE INITIAL FLUSHING PERIOD
TO START FILTERING WATER THROUGH
THE NEW FILTER CARTRIDGE.
Warranty
A 1-year warranty is included, which covers defects in materials and workmanship. This filter
system is designed and tested for use with genuine Aquasana parts, including replacement
filters and all hardware. Use of parts from other manufacturers may result in loss of contaminant
reduction performance, system damage or failure. Use of parts from other manufacturers will
also void your warranty. Please visit your retailer or www.aquasana.com for all replacement parts.

Aquasana, Inc.
6310 Midway Road
Haltom City, Texas 76117
866.662.6885 USA
877.332.7873 Canada
www.aquasana.com
For exclusive deals
facebook.com/aquasana
twitter.com/aquasana
aq-pwfs_install_20140905
/