Duerkopp Adler 281 User manual

Type
User manual

Duerkopp Adler 281, the oil tray with fan, enhances your sewing machine's performance by effectively cooling the oil, extending its lifespan, and reducing wear. This easy-to-install accessory features a powerful fan that generates airflow, ensuring optimal oil temperature even during prolonged operation. Compatible with various sewing machines, the Duerkopp Adler 281 is a must-have upgrade for demanding sewing projects and industrial applications.

Duerkopp Adler 281, the oil tray with fan, enhances your sewing machine's performance by effectively cooling the oil, extending its lifespan, and reducing wear. This easy-to-install accessory features a powerful fan that generates airflow, ensuring optimal oil temperature even during prolonged operation. Compatible with various sewing machines, the Duerkopp Adler 281 is a must-have upgrade for demanding sewing projects and industrial applications.

281
Mounting instructions
Oil tray with fan
All Rights Reserved
Property of Dürkopp Adler AG and subject to copyright. Any use of this content, or part of it, is
prohibited without prior written permission of Dürkopp Adler AG
Copyright © Dürkopp Adler AG 2014
Table of Contents
Mounting instructions 281 Version 00.0 - 01/2014
1
1 Components of the kit................................................................3
2 Mounting instructions................................................................4
2.1 Removing the oil tray....................................................................5
2.2 Mounting the oil tray .....................................................................6
2.3 Connecting the fan........................................................................7
Table of Contents
Mounting instructions 281 Version 00.0 - 01/2014
2
Components of the kit
Mounting instructions 281 Version 00.0 - 01/2014
3
1 Components of the kit
Please check before you start to mount the oil tray with fan whether all the
components of the kit 0281 590144 are included in the delivery.
Fig. 1: Kit
Part number Amount Designation
0281 400060 1 Oil tray with fan
9870 281005 1 Set of cables with connectors
Mounting instructions
Mounting instructions 281 Version 00.0 - 01/2014
4
2 Mounting instructions
Mounting prerequisites
Turn the machine off
Pull the mains plug
Risk of injury due to electric shock
Turn off the main switch and remove the plug from
the mains before you start with mounting the oil
tray with fan.
Secure the plug against unintentional reconnec-
tion.
DANGER
Possible material damage!
If the machine is not cut off from the mains, machine parts might be
damaged. This might render the machine inoperative.
ATTENTION
Mounting instructions
Mounting instructions 281 Version 00.0 - 01/2014
5
2.1 Removing the oil tray
How to remove the old oil tray:
1. Tilt the machine head to the back.
Fig. 2: Machine tilted, with the old oil tray
2. Loosen all 9 screws that fix the oil tray (1) to the table top.
3. Remove the oil tray (1).
Risk of crushing due to the heavy machine
Always use both hands to tilt the machine.
Keep hold onto the machine during tilting!
WARNING
(1) - Old oil tray
Mounting instructions
Mounting instructions 281 Version 00.0 - 01/2014
6
2.2 Mounting the oil tray
How to mount the new oil tray:
1. Position the oil tray (1) exactly at the positioning point (2).
Fig. 3: Positioning points oil tray
2. Fix the new oil tray (1) with the 9 screws underneath the table top.
3. Fix the machine head strap (4) with screw (3) to the table top.
Fig. 4: Fixing the machine head strap
(1) - New oil tray (2) - Positioning point
(3) - Screw (4) - Machine head strap
Mounting instructions
Mounting instructions 281 Version 00.0 - 01/2014
7
2.3 Connecting the fan
How to connect the fan:
1. Pull off the old connector (1) from the control unit.
Fig. 5: Pulling off the old connector
2. Connect the new connector (2) of the cable set to the control unit.
Fig. 6: Connecting the new connector
3. Connect the old connector (1) and the new connector (2) by using the
coupler (3).
(1) - Old connector (36 poles)
(2) - New connector (36 poles)
Mounting instructions
Mounting instructions 281 Version 00.0 - 01/2014
8
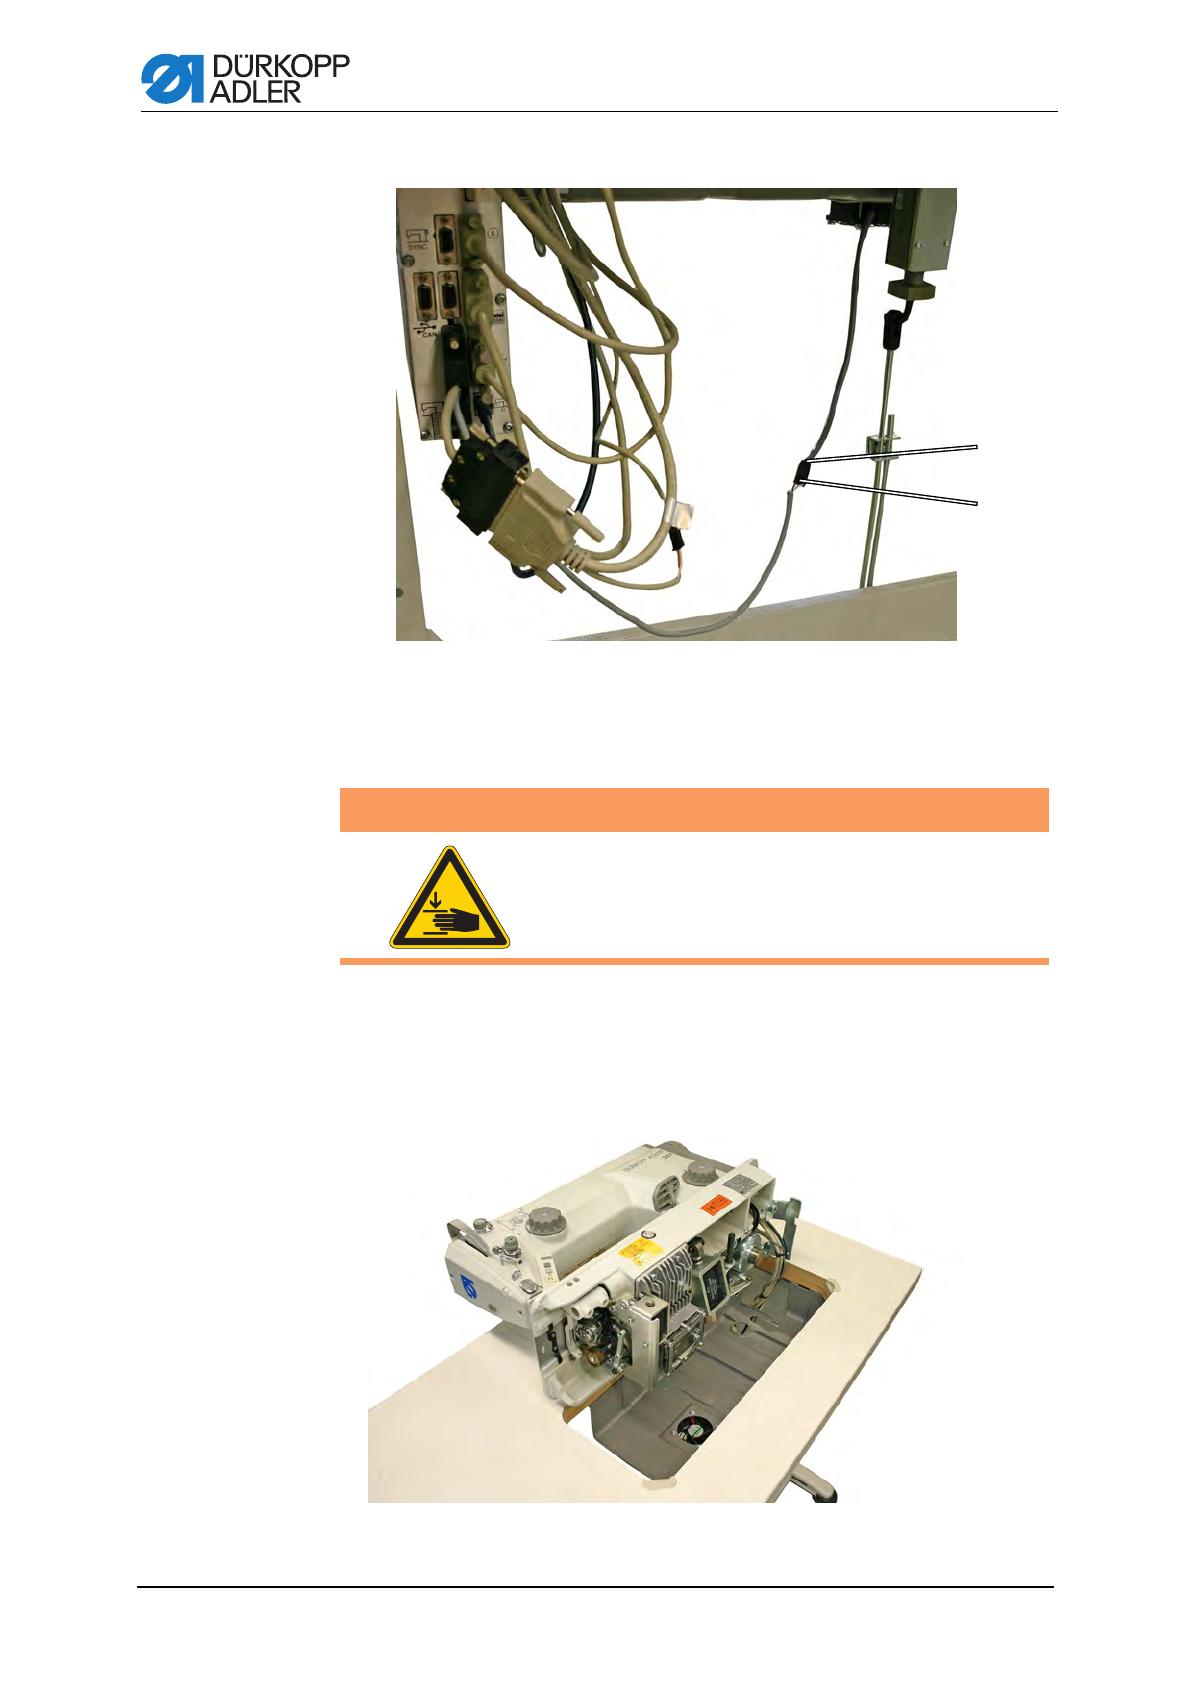
Fig. 7: Connecting the fan
4. Connect the connector of the fan (4) with the connector (5) on the cable
set.
5. Switch on the machine and test the fan's functioning.
You should be able to feel the airflow generated by the fan.
6. Raise up the machine again.
Fig. 8: Machine tilted, with the new oil tray
(4) - Connector of the fan (5) - Connector of the cable set
Risk of crushing due to the heavy machine
Always use both hands to tilt the machine.
Keep hold onto the machine during tilting!
WARNING
DÜRKOPP ADLER AG
Potsdamer Str. 190
33719 Bielefeld
Germany
Phone +49 (0) 521 925 00
www.duerkopp-adler.com
Subject to design changes - Printed in Germany - © Dürkopp Adler AG - Additional instructions - 0791 281704 EN - 00.0 - 01/2014
  • Page 1 1
  • Page 2 2
  • Page 3 3
  • Page 4 4
  • Page 5 5
  • Page 6 6
  • Page 7 7
  • Page 8 8
  • Page 9 9
  • Page 10 10
  • Page 11 11
  • Page 12 12

Duerkopp Adler 281 User manual

Type
User manual

Duerkopp Adler 281, the oil tray with fan, enhances your sewing machine's performance by effectively cooling the oil, extending its lifespan, and reducing wear. This easy-to-install accessory features a powerful fan that generates airflow, ensuring optimal oil temperature even during prolonged operation. Compatible with various sewing machines, the Duerkopp Adler 281 is a must-have upgrade for demanding sewing projects and industrial applications.

Ask a question and I''ll find the answer in the document

Finding information in a document is now easier with AI