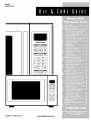
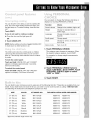
KitchenAid KCMC155JWH0 Owner's manual
- Category
- Microwaves
- Type
- Owner's manual
This manual is also suitable for

Model
KCMCI55J
KitchenAid
_, _ _ _,z ¸
.o
.................................................J
3828WSA 1492/8172191 www.kitchenaid.com

....._i_:_i:__'_ii,_i:ilij_,'©_i__ii}_io__"!!:::;i,__yii_ii_iii!;i:ii:!_!iii_illiiii'!iii¸¸¸¸¸¸_!::iiiiii:iiiii'iiiiiiliiii:i:i:i!iii!"',,_;ij:ii_,:,ililililiii_i3:i_¸_¸¸_¸¸_:_i_ii::::i_¸ii::;_¸I_i_i__iiY_,i::::¸_!!_,_!
KitchenAid designs the best tools for the most important room in your house. To ensure that you enjoy many
years of trouble-free operation, we developed this Use and Care Guide. It contains valuable information
concerning how to operate and maintain your new appliance properly. Please read it carefully.
Also, please complete and mail the enclosed Product Registration Card.
_::O__¸_i_t_C@ ©_ _i@_¸'¸¸¸i_i:_
Call the Customer Interaction Center toll free ........................................................................ 1-800-422-1230
If you need assistance or service, first see the "Troubleshooting" section of this book. After checking
"Troubleshooting," additional help can be found by checking the "Requesting Assistance or Service"
section, or by calling the telephone number above.
When calling, you will need to know your appliance's complete model number and serial number. You can find
this information on the model and serial number label/plate (see diagram in the "Getting to Know Your
Microwave Oven" section.)
Keep this book and the sales slip together in a safe place for future reference. You must provide proof
of purchase or installation date for in-warranty service.
Model Number
Serial Number
Date Installed
Builder/Dealer Name
Address
Phone

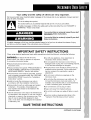
Your safety and the safety of others are very important.
We have provided many important safety messages in this manual and on your appliance. Always read and
obey all safety messages.
This is the safety alert symbol.
This symbol alerts you to potential hazards that can kill or hurt you and others.
All safety messages will follow the safety alert symbol and either the word "DANGER" or
"WARNING." These words mean:
You can be killed or seriously injured if you don't
immediately follow instructions.
You can be killed or seriously injured if you don't
follow instructions.
All safety messages will tell you what the potential hazard is, tell you how to reduce the chance of injury,
and tell you what can happen if the instructions are not followed.
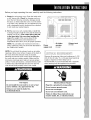
IMPORTANT SAFETY INSTRUCTIONS
When using electrical appliances basic safety precautions should be followed, including the following:
WARNING: To reduce the risk of burns,
electric shock, fire, injury to persons or exposure
to excessive microwave energy:
• Read all instructions before using the
microwave oven.
• Read and follow the specific "PRECAUTIONS TO
AVOID POSSIBLE EXPOSURE TO EXCESSIVE
MICROWAVE ENERGY" found in this section.
• The microwave oven must be grounded. Connect
only to properly grounded outlet. See "GROUND-
ING INSTRUCTIONS" found in the "Installation
Instructions" section.
• Install or locate the microwave oven only in
accordance with the installation instructions.
• Some products such as whole eggs and sealed
containers - for example, closed glass jars -
may explode and should not be heated in the
microwave oven.
• Use the microwave oven only for its intended use
as described in this manual. Do not use corrosive
chemicals or vapors in the microwave oven. This
type of oven is specifically designed to heat,
cook, or dry food. It is not designed for industrial
or laboratory use.
• As with any appliance, close supervision is
necessary when used by children.
• Do not operate the microwave oven if it has a
damaged cord or plug, if it is not working properly,
or if it has been damaged or dropped.
• The microwave oven should be serviced only by
qualified service personnel. Call an authorized
service company for examination, repair or
adjustment.
• Do not cover or block any openings on the
microwave oven.
• Do not store the microwave oven outdoors. Do
not use the microwave oven near water - for
example, near a kitchen sink, in a wet basement,
or near a swimming pool, and the like.
• Do not immerse cord or plug in water.
• Keep cord away from heated surfaces.
• Do not let cord hang over edge of table or count-
er.
• See door surface cleaning instructions in the
"Caring for Your Microwave Oven" section.
SAVE THESE INSTRUCTIONS
continued on next page

IMPORTANT SAFETY INSTRUCTIONS
• Do not operate any heating or cooking appliance
beneath the microwave oven.
• Do not mount microwave oven over or Rear any
portion of a heating or cooking appliance.
• Do not mount over a sink.
• Do not store anything directly on top of the
microwave oven surface when the microwave
oven is in operation.
• To reduce the risk of fire in the oven cavity:
- Do not overcook food. Carefully attend the
microwave oven if paper, plastic, or other
combustible materials are placed inside the
oven to facilitate cooking.
- Remove wire twist-ties from paper or plastic
bags before placing bag in oven.
- If materials inside the oven should ignite, keep
oven door closed, turn oven off, and disconnect
the power cord, or shut off power at the fuse or
circuit breaker panel.
- Do not use the cavity for storage purposes. Do
not leave paper products, cooking utensils, or
food in the cavity when not in use.
SAVE THESE INSTRUCTIONS
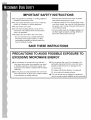
PRECAUTIONS TO AVOID POSSIBLE EXPOSURE TO
EXCESSIVE MICROWAVE ENERGY
(a) Do not attempt to operate this oven with the
door open since open-door operation can result
in harmful exposure to microwave energy. It is
important not to defeat or tamper with the safety
interlocks.
(b) Do not place any object between the oven front
face and the door or allow soil or cleaner residue
to accumulate on sealing surfaces.
(c) Do not operate the oven if it is damaged. It is
particularly important that the oven door close
properly and that there is no damage to the:
(1) door (bent),
(2) hinges and latches (broken or loosened),
(3) door seals and sealing surfaces.
(d) The oven should not be adjusted or repaired by
anyone except properly qualified service personnel.

Beforeyou beginoperatingtheoven,carefullyreadthefollowinginstructions.
1.Emptythemicrowaveoven.Cleantheinsidewith
asoft,clampcloth.Checkfordamagesuchasa
doorthatisn'tlinedupcorrectly,damagearound
thedoor,ordentsinsidetheovenorontheexteri-
or.Ifthereisanydamage,donotoperatetheoven
untiladesignatedservicetechnicianhaschecked
it andmadeanyneededrepairs.
2. Puttheovenonacart,counter,table,orshelfthat
isstrongenoughtoholdtheovenandthefoodand
utensilsyouputinit.(Thecontrolsideoftheunit
istheheavyside.Usecarewhenhandlingthe
oven.)Theweightoftheovenisabout55Ibs
(25kg).Themicrowaveovenshouldbeata
temperatureabove50°F(10°C)forproperoperation.
NOTE:Youcanbuildyourmicrowaveovenintoa
wallorcabinetbyusingoneofthetrimkitslistedin
the"Built-inkits"section.
oooo_oo_ooooooo I
J_%%%%%%%%%%%%_%
°%%%%%%%%%%%%%%%%
%%%_o%%%%%%%%%%%%%%
%%%_5%%° %%%%%°d%%%%
%%%°0%° %_%%%%%%%
%%%%% 0%%%%%%%%
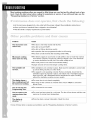
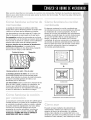
Air intake Exhaust vent
Power opening (in rear)
supply cord (in rear)
NOTE: Do not block the exhaust vents or air intake
openings. Allow a few inches of space at the back of
the oven where the exhaust vents are located.
Blocking the exhaust vents could cause damage to
the oven and poor cooking results. Make sure the
microwave oven legs are in place to ensure proper
airflow. If vents are blocked, a sensitive thermal safe-
ty device may automatically turn the oven off. The
oven should work properly once it has cooled.
Fire Hazard
Do not install the oven next to or over a heat
source without a UL approved trim kit.
Doing so can result in death, fire,
or electrical shock.
Observe all governing codes and ordinances. A 120
Volt, 60 Hz, AC only, 15- or 20-amp fused electrical
supply is required. (A time-delay fuse is
recommended.) It is recommended that a separate
circuit serving only this appliance be provided.
Electrical Shock Hazard
Plug into a grounded 3 prong outlet.
Do not remove ground prong.
Do not use an adapter.
Do not use an extension cord.
Failure to follow these instructions can
result in death, fire, or electrical shock.

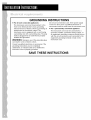
GROUNDING INSTRUCTIONS
• For all cord connected appliances:
The microwave oven must be grounded. In the
event of an electrical short circuit, grounding
reduces the risk of electric shock by providing an
escape wire for the electric current. The
microwave oven is equipped with a cord having
a grounding wire with a grounding plug. The plug
must be plugged into an outlet that is properly
installed and grounded.
WARNING: Improper use of the grounding plug
can result in a risk of electric shock.
Consult a qualified electrician or serviceman if the
grounding instructions are not completely
understood, or if doubt exists as to whether the
microwave oven is properly grounded.
Do not use an extension cord. If the power supply
cord is too short, have a qualified electrician or
serviceman install an outlet near the microwave oven.
• For a permanently connected appliance:
The microwave oven must be connected to a
grounded, metallic, permanent wiring system, or
an equipment grounding conductor should be run
with the circuit conductors and connected to the
equipment grounding terminal or lead on the
microwave oven.
SAVE THESE INSTRUCTIONS

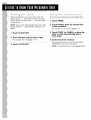
This section discusses the concepts behind microwave cooking. It also shows you the basics
you need to know to operate your microwave oven. Please read this information before you use
your oven.
iiiiilfi ii, ,,,
Microwave energy is not hot. It causes food to make its
own heat, and it's this heat that cooks the food.
Microwaves are likeTV waves, radio waves, or light
waves. You cannot see them, but you can see what they
do,
A magnetron in the microwave oven produces
microwaves. The microwaves move into the oven where
they contact food as itturns on the turntable.
Your oven has a multiple microwave distribution sys-
tem. Microwave energy is releasedfrom two locations,
giving you better, more even cooking.
Oven cavity Magnetron
Glass turntable Metal floor
The glass turntable of your microwave oven lets
microwaves pass through. Then they bounce off a metal
floor, back through the glass turntable, and are absorbed
by the food.
Microwaves pass through most glass, paper, and plas-
tics without heating them so food absorbs the energy.
Microwaves bounce off metal containers so food does
not absorb the energy.
Convection cooking circulates hot air through the oven
cavity with a fan. The constantly moving air surrounds the
food to heat the outer portion quickly. Your oven uses con-
vection cooking whenever you usethe Auto Convection,
Custom Convection or Combination cooking programs.
DO NOT USE THE OVEN WITHOUT THE TURNTABLE
IN PLACE.
Sometimes combination microwave-convection cooking
issuggested to get the proper cooking results. It short-
ens the cooking time for foods that normally need a long
time to cook. This cooking process also leaves meats
juicy on the inside and crispy on the outside. In combina-
tion cooking, the convection heat and microwave energy
alternate automatically. Your oven has a setting that
makes it easy to cook with both convection heat and mi-
crowave energy automatically.
m
m
Combination microwave/convection
Broiling is achieved by two radiant heating elements at
the top of the microwave oven. The hot air is circulated
through the oven cavity with a fan. The food on the broil-
ing rack is cooked by radiant heat and circulating hot air.
• Ifyou increase or decrease the amount of food you
prepare, the time ittakes to cook that food will also
change. For example, if you double a recipe, add a little
more than half the original cooking time. Check for
doneness and, if necessary, add more time in small
increments.

i!j:i!!iiiii::;_i;!ii:iiq:;iifq_i!illii:;=_i!!!!_,_iii_%l::]_4!!!!_,tq!!ii;_::;_:ii'_'_ii!!!!_,O_ii:iI_OO=_i_i::!_
• The lower the temperature of the food being put
into the microwave oven, the longer it takes to
cook. Food at room temperature will be reheated
more quickly than food at refrigerator temperature.
_i,iiiiiii0 _I__!I::)0!_:iiii:iiiiiOl'!i_O_il¸:¸ii:O0 di
• Food with a lot of fat and sugar will be heated
faster than food containing a lot of water. Fat and
sugar will also reach a higher temperature than
water in the cooking process.
• The more dense the food, the longer it takes to heat.
"Very dense" food like meat takes longer to reheat
than lighter, more porous food like sponge cakes.
• Smaller pieces of food will cook faster than larger
pieces. Also, same-shaped pieces cook more
evenly than different-shaped pieces.
• With foods that have different thicknesses, the
thinner parts will cook faster than the thicker parts.
Place the thinner parts of chicken wings and legs
in the center of the dish.
• Stirring and turning foods spreads heat quickly
to the center of the dish and avoids overcooking at
the outer edges of the food.
_i,iiiiiiiOv,_i!!!_!__i!''¸¸ii!in;_;i!i_¸_l;¸iOO_i::::l
Cover food to:
• Reduce splattering
• Shorten cooking times
• Keep food moist
You can use any covering that lets microwaves pass
through. See "Getting to Know Your Microwave
Oven" for materials that microwaves will pass
through. If you are using the Sensor function, be sure
to vent.
• Several foods (for example: baked potatoes,
sausages, egg yolks, and some fruits) are tightly
covered by a skin or membrane. Steam can build
up under the membrane during cooking, causing
the food to burst. To relieve the pressure and to
prevent bursting, pierce these foods before
cooking with a fork, cocktail pick, or toothpick.
U !; ;i!i i:ii d iii ii!!i t;ii
• Always allow food to stand after cooking. Stand-
ing time after defrosting and cooking allows the
temperature to evenly spread throughout the food,
improving the cooking results.
• The length of the standing time depends on how
much food you are cooking and how dense it is.
Sometimes it can be as short as the time it takes
you to remove the food from the oven and take it to
the serving table. However, with larger, denser food,
the standing time may be as long as 10 minutes.
For best results, place food evenly on the plate. You
can do this in several ways:
• If you are cooking several items of the same
food, such as baked potatoes, place them in a
ring pattern for uniform cooking.
• When cooking foods of uneven shapes or thick-
ness, such as chicken breasts, place the smaller
or thinner area of the food towards the center of
the dish where it will be heated last.
• Layer thin slices of meat on top of each other.
• When you cook or reheat whole fish, score the
skin - this prevents cracking.
• Do not let food or a container touch the top or
sides of the oven. This will prevent possible arcing.
Metal containers should not be used in a microwave
oven. There are, however, some exceptions. If you
have purchased food which is prepackaged in an
aluminum foil container, refer to the instructions on
the package. When using aluminum foil containers,
cooking times may be longer because microwaves
will only penetrate the top of the food. (See "Oven
Utensils Guide".)
If you use aluminum containers without package
instructions, follow these guidelines:
• Place the container in a glass bowl and add some
water so that it covers the bottom of the container,
not more than ¼in. (.64 cm) high. This ensures
even heating of the container bottom.
• Always remove the lid to avoid damage to the
oven.
• Use only undamaged containers.
• Do not use containers taller than % in. (1.9 cm).
• Container must be at least half filled.
• To avoid arcing, there must be a minimum ¼in.
(.64 cm) between the aluminum container and the
walls of the oven and also between two aluminum
containers.
• Always place the container on the turntable.
• Reheating food in aluminum foil containers usual-
ly takes up to double the time compared to reheat-
ing in plastic, glass, china, or paper containers.
The time when food is ready will vary depending
upon the type of container you use.
• Let food stand for 2 to 3 minutes after heating so
that heat is spread evenly throughout container.

• Donotdocanningoffoodsintheoven.Closed
glassjarsmayexplode,resultingindamagetothe
oven.
• Donotusethemicrowaveovento sterilizeobjects
(babybottles,etc.).Itisdifficulttokeeptheoven
atthehightemperatureneededforsterilization.
Usingyourmicrowaveovenmaycauseinterference
to yourradio,TV,orsimilarequipment.Whenthere
isinterference,youcanreduceitorremoveit by:
• Cleaningthedoorandsealingsurfacesofthe
oven.
• Adjustingthereceivingantennaoftheradioortelevi-
sion.
• Movingthereceiverawayfromthemicrowave
oven.
• Pluggingthemicrowaveovenintoadifferentoutlet
sothatthemicrowaveovenandreceiverareon
differentbranchcircuits.
• Alwayscookfoodfortheshortestcookingtime
recommended.Checktoseehowthefoodiscook-
ing.Ifneeded,touchEASYSTARTpadwhilethe
ovenisoperatingorafterthecookingcycleisover
(seethe"UsingEASYSTART"section).
• Stir,turnover,orrearrangethefoodbeingcooked
abouthalfwaythroughthecookingtimeforall
recipes.Thiswillhelpmakesurethefoodisevenly
cooked.
• If you do not have a cover for a dish, use wax
paper, or microwave-approved paper towels or
plastic wrap. Remember to turn back a corner of
the plastic wrap to vent steam during cooking.
........iii iiiiliii!ill i!i,.iii iiii
To test the oven, put 1 cup (250 mL) of cold water in
a glass container in the oven. Close the door. Make
sure it latches. Cook at 100% power for 2 minutes.
When the time is up, the water should be heated.
You can use a variety of utensils and materials in
your microwave-convection oven. To prevent dam-
age to utensils and your oven, choose appropriate
utensils and materials for each cooking method. The
list below is a general guide to help you select the
correct utensils and materials.
YES: Utensils to use
NO: Utensils to avoid
MICRO- COMBINA- CONVEC-
WAVE TION TION
MATERIAL UTENSILS COOKING COOKING COOKING
Ceramic Ceramic YES YES YES
& Glass Ovenproof, YES YES YES
Heat-
Tempered,
Micn:_vave-
Safe
Glassware
Glassware NO NO YES
with Metal
Decoration
LeadGlass NO NO YES
China Without YES YES YES
Metal
Decoration
(Ovenprcof
and Heat-
Tempered)
Pottery Ovenproof YES YES YES
.................................................p0tte_' ........................................................................................................................................
Plastic Ovenproof YES YES YES
Microwave- YES NO NO
safe plas-
ticware
Metal Bake/Roast NO NO YES
Rack
Metal NO NO YES
BakingPan
Aluminum YES
Foil
Paper Cups, YES NO NO
Plates,
Towels
sty, YES ................No No
Wicker,
* Refer to "Microwave cooking tips" and "Questions
and Answers" for proper use.

........,!!ii;i:i i i;iii i!ii!iii!iiii ili i!!iilCiiii iii i! iiiw i!!i ii i ii ii
_Ci!_Jiiii_'_''C,_:iiiiiiiiiii__Ci_!!,_iiW' _i!!:ii_:i_iiiiU__!!!!ii!!_
Test dinnerware or cookware before using. To test
a dish for safe use, put it into the oven with 1 cup
(250 mL) of water beside it. Cook at 100% cook
power for one minute. If the dish gets hot and
water stays cool, do not use it. Some dishes
(melamine, some ceramic dinnerware, etc.) absorb
microwave energy and may become too hot to han-
dle or may slow cooking times. Cooking in metal
containers not designed for microwave use could
damage the oven, as could containers with hidden
metal (twist-ties, foil lining, staples, metallic glaze or
trim).
• Never lean on the door or allow a child to swing
on it when the door is open.
• Use hot pads. Microwave energy does not heat
containers, but the heat from the food can make
the container hot.
• Do not use newspaper or other printed paper in
the oven.
• Do not dry flowers, fruit, herbs, wood, paper,
gourds, or clothes in the oven.
• Do not start a microwave oven when it is empty.
Product life may be shortened. If you practice
programming the oven, put a container of water in
the oven. It is normal for the oven door to look
wavy after the oven has been running for a while.
• Do not try to melt paraffin wax in the oven.
Paraffin wax will not melt in a microwave oven be-
cause it allows microwaves to pass through it.
• Do not operate the microwave oven unless the
glass turntable is securely in place and can rotate
freely. The turntable can rotate in either direction.
Make sure the turntable is correct-side up in the
oven. Handle your turntable with care when
removing it from the oven to avoid possibly break-
ing it. If your turntable cracks or breaks, contact
your dealer for a replacement.
• When you use a browning dish, the browning
dish bottom must be at least _0 in. (5 mm) above
the turntable. Follow the directions supplied with
the browning dish.
• Never cook or reheat a whole egg inside the
shell. Steam buildup in whole eggs may cause
them to burst, and possibly damage the oven.
Slice hard-boiled eggs before heating. In rare
cases, poached eggs have been known to
explode. Cover poached eggs and allow a stand-
ing time of one minute before cutting into them.
• For best results, stir any liquid several times
during heating or reheating. Liquids heated in
certain containers (especially containers shaped like
cylinders) may become overheated. The liquid may
splash out with a loud noise during or after heating
or when adding ingredients (coffee granules, tea
bags, etc.). This can harm the oven.
• Microwaves may not reach the center of a roast.
The heat spreads to the center from the outer,
cooked areas just as in regular oven cooking. This
is one of the reasons for letting some foods (for
example, roasts or baked potatoes) stand for a
while after cooking, or for stirring some foods dur-
ing the cooking time.
• Do not deep fry in the oven. Microwavable uten-
sils are not suitable and it is difficult to maintain
appropriate deep-frying temperatures.
• Do not overcook potatoes. At the end of the
recommended cooking time, potatoes should be
slightly firm because they will continue cooking
during standing time. After microwaving, let
potatoes stand for 5 minutes. They will finish
cooking while standing.
If your electric power line or outlet voltage is less
than 110 volts, cooking times may be longer. Have a
qualified electrician check your electrical system.

iii!"_"ii!_iili_IIZ!iiii"_'OYY'i;iii!!!_ii"_,_i''_i!!!i_i_O'_7_i!!ii!!___i_i;_ii!ii_iiii!!!i!!!,iiiii!__iiiiiiii_iii,ilii_iiii,_''_!!I!!_S
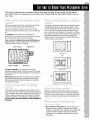
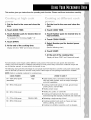
® ®
Your microwave oven is designed to make your
cooking experience enjoyable and productive. To help
get you up and running quickly, the following is a list
of the oven's basic features:
1. Door Safety Lock System. The oven will not work
unless the door is securely closed.
2. Window with Metal Shield. The shield prevents
microwaves from escaping. It is designed as a
screen to allow you to view food as it cooks.
3. Glass Turntable. This turntable turns food as it
cooks for more even cooking. It must be in the
oven during operation for best cooking results.
The turntable is sunken into the cavity floor to give
you more cooking space and better cooking
results.
4. Removable Turntable Support (under turntable).
5. Control Panel. Touch pads on this panel to
perform all functions.
6. Light (not shown). Automatically turns on when the
door is opened or when the oven is running.
7. Cooking Guide Label.
8. Model and Serial Number Plate.
9. Convection Rack. (Part No. 8172251) Use to
convection or combination cook.
10. Broiling Rack (Part No. 8172252) (shown below).
Use this rack with the drip pan for foods such as
fish steaks, chicken breasts and hamburgers.
11. Drip Pan (Part No. 8172250). The Drip Pan is
useful for catching grease from foods that drip
grease during Convection, Combination or Broil
cooking.
Convection Rack
Broiling Rack

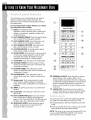
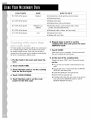
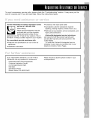
Your microwave oven control panel lets you select a
desired cooking function quickly and easily. The
following is a list of all the Command pads located on
the control panel.
For more information on these features, see "Using
your microwave oven" section.
1. Display. This display includes a clock and
indicators to tell you the time of day, cooking time
settings, cook powers, quantities, weights, and
cooking functions.
2. AUTO SENSOR REHEAT. Touch this pad to reheat
from a variety of food categories available.
3. AUTO SENSOR COOK. Touch this pad to cook
from a variety of food categories available.
4. AUTO SENSOR POPCORN. Touch this pad to
pop a bag of popcorn in any of 3 sizes.
5. CUSTOM DEFROST. Touch this pad to defrost
frozen food by weight or quantity.
6, COOK POWER. Touch this pad to set the amount
of microwave energy released to cook the food.
The higher the number, the higher the power
wattage and the faster the "cooking speed."
7. COOK TIME. Touch this pad to set cooking time.
8. CUSTOM CONVECT. Touch this pad to cook in
Custom Convection mode. See "Convection and
Combination Cooking".
9, CUSTOM COMBI. Touch this pad to cook in
Custom Combination mode. See "Convection and
Combination Cooking".
10, CUSTOM BROIL. Touch this pad to cook in
Custom Broil mode. See "Using Your Microwave
Oven".
11, Number pads. Touch number pads to control
sound volume, weight, language, scroll speed,
clock, Demo mode, cooking times, cook powers, or
quantities.
12. TIMER. Touch this pad to set or cancel the timer
function.
13. CLOCK SET. Touch this pad to enter the correct
time of day.
14. AUTO CONVECTION pads. Touch one of these
pads to select type of food to be cooked (see
pages 21-25). Touch SPECIALTY FOODS pad once
for Warm Hold. See "Using Warm Hold" section.
15. START/EASY START. Touch this pad to start a
function you have set or to cook food for 30
seconds at 100% cook power.
16. PERSONAL CHOICE. Touch this pad to, change
sound volume to low, medium, high or off, to
change weight measurement from Ibs to kilograms,
to change the language displayed, to change scroll
speed, to change the clock from 12 hours to 24
hours, or to turn on/off, or to turn the Demo mode
on and off.
17. CANCEL/OFF. Touch this pad once to clear an
incorrect command or to cancel a program during
cooking. This pad will not erase the time of day.
Your microwave oven comes with audible signals that
can guide you when setting and using your oven:
• A programming tone will sound each time you touch
a pad.
• Three tones signal the end of a cooking cycle and five
tones signal the end of the timer function.
NOTE: The tones on your oven can be turned off. To do
so, see "Using PERSONAL CHOICE." This will only
work when the oven is in standby mode.

I::::i_¢;ii_n:i!i!_,c_::i_,o k _ii}_,D_:8:
You can stop the oven during a cycle by opening the
door. The oven stops heating and the fan stops, but
the light stays on. To restart cooking, close the door
and
Touch START.
If you do not want to continue cooking:
• Close the door and the light goes off.
OR
• Touch CANOEIJOFE
NOTE: Before setting a function, touch CANCEL/OFF
to make sure no other function is on.
You can select or change the following functions or
displays by touching PERSONAL CHOICE:
Function Choice
Sound volume Change to low, medium, high or off.
Weight Chang; to siandaid (ibsi oi
metric (kgs).
Language Change to English, French or
Spanish.
Scroll speed Change speed.
Clock Change to 12 hrs. or 24 hrs. or
turn on/off.
Demo mode Turn on or off.
;::::::::: t::
The Child Lock locks the control panel so children
cannot use the microwave when you do not want
them to. This will only work when the oven is in stand-
by mode.
To lock the control panel:
Touch and hold CANCEL!OFF until "LOCKED"
appears on display (approximately 4 seconds).
(One tone will sound.)
To unlock the control panel:
Touch and hold CANCEL!OFF until "UNLOCK"
appears on display. (Two tones will sound.)
1. Touch PERSONAL CHOICE.
The category name changes in sequence. When
the desired category appears, touch START.
For example, to change weight measurements
you see:
2. Touch PERSONAL CHOICE twice to
reach "LBS/KGS". Touch START. Touch
PERSONAL CHOICE again to select
"LBS" or "KGS".
3. Touch START.
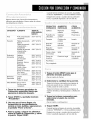
You can build in your microwave oven by using one of the following trim kits*. These kits are available from your
dealer. If your dealer does not stock the kit you can order it, by kit model number, by calling 1-800-422-1230
and following the instructions and telephone prompts you hear.
30" (76 cm)
27" (69 cm)
30" (76 cm)
27" (69 cm)
30" (76 cm)
27" (69 cm)
30" (76 cm)
Black MK1157XJB KEBI171D KEBS177D
Black MK1150XJB KEBI101D KEBS107D
White MK1157XJQ KEBI171D KEBS177D
White MK1150XJQ KEBI101D KEBS107D
Biscuit MK1157XJT KEBI171D KEBS177D
Biscuit MK1150XJT KEBI101D KEBS107D
Stainless MK1157XJS KEBI171D KEBS177D
Stainless MK1150XJS KEBI101D KEBS107D
* Approved, electric single ovens only

Whenyoufirstpluginyourmicrowaveoven,the
displayshows" : ".Iftheelectricpowerevergoes
off,thedisplaywillagainshow" : " whenthepower
comesbackon.
NOTE:Youcancookwithoutsettingtheclock,butthe
displaywillshow" :"againafterthecookingiscom-
pleted.
1. Touch CLOCK SET.
2. Touch Number pads for time of day.
For example: For 7:00, touch "7 0 0"
3. Touch CLOCK SET.
You can use your microwave oven as a kitchen timer.
1. Touch TIMER.
2. Touch Number pads for desired time
in hours:minutes.
For example: For 10 minutes, touch "1 0"
3. Touch START, (or TIMER), or allow the
timer to start automatically after a
short delay.
4. At the end of the set time:
Timer will count down to zero, then will display
"TIMER END" and 5 tones will sound.
NOTE: To cancel timer at any time, touch TIMER.

This section gives you instructions for operating each function. Please read these instructions carefully.
1. Put the food in the oven and close the
door.
2. Touch COOK TIME.
3. Touch Number pads for desired time in
hours:minutes.
For example: For 10 minutes, touch "1 0"
4. Touch START.
5. At the end of the cooking time:
Display will show "END" and 3 tones will sound.
1. Put the food in the oven and close the
door.
2. Touch COOK TIME.
3. Touch Number pads for desired time in
hours:minutes.
4. Touch COOK POWER.
5. Select Number pad for desired power
setting.
(See the following chart.)
6. Touch START.
7. At the end of the cooking time:
Display will show "END" and 3 tones will sound.
For best results, some recipes call for different cook powers. The lower the cook power, the slower the
cooking. Each level stands for a different percentage of cook power. Many microwave cookbook recipes tell
you by number, percent, or name which cook power to use.
The following chart gives the percentage of cook power each level stands for, and the cook power name usually
used. It also tells you when to use each cook power. Follow recipe or food package instructions if available.
NOTE: Refer to a reliable cookbook for cooking times.
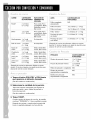
COOK POWER NAME WHEN TO USE IT
HI = 100% of full power High • Quick heating many convenience foods and foods
(automatic) with high water content, such as soups, beverages
and most vegetables
90 = 90% of full power • Cooking small tender pieces of meat, ground meat,
poultry pieces, and fish fillets
• Heating cream soups
80 = 80% of full power • Heating rice, pasta, or casseroles
• Cooking and heating foods that need a cook power
70 = 70% of full power Medium-High • Reheating a single serving of food
60 = 60% of full power • Cooking sensitive foods such as cheese and egg
dishes, pudding, and custards
• Cooking non-stirrable casseroles, such as lasagna

COOKPOWER NAME WHENTOUSEIT
50=50%offullpower Medium • Cookingham,wholepoultry,andpotroasts
• Simmeringstews
40=40%offullpower • Meltingchocolate
• Heatingbread,rollsandpastries
30=30%offullpower Medium-Low, • Defrostingfoods,suchasbread,fish,meats,
Defrost poultry,andprecookedfoods
20=20%offullpower • Softeningbutter,cheese,andicecream
10= 10%offullpower Low • Keepingfoodwarm
• Takingchilloutoffruit
Forbestresults,somerecipescallforonecookpower
foracertainlengthoftime,andanothercookpower
foranotherlengthoftime,Yourovencanbesetto
changefromonepowerleveltoanotherautomatically,
forupto3cyclesplusadefrostcycle,
1. Put the food in the oven and close the
door.
2. Touch COOK TIME.
3. Touch Number pads to set the cooking
time for the first cycle.
4. Touch COOK POWER.
5. Touch Number pad to set the cook
power for the first cycle.
6. Repeat steps 2 and 3 to set the
cooking time and cook power for each
additional cycle.
7. Touch START.
After each cycle is complete, 2 tones sound and
the next cycle(s) will count down.
8. At the end of the cooking time:
Display will show "END" and 3 tones will sound.
NOTES:
• You can set your chosen cook functions in any
order.
• You can set up to 3 cook cycles plus CUSTOM
DEFROST and Warm Hold.
• CUSTOM DEFROST will operate first.
• Warm Hold will operate last.
• Cooking with more than one cook cycle will not
work with AUTO SENSOR COOK or AUTO
SENSOR REHEAT functions.

Youcandefrostfoodbychoosingacategoryandset-
tingaweight.CUSTOMDEFROSThaspresettimes
andcookpowersfor6categories:Meat,Poultry,Fish,
Bagel,MuffinandButter.
1. Touch CUSTOM DEFROST.
Once for Meat, twice for Poultry, 3 times for Fish,
4 times for Bagel, 5 times for Muffin, 6 times for
Butter.
2. Touch Number pads for desired weight
(from .1 to 6.0 Ibs [45g to 2.7 kgs.]) or
quantity.
3. Touch START.
4. During defrosting, 5 tones will sound.
(for Meat, Poultry and Fish when set for more
than 1 minute)
These tones tell you when to check, turn over,
separate, or rearrange food. To restart oven,
touch START.
5. At the end of the defrosting time:
Display will show "END" and 3 tones will sound.
1. Touch CUSTOM DEFROST pad 7 times.
2. Touch Number pads to set the time for
manual defrosting.
The power is automatically set at 30 percent,
unless you change it.
3. Touch START.
4. At the end of the defrosting time"
Display will show "END" and 3 tones will sound.
You are probably used to food weights as being in
pounds and ounces that are fractions of a pound
(for example, 4 ounces equals ¼pound [113.4 g]).
If the weight on the food package is in fractions of a
pound, you can use the following chart to convert the
weight to decimals.
Equivalent Weight
OUNCES GRAMS DECIMAL WEIGHT
1.6 45.4 .10
3.2 90.7 .20
4.0 113.4 .25
4.8 136.1 .30
6.4 181.4 .40
8.0 226.8 .50
9.6 272.2 .60
11.2 317.5 .70
12.0 340.2 .75
12.8 362.9 .80
14.4 408.2 .90
16.0 453.6 1.00
One-Quarter Pound
One-Half Pound
Three-Quarters Pound
One Pound
• Before starting, make sure you have removed any of
the metal twist-ties which often come with frozen food
bags, and replace them with strings or elastic bands.
• Open containers such as cartons before they are
placed in the oven.
• Always slit or pierce plastic pouches or packaging.
• If food is foil wrapped, remove foil and place it in a
suitable container.
• Slit the skins, if any, of frozen food such as sausage.
• Bend plastic pouches of food to ensure even defrosting.
• Always underestimate defrosting time. If defrosted
food is still icy in the center, return it to the
microwave oven for more defrosting.
• The length of defrosting time varies according to
how solidly the food is frozen.
• The shape of the package affects how quickly
food will defrost. Shallow packages will defrost
more quickly than a deep block.
• As food begins to defrost, separate the pieces.
Separated pieces defrost more evenly.
• Use small pieces of aluminum foil to shield parts
of food such as chicken wings, leg tips, fish tails,
or areas that start to get warm. Make sure the foil
does not touch the sides, top, or bottom of the
oven. The foil can damage the oven lining.
• For better results, let food stand after defrosting.
(For more information on standing time, see
"Microwave cooking tips".)
• Turn food over during defrosting or standing time.
Break apart and remove food as required.

Li!liiiii; iiSiiiiii!ii!ili!:ii!!!!iiil;;'YS iiii: ........
EASY START lets you cook food for 30 seconds at
100% cook power or, during any manual program,
you can use it to add 30-second increments.
NOTES:
• Each time you touch EASY START, it will add 30
seconds up to 3 minutes, then will add 1 minute up
to a total of 10 minutes.
• You can enter Easy Start only after closing the door
or after touching CANCEL/OFR
• You can also use the pad to increase the remaining
cook time during manual programs.
1. Put the food in the oven and close the
door.
2. Touch EASY START.
(Each additional touch adds 30 seconds of cook-
ing time, up to 3 minutes, then adds 1 minute up
to a total of 10 minutes.)
3. At the end of the cooking time:
Display will show "END" and 3 tones will sound.
Food Poisoning Hazard
Do not let food sit in oven more than one hour
before or after cooking.
Doing so can result in food poisoning or
sickness.
Warm Hold keeps hot, cooked food warm in your
microwave oven.
NOTES:
• Food cooked should be covered during Warm
Hold.
• Pastry items (pies, turnovers, etc.) should be
uncovered during Warm Hold.
• Complete meals kept warm on a dinner plate
should be covered during Warm Hold.
• Do not use more than 1 complete Warm Hold
cycle. The quality of some foods will suffer with
extended time.
• Warm Hold can be used in conjunction with Stage
Cooking. (See "Cooking with more than one cook
cycle".)
1. Put hot, cooked food in the oven and
close the door.
2. Touch SPECIALTY FOODS once.
"WARM HOLD" scrolls, then "START" flashes until
you touch START.
3. Touch START.
Display will show "WARM".
4. To cancel Warm Hold, open door or
touch CANCEL/OFF.

Your microwave oven has a sensor that detects
the humidity released by the food. The amount
of humidity detected tells the oven how long to
cook or heat your food. The sensor is used by
3 special functions: AUTO SENSOR COOK,
AUTO SENSOR REHEAT, and AUTO SENSOR
POPCORN. The simple instructions for these
functions are on the following pages.
NOTES:
• If you want to cook by entering a time and cook
power, see "Cooking at different cook powers".
• The oven should be plugged in at least 5 minutes
before sensor cooking.
• Room temperature should not exceed 95°F (35°C).
• Be sure the exterior of the cooking container and
the interior of the oven are dry. Wipe off each with
a paper towel.
• The oven will not generate microwave energy for
approximately 28 seconds at the beginning of the
sensor cooking cycle.
• When covering foods, be sure to leave an opening
big enough for moisture to escape so that the
sensor can determine cooking or reheating time.
To use AUTO SENSOR COOK:
1. Put the food in the oven and close the
door.
2. Touch AUTO SENSOR COOK until
desired food type is displayed.
AUTO SENSOR COOK will start automatically
after a short delay.
(See Auto Sensor Cooking Chart.)
Baked 1 to 4 medium, • Pierce each potato several times with a fork and place
Potatoes about 10 to 13 oz on the turntable around the edge, at least 1 inch (2.5 cm)
(284 to 369 g) each apart. Let potato stand 5 minutes to finish cooking.
Frozen 1 to 4 cups • Remove from package. Place vegetables in a microwav-
Vegetables (250 mL to 1 L) able container. Cover with plastic wrap and vent.
• Most vegetables need stirring and 2-3 minutes standing
time after cooking.
Fresh 1 to 4 cups • Place moist vegetables in a microwavable
Vegetables (250 mL to 1 L) container. Cover with plastic wrap and vent.
• Most vegetables need stirring and 2-3 minutes standing
time after cooking.
Frozen Entree Works best if entree • Remove from outer package. Loosen cover on three
is 10 to 20 oz. sides. If entr6e is not in a microwave-safe container, place
(284 to 567 g) it on a plate, cover with plastic wrap and vent.
• Most entrees need 2-3 minutes standing time after cook-
ing.
Rice
to 2 cups (125 to
500 mL) of dry rice
(Use medium or long
grain rice. Cook
instant rice accord-
ing to directions on
the package.)
• Follow measurements on package for ingredient amounts.
Place rice and liquid (water or chicken or vegetable stock)
in a microwavable dish. Cover with plastic wrap and vent.
When cooking is complete, allow rice to stand 5 minutes or
until liquid is absorbed. Stir rice.

iiiljsiii i; i l!ii ;ilS!i ,Lii! Siiiiiii!!!!! ii,?,,iiiiSOiiii: i!i!il
1. Put the food in the oven and close the
door.
2. Touch AUTO SENSOR REHEAT until
desired food type is displayed.
AUTO SENSOR REHEAT will start automatically
after a short delay.
(See Auto Sensor Reheating Chart.)
NOTE: When covering foods, be sure to leave an
opening big enough for moisture to escape so that
the sensor can determine cooking or reheating time.
FOOD SERVING SIZE DIRECTIONS
Dinner About 8 to 16 oz • Place food to be
plate (227 to 454 g) heated on a dinner
plate or similar
dish. Cover with
plastic wrap and
vent.
Soup 1 to 4 cups • Place food to be
(250 mL to 1 L) heated in a
microwave con-
tainer. Cover with
plastic wrap and
vent.
Sauce 1 to 4 cups • Place food to be
(250 mL to 1 L) heated in a
microwave con-
tainer. Cover with
plastic wrap and
vent.
Casserole 1 to 4 cups • Place food to be
(250 mL to 1 L) heated in a
microwave con-
tainer. Cover with
plastic wrap and
vent.
AUTO SENSOR POPCORN lets you pop commercially
packaged microwave popcorn with just one touch.
NOTES:
• Pop only 1 package at a time.
• If you are using a microwave popcorn popper,
follow manufacturer's instructions.
1. Place the bag in the center of the
turntable and close the door.
2. Touch AUTO SENSOR POPCORN.
NOTE: The sensor will determine "popping time",
based on the size of the package.
POPCORN
3.5 oz (99 g)
3.0 oz (85 g)
1.75 oz (50 g)
• Follow package
directions.
• Use a popcorn
package which is
made especially for
microwave cooking.
• Do not try to pop
unpopped kernels.
• Pop only 1 package
at a time.
• Do not leave the
microwave OVeR
unattended while
popping popcorn.
• If you are using a
microwave popcorn
popper, follow
manufacturer's
instructions.
• How well your pop-
corn cooks will de-
pend on the brand
of popcorn and how
much fat it has in it.
Try several brands to
decide which pops
the best. For best
results, use fresh
bags of popcorn.
Page is loading ...
Page is loading ...
Page is loading ...
Page is loading ...
Page is loading ...
Page is loading ...
Page is loading ...
Page is loading ...
Page is loading ...
Page is loading ...
Page is loading ...
Page is loading ...
Page is loading ...
Page is loading ...
Page is loading ...
Page is loading ...
Page is loading ...
Page is loading ...
Page is loading ...
Page is loading ...
Page is loading ...
Page is loading ...
Page is loading ...
Page is loading ...
Page is loading ...
Page is loading ...
Page is loading ...
Page is loading ...
Page is loading ...
Page is loading ...
Page is loading ...
Page is loading ...
Page is loading ...
Page is loading ...
Page is loading ...
Page is loading ...
Page is loading ...
Page is loading ...
Page is loading ...
Page is loading ...
Page is loading ...
Page is loading ...
Page is loading ...
Page is loading ...
-
 1
1
-
 2
2
-
 3
3
-
 4
4
-
 5
5
-
 6
6
-
 7
7
-
 8
8
-
 9
9
-
 10
10
-
 11
11
-
 12
12
-
 13
13
-
 14
14
-
 15
15
-
 16
16
-
 17
17
-
 18
18
-
 19
19
-
 20
20
-
 21
21
-
 22
22
-
 23
23
-
 24
24
-
 25
25
-
 26
26
-
 27
27
-
 28
28
-
 29
29
-
 30
30
-
 31
31
-
 32
32
-
 33
33
-
 34
34
-
 35
35
-
 36
36
-
 37
37
-
 38
38
-
 39
39
-
 40
40
-
 41
41
-
 42
42
-
 43
43
-
 44
44
-
 45
45
-
 46
46
-
 47
47
-
 48
48
-
 49
49
-
 50
50
-
 51
51
-
 52
52
-
 53
53
-
 54
54
-
 55
55
-
 56
56
-
 57
57
-
 58
58
-
 59
59
-
 60
60
-
 61
61
-
 62
62
-
 63
63
-
 64
64


KitchenAid KCMC155JWH0 Owner's manual
- Category
- Microwaves
- Type
- Owner's manual
- This manual is also suitable for
Ask a question and I''ll find the answer in the document
Finding information in a document is now easier with AI
in other languages
Related papers
-
KitchenAid KEMC378HBL2 Owner's manual
-
KitchenAid KEHC309JBL07 User manual
-
KitchenAid KCMC155JBT Owner's manual
-
KitchenAid KEMC308KWH02 Owner's manual
-
-
KitchenAid YKBMC140HS04 Owner's manual
-
KitchenAid KHHC2090SWH0 Owner's manual
-
-
-
Other documents
-
LG MT1110SKQ1 Owner's manual
-
 Kenmore Elite 80824 User manual
-
-
Whirlpool GM8131XEB0 Owner's manual
-
-
-
Sharp R-1870 Owner's manual
-
-
Sharp R-930AW Owner's manual
-
Kenmore 72180593402 User manual
