Page is loading ...

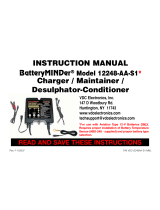
BatteryMINDer® Plus Model 12117TC
Charger / Maintainer / Desulfator*
Instruction Manual
*NOT for use with Aviation Type Batteries
READ AND SAVE THESE INSTRUCTIONS
Rev. A-052518 VDC12117TC-MNL
VDC Electronics, Inc.
Huntington, NY 11743
www.BatteryMINDers.com
800.379.5579 x6 (M - F)
INCLUDES:
• 2’ Battery Clip Cord Set
with Quick Connector
• Auto-Temp
Compensation Sensor
(installed)
BatteryMINDer®
Plus
VDC Electronics, Inc.
BatteryMINDers.com
P
R
E
S
S
F
O
R
BatteryMINDer®

Rev. A-052518 Page 2 VDC12117TC-MNL
BatteryMINDer Plus Model 12117TC
TABLE of CONTENTS
REQUIRED SAFETY INSTRUCTIONS ....................................................................... 3
WIRE GAUGE TABLE ................................................................................................. 3
WARNING – RISK OF EXPLOSIVE GASES ............................................................. 4
PERSONAL PRECAUTIONS ...................................................................................... 4
PREPARING TO CHARGE .......................................................................................... 5
CHARGER LOCATION ................................................................................................ 5
DC CONNECTION PRECAUTIONS ............................................................................ 5
SIMPLE INSTRUCTIONS ............................................................................................ 7
DETERMINING YOUR CHARGING STATUS ............................................................. 7
CHARGING STAGES .................................................................................................. 7
LED INDICATION ........................................................................................................ 7
MAINTENANCE BUTTON ........................................................................................... 8
TROUBLESHOOTING ................................................................................................. 8
CALL-OUTS ................................................................................................................. 8
AC POWER INPUT CHARACTERISTICS ................................................................... 9
ELECTRICAL CABLE & PHYSICAL PARAMETERS ................................................ 9
SAFETY & PROTECTION ........................................................................................... 9
CHARGING CURVE .................................................................................................... 9
CHARGING / MAINTAINING MULTIPLE BATTERIES ............................................. 10
12-V PARALLEL CONNECTION DIAGRAM ............................................................ 10
12-V SERIES-PARALLEL USING 6-V BATTERIES ................................................. 10
6-V SERIES CONNECTION DIAGRAM .................................................................... 10
FOR REPAIR OR REPLACEMENT ........................................................................... 11
GUARANTEE ............................................................................................................. 12
WARRANTY ............................................................................................................... 12
WARRANTY REGISTRATION .................................................................................. 12

Rev. A-052518 Page 3 VDC12117TC-MNL
BatteryMINDer Plus Model 12117TC
1. SAVE THESE INSTRUCTIONS
This manual contains important safety and operating instructions for
BatteryMINDer Model 12117TC.
2. Do not expose charger to rain or snow.
3. Use of an attachment not recommended or sold by VDC Electronics may
result in a risk of fire, electric shock, or injury to persons.
4. To reduce risk of damage to electric plug and cord, pull by plug rather
than cord when disconnecting charger.
5. An extension cord should not be used unless absolutely necessary. Use
of improper extension cord could result in a risk of fire and electric shock.
If an extension cord must be used, make sure:
6. a) That extension cord is properly wired and in good electrical condition;
and
b) That wire size is large enough for AC ampere rating of charger as
specified in Table below.
7. Do not operate charger with damaged extension cord or plug – replace
the cord or plug immediately.
8. Do not operate charger if it has received a sharp blow, been dropped,
or otherwise damaged in any way; call VDC Electronics Tech Support
Dept. 800.379.5579 x6 (ET) for advice.
Recommended minimum AWG size for
extension cords for battery chargers
AC input rating,
amperesa
AWG size of cord
Equal to
or
greater
than
But less
than
Length of cord, feet (m)
25
(7.6)
50
(15.2)
100
(30.5)
150
(45.6)
0 2 18 18 18 16
aIf the input rating of a charger is given in watts rather than in amperes, the
corresponding ampere rating is to be determined by dividing the wattage rating by
the voltage rating - for example: 1250 watts/125 volts = 10 amperes
Underwriters Laboratories (UL)
REQUIRED IMPORTANT SAFETY INSTRUCTIONS
WARNING
TO REDUCE THE RISK OF FIRE, ELECTRIC SHOCK, OR
INJURY TO PERSON, OBSERVE THE FOLLOWING:

Rev. A-052518 Page 4 VDC12117TC-MNL
BatteryMINDer Plus Model 12117TC
9. Do not disassemble charger; call VDC Electronics Tech Support Dept.
800.379.5579 x6 (ET) for advice when service or repair is required.
Incorrect reassembly may result in a risk of electric shock or fire.
10. To reduce risk of electric shock, unplug charger from outlet before
attempting any maintenance or cleaning. Turning off controls will not
reduce this risk.
11. WARNING – RISK OF EXPLOSIVE GASES
a) WORKING IN VICINITY OF A LEAD-ACID BATTERY IS
DANGEROUS. BATTERIES GENERATE EXPLOSIVE GASES DURING
NORMAL BATTERY OPERATION. FOR THIS REASON, IT IS OF
UTMOST IMPORTANCE THAT YOU FOLLOW THE INSTRUCTIONS
EACH TIME YOU USE THE CHARGER.
b) To reduce risk of battery explosion, follow these instructions and those
published by manufacturer of any equipment you intend to use in vicinity
of battery. Review cautionary marking on these products and on engine.
12. PERSONAL PRECAUTIONS
a) Consider having someone close enough to come to your aid when
you work near a lead-acid battery.
b) Have plenty of fresh water and soap nearby in case battery acid
contacts skin, clothing, or eyes.
c) Wear complete eye protection and clothing protection. Avoid touching
eyes while working near battery.
d) If battery acid contacts skin or clothing, wash immediately with soap
and water. If acid enters eye, immediately flood eye with running cold
water for at least 10 minutes and get medical attention immediately.
e) NEVER smoke or allow a spark or flame in vicinity of battery or
engine.
f) Be extra cautious to reduce risk of dropping a metal tool onto battery.
It might spark or short-circuit battery or other electrical part that may
cause explosion.
g) Remove personal metal items such as rings, bracelets, necklaces,
and watches when working with a lead-acid battery. A lead-acid battery
can produce a short-circuit current high enough to weld a ring or the like
to metal, causing a severe burn.
h) Use charger for charging a LEAD-ACID battery only. It is not intended
to supply power to a low voltage electrical system. Do not use battery
charger for charging dry-cell batteries that are commonly used with home
appliances. These batteries may burst and cause injury to persons and
damage to property.
i) NEVER charge a frozen battery or a battery at a temperature above
122°F.

Rev. A-052518 Page 5 VDC12117TC-MNL
BatteryMINDer Plus Model 12117TC
13. PREPARING TO CHARGE
a) If necessary to remove battery from vehicle to charge, always remove
grounded terminal from battery first. Make sure all accessories in the
vehicle are off, so as not to cause an arc.
b) Be sure area around battery is well ventilated while battery is being
charged.
c) Clean battery terminals. Be careful to keep corrosion from coming in
contact with eyes.
d) Add distilled water in each cell until battery acid reaches level
specified by battery manufacturer. Do not overfill. For a battery without
removable cell caps, such as valve regulated lead acid batteries,
carefully follow manufacturer’s recharging instructions.
e) Study all battery manufacturer’s specific precautions while charging
and recommended rates of charge.
f) Determine voltage of battery by referring to car owner’s manual and
make sure it matches output rating of battery charger.
14. CHARGER LOCATION
a) Locate charger as far away from battery as DC cables permit.
b) Never place charger directly above battery being charged; gases from
battery will corrode and damage charger.
c) Never allow battery acid to drip on charger when reading electrolyte
specific gravity or filling battery.
d) Do not operate charger in a closed-in area or restrict ventilation in any
way.
e) Do not set a battery on top of charger.
15. DC CONNECTION PRECAUTIONS
a) Connect or disconnect DC output clips only when the unit is
unplugged from AC power. Never allow clips to touch each other.
b) Attach clips to battery and chassis as indicated in 16(e), 16(f), and
17(b) through 17(d).
16. FOLLOW THESE STEPS WHEN BATTERY IS INSTALLED IN
VEHICLE. A SPARK NEAR BATTERY MAY CAUSE BATTERY
EXPLOSION.
TO REDUCE RISK OF A SPARK NEAR BATTERY:
a) Position DC cord to reduce risk of damage by hood, door, or moving
engine part.
b) Stay clear of fan blades, belts, pulleys, and other parts that can cause
injury to persons.
c) Check polarity of battery posts. POSITIVE (POS, P, +) battery post
usually has larger diameter than NEGATIVE (NEG, N, –) post.
d) Determine which post of battery is grounded (connected) to the

Rev. A-052518 Page 6 VDC12117TC-MNL
BatteryMINDer Plus Model 12117TC
chassis. If negative post is grounded to chassis (as in most vehicles),
see (e). If positive post is grounded to the chassis, see (f).
e) For negative-grounded vehicle, connect POSITIVE (RED) clip from
battery charger to POSITIVE (POS, P, +) ungrounded post of battery.
Connect NEGATIVE (BLACK) clip to vehicle chassis or engine block
away from battery. Do not connect clip to carburetor, fuel lines, or sheet-
metal body parts. Connect to a heavy gage metal part of the frame or
engine block.
f) For positive-grounded vehicle, connect NEGATIVE (BLACK) clip from
battery charger to NEGATIVE (NEG, N, –) ungrounded post of battery.
Connect POSITIVE (RED) clip to vehicle chassis or engine block away
from battery. Do not connect clip to carburetor, fuel lines, or sheet-metal
body parts. Connect to a heavy gage metal part of the frame or engine
block.
g) When disconnecting charger, first disconnect the charger from AC
power, remove clip from vehicle chassis, and then remove clip from
battery terminal.
h) See operating instructions for length of charge information.
17. FOLLOW THESE STEPS WHEN BATTERY IS OUTSIDE VEHICLE. A
SPARK NEAR THE BATTERY MAY CAUSE BATTERY EXPLOSION.
TO REDUCE RISK OF A SPARK NEAR BATTERY:
a) Check polarity of battery posts. POSITIVE (POS, P, +) battery post
usually has a larger diameter than NEGATIVE (NEG, N, –) post.
b) Connect NEGATIVE (BLACK) charger clip to NEGATIVE (NEG, N, –)
battery post.
c) Connect POSITIVE (RED) charger clip to POSITIVE (POS, P, +) post
of battery.
d) Position yourself and free end of cable as far away from battery as
possible – then connect NEGATIVE (BLACK) charger clip to free end of
cable.
e) Do not face battery when making final connection.
f) When disconnecting charger, always do so in reverse sequence of
connecting procedure and break first connection while as far away from
battery as practical.
g) A marine (boat) battery must be removed and charged on shore. To
charge it on board requires equipment specially designed for marine use.

Rev. A-052518 Page 7 VDC12117TC-MNL
BatteryMINDer Plus Model 12117TC
LED INDICATION
LED DISPLAY STATUS CHARGING
(GREEN)
POWER
(RED) COMMENTS
AA.C. Power Connected,
Battery Disconnected OFF ON Check battery connection
B Bulk Charging ON ON
Normal CHARGING state
C Analysis Stage ON ON
D Absorption Charging ON ON
E Equalization Charging ON ON
F Float Charging Flash ON Normal MAINTENANCE state
G Maintenance Charging Flash ON
H Battery Reverse Polarity OFF ON Check battery connection
I Analysis Failed Flash Flash
Both RED & GREEN
flash simultaneously
Contact VDC Tech Support
STAGE/FAULT LEGEND
Green STEADY Red STEADY FLASHING OFF
STAGE/FAULT CHG PWR LED INDICATION
Charging B, C, D or E
Maintaining F or G
BATT Disconnected/Polarity A or H
BATT Weak I
SIMPLE INSTRUCTIONS:
1. Place the positive (RED) connection on the positive battery terminal.
2. Place the negative (BLACK) connection on the negative battery terminal.
3. Plug in the BatteryMINDer.
4. CHARGING/MAINTENANCE LED should be GREEN. AC POWER ON
LED should be RED.
DETERMINING YOUR CHARGING STATUS:
1. Match the LEDs on your BatteryMINDer 12117TC to one of the stages in
the STAGE/FAULT Table below and note the LED INDICATION Letter
(A - I). (This table can also be found on the top enclosure of the
charger.) Refer to STAGE/FAULT LEGEND Table if needed.
2. Go to the corresponding LED INDICATION Letter in the LED
INDICATION Table for a detailed explanation.

Rev. A-052518 Page 8 VDC12117TC-MNL
BatteryMINDer Plus Model 12117TC
MAINTENANCE BUTTON
If the battery voltage is above 12.5V before connecting the charger to AC
power, proceed and connect to AC power. Pressing the Maintenance
Button will cause the charger to skip the Charging Stage and go directly to
Maintenance Mode. Pressing and holding the Maintenance Button for more
than 3 seconds will force the charger out of Maintenance Mode.
TROUBLESHOOTING
VDC Electronics Technical Support: (800) 379-5579 x6
• Unit will not operate if battery is below the minimum voltage (6 Volts).
• If there is a load on your battery, disconnect it and charge again. If the
problem persists, your battery may be badly sulfated and is non-recoverable.
• Unit does not have an output unless connected to a battery. In order to
test the output using a meter, connect the meter to your battery. When you
connect the unit, you will see the voltage rise.
• Badly sulfated batteries may need 2 - 4 weeks of float charging to show
results.
BatteryMINDer Plus 12117TC Call-Outs
MAINTENANCE
BUTTON
A.C.
POWER ON
LED
BatteryMINDer®
Plus
VDC Electronics, Inc.
BatteryMINDers.com
P
R
E
S
S
F
O
R
CHARGING
MAINTENANCE
LED
TEMPERATURE
SENSOR
OUTPUT 10’ CORD
WITH QUICK CONNECT
PLUG
BATTERY CLIP
CORD SET
WITH QUICK
CONNECTOR
POWER PLUG
(back of unit)
STAGE/FAULT
TABLE LABEL
(bottom of unit)

Rev. A-052518 Page 9 VDC12117TC-MNL
BatteryMINDer Plus Model 12117TC
Electrical Cable & Physical Parameters
Input Connector Wall mount
Output Cord SPT-2 18AWG with quick connector, total length 10 Feet
Extension Cord
construction
SPT-2 18AWG Connector with color code battery clamp, total
length 2 Feet
SPT-2 18AWG Connector with Blade Terminal fuse with Fuse
Holder & Ring Terminal Assembly 2 Feet (Optional)
Enclosure Dimensions 3.8” L x 2.6” W x 2.2” H (95.8 [L] x 65.5 [W] x 55.6 [H] mm)
Weight 1.1 lbs. (0.5Kg)
Safety & Protection
Safety Standards Design according to UL1236
EMC Standards FCC part-15
Built-in Temperature
Protection
Output short-circuit, reverse polarity protection
Temperature
Compensation Range
14°F - 122°F (-10°C - 50°C)
In float and maintenance stages the minimum voltage will be
13.0V ±0.15V
Storage Temperature -4°F - 185°F (-20°C - 85°C)
Operating Humidity Range 0 to 90% Relative Humidity
1 8765432
V
Bulk 1 MaintenanceFloatEqualizationAnalysis 2AbsorptionBulk 2Analysis 1
6V<Vbatt<13.2V
1.0A Bad Cells 1.0A Max
Vbatt=13.2VVbatt=13.2VVbatt=14.6VVbatt<12.5VVbatt=14.4VVbatt<14.4VVbatt<11.8V
Pulse up to 15kHz frequency1.0A Battery Weak 1.0A Max 1.0A Max
A
CHARGING CURVE
AC Power Input Characteristics Normal Withstand Unit
Input voltage 100-120 90 - 140 Vac
Input voltage frequency 50/60 47 - 63 Hz
Input quiescent power consumption when no battery is
connected
0.5 max. W
Input current consumption 0.28 max. A/ac
Nominal efficiency >76%
All Values are related to 77°F (25°C) Ambient Temperature

Rev. A-052518 Page 10 VDC12117TC-MNL
BatteryMINDer Plus Model 12117TC
CHARGING / MAINTAINING MULTIPLE BATTERIES
To properly charge or maintain multiple batteries they should all be the same
type (flooded or AGM) and condition. It is OK to mix deep cycle and starter.
Charge each battery individually before connecting together. Never connect
batteries at different states of charge. The charged battery will rapidly transfer
energy to the discharged battery possibly causing catastrophic failure.
Once the batteries are charged, use 18 gauge or heavier wire to connect the
batteries.
If connecting multiple batteries of the same voltage, wire them in parallel
(BatteryMINDer positive to positive A to positive B, BatteryMINDer negative to
negative A to negative B). This is the same type of connection you would use
when jumping a car (in fact, jumper cables are great for this).
If connecting 2 batteries of half your unit’s voltage (example: 6V batteries on a
12V unit), wire them in series (BatteryMINDer positive to positive A, negative A
to positive B, negative B to BatteryMINDer negative). When wired in series they
act as one large system at the combined
voltage (example: 6V+ 6V = 12V). You
can connect these systems in a series
parallel configuration in order to charge
or maintain 4 or batteries in groups of 2.
As long as your batteries stay wired
together they act as one large battery
allowing you to charge and discharge
them as a group
6V 6V
6V 6V
TO CHARGER
–
TOREGRAHC
+
12 VOLT (SERIES-PARALLEL)
Using 6Volt Batteries.
Series - Parallel Connection Diagram
(12V System using Four 6V Batteries)
6
V
+
_
6V
+
_
+
_
Series Connection Diagram
(12V System using Two 6V Batteries)
12V
+–
12V
+–
TO CHARGER +
TO CHARGER –
Parallel Connection Diagram
(12V System using Two 12V Batteries)

Rev. A-052518 Page 11 VDC12117TC-MNL
BatteryMINDer Plus Model 12117TC
FOR REPAIR OR REPLACEMENT
All returns must be authorized by VDC Electronics.
In the event that you believe your product may be defective, you MUST speak
to a VDC Electronics technician at 1-800-379-5579 x6 (9 - 5 ET) before
proceeding further.
NOTES
MODEL BatteryMINDer _________________
SERIAL NUMBER ______________________________
PLACE OF PURCHASE ______________________________
DATE OF PURCHASE ______________________________

Rev. A-052518 Page 12 VDC12117TC-MNL
BatteryMINDer Plus Model 12117TC
/