Page is loading ...

[Instruction Manual]
SKU: HRS101W
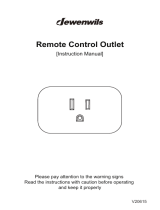
Remote Control Outlet
1 2
V20803
Please pay attention to the warning signs
Read the instructions with caution before operating
and keep it properly

Program button
ON/OFF button
Indicator 1
Indicator 2
01
1. Do not immerse in water.
2. Do not connect any devices which may exceed the maximum ratings of
this remote outlet.
3. Do not disassemble or repair the product, but only by authorized service
personnel.
4. Children are not allowed to use the remote outlets without supervision.
5. To prevent children from suffocation and chocking, keep them away
from packaging materials.
6. Used batteries should be disposed of safely and environmentally.
Warning:
Product Layout
To reduce the risk of fire, electric shock or personal injury,
please strictly follow the instructions.
Operating Instructions
Notes: The receiver must be located within 100 feet of the remote transmitter.
Actual functional range may be affected by the following factors: weather,
radio frequency interference, low remote battery, and obstructions between
the transmitter and receiver.
Indicator
1
2
ALL
ON OFF
1
2

02
Note: The transmitter and receiver have been pre-programmed for immediate
use, but the configuration can be customized to meet your needs.
1. Remove the isolation tap in the battery compartment on the transmitter.
2. Plug the receiver into a powered outlet.
3. Plug your device into the socket of the receiver.
4. To control your matching devices:
1) Press the ON/OFF button on the transmitter.
2) Or press the program button on the receiver.
3) The indicator light of the receiver lights up when the unit is activated.
Step 1: To program the Socket 1 of the receiver:
1. Plug the receiver into outlet.
2. Press and hold the program button for about 3 seconds until indicator 1
flashes slowly.
3. Release the program button, then press the ON button (1) on the
transmitter, after 1 second, press the OFF button (1).
4. Indicator 1 stops flashing and stays on means that Socket 1 of the receiver
has been programmed successfully.
Step 2: To program the Socket 2 of the receiver:
1. Press and hold the program button for about 6 seconds until the indicator
2 flashes slowly.
2. Release the program button, then press the ON button (2) on the
transmitter, after 1 second, press the OFF button (2).
3. Indicator 2 stops flashing and stays on means that Socket 2 of the receiver
has been programmed successfully.
Programming the Outlets
To program the remote transmitter with the receiver:
Cancel all programming so that no remote transmitter can control this
receiver.
1. Plug the receiver into outlet.
2. Press the program button on the receiver for about 9 seconds until
indicator 1 and indicator 2 flash rapidly at the same time.
Cancelling All Programming

03
Remote control outlets adopt variable learning codes technology.The codes
will be changed each time after re-programming. If this remote control outlet
happens to be in the same channels with other RF remote devices, just
re-program it and the interference will be eliminated.
No Interference
(Note: The flashing status of indicators go from: indicator 1 flashes slowly
- indicator 2 flashes slowly - indicator 1 and indicator 2 flash rapidly
simultaneously)
3. Release the program button and press it again, the indicator will go out,
and all programming will be canceled.
If you find the receivers works abnormally or the indicator on the remote
control becomes dim, please replace the battery.
- Open the battery compartment and remove the old battery.
- Install a new CR2032 battery, making sure the polarity + / - of the battery
is correct.
- Close the battery compartment.
Battery Replacement
- Input Voltage: 125VAC, 60Hz
- Max Power Rating: 15A, 1875W
- Transmission Frequency: 433.92 MHz
- Remote Control Range : 100 Feet (Free Area)
- Remote Battery: CR2032 3V
Specifications
This device complies with Part 15 of the FCC rules. Operation is subject to
the following two conditions:
1) this device may not cause harmful interference, and 2) this device must
accept any interference received, including interference that may cause
undesired operation.
FCC STATEMENT

04
cause harmful interference to radio or television reception, which can be
determined by turning the equipment off and on, the user is encouraged to try
to correct the interference by one or more of the following measures:
● Reorient or relocate the receiving antenna.
● Increase the separation between the equipment and receiver.
● Connect the equipment into an outlet on a circuit different from that to which
the receiver is connected.
● Consult the dealer or an experienced radio/TV technician for help.
One Year Limited Warranty
Supported by our professional R&D team and QC team, we provide One
Year Warranty for materials and workmanship from the purchase date.
Please note that the warranty does not cover damage caused by personal
misuse or improper installation.
Please attatch your Order ID and Name so that our dedicated customer
service team can help you better.
Changes or modifications not expressly approved by the party responsible for
compliance could void your authority to operate the equipment.
NOTE: This equipment has been tested and found to comply with the limits for
a Class B digital device, pursuant to Part 15 of the FCC Rules. These limits are
designed to provide reasonable protection against harmful interference in a
residential installation.
This equipment generates uses and can radiate radio frequency energy and,
if not installed and used in accordance with the instructions, may cause harmful
interference to radio communications. However, there is no guarantee that
interference will not occur in a particular installation. If this equipment does
/