TRUE RESIDENTIAL REFRIGERATION
15 INCH AND 24 INCH UNDERCOUNTER INSTALL GUIDE
“ B ” R E V I S I O N S

THANK YOU
FOR YOUR PURCHASE

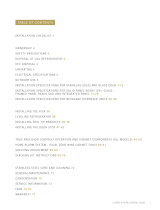
OWNERSHIP 4
SAFETY PRECAUTIONS 4
DISPOSAL OF OLD REFRIGERATOR 4
CFC DISPOSAL 4
UNCRATING 5
ELECTRICAL SPECIFICATIONS 6
INSTALLATION SPECIFICATIONS 7-12
INSTALLATION SPECIFICATIONS FOR SOLID PANEL READY (OP)
AND GLASS FRAMED PANEL READY (OG) 13-25
INSTALLATION SPECIFICATIONS FOR BEVERAGE DISPENSER UNITS 26-33
INSTALLATION CHECKLIST 2
GENERAL MAINTENANCE, REPLACEMENT PARTS, FAQ S
AND WARRANTY 59-64
TRUE PRECISION CONTROL OPERATION AND CABINET
COMPONENTS 39-47
HOME ALARM SYSTEM - (DUAL ZONE WINE CABINET ONLY) 48
SHELVING ADJUSTMENT 50
STACKING KIT INSTRUCTIONS 52-58
INSTALLING TOE KICK 35
LEVELING REFRIGERATOR 35
INSTALLING ANTI-TIP BRACKETS 36
INSTALLING THE DOOR STOP 37
INSTALLATION OF CASTORS 38
TABLE OF CONTENTS

2
TRUE RESIDENTIAL LINE
INSTALLATION CHECKLIST
To ensure a proper installation, this checklist should be completed to ensure that no part of the
process has been overlooked.
Have all packaging materials been removed?
Have the anti-tip brackets been installed securely and are they properly engaging the unit?
Is the unit leveled properly with all leveling legs making contact with the floor? Has the toe kick
been installed?
Has door stop being installed? (If needed)
Are panels attached securely and properly aligned? (Overlay cabinets only).
Does the customer understand the unit’s operation?
Has the customer been given the keys and literature package?
Have stainless steel surfaces been inspected for any imperfections? This is to be done by the
authorized True dealer or installer with the customer, upon completion of installation. Stainless
steel doors, handles and shelves are covered by a limited 30-day warranty for cosmetic defects.
Is the unit operating properly? If not, is the unit plugged in? Is the control turned on?

3
15 INCH & 24 INCH INSTALL GUIDE
O w n e r s h i p
s a f e t y p r e c a u t i O n s
D i s p O s a l O f t h e O l D r e f r i g e r a t O r
c f c D i s p O s a l
u n c r a t i n g
e l e c t r i c a l s p e c i f i c a t i O n s
3 - 6

4
TRUE RESIDENTIAL LINE
OWNERSHIP
To insure that your unit works properly from the
first day, it must be installed properly. (We highly
recommend a trained refrigeration mechanic and
electrician install your True Professional Cabinet.) The
cost of a professional installation is money well spent.
Before you start to install your True Professional
Cabinet, carefully inspect it for freight damage. If
damage is discovered, immediately file a claim with
the delivery freight carrier. True is not responsible for
damage incurred during shipment.
Any questions about the installation please
contact your True dealer or True Technical Service
Department at 1-800-325-6152 (Please have your
model and serial numbers available when you call our
Service Department).
SAFETY PRECAUTIONS
• This refrigerator must be properly installed
and located in accordance with the installation
instructions before it is used.
• Do not allow children to climb, stand or hang on
the shelves in the refrigerator. They could damage
the refrigerator and seriously injure themselves.
• Do not store or use gasoline or other flammable
vapors and liquids in the vicinity of this or any
other appliance.
• Keep hands away from the “pinch point” areas
(gaps between the doors and between the doors
and cabinet) small areas are not necessarily safe.
• Unplug the refrigerator before cleaning and
making repairs.
NOTE: WE STRONGLY RECOMMEND THAT
ANY SERVICING BE PERFORMED BY A
QUALIFIED INDIVIDUAL.
• Setting temperature control to OFF only removes
power from the refrigeration system, it does not
remove power from other circuits. For example,
temperature control and lights.
PROPER DISPOSAL OF THE OLD
REFRIGERATOR
Child entrapment and suffocation are not problems
of the past. Junked or abandoned refrigerators are
still dangerous... Even if they will sit for “just a few
days”. If you are getting rid of your old refrigerator,
please follow the instructions below to help prevent
accidents.
BEFORE YOU THROW AWAY YOUR OLD REFRIGERATOR OR
FREEZER:
• Take off the doors.
• Leave the shelves in place so that children may
not easily climb inside.
CFC DISPOSAL
Your old refrigerator may have a cooling system that
used CFCs (chlorofluorocarbons). CFCs are believed
to harm stratospheric ozone. If you are throwing away
your old refrigerator, make sure the CFC refrigerant is
removed for proper disposal by a qualified service. If
you intentionally release this CFC refrigerant you can
be subject to fines and imprisonment under provisions
of the environment legislation.
DANGER!
RISK OF CHILDREN
ENTRAPMENT

5
15 INCH & 24 INCH INSTALL GUIDE
packing material
TOE KICK IS ATTACHED
TO BACK OF UNIT
UNCRATING
Required Tools:
• Cutting utensil (utility knife)
• Hammer
• Crowbar
• Phillips head screwdriver
The following procedure is recommended for
uncrating the unit:
MOVE YOUR UNIT AS CLOSE TO THE FINAL
LOCATION AS POSSIBLE BEFORE REMOVING THE
WOODEN SKID.
A. Remove nails securing cardboard box to the
wooden skid. Then discard any outer packaging
(cardboard, clear plastic).
INSPECT FOR CONCEALED DAMAGE. AGAIN,
IMMEDIATELY FILE A CLAIM WITH THE FREIGHT
CARRIER IF THERE IS DAMAGE.
B. IMPORTANT: Cut green polyband and remove
styrofoam block before removing refrigerator from
pallet.
C. Remove skid by carefully lifting the refrigerator off
and place skid aside.
D. Open the unit and remove any packing material.
Styrofoam, tape, and any other material used
for shipping purposes.
NOTE: KEYS FOR UNIT ARE PROVIDED WITH
THIS PACKET.
NOTE: ANTI-TIP KIT AND DOOR STOP ARE PACKED
INSIDE UNIT.
A B
C D

6
TRUE RESIDENTIAL LINE
ELECTRICAL SPECIFICATIONS
Do not, under any circumstances, cut or remove
the third (ground) prong from the power cord. For
personal safety, this appliance must be properly
grounded.
To minimize the depth of the cutout opening, the
electrical outlet must be positioned as shown below.
Outlet must be flush with wall.
Before your new unit is connected to a power supply,
check the incoming voltage with a volt meter. If
anything less than 100% of the rated voltage for
operation is noted, correct immediately.
The power cord of this appliance is equipped with
a 3-prong (grounding) plug which mates with a
standard 3-prong (grounding) wall outlet to minimize
the possibility of electric shock hazard from this
appliance. A 115V AC, 60 Hz, 15 amp circuit
breaker and electrical supply are required.
Have the wall outlet and circuit checked by a
qualified electrician to make sure the outlet is
properly grounded.
If the outlet is a standard 2-prong outlet, it is your
personal responsibility and obligation to have it
replaced with the properly grounded 3 prong wall
outlet.
Do not use an extension cord or two prong adaptor.
Electrical ground is required on this appliance.
The unit should always be plugged into its own
individual electrical outlet, which has a voltage rating
that matches the rating plate. This provides the best
performance and also prevents overloading house
wiring circuits which could cause a fire hazard from
overheated wires. Never unplug your refrigerator by
pulling on the power cord. Always grip plug firmly
and pull straight out from the outlet.
Repair or replace immediately all power cords that
have become frayed or otherwise damaged. Do not
use a cord that shows cracks or abrasion damage
along its length or at either end. When moving the
refrigerator away from the wall, be careful not to roll
over or damage the power cord.
2” 2”
8”
Rear wall of cut out

7
15 INCH & 24 INCH INSTALL GUIDE
i n s t a l l a t i O n s p e c i f i c a t i O n s
7 - 12

8
TRUE RESIDENTIAL LINE
INSTALLATION SPECIFICATIONS - STAINLESS SOLID & GLASS DOOR
True’s Stainless Solid and Glass Door units are designed to be inserted into a cabinet opening or free standing.
Below are recommended dimensions for rough opening.
True’s stainless steel cabinets are UL rated for use in outdoor settings.
In outdoor locations where the ambient temperature regularly exceeds 95˚F, it is recommended to vent the rear
of the cut out opening in the area shown below for optimum performance.
The recommended cut out size is 4” x 10”.
23
7
/
8
"
29
3
/
4
"
4
1
/
8
"
Rough Opening
HEIGHT
34
1/2
”
Front view
of unit
between
cabinets
Rough Opening
DEPTH
24”
Rough Opening
WIDTH
24”
24 INCH
Rough
Opening
HEIGHT
34
1/2
”
Rough
Opening
DEPTH
24”
Front
view of
unit
between
cabinets
Rough
Opening
WIDTH
15”
15 INCH

9
15 INCH & 24 INCH INSTALL GUIDE
ALL REFRIGERATOR
BEVERAGE CENTER WINE CABINET DUAL ZONE WINE CABINET
TUR-24-R/L-SS-B TUR-24-R/L-SG-B TUR-24-D-SS-B
TBC-24-R/L-SG-B TWC-24-R/L-SG-B TWC-24DZ-R/L-SG-B
DIMENSIONS MAY VARY BY ±
1
/
8
”
23
7
/8" 23
7
/8"
46
7
/8"
25
1
/4"
34
1
/4"
29
3
/4"
1
7
/8"
3
3
/4"
4
1
/8"
24 INCH

10
TRUE RESIDENTIAL LINE
TUR-24BD-R/L-SS-B TUR-24DD-R/L-SS-B
Be ve r age dispe nse r
DIMENSIONS MAY VARY BY ±
1
/
8
”
24” SINGLE TAP UNIT ACCOMMODATES (1) SHORT 1/4
BARREL, (1) SLIM 1/4 BARREL, OR (1) 1/6 BARREL.
24” DUAL TAP UNIT ACCOMMODATES (2) 1/6 BARRELS
OR (1) SLIM 1/4 BARREL AND (1) 1/6 BARREL.
23
7
/8"
34
1
/4"
46
7
/8"
11
7
/8"
10
1
/4"
25
1
/4"
4
1
/8"
34
1
/4"
46
3
/8"
49
7
/8"
49
7
/8"
23
7
/8"
25
3
/4"
3
3
/4"

11
15 INCH & 24 INCH INSTALL GUIDE
ALL REFRIGERATOR
DIMENSIONS MAY VARY BY ±
1
/
8
”
TUR-15-R/L-SS-B TUR-15-R/L-SG-B
WINE CABINET
TWC-15-R/L-SG-B
14
7
/8"
34
1
/4"
16
1
/4"
37
7
/8"
34
1
/4"
23
7
/8"
25
3
/4"
3
3
/4"
4
1
/8"
15 INCH

12
TRUE RESIDENTIAL LINE
DIMENSIONS MAY VARY BY ±
1
/
8
”
TUR-15BD-R/L-SS-B
BEVERAGE DISPENSER
15” SINGLE TAP UNIT ACCOMMODATES (1) SLIM 1/4
BARREL OR (1) 1/6 BARREL.
16
1
/4"
37
7
/8"
14
7
/8"
34
1
/4"
7
1
/2"
10
1
/4"
4
1
/8"
34
1
/4"
46
3
/8"
49
7
/8"
49
7
/8"
23
7
/8"
25
3
/4"
3
3
/4"

13
15 INCH & 24 INCH INSTALL GUIDE
13 - 25
i n s t a l l a t i O n s p e c i f i c a t i O n s
f O r s O l i D p a n e l r e a D y ( O p ) a n D
g l a s s f r a m e D p a n e l r e a D y ( O g )

14
TRUE RESIDENTIAL LINE
INSTALLATION SPECIFICATIONS - SOLID (OP) AND GLASS FRAMED PANEL (OG)
True’s units with Solid and Glass Framed Panels are designed to be inserted into a cabinet opening or free
standing. Below are recommended dimensions for rough opening.
True’s stainless steel cabinets are UL rated for use in outdoor settings.
In outdoor locations where the ambient temperature regularly exceeds 95˚F, it is recommended to vent the rear
of the cut out opening in the area shown below for optimum performance.
The recommended cut out size is 4” x 10”.
23
7
/
8
"
29
3
/
4
"
4
1
/
8
"
Rough Opening
HEIGHT
34
1/2
”
Front view
of unit
between
cabinets
Rough Opening
DEPTH
24”
Rough Opening
WIDTH
24”
Rough
Opening
HEIGHT
34
1/2
”
Rough
Opening
DEPTH
24”
Front
view of
unit
between
cabinets
Rough
Opening
WIDTH
15”
24 INCH 15 INCH

15
15 INCH & 24 INCH INSTALL GUIDE
TWC-24DZ-R/L-OG-B
TBC-24-R/L-OP-B
24 INCH
ALL REFRIGERATOR
BEVERAGE CENTER
TBC-24-R/L-OG-B
WINE CABINET
TWC-24-R/L-OP-B TWC-24-R/L-OG-B
DUAL ZONE WINE CABINET
TWC-24DZ-R/L-OP-B
TUR-24-R/L-OG-BTUR-24-R/L-OP-B TUR-24-D-OP-B
TUR-24BD-R/L-OP-B TUR-24DD-R/L-OP-B
BEVERAGE DISPENSER

16
TRUE RESIDENTIAL LINE
24” SINGLE TAP UNIT ACCOMMODATES (1) SHORT 1/4 BARREL, (1) SLIM
1/4 BARREL, OR (1) 1/6 BARREL. 24” DUAL TAP UNIT ACCOMMODATES
(2) 1/6 BARRELS OR (1) SLIM 1/4 BARREL AND (1) 1/6 BARREL.
*
INCLUDING 3/4” THICK PANEL (PROVIDED BY OTHERS)
DIMENSIONS MAY VARY BY ±
1
/
8
”
23
7
/8"
34
1
/4"
21"
42
5
/8"
34
1
/4"
23
1
/8"
23
7
/8"
3
3
/4"
4
1
/8"
23
7
/8"
34
1
/4"
46
7
/8"
11
7
/8"
10
1
/4"
25
1
/4"
4
1
/8"
34
1
/4"
46
3
/8"
49
7
/8"
49
7
/8"
23
1
/8"
23
7
/8"
3
3
/4"
23
7
/8"
34
1
/4"
25
1
/4"
46
7
/8"
34
1
/4"
23
7
/8"
3
3
/4"
4
1
/8"
23
1
/8"
3
/4"

17
15 INCH & 24 INCH INSTALL GUIDE
23
7
/8"
34
1
/4"
21"
42
5
/8"
34
1
/4"
23
1
/8"
23
7
/8"
3
3
/4"
4
1
/8"
23
7
/8"
34
1
/4"
46
7
/8"
11
7
/8"
10
1
/4"
25
1
/4"
4
1
/8"
34
1
/4"
46
3
/8"
49
7
/8"
49
7
/8"
23
1
/8"
23
7
/8"
3
3
/4"
ALL REFRIGERATOR
TUR-15-R/L-OP-B TUR-15-R/L-OG-B
WINE CABINET
TWC-15-R/L-OP-B TWC-15-R/L-OG-B
BEVERAGE DISPENSER
TUR-15BD-R/L-OP-B
15 INCH

18
TRUE RESIDENTIAL LINE
16
1
/4"
37
7
/8"
14
7
/8"
34
1
/4"
7
1
/2"
10
1
/4"
4
1
/8"
34
1
/4"
46
3
/8"
49
7
/8"
49
7
/8"
23
7
/8"
3
3
/4"
14
7
/8"
34
1
/4"
16
1
/4"
37
7
/8"
34
1
/4"
23
7
/8"
3
3
/4"
4
1
/8"
15” SINGLE TAP UNIT ACCOMMODATES
(1) SLIM 1/4 BARREL OR (1) 1/6 BARREL.
*
INCLUDING 3/4” THICK PANEL (PROVIDED BY OTHERS)
DIMENSIONS MAY VARY BY ±
1
/
8
”
Page is loading ...
Page is loading ...
Page is loading ...
Page is loading ...
Page is loading ...
Page is loading ...
Page is loading ...
Page is loading ...
Page is loading ...
Page is loading ...
Page is loading ...
Page is loading ...
Page is loading ...
Page is loading ...
Page is loading ...
Page is loading ...
Page is loading ...
Page is loading ...
Page is loading ...
Page is loading ...
Page is loading ...
Page is loading ...
Page is loading ...
Page is loading ...
Page is loading ...
Page is loading ...
Page is loading ...
Page is loading ...
Page is loading ...
Page is loading ...
Page is loading ...
Page is loading ...
Page is loading ...
Page is loading ...
Page is loading ...
Page is loading ...
Page is loading ...
Page is loading ...
Page is loading ...
Page is loading ...
Page is loading ...
Page is loading ...
Page is loading ...
Page is loading ...
Page is loading ...
Page is loading ...
Page is loading ...
/


