Garland 36ER33-88 User manual

Category
Deep fryers
Type
User manual
Part # P157 Rev 2(01/06/10) Page 1
Users are cautioned that maintenance and repairs must be performed by a Garland authorized service agent
using genuine Garland replacement parts. Garland will have no obligation with respect to any product that has been
improperly installed, adjusted, operated or not maintained in accordance with national and local codes or installation
instructions provided with the product, or any product that has its serial number defaced, obliterated or removed,
or which has been modified or repaired using unauthorized parts or by unauthorized service agents.
For a list of authorized service agents, please refer to the Garland web site at http://www.garland-group.com.
The information contained herein, (including design and parts specifications), may be superseded and is subject
to change without notice.
GARLAND COMMERCIAL INDUSTRIES
185 East South Street
Freeland, Pennsylvania 18224
Phone: (570) 636-1000
Fax: (570) 636-3903
GARLAND COMMERCIAL RANGES, LTD.
1177 Kamato Road, Mississauga, Ontario L4W 1X4
CANADA
Phone: 905-624-0260
Fax: 905-624-5669
Part # P157 Rev 2 (01/06/10) © 2004 Garland Commercial Industries, Inc.
FOR YOUR SAFETY:
DO NOT STORE OR USE GASOLINE
OR OTHER FLAMMABLE VAPORS OR
LIQUIDS IN THE VICINITY OF
THIS OR ANY OTHER
APPLIANCE
WARNING:
IMPROPER INSTALLATION, ADJUSTMENT,
ALTERATION, SERVICE OR MAINTENANCE
CAN CAUSE PROPERTY DAMAGE, INJURY,
OR DEATH. READ THE INSTALLATION,
OPERATING AND MAINTENANCE
INSTRUCTIONS THOROUGHLY
BEFORE INSTALLING OR
SERVICING THIS EQUIPMENT
INSTALLATION AND
OPERATION MANUAL
GARLAND
S18-F AND S18-SF SERIES
RESTAURANT FRYERS
PLEASE READ ALL SECTIONS OF THIS MANUAL
AND RETAIN FOR FUTURE REFERENCE.
THIS PRODUCT HAS BEEN CERTIFIED AS
COMMERCIAL COOKING EQUIPMENT AND
MUST BE INSTALLED BY PROFESSIONAL
PERSONNEL AS SPECIFIED.
INSTALLATION AND ELECTRICAL CONNECTION
MUST COMPLY WITH CURRENT CODES:
IN CANADA - THE CANADIAN ELECTRICAL
CODE PART 1 AND / OR LOCAL CODES.
IN USA – THE NATIONAL ELECTRICAL CODE
ANSI / NFPA – CURRENT EDITION.
ENSURE ELECTRICAL SUPPLY CONFORMS WITH
ELECTRICAL CHARACTERISTICS SHOWN ON
THE RATING PLATE.
NRTL/C
Part # P157 Rev 2 (01/06/10)Page 2
IMPORTANT INFORMATION
WARNING:
This product contains chemicals known to the state of California to cause cancer and/or birth defects
or other reproductive harm. Installation and servicing of this product could expose you to airborne
particles of glass wool/ceramic fibers. Inhalation of airborne particles of glass wool/ceramic fibers
is known to the state of California to cause cancer.
Part # P157 Rev 2(01/06/10) Page 3
TABLE OF CONTENTS
IMPORTANT INFORMATION..........................................2
DIMENSIONS AND SPECIFICATIONS ..................................4
Exterior Dimensions. . . . . . . . . . . . . . . . . . . . . . . . . . . . . . . . . . . . . . . . . . . . . . . . . . . . . . . . . . . . . .5
INTRODUCTION.....................................................5
General Information .............................................................5
Safety ...........................................................................5
Rating Plate ......................................................................5
Product Information .............................................................6
INSTALLATION......................................................6
Unpacking .......................................................................6
Siting ............................................................................6
Clearances .......................................................................7
Appliances Equipped With Legs ..................................................7
Appliances Equipped With Casters ................................................7
Ventilation .......................................................................7
Electrical Supply .................................................................7
Single and Three Phase Connection ...............................................7
Commissioning ..................................................................7
Preparation Before Use ...........................................................8
OPERATION.........................................................8
Filling the Tank. . . . . . . . . . . . . . . . . . . . . . . . . . . . . . . . . . . . . . . . . . . . . . . . . . . . . . . . . . . . . . . . . . .8
Operating Instructions ...........................................................8
High Temperature Cuto/Reset ...................................................8
Operating Controls. . . . . . . . . . . . . . . . . . . . . . . . . . . . . . . . . . . . . . . . . . . . . . . . . . . . . . . . . . . . . . .9
Operation Safety .................................................................9
Suggestions for Quality Fried Products ............................................9
MAINTENANCE AND CLEANING.....................................10
Frying Compound ..............................................................10
Stainless Steel ..................................................................10
Enamelled / Painted Surfaces ....................................................10
Thermostat Calibration ..........................................................10
Servicing .......................................................................11
Precautions .....................................................................11
Part # P157 Rev 2 (01/06/10)Page 4
DIMENSIONS AND SPECIFICATIONS
North American (60 cycle) Electrical Loading:
Model
Total
kW
Nominal Amperes Per Line
208v/1Ø 240V/1Ø
208V/3Ø 240V/3Ø
XYZXYZ
S18F 12 58 50 34 34 34 28.9 28.9 28.9
S18SF 16 77 66.7 49 38 49 41.8 41.8 32.5
Export (50 cycle) Electrical Loading:
Model
Total kW
Nominal Amperes Per Line
220/380V/
240/415V/
220/380/3Ø 240/415V/3Ø
220/380V 240/415V XYZXYZ
S18F 10.1 12 46.2 50 15.4 15.4 15.4 16.7 16.7 16.7
S18SF 13.4 16 61.1 66.7 17.2 26.7 17.2 18.8 29.2 18.8
DAIS Installation:
MAX
2-/12"
[64mm]
FRYER
Installation Clearances:
Clearance to combustible surfaces
Sides: 1” (25mm) Rear: 1-1/2” (38mm)
NOTE: Many local codes exist, and it is the
responsibility of the Owner and the Installer to comply
with those codes.
Production Capacity (per hour)
Model French Fries
S18F
Frozen to Done
50 lbs. /23kg
S18SF
Frozen to Done
60 lbs./ 27kg
Frying area is 13” (330mm) wide x 15-1/2” (394mm) deep.
34-1/2"
[877mm]
43-3/4"
[1111mm]
37-3/4"
[959mm]
6"
[152mm]
6"
[152mm]
18"
[457mm]
REAR
ELECTRICAL
CONNECTION
28-7/8"
[733mm]
Fr ying area is 13" (330mm) wide x 15-1/2" (394mm) deep
Part # P157 Rev 2(01/06/10) Page 5
DIMENSIONS AND SPECIFICATIONS continued
Exterior Dimensions
Model Height* Width Depth Weight
S18-(F,SF) 37-3/4” (959mm) 18” (457mm) 34-1/2” (876mm) 140Lb/64Kg
* Height from front rail to oor
NOTE: Height Dimensions specied with 6” (152mm) legs.
INTRODUCTION
You have purchased the nest Commercial cooking
Equipment available. Like any ne precision built piece of
equipment it should be given regular care and maintenance.
The following instructions should be read carefully as the
manufacturer can not be held responsible for any damage
to property or persons caused by incorrect installation or
operation of the equipment.
General Information
1. Check the crate for possible damage sustained during
transit. Carefully remove the unit from the crate and
again check for damage. Any damage to the unit must be
reported to the carrier immediately.
2. Any protective material covering stainless steel parts
must be removed.
3. All fryers are shipped from the factory with legs or casters
tted unless specially ordered without.
4. The type of voltage supply that the equipment was
manufactured for at the factory is noted on the data plate
and on the packaging. This type of supply must be used.
5. Do not remove permanently axed labels, warnings
or data plates from the appliance, for this may void
approvals and creates a safety hazard.
Safety
This manual pertains to fryers. The reader/operator must
interpret its contents to applicable needs. If there is any
question of interpretation of any of the literature pertaining
to Garland fryers, please contact your Authorized Service
Agency or our Customer Service Department at the phone
number listed on the front of this manual.
A qualied person must make the installation of these
products in accordance with the local codes of the country of
destination.
Always follow these safety precautions when operating the
fryer.
The unit must only be operated by qualied persons. DO
NOT operate without reading this manual.
DO NOT operate the product unless it has been properly
installed and earthed.
DO NOT operate the product unless all service and access
panels are in place and fastened properly.
DO NOT attempt to repair or replace any part of this product
unless all main power supplies have been disconnected.
WARNING: to avoid serious personal injury: Use extreme
caution in setting up, operating and cleaning this product to
avoid coming in contact with hot surfaces or hot oil. Suitable
protective clothing should be worn to prevent the risk of
burns.
NOTE all warning labels and markings on the product,
which call attention to further dangers and necessary
precautions.
WARNING: this appliance must not be cleaned with a
water jet.
Rating Plate
For proper operation, the information on the data plate of
your new equipment must match your electrical supply.
The data plate is readily accessible, located on the inside of
the cabinet door. It contains all of the pertinent information
required by the installer.
Part # P157 Rev 2 (01/06/10)Page 6
When corresponding with the factory or your equipment
dealer regarding service problems or replacement parts,
be sure to refer to the particular unit by the correct model
number, including prex and sux letters and numbers and
serial number. The rating plate axed to the unit contains
this information.
INTRODUCTION continued
Product Information
The deep fat fryer is one of the more versatile products in
today’s kitchen. Its ability to cook a variety of products in
large quantities makes it the most common & economical
choice. The Garland restaurant series fryer is designed to be
installed free standing or in battery with Garland S, SS, SU680
series ranges.
Cooking larger quantities of food can be done more
eciently than small quantities. Product is cooked directly in
the oil using the lift out wire baskets supplied.
INSTALLATION
The Garland S18 series deep fat fryer complies with the
standards CSA C22.2 No. 109 – latest edition, the UL197 –
latest edition and the NSF#4 – latest edition. The installation
& connection of this appliance must comply with current
codes. In Canada – the Canadian Electric Code Part 1 and in
the USA – The National Electrical Code.
Your new equipment must be installed and adjusted by
a competent person as required by the local electrical
authorities. Failure to install appliances correctly could lead
to prosecution. It is in your own interests and that of safety to
ensure that the law is complied with.
Your Garland Dealer is well qualied to provide this service.
Periodic inspections by your dealer or a qualied service
company are recommended to check temperatures and to
ensure moving parts are operative. Wherever possible avoid
overheating idle equipment, as this is the primary cause for
increased service cost.
Unpacking
1. Carefully remove the unit from the crate. All packing
material must be removed from the unit. The protective
material covering the stainless steel must be removed
immediately after the unit is installed.
2. Do not remove permanently axed labels, warnings
or data plates from the appliance, for this may void
approvals and creates a safety hazard.
Siting
The fryer should be installed on a rm smooth and level oor
designed to withstand the weight of the appliance and any
ancillary equipment. (Refer to dimensions and specications
section for weights). Once in position check that the
equipment is level, the fryer must be level front to back, side
to side and diagonally. This leveling must be done with the
unit under the hood and in it’s normal operational position.
Adjust if necessary.
If the fryer is to be dais or cove mounted, the base on which
it is to be set should be level. If it is not, the fryer must be
shimmed to level.
Part # P157 Rev 2(01/06/10) Page 7
Clearances
The space in which the appliance is to be sited must include
the minimum installation clearances to combustible surfaces
as indicated in the following table.
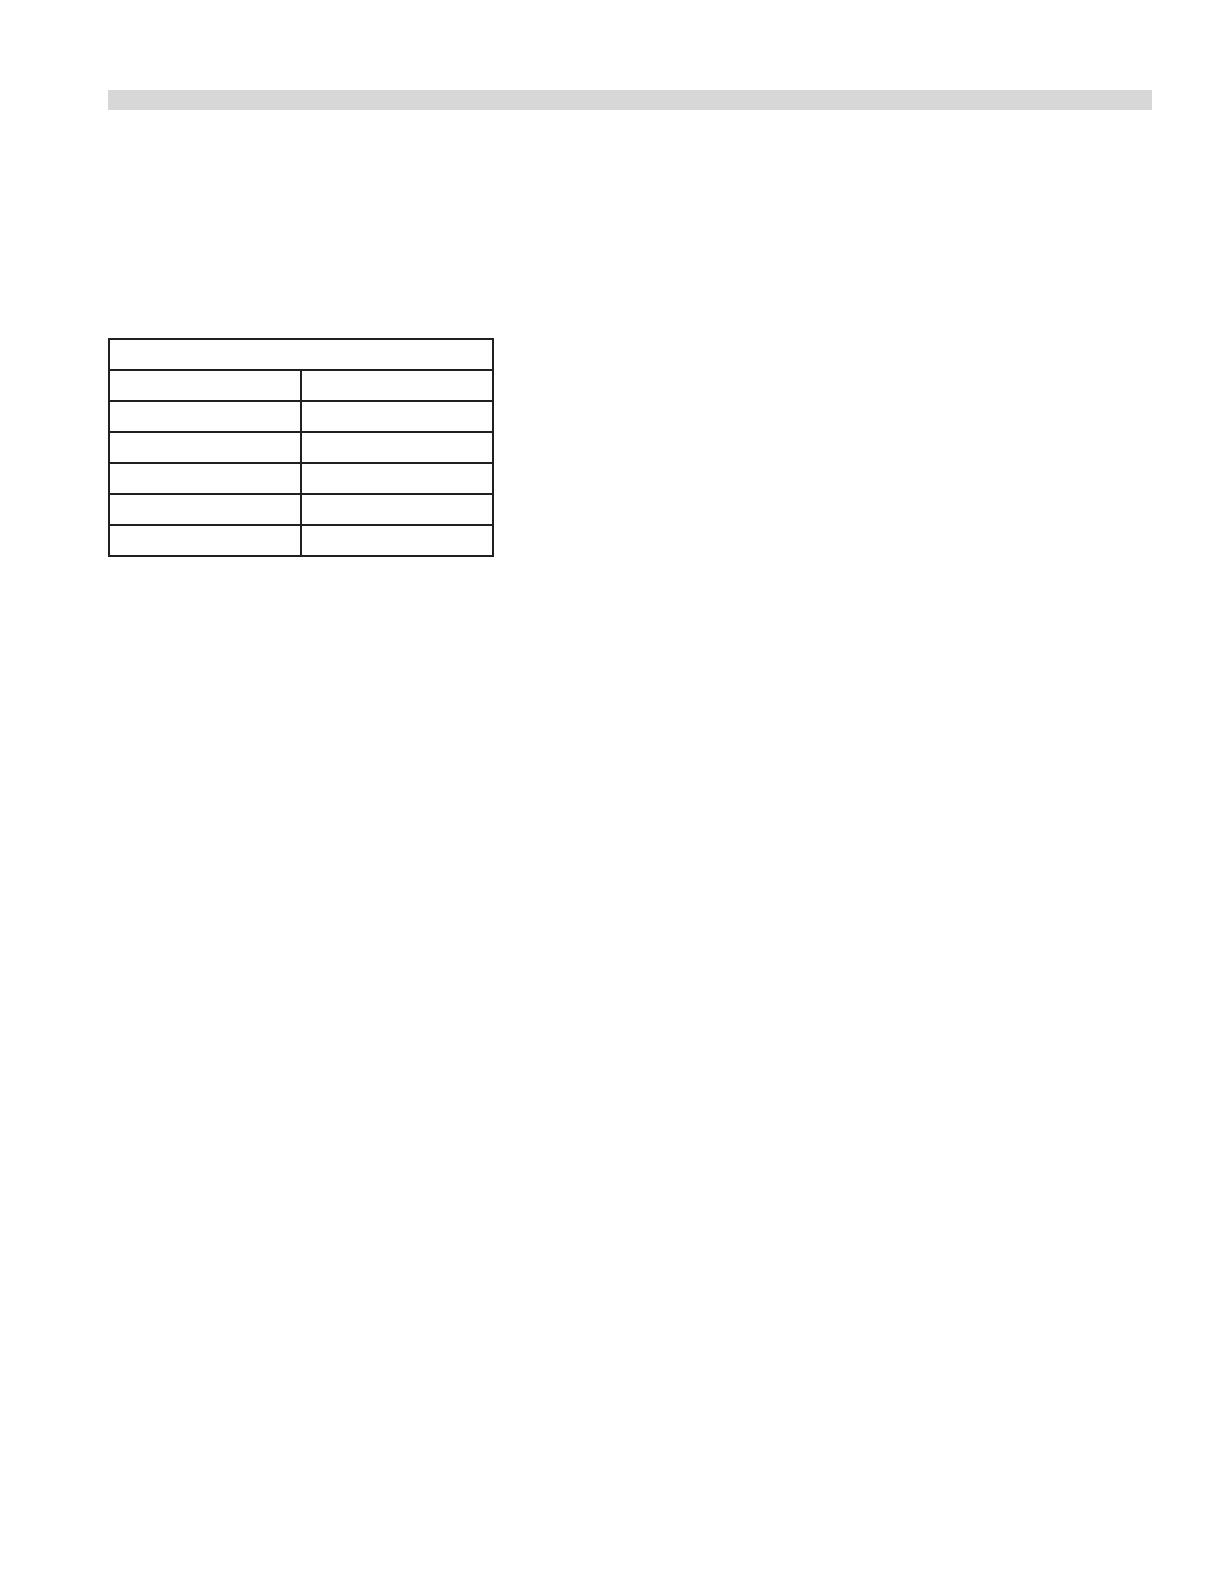
CLEARANCE TO COMBUSTIBLE MATERIAL
Location All Models
Top *
Left Hand Side 1” (25mm)
Right Hand Side 1” (25mm)
Rear 1.5” (38mm)
Type of Floor or Base Combustible
* NOTE Equipment must be installed
under a ventilation canopy
Adequate clearance must be provided for servicing,
ventilation & proper operation. The product must be kept
free from combustible material.
Appliances Equipped With Legs
All Fryers are shipped from the factory with legs installed
unless otherwise specied. When the fryer is specied for
dais or cove mounting it is shipped less legs. Legs must be
adjusted to a minimum height of 6” (152mm) in order to
comply with NSF standards.
Appliances Equipped With Casters
1. The front casters on the unit are equipped with brakes to
limit the movement of the fryer without depending on
the electrical connection.
2. A restraint can be attached to the unit near the electrical
connection. If the restraint is disconnected be sure to
reconnect it after the fryer has been returned to its
original installed position.
Ventilation
The area in which the appliance is installed must be
adequately ventilated to provide air for removal of steam,
heat generated by the appliance, etc. These products are
intended to be installed under a ventilation hood. The use
of a mechanical extract system should be considered and
conform to local codes.
Proper operation of exhaust fans (proper speed, rotation and
adjustment) is essential. In addition a make-up air system
(HVAC) for the kitchen to supply fresh air is recommended.
Any ventilation system will break down if improperly
maintained. The duct system, the hood, and the lters must
be cleaned on a regular bases and kept clean.
Electrical Supply
CAUTION: Prior to installation check the electrical supply
to ensure input voltage and phase match the equipment
voltage rating and phase. See data plate located inside of the
cabinet door.
The supply entrance is located at the rear. The supply
terminal block is accessible from the front. The electrical
supply must be adequate for the voltage, phase & current
marked on the rating plate.
NOTE: A means of disconnection from the supply having
a contact separation of at least 3 mm in all poles must be
incorporated in the xed wiring.
This equipment is intended to be installed with xed
permanent wiring
WARNING: This appliance must be earthed.
Single and Three Phase Connection
Unless otherwise noted all fryers are shipped from the
factory for three phase connection. A wiring diagram is
attached to the rear of each fryer. Visually check all the
electrical connections. The fryer is wired at the factory
as specied on the order. If it is necessary to change the
phasing, refer to the wiring diagram.
Commissioning
Ensure all circuit breakers located in the lower compartment
are set to the ‘ON’ (1) position.
1. Ensure that all controls are in the o position and turn on
the main electrical supply.
2. Operate the fryer in accordance with the operating
instructions.
3. Check that the product functions correctly and that the
voltage supply to the unit does not drop by more than
5% when all sections are operated simultaneously.
When the operation has been check, hand the instructions to
the user or purchaser for retention and instruct them in the
ecient and safe operation of the appliance.
INSTALLATION continued
Part # P157 Rev 2 (01/06/10)Page 8
Preparation Before Use
After the fryer has been properly installed and checked for
operation, it will be necessary to clean the protective coating
from the tank as follows:
1. Turn the power service disconnect switch o.
2. Remove baskets from the fry tank.
3. Lift the element handle until the heating elements are in
full raised position.
4. Lift the tank out of the fryer for cleaning. If a special fry
tank cleaner is used, carefully follow the manufactures
instructions for use. A soap, vinegar or baking soda
solution may be used for cleaning the tank. Rinse the tank
thoroughly with clean, hot water and dry completely.
5. Replace the tank in the fryer. If the tank has the optional
drain valve, make sure that this valve is tightly closed.
6. With the circuit breakers and toggle switch on the fryer
in the “OFF” position, turn on the power at the service
disconnect box.
INSTALLATION continued
OPERATION
Filling the Tank
Once the tank and elements have been cleaned the tank can
be lled with oil.
1. If Liquid frying compound is used, ll the tank to the ‘Full’
mark stamped on the inside of the tank. Do not over ll
the tank.
2. If hydrogenated or solid frying compound is used,
measure 30 lbs (13.6 kg). Pack the compound rmly
around the heating unit. The elements must be
completely covered with compound. Start the fryer
and set the thermostat to 250°F (121°C). Operate at this
temperature until the compound is completely melted.
Operating at higher temperatures can scorch the frying
compound.
3. For optimum frying compound life, it has been
recommended by the manufactures of the compound
limit the maximum operating temperature to 375°F
(190°C) on S18F models and 350°F (177°C) on S18SF
models.
Operating Instructions
The S18 series fryers are equipped with a temperature
limiting safety system. To start the fryer operating:
1. Turn the thermostat to the “OFF” position.
2. Lift the toggle switch to the start position (momentarily
up).
3. Release the switch. It will return to the run position. The
green indicator lamp should be illuminated.
4. Turn the thermostat dial to the desired temperature.
High Temperature Cuto/Reset
Your Garland Fryer is equipped with a protective secondary
thermostat. If the operating thermostat fails to control
the temperature, the secondary (Hi-Limit) thermostat will
take over. It will cut o power to the heating elements if
the frying compound reaches a temperature greater than
430°F (221°C). The system cannot be reset until the frying
compound drops in temperature by approximately 50°F
(28°C). Repeating the starting procedure can reset the
system.
Part # P157 Rev 2(01/06/10) Page 9
OPERATION continued
If this condition occurs, it could indicate that the operating
thermostat has become damaged. A qualied service
technician should check the fryer. Continued operation
of the fryer in this condition will deteriorate the frying
compound and degrade the product quality.
Operating Controls
Control Panel, Symbols and Indicators
OVER TEMPERATURE
(HIGH LIMIT) SYMBOL
AND INDICATOR - RE
D
START
POWER
SWITCH
HEATING SYMBOL AND
INDICATOR - AMBER
OFF
POWER SYMBOL
AND INDICATOR
GREEN
ON
Thermostat Dial
Degrees C
1
9
0
1
7
5
1
5
0
1
2
0
9
5
C
˚
Thermostat Dial
Degrees F
3
7
5
3
5
0
3
0
0
2
5
0
2
0
0
F
˚
3
0
1
0
3
0
0
Operation Safety
It is the responsibility of the supervisor or equivalent
person to ensure that users of this equipment wear suitable
protective clothing and to draw attention to the fact that
some parts will be necessity, become very hot and will cause
burns if touched accidentally.
Suggestions for Quality Fried Products
Clean equipment is vital to the quality of fried foods. Fresh
uncontaminated frying compounds produce better fried
foods.
1. Taste the frying compound once a day. Your patrons do,
when they eat the product.
2. Filter the frying compound daily. Use a proper lter and
cone or a lter system.
3. Drain or dry foods before frying. Excessive moisture and
water breaks down frying compound.
4. Do not salt or otherwise season food over the fryer.
This practice contaminates the frying compound and
accelerates its deterioration.
5. Do not shake breaded items over the fryer.
6. Keep the fry tank covered when not in use. This will
prevent air from oxidizing the frying compound and will
keep impurities out.
Part # P157 Rev 2 (01/06/10)Page 10
7. Watch for the signs of shortening break down. An
unusual darkening of the shortening or smoking are the
rst signs of break down. Foaming, objectionable change
in avour of the product and fuming also indicate a break
down of the frying compound.
OPERATION continued
8. Set the thermostat to 200°F (93°C) during idle periods. This
will conserve energy and extend frying compound life.
MAINTENANCE AND CLEANING
NOTE: This Appliance is not Protected against Water Jets. Do
not Clean with Water Jets.
Frying Compound
It is important to keep the cooking oil clean. The frequency
of change depends on the amount of use and the type of
products cooked.
Stainless Steel
Stainless steel should be cleaned using a mild detergent,
a soft cloth and hot water. If it is necessary to use a non-
metallic scouring pad, always rub in the direction of the grain
in the metal to prevent scratching. Wash a small area at a
time and rinse the washed area with a clean sponge dipped
into a disinfectant and wipe dry with a soft clean cloth before
it can dry.
Use only stainless steel, wood or plastic tools to scrape
o heavy deposits of grease or oil. Do not use ordinary
steel scrapers or knives, as particles of iron may become
embedded and rust.
NEVER USE STEEL WOOL.
Enamelled / Painted Surfaces
Establish a regular cleaning schedule. Any spills should be
wiped o immediately. The unit should be allowed to cool
down before cleaning any exterior surfaces. Wipe exposed
surfaces when cool with mild detergent and hot water.
Stubborn residue spots may be removed with scouring pad.
Dry thoroughly with a clean cloth.
Thermostat Calibration
WARNING: Turn o the electrical mains before commencing
any service work.
It is normal for an electromechanical thermostat to cycle
with a 45° F - 50°F (25°C - 28°C). When checking calibration,
allow the thermostat to cycle a minimum of two times.
1. Place the thermocouple of the test instrument in the
center of the tank 1” (25mm) below the oil surface.
2. Turn the thermostat dial to 325° F (163° C). In order to
allow the oil temperature to stabilize, the control must be
allowed to cycle twice before taking a test reading.
3. Check the temperature reading just when the control
cycles “OFF” as indicated by the cycle pilot lamp. If the
temperature does not read within 15°F (8°C) of the dial
setting, recalibrate as follows:
4. Carefully remove the thermostat dial, not disturbing the
dial setting.
5. Hold the thermostat shaft steady and with a small at
blade screw driver, turn the calibration screw located
inside the shaft clockwise to decrease the temperature
and counter clock wise to increase the temperature.
NOTE: Each 1/4 turn of the screwdriver will create a
change of approximately 35° F (20° C).
6. Replace the thermostat dial and repeat steps 1 through 3
to verify that correct adjustment has been made.
Part # P157 Rev 2(01/06/10) Page 11
MAINTENANCE AND CLEANING continued
Servicing
To ensure ecient and safe operation of the appliance it
is recommended that servicing is carried out at regular
intervals, the frequency of which will vary, depending on the
installation conditions and usage. Usually once per year is
adequate.
Competent persons in accordance with the law must carry
out servicing.
Precautions
It is essential that the instructions in this booklet be strictly
followed for the safe and economical operation of the
equipment. If it is known or suspected that a fault exists on
the appliance then it must not be used until a competent
person has rectied the fault.
Pièce n° P157 Rev 2(01/06/10) Page 1
Nous attirons l’attention des utilisateurs sur le fait que l’entretien et les réparations doivent être exécutés uniquement
par une entreprise de service agréée Garland utilisant des pièces de rechange d’origine Garland. Garland décline toute
responsabilité pour les produits incorrectement installés, réglés, utilisés ou entretenus sans respecter les codes nationaux
et locaux, ni les instructions d’installation fournies avec le produit ou pour tout produit dont le numéro de série a été
modifié, abîmé, effacé ou supprimé ou pour tout produit modifié ou réparé par des agents de service non autorisés. Pour
obtenir une liste des agences de service agréées, contacter le site web de Garland à l’adresse www.garland-group.com.
Les informations contenues dans le présent manuel (y compris les spécifications de conception et des pièces) peuvent
être modifiées à tout moment et sans préavis.
Pièce n° P157 Rev 2 (01/06/10) © 2004 Garland Commercial Industries, Inc.
POUR VOTRE SÉCURITÉ :
NE PAS STOCKER NI UTILISER D’ESSENCE
OU D’AUTRES VAPEURS OU LIQUIDES
INFLAMMABLES À PROXIMITÉ DE CET
APPAREIL OU DE TOUT AUTRE APPAREIL.
AVERTISSEMENT :
UNE INSTALLATION, DES RÉGLAGES, DES
MODIFICATIONS, DES RÉPARATIONS
OU UN ENTRETIEN MAL FAITS PEUVENT
CAUSER DES DOMMAGES MATÉRIELS,
DES BLESSURES OU LA MORT. LIRE
SOIGNEUSEMENT LES INSTRUCTIONS
D’INSTALLATION, D’UTILISATION ET
D’ENTRETIEN AVANT D’INSTALLER OU DE
RÉPARER L’ÉQUIPEMENT.
MANUEL D’INSTALLATION
ET D’UTILISATION
GARLAND
SÉRIE S18-F ET S18-SF
FRITEUSES DE RESTAURANT
LIRE TOUTES LES SECTIONS DU PRÉSENT MANUEL
ET LE CONSERVER POUR S’Y REPORTER ULTÉRIEURE-
MENT.
CE PRODUIT A ÉTÉ HOMOLOGUÉ EN TANT
QU’ÉQUIPEMENT PROFESSIONNEL DE CUISSON ET
DOIT ÊTRE INSTALLÉ PAR DU PERSONNEL PROFES-
SIONNEL TEL QUE SPÉCIFIÉ.
L’INSTALLATION ET LES CONNEXIONS ÉLECTRIQUES
DEVRONT ÊTRE CONFORMES AUX CODES EN
VIGUEUR :AU CANADA – LE CODE CANADIEN DE
L’ÉLECTRICITÉ, PARTIE 1 ET/OU LES CODES LOCAUX.
AUX É.-U. – LE NATIONAL ELECTRICAL CODE ANSI /
NFPA – ÉDITION EN VIGUEUR.
VÉRIFIER QUE LALIMENTATION ÉLECTRIQUE EST
CONFORME AUX CARACTÉRISTIQUES ÉLECTRIQUES
FIGURANT SUR LA PLAQUE SIGNALÉTIQUE.
NRTL/C
GARLAND COMMERCIAL INDUSTRIES, LLC
185 East South Street
Freeland, Pennsylvanie 18224
Téléphone : (570) 636-1000
Télécopieur : (570) 636-3903
GARLAND COMMERCIAL RANGES, LTD.
1177 Kamato Road, Mississauga, Ontario L4W 1X4
CANADA
Téléphone : 905-624-0260
Télécopieur : 905-624-5669
  • Page 1 1
  • Page 2 2
  • Page 3 3
  • Page 4 4
  • Page 5 5
  • Page 6 6
  • Page 7 7
  • Page 8 8
  • Page 9 9
  • Page 10 10
  • Page 11 11
  • Page 12 12
  • Page 13 13
  • Page 14 14
  • Page 15 15
  • Page 16 16
  • Page 17 17
  • Page 18 18
  • Page 19 19
  • Page 20 20
  • Page 21 21
  • Page 22 22
  • Page 23 23
  • Page 24 24

Garland 36ER33-88 User manual

Category
Deep fryers
Type
User manual

Ask a question and I''ll find the answer in the document

Finding information in a document is now easier with AI

in other languages