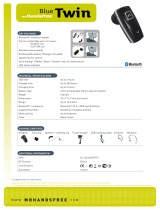
Liz Claiborne V1 User manual

Category
Mobile headsets
Type
User manual
USER MANUAL
DUAL MIC
DUAL
M
American
English Version
IC
IC
ENGLISH
BlueAnt
3
V1 USER GUIDE
Introduction
The revolutionary BlueAnt V1 voice controlled portable headset marks the future of voice controlled Bluetooth devices. Its
voice activated ‘prompt and response’ interface combined with the BlueAnt Voice Isolation Technology™ software, provide
the BlueAnt V1 with high quality and easy to use voice communications. Its dual microphones provide clear and clean voice
input enabling superb Noise Suppression, Echo Cancellation and Wind Noise Reduction.
Your headset is a Bluetooth 2.1 quali ed product and supports both the Headset and Handsfree Bluetooth pro les. The V1
can store information and wirelessly interact with up to eight different Bluetooth compliant devices (backward and forward
compatible), including mobile phones, PDA’s, PC’s / Mac’s or any Bluetooth enabled device that supports Headset pro le
or Handsfree pro le. This manual focuses on how to use your headset with your Bluetooth enabled phone.
The V1 can be used in Voice Control or Button Only modes. No voice training is required.
“PAIR ME” “TEACH ME” “WHAT CAN I SAY?” These voice commands get you to everything you need to use the BlueAnt V1.
There are two settings of Voice Isolation - STANDARD and MAX
Voice Isolation Standard is for use in normal environments and gives you a natural sounding voice removing mild noise.
Voice Isolation Max gives you superior voice clarity in a wide variety of high noise areas.
BlueAnt
4
Features of the BlueAnt V1
Voice Controlled user interface
Two microphones for pure speech
Voice Isolation Technology ™ BlueAnt’s revolutionary Digital Signal Processor (DSP) software
During a call, users can switch between two Voice Isolation modes – Standard and Max
This world class DSP provides echo suppression, noise reduction and wind noise reduction which separates the
desired voice signal from background noise enabling crystal clear conversation in even the noisiest of environments
The V1 can be paired with 8 devices
Different ringtones for known and unknown contacts (Phone Dependent)
Innovative tie clip for attaching to shirt or cuff, when not in use
Stylish, translucent ear hook plus a soft rubber ear hook
• Small and Large rubber ear gels, plus Small and Large Comply™ Foam Tips.
• 3 Charging options – Car, Wall and USB
Small & lightweight (1.5” in length & weighs only 0.35 oz) (41mm & 10grams)
Up to 5hrs talk-time or 200 hrs standby
2 Year Replacement Warranty
Bluetooth v2.1
What is Bluetooth wireless technology?
Bluetooth is the most advanced cable-replacement technology available today. It enables effortless wireless connections
between your Bluetooth devices within a range of up to 10m (30 ft).
ENGLISH
BlueAnt
5
What is Voice Control?
Voice control is the V1’s method of controlling actions on
it or the phone it is connected to. With simple commands
you can activate most of the headsets functions. To answer
a call with your voice just say “Answer”, to reject a call say
“Ignore”. To “Call Home”, just say the words, it’s that simple.
To initiate a new Bluetooth connection with your phone, just
say “Pair Me”. It’s that easy. The BlueAnt V1 listens to YOU.
What’s in the Package?
> A BlueAnt V1 Voice Control Bluetooth Headset
> 1 rubberized metal ear hook
> 1 translucent ear hook
> Small and Large rubber ear gels
> Small and Large Comply™ Foam Tips
> Gooseneck USB Cable
> USB Adapter
> USB Car Charger
> AC Power Adaptor
> Quick Start Guide
> V1 User Manual
> Warranty Card
BAB
(BlueAnt Button)
Volume Up
Volume Down
Ear Hook
Speaker
USB Charging
and
Upgrade Port
Overview
Microphones
BlueAnt
6
Getting Started - Before you can use your headset, you must do the following:
1. Fully charge your headset until the red LED goes out, using one of the chargers provided.
2. Pair your headset with a Bluetooth enabled device, e.g. Cell phone, PDA, Computer
Charging
Your V1 comes with a built-in rechargeable battery. For rst time use, you must fully charge your V1. During charging, the
indicator shows a steady red light. When the battery is fully charged, the red light will turn off. It takes 120-150 minutes
to fully charge the battery. The more you talk using your headset, the less standby time your battery has. Your headset will
require longer charging times when not used over extended periods of time.
Charging the V1 with the Gooseneck USB cable
1. Plug the Gooseneck USB charging cable into the PC/Mac’s USB port
2.
Plug the other end of the USB charging cable into the charging port of your headset. Make sure the USB plug matches up
to the USB socket on the headset. Do not force the plug into the socket, it should slide in easily. The red LED will turn ON.
3. When charging is complete the red LED will turn OFF. Remove the charging adapter.
Charging the V1 with the AC Power Adapter
1. Plug the AC Adapter into a power socket and the gooseneck USB cable into the wall charger.
2. Plug the other end of the USB charging cable into the charging port of your headset. Make sure the USB plug matches
up
to the USB socket on the headset. Do not force the plug into the socket it should slide in easily. The red LED will turn ON.
3. When charging is complete the red LED will turn OFF. Remove the charging adapter.
Using the USB Converter Plug
1.
Plug the adapter into the headset to give you the larger mini-usb connecter most common with cell phones and USB devices.
2. This allows you to use any standard USB cable to charge your headset.
ENGLISH
BlueAnt
7
For optimal performance of the
V1 headset, angle the headset so
that it points towards your mouth.
Charging the V1 with the Car Charger
1.
Plug the car charger into your car’s cigarette lighter, and the gooseneck USB cable into the car charger
2.
Plug the other end of the gooseneck USB charging cable into the charging port of your headset. Make sure the USB plug matches
up to the USB socket on the headset. Do not force the plug into the socket it should slide in easily. The red LED will turn ON.
3.
When charging is complete the red LED will turn OFF. Remove the charger
Wearing the BlueAnt V1
Push the ear hook through the ear hook hole which sits on the headset clip and adjust its length to t comfortably on your
ear. Ensure that the headset is pointing towards your mouth. You can wear the V1 on left or right ears, but for optimal
performance, wear the V1 on the right ear and angle it so that it points towards your mouth.
BlueAnt
8
Swapping and Fitting the Ear Gels and Comply™ Foam Tips
The V1 comes with four different options for Ear gels. The larger rubber ear gel is tted on the unit already.
When trying the different options, carefully pull the ear gel off and replace as per below.
Rubber Gels
Gently lift to remove.
Gently press to attach. Push on rmly to click into place.
The rubber ear gels should be placed so that the tip of the rubber is directed into your ear canal.
In most cases the gel should be spun about 45 degrees from the tie clip as per below.
Right Ear Left Ear
ENGLISH
BlueAnt
9
Comply™ Foam Tips
Gently pull to remove. Gently press to attach.
Push on rmly to make sure of correct attachment.
Compress the Comply Foam Tips™ around all sides by rolling the tip into a thin round cylinder, then insert into your ear.
Hold the V1 in place while the foam expands. This should take around 30 seconds.
Comply™ Foam Tips use super soft memory foam providing a comfortable seal that securely holds the V1 in the ear while
blocking outside noise.
To reorder Comply™ Foam Tips for BlueAnt devices go to www.blueantwireless.com/foamtips
Note: The Foam tips will last for many
months providing they are kept clean.
We recommend carefully cleaning your
ears before using these tips.
Disclaimer: The warranty period for the
Comply™ Foam tips is 3 months only.
This warranty covers workmanship and
defects but does not cover normal use
and wear and tear.
BlueAnt
10
VOICE CONTROL – “Say a command”
Step 1: Press the BlueAnt Button (BAB), a voice prompt asks you to “Say a command”
Step 2: Say one of the available commands such as “What Can I Say?”.
A voice prompt responds and the headset makes the action.
VOICE CONTROL - Getting the best results
1. After the “Say A Command” prompt, speak your command clearly.
2. If the headset does not respond immediately to your command, say it again.
3. Speak at a consistent speed and pronounce each syllable clearly.
4. Make sure the microphone is not covered and is pointed towards your mouth.
5. Speak louder than any background noise.
6. Say What Can I Say” for a reminder of the usable commands.
7. You can say “cancel” in any menu.
8. Press the BlueAnt Button to cancel at any time.
9. Use the “Am I connected?” command to nd out your headsets status
ENGLISH
BlueAnt
11
Speed Dials in the V1
This method requires that you rst receive an incoming
call from the number you want to input into the
headset for later dialing.
1. Receive a call from the number you want the
headset to later dial
2. Press and Hold Vol – for 3 seconds
3. The headset will ask you which voice command
you would like to associate with the number.
VOICE CONTROL – Set up your Speed Dials
There are two methods of inputting and activating the speed dials from your headset.
The rst is to Set up the speed dialing in your phone. The second (used if your phone does not adhere to the Bluetooth
speci cation for Speed Dialling) is to input the numbers into the headset.
We recommend to try the rst method rst.
Note: Call GOOG-411 is preset to dial GOOG-411.
Speed dials in the phone.
To use effectively you are required to store the associated
numbers into each speed dial position on your phone as follows:
BlueAnt
12
VOICE CONTROL – Available Commands
The following is a comprehensive list of the commands available in the V1.
At any time you can use the “What can I say?” command to hear the available commands
Pair Me – Puts your V1 into pairing mode ready to connect with your phone. Follow the Prompts.
Teach Me - This menu helps you to understand and use the V1
Try it Now – Takes you through a program which lets you practice the voice commands.
Speed Dial Set Up – Assistance in how to set up the Speed list in your phone
Tips and Tricks – Some helpful information to get the most out of the kit
What Can I Say? – Gives you a list of all the available commands
Am I Connected? – Checks to see if there is a phone connected. If not it will attempt to connect to your phone.
Check Battery – Tells you the status of your battery charge level
Settings Menu – Puts you into the Settings menu
‘Say a command’ Prompt - Enables or Disables the ‘Say a Command” prompt. With it disabled, you will hear a beep instead.
Incoming Call Function – Disable the Incoming call ID prompt and Voice Answer functions.
Turn Off Voice Control – Turns OFF the Voice Control. To re-enable, Hold Vol+ and Vol – for 6 seconds
Sensitivity Level – Choose from High Medium and Low. High will reject more, low will reject less.
LED Light – Turns the LED Lights OFF
Reset the V1 – Deletes all pairing information resets the Voice Interface and reboots the headset back into pairing mode
ENGLISH
BlueAnt
13
Phone Commands – Triggers the Voice Dial function of your cell phone (If your phone supports voice dialing)
Redial – Calls the number you last dialed
Call Back – Calls the last received number
Call Voice Mail – Calls your Voicemail
Call Home – Calls your Home
Call Of ce Calls your Of ce
Call Favorite – Dials your favorite number
Call GOOG-411 – Connects you to the GOOG-411 service, see http://www.google.com/goog411/ for details
Call Speed Dial 6 – Dials the number you have set to Speed Dial 6
Call Speed Dial 7– Dials the number you have set to Speed Dial 7
Call Speed Dial 8 – Dials the number you have set to Speed Dial 8
Call Speed Dial 9 – Dials the number you have set to Speed Dial 9
Switch Headset Off - Turns the headset OFF
Cancel – Cancels the active operation
BlueAnt
14
VOICE CONTROL – Voice Answer
On an incoming call the headset will announce the Caller ID.
It will then ask you if you want to Answer or Ignore the Call
Say “ANSWER” to accept the call
OR “IGNORE” to reject the call
Note : If the voice recognition in the V1 cannot understand you because of high noise or a loud ringtone coming from the
phone, it will ask you to press the BAB once to answer or twice to Ignore the call.
BUTTON OPERATION
To Turn Voice Control ON or OFF
Press and Hold Vol + and Vol - for 6 Seconds
Pairing
Pairing need only be done once for each device you use. The V1 can store pairing information for up to 8 different Bluetooth
devices. To pair another phone, make sure the rst paired phone has Bluetooth switched off or is out of range. If you want
to connect to a previously paired phone, use that phones Bluetooth Menu to connect.
Note: You can say ‘Pair Me’ to enter pair mode at any time, or follow the steps below
ENGLISH
BlueAnt
15
Pairing Procedure
(This is an example only and may differ from your phone, but the process will be the same.)
1. First turn the phone OFF and then back ON again to refresh its memory.
2. Bring the mobile phone to about 30cm from the V1 Device.
3. Find the Bluetooth menu in your mobile phone. Turn Bluetooth ON. (Check your mobile phone user guide if necessary)
4. With the V1 OFF, Press and Hold the BAB
for about 6 seconds. The LED will appear a solid Blue, and then will start
ashing. The V1 is now in Pairing mode and ready to be found in searches by other Bluetooth devices. Pairing mode will
be active for 2 minutes.
5. Perform a Bluetooth device discovery on your mobile phone to add a new device. (It takes a few seconds to search for
and nd other Bluetooth devices around you).
6. When Bluetooth devices are found, the phone will display “BlueAnt V1”. Scroll to it and press OK to con rm that you
want to Pair with it.
7. Enter Passkey “0000” when your phone prompts you. The phone and V1 will now Pair.
8. An additional security setting in your phone may be needed to allow the headset and phone to connect automatically
without con rmation each time you connect your V1. Generally in the options for the BlueAnt V1, it will be referred to as
“set as authorized”, “add to trusted devices”, ‘’allow connection’’ or similar.
9. If required for rst time connection, select the BlueAnt V1 to connect with your phone. OR, Click the BAB
on the V1,
to connect with the phone.
BlueAnt
16
Basic Headset Functions
For easy reference, also see the Button/Function Matrix and the Quick Start Guide.
1. Power ON: Press and Hold the BAB
for 3 seconds. The solid Blue LED will light up. If the battery is low a solid Red LED
will be displayed. After powering ON, your headset will automatically connect to your last used phone if it is in operating
range. If this phone is not range, the V1 will enter idle mode after 60 seconds. If no phone has yet been Paired, it will enter
the welcome prompt.
2. Power OFF: Press and Hold the BAB
for 3 seconds. The Red LED ashes three times. Power Off works on Standby/
Idle mode.
3. Enter Pairing Mode: With the V1 OFF, Press and Hold the BAB for about 6 seconds until the LED ashes Blue. The V1 will
stay in pairing mode for 2 minutes then will go into idle mode. To re-enter pairing mode, repeat this step, or say “Pair Me”
4. Make a Call: Dial the number using your phones keypad as normal. Audio will automatically transfer to the headset.
5. To Answer a call: Click the BAB
once when there is an incoming call.
6. To End a call: Double Click the BAB to end the call.
7. Reject: Double Click the BAB
to reject an incoming call.
8. Redial the last call : Press and Hold Vol
for about 3 seconds. To cancel Redial, click the BAB
9. Activate Phone Commands (Voice Dialling)*: While connected to a phone, press the BAB once. Voice commands must
have been previously recorded into your phone (see your phones user guide for speci c instructions. (Button Only Mode)
10. Reconnect: To reconnect your phone to the V1, simply turn the V1 ON. Or if already powered ON, Click Volume and
Volume
together. Alternatively, you can use the menu of your Bluetooth phone.
ENGLISH
BlueAnt
17
11. Volume level: Click Volume or Volume during a call to adjust the desired level. Volume changes will be
remembered for the next call. Be sure to use the headset at a comfortable and safe volume level. Note: Volume levels for
Voice Prompts and Active calls are independent.
12. Mute/Unmute the microphone. Press and Hold Vol
and Vol for 3 seconds during a call.
Advanced Headset Functions
1. Disconnect / Transfer: To transfer the audio to the phone, Click Volume and Volume together once. To transfer audio
back to the V1, Click Volume
and Volume together again
2. Disable/Enable the LED indicators: (for night time driving): When your headset is in idle or standby mode Press and
Hold Volume
and Volume together for 3 seconds. After turning the headset OFF and back ON, the LED Indicators
will be active again by default. Note the LED’s are turned OFF while a call is active.
3. Turn Voice Control ON/OFF: Press and Hold Vol
and Vol for 6 Seconds
4. V1 Reset: To reset the V1 to factory settings; while in idle mode (not connected to any device), Click Volume ,
Volume
and BAB together (3 buttons). The V1 will refresh its memory, delete all current pairing information and
the welcome message will play in the headset.
BlueAnt
18
V1 Function Button Time Status
Power ON/OFF
BAB
3 Seconds
From Off/Standby/Idle
Activate Voice Control
BAB
Click Idle/Standby
Enter Pairing Mode
BAB
6 Seconds From OFF
Answer Call
BAB
Click Ringing
End Call
BAB
Double Click
Active Call
Reject Call
BAB
Double Click
Ringing
Redial Last Number
Vol
3 Seconds Standby
Phone Commands
(Button Only mode)
BAB
Click Standby
Switch Voice Isolation
between Standard and Max
BAB
Click Active Call
Volume Up
Vol
Click Active Call
Volume Down
Vol
Click Active Call
Mute
Vol
& Vol
3 Seconds Active Call
Standby Mode
means connected to a device but not on a call.
Idle Mode
means the V1 is ON but not connected to any device
Multiple
button presses mean click together
To cancel a command, simply click BAB
at any time.
Button Function Matrix
Advanced Button Function Matrix
Advanced V1 Functions
V1 Function Button Time Status
Transfer Audio to phone
Vol
&
Vol
Click Audio on Headset
Transfer Audio to headset
Vol
&
Vol
Click Audio on Phone
Set up Speed dials
directly in the V1
Vol
3 Seconds
Standby
Turn LED’s OFF/ON
Vol
&
Vol
3 Seconds
Idle/Standby
Turn Voice Control ON/OFF
Vol
&
Vol
6 Seconds
Idle/Standby
Reset the V1
BAB
&
&
Click
Idle/Standby/
Active call
ENGLISH
BlueAnt
19
Pairing your headset with multiple Bluetooth devices
The V1 can be paired with 8 devices. If you want to connect to a previously paired phone, use that phones Bluetooth Menu
to connect.
1. Make sure the last phone used has Bluetooth switched off or is out of range.
2. Follow the procedure in ‘Pairing Procedure’ above for each device you want to pair.
Firmware upgrade
The BlueAnt V1 is rmware upgradeable via the USB port and provided USB cable.
Please see the support section at www.blueantwireless.com for information and downloads of available upgrades.
Power ON Solid Blue for 5 Seconds
Power OFF Red ash 3 times
Pairing Mode Blue ashing
Reset Blue ashing
Charging Solid Red
Charging with Power ON Solid Red with a Purple Flash
Charging Complete Red indicator OFF
Low Battery All LED’s change to Red
Idle Blue ash every 8 seconds
Standby 2 Blue ashes every 5 seconds
Ongoing call NO LED’s
LED Indicator Chart
BlueAnt
20
BlueAnt Voice Isolation Technology™
You can switch between two settings of Voice Isolation - STANDARD and MAX.
Voice Isolation Standard - For use in normal everyday environments and gives you a natural sounding voice
while removing mild noise.
Voice Isolation Max - Gives you more intelligible voice in a wide variety of high noise environments.
HOW DO I SWITCH?
• When switching between Standard and Max you will hear a con rmation voice tag played from the V1 speaker.
• When you rst turn the headset ON, it will be in the Standard setting.
• After switching the headset OFF and back ON, the headset will return to the Standard setting by default.
• Standard and Max both use the same amount of battery power.
To switch between Standard and Max: Click the BAB
while on a call
What Voice Isolation mode should I use when?
STANDARD MAX
Of ce In Vehicle, Restaurant
Home Walking
Quiet environment Music in background
  • Page 1 1
  • Page 2 2
  • Page 3 3
  • Page 4 4
  • Page 5 5
  • Page 6 6
  • Page 7 7
  • Page 8 8
  • Page 9 9
  • Page 10 10
  • Page 11 11
  • Page 12 12
  • Page 13 13
  • Page 14 14
  • Page 15 15
  • Page 16 16
  • Page 17 17
  • Page 18 18
  • Page 19 19
  • Page 20 20
  • Page 21 21
  • Page 22 22
  • Page 23 23
  • Page 24 24
  • Page 25 25
  • Page 26 26
  • Page 27 27
  • Page 28 28

Liz Claiborne V1 User manual

Category
Mobile headsets
Type
User manual

Ask a question and I''ll find the answer in the document

Finding information in a document is now easier with AI