Electrolux K353U (601416) Operating instructions
- Category
- Electric food choppers
- Type
- Operating instructions
This manual is also suitable for
Electrolux K353U (601416) is a professional-grade cutter designed for mincing, mixing, emulsifying, liquidizing, and kneading a wide range of food products. Its robust construction and powerful motor make it ideal for commercial kitchens and food processing facilities.
With its versatile rotor system, the Electrolux K353U can handle various tasks, including:
- Mincing meat for terrines, sausages, and beef burgers
- Creating smooth stuffing and mousses
- Mixing butters, mayonnaise, and purées
- Kneading all types of pastries
- Liquidizing shellfish and fish
- Grinding breadcrumbs and almonds


-
 1
1
-
 2
2
-
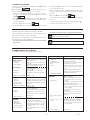 3
3
-
 4
4
-
 5
5
-
 6
6


Electrolux K353U (601416) Operating instructions
- Category
- Electric food choppers
- Type
- Operating instructions
- This manual is also suitable for
Electrolux K353U (601416) is a professional-grade cutter designed for mincing, mixing, emulsifying, liquidizing, and kneading a wide range of food products. Its robust construction and powerful motor make it ideal for commercial kitchens and food processing facilities.
With its versatile rotor system, the Electrolux K353U can handle various tasks, including:
- Mincing meat for terrines, sausages, and beef burgers
- Creating smooth stuffing and mousses
- Mixing butters, mayonnaise, and purées
- Kneading all types of pastries
- Liquidizing shellfish and fish
- Grinding breadcrumbs and almonds
Ask a question and I''ll find the answer in the document
Finding information in a document is now easier with AI
Related papers
-
Electrolux K25XU (601413) Operating instructions
-
-
Electrolux DITO K353 User manual
-
-
-
-
-
-
-
Other documents
-
 Robot Coupe R23 User manual
-
 Robot Coupe R 30 Owner's manual
-
Robot Coupe R 20 User manual
-
Cuisinart Brew Central DCC-1200 Series Instructions Manual
-
-
Moulinex ODACIO FP723 User manual
-
-
-
 Robot Coupe R502 User manual
-
 Robot Coupe Blixer 23 Operating instructions


