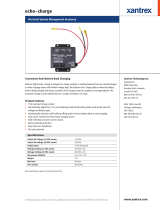
C60

Xantrex C60, C35, C40, Trace C40 User manual

  • Hello! I am an AI chatbot trained to assist you with the Xantrex C60 User manual. I’ve already reviewed the document and can help you find the information you need or explain it in simple terms. Just ask your questions, and providing more details will help me assist you more effectively!
www.xantrex.com
Smart choice for power
C-Series
Multifunction
DC Controller
Manual Typ
e
C35
C40
C60
Owner’s Manual
C-Series Multifunction
DC Controller
Owner’s Guide
About Xantrex
Xantrex Technology Inc. is a world-leading supplier of advanced power
electronics and controls with products from 50 watt mobile units to one MW
utility-scale systems for wind, solar, batteries, fuel cells, microturbines, and
backup power applications in both grid-connected and stand-alone systems.
Xantrex products include inverters, battery chargers, programmable power
supplies, and variable speed drives that convert, supply, control, clean, and
distribute electrical power.
Trademarks
C-Series Multifunction DC Controller is a trademark of Xantrex International.
Xantrex is a registered trademark of Xantrex International.
Other trademarks, registered trademarks, and product names are the property of
their respective owners and are used herein for identification purposes only.
Notice of Copyright
C-Series Multifunction DC Controller Owner’s Guide © November 2003 Xantrex
International. All rights reserved.
Disclaimer
UNLESS SPECIFICALLY AGREED TO IN WRITING, XANTREX TECHNOLOGY INC.
(“XANTREX”)
(a) MAKES NO WARRANTY AS TO THE ACCURACY, SUFFICIENCY OR SUITABILITY OF
ANY TECHNICAL OR OTHER INFORMATION PROVIDED IN ITS MANUALS OR OTHER
DOCUMENTATION.
(b) ASSUMES NO RESPONSIBILITY OR LIABILITY FOR LOSS OR DAMAGE, WHETHER
DIRECT, INDIRECT, CONSEQUENTIAL OR INCIDENTAL, WHICH MIGHT ARISE OUT OF
THE USE OF SUCH INFORMATION. THE USE OF ANY SUCH INFORMATION WILL BE
ENTIRELY AT THE USER’S RISK.
Date and Revision
November 2003 Revision D
Part Number
975-0004-01-02 Rev D
Contact Information
Telephone: 1 800 670 0707 (toll free North America)
1 360 925 5097 (direct)
Fax: 1 800 994 7828 (toll free North America)
1 360 925 5143 (direct)
Email: customerservice@xantrex.com
Web: www.xantrex.com
iii
About This Guide
Purpose
The purpose of this Guide is to provide explanations and
procedures for installing, operating, maintaining, and
troubleshooting the C-Series Multifunction DC Controller.
Scope
This Guide provides safety guidelines, detailed planning and
setup information, procedures for installing the inverter, as
well as information about operating and troubleshooting the
unit. It does not provide details about particular brands of
batteries. You need to consult individual battery
manufacturers for this information.
Audience
This Guide is intended for anyone who needs to install and
operate the C-Series Multifunction DC Controller. Installers
should be certified technicians or electricians.
Organization
This Guide is organized into four chapters and three
appendices.
Chapter 1 describes features and functions of the C-Series
Multifunction DC Controller.
About This Guide
iv 975-0004-01-02 Rev D
Chapter 2 contains information and procedures to install
C-Series Multifunction DC Controller.
Chapter 3 contains information about the operation of a
C-Series Multifunction DC Controller.
Chapter 4, “Troubleshooting” contains information about
identifying and resolving possible problems with systems
using a C-Series Multifunction DC Controller.
Appendix A, “Specifications” provide the specifications for
the C-Series Multifunction DC Controller.
Appendix B, “Batteries” describes types of batteries.
Appendix C, “Diversion Loads” provides additional
information about Diversion Loads.
Conventions Used
The following conventions are used in this guide.
WARNING
Warnings identify conditions that could result in personal injury or
loss of life.
CAUTION
Cautions identify conditions or practices that could result in
damage to the unit or to other equipment.
Important:
These notes describe an important action item or
an item that you must pay attention to.
About This Guide
975-0004-01-02 Rev D v
Abbreviations and Acronyms
Related Information
You can find more information about Xantrex Technology
Inc. as well as its products and services at
www.xantrex.com.
ASC Authorized Service Center
BTS Battery Temperature Sensor
CM C-Series Meter
CM/R C-Series Meter - Remote
DC Direct Current
LCD Liquid Crystal Display
LED Light Emitting Diode
LVD Low Voltage Disconnect
LVR Low Voltage Reconnect
RE Renewable Energy
vi
975-0004-01-02 Rev D vii
Important Safety Instructions
General Safety Instructions
All electrical work must be done in accordance with
local, national, and/or international electrical codes.
Before installing or using this device, read all instructions
and cautionary markings located in (or on) this guide, the
controller, the batteries, PV array, and any other
equipment used.
This product is designed for indoor mounting only. Do
not expose this unit to rain, snow or liquids of any type.
In outdoor installations, the C-Series controller must be
installed in a rainproof enclosure to eliminate exposure to
rain or water-spray.
To reduce the chance of short-circuits, use insulated tools
when installing or working with the inverter, the
controller, the batteries, or any DC source (e.g., PV,
hydro, or wind).
Remove all jewelry. This will greatly reduce the chance
of accidental exposure to live circuits.
The controller contains more than one live circuit
(batteries and PV array, wind, or hydro). Power may be
present at more than one source.
This product contains no user serviceable parts. Do not
attempt to repair this unit unless fully qualified.
WARNING
This manual contains important safety instructions that should be
followed during the installation and maintenance of this product. Be
sure to read, understand, and save these safety instructions.
Safety
viii 975-0004-01-02 Rev D
Battery Safety Information
Always wear eye protection, such as safety glasses, when
working with batteries.
Remove all jewelry before working with batteries.
Never work alone. Have someone assist you with the
installation or be close enough to come to your aid when
working with batteries.
Always use proper lifting techniques when handling
batteries.
Always use identical types of batteries.
Never install old or untested batteries. Check each
battery’s date code or label to ensure age and type.
Batteries should be installed in a well-vented area to
prevent the possible buildup of explosive gasses. If the
batteries are installed inside an enclosure, vent its highest
point to the outdoors.
When installing batteries, allow at least 1 inch of air
space between batteries to promote cooling and
ventilation.
NEVER smoke in the vicinity of a battery or generator.
Always connect the batteries first, then connect the
cables to the inverter or controller. This will greatly
reduce the chance of spark in the vicinity of the batteries.
Use insulated tools when working with batteries.
When connecting batteries, always verify proper voltage
and polarity.
Do not short-circuit battery cables. Fire or explosion can
occur.
In the event of exposure to battery electrolyte, wash the
area with soap and water. If acid enters the eyes, flood
them with running cold water for at least 15 minutes and
get immediate medical attention.
Always recycle old batteries. Contact your local
recycling center for proper disposal information.
Battery Safety Information
975-0004-01-02 Rev D ix
CAUTION:
A battery can produce the following hazards to personal safety:
electrical shock,
burn from high-short-circuit current, and/or
fire or explosion from vented gasses.
Observe proper precautions when working with or around batteries.
x
xi
Important Safety Instructions
- - - - - - - - - - - - - - - - - -vii
1
Introduction
Features - - - - - - - - - - - - - - - - - - - - - - - - - - - - - - - - - - - - - - - 2
Operating Modes - - - - - - - - - - - - - - - - - - - - - - - - - - - - - - - - - 3
Charge Control Mode - - - - - - - - - - - - - - - - - - - - - - - - - - - 4
Three-Stage Battery Charging- - - - - - - - - - - - - - - - - - - 4
Battery Temperature Compensation - - - - - - - - - - - - - - - 6
Manual or Auto Equalization Charge - - - - - - - - - - - - - - 6
Load Control Mode- - - - - - - - - - - - - - - - - - - - - - - - - - - - - 6
Controller Functions - - - - - - - - - - - - - - - - - - - - - - - - - - - - - - - 7
Photovoltaic Charge Controller- - - - - - - - - - - - - - - - - - - - - 7
Automatic PV Array Night Disconnect- - - - - - - - - - - - - 8
Diversion Controller - - - - - - - - - - - - - - - - - - - - - - - - - - - - 8
Diversion Loads - - - - - - - - - - - - - - - - - - - - - - - - - - - - 9
Load Controller - - - - - - - - - - - - - - - - - - - - - - - - - - - - - - 10
Low Voltage Disconnect - - - - - - - - - - - - - - - - - - - - - 11
Low Voltage Reconnect- - - - - - - - - - - - - - - - - - - - - - 11
Optional Accessories - - - - - - - - - - - - - - - - - - - - - - - - - - - - - 12
2
Installation
Pre-Installation - - - - - - - - - - - - - - - - - - - - - - - - - - - - - - - - - 14
Removing the Top Cover - - - - - - - - - - - - - - - - - - - - - - - - 14
Removing Knockouts - - - - - - - - - - - - - - - - - - - - - - - - - - 14
Mounting the Controller - - - - - - - - - - - - - - - - - - - - - - - - 16
Configuring the C-Series Controller - - - - - - - - - - - - - - - - - - - 18
Jumper Settings - - - - - - - - - - - - - - - - - - - - - - - - - - - - - - 18
Operating Mode Jumper- - - - - - - - - - - - - - - - - - - - - - 20
Voltage Jumper- - - - - - - - - - - - - - - - - - - - - - - - - - - - 20
Contents
Contents
xii 975-0004-01-02 Rev D
Automatic/Manual Battery Equalization (EQ) and Low
Voltage Reconnect (LVR) Jumper- - - - - - - - - - - - - - 21
Adjusting the C-Series Voltage Settings- - - - - - - - - - - - - - - - - 22
Setting Voltage Parameters for Charge Control Mode- - - - - 22
Setting Voltage Parameters for Load Control Mode - - - - - - 24
Setting Voltage Parameters Diversion Control Mode - - - - - 26
Setting Voltage Parameters for Alkaline Batteries - - - - - - - 26
Using a Digital Voltmeter to Adjust Voltage Settings - - - - - 28
Equalization Charging- - - - - - - - - - - - - - - - - - - - - - - - - - - - - 30
Manual Equalization - - - - - - - - - - - - - - - - - - - - - - - - - - - 31
Automatic Equalization - - - - - - - - - - - - - - - - - - - - - - - - - 32
Terminating the Equalization Process - - - - - - - - - - - - - - - 33
Temperature Compensation - - - - - - - - - - - - - - - - - - - - - - - - - 33
Temperature Compensation Based on Battery Type - - - - - - 34
Automatic Battery Temperature Compensation - - - - - - - - - 34
Manual Battery Temperature Compensation - - - - - - - - - - - 36
Grounding- - - - - - - - - - - - - - - - - - - - - - - - - - - - - - - - - - - - - 37
Wiring - - - - - - - - - - - - - - - - - - - - - - - - - - - - - - - - - - - - - - - 38
DC Terminal Connector Locations - - - - - - - - - - - - - - - - - 38
Terminal Torque Requirements - - - - - - - - - - - - - - - - - 39
Wire Size and Over-current Protection Requirements- - - - - 39
Current Rating - - - - - - - - - - - - - - - - - - - - - - - - - - - - 39
Minimum Recommended Wire Gauge - - - - - - - - - - - - 40
Surge Protection - - - - - - - - - - - - - - - - - - - - - - - - - - - 40
Over-current Protection - - - - - - - - - - - - - - - - - - - - - - 41
Long-distance wire runs- - - - - - - - - - - - - - - - - - - - - - 42
Maximum One-way Distance and Wire Size - - - - - - - - 42
PV Charge Control Mode Wiring - - - - - - - - - - - - - - - - - - 44
Diversion Control Mode Wiring - - - - - - - - - - - - - - - - - - - 46
DC Load Control Mode Wiring- - - - - - - - - - - - - - - - - - - - 48
Installing Optional Accessories- - - - - - - - - - - - - - - - - - - - - - - 50
Installing a Digital Display- - - - - - - - - - - - - - - - - - - - - - - 50
Installing the Battery Temperature Sensor - - - - - - - - - - - - 51
Reinstalling the Faceplate - - - - - - - - - - - - - - - - - - - - - - - - - - 52
Contents
975-0004-01-02 Rev D xiii
3
Operation
Basic Operation - - - - - - - - - - - - - - - - - - - - - - - - - - - - - - - - - 54
LED Status Indicator - - - - - - - - - - - - - - - - - - - - - - - - - - - - - 55
Charge Control or Diversion Control Indications (Green) - - 56
Blinking Green- - - - - - - - - - - - - - - - - - - - - - - - - - - - 57
Solid Green - - - - - - - - - - - - - - - - - - - - - - - - - - - - - - 57
Equalization Mode Indication (Red/green) - - - - - - - - - 58
Load Control Indications (Red)- - - - - - - - - - - - - - - - - - - - 58
Blinking Red - - - - - - - - - - - - - - - - - - - - - - - - - - - - - 58
Solid Red- - - - - - - - - - - - - - - - - - - - - - - - - - - - - - - - 58
Error Mode Indication (Orange) - - - - - - - - - - - - - - - - - - - 59
Over-temperature Condition - - - - - - - - - - - - - - - - - - - 59
Over-Current Condition - - - - - - - - - - - - - - - - - - - - - - 59
Low-voltage Disconnect Condition - - - - - - - - - - - - - - 60
Reconnecting to Loads - - - - - - - - - - - - - - - - - - - - - - - - - - - - 60
Reset Switch - - - - - - - - - - - - - - - - - - - - - - - - - - - - - - - - - - - 61
4
Troubleshooting
PV Charge Control Troubleshooting - - - - - - - - - - - - - - - - - - - 64
Diversion Control Troubleshooting - - - - - - - - - - - - - - - - - - - - 66
Load Control Troubleshooting - - - - - - - - - - - - - - - - - - - - - - - 68
A
Specifications
Electrical Specifications - - - - - - - - - - - - - - - - - - - - - - - - - - - 70
Features and Options Specifications - - - - - - - - - - - - - - - - - - - 71
Environmental Specifications- - - - - - - - - - - - - - - - - - - - - - - - 72
B
Batteries
Battery Types - - - - - - - - - - - - - - - - - - - - - - - - - - - - - - - - - - 74
Automotive Batteries- - - - - - - - - - - - - - - - - - - - - - - - - - - 74
Maintenance-Free Batteries - - - - - - - - - - - - - - - - - - - - - - 74
Deep-Cycle Batteries- - - - - - - - - - - - - - - - - - - - - - - - - - - 74
Sealed Batteries - - - - - - - - - - - - - - - - - - - - - - - - - - - - - - 75
NiCad and NiFe Batteries - - - - - - - - - - - - - - - - - - - - - - - 76
Contents
xiv 975-0004-01-02 Rev D
Battery Sizing - - - - - - - - - - - - - - - - - - - - - - - - - - - - - - - - - - 76
Equalization Charging- - - - - - - - - - - - - - - - - - - - - - - - - - - - - 77
Equalization Setpoints (Non-Sealed Batteries Only)- - - - - - 79
C
Diversion Loads
Diversion Load Types- - - - - - - - - - - - - - - - - - - - - - - - - - - - - 82
Warranty and Product Information
Warranty - - - - - - - - - - - - - - - - - - - - - - - - - - - - - - - - - - - - - 85
Disclaimer - - - - - - - - - - - - - - - - - - - - - - - - - - - - - - - - - - - - 86
Return Material Authorization Policy - - - - - - - - - - - - - - - - - - 87
Return Procedure - - - - - - - - - - - - - - - - - - - - - - - - - - - - - - - - 88
Out of Warranty Service - - - - - - - - - - - - - - - - - - - - - - - - - - - 88
Information About Your System - - - - - - - - - - - - - - - - - - - - - 89
Index
- - - - - - - - - - - - - - - - - - - - - - - - - - - - - - - - - - - - - - - - - - 91
xv
Figure 1-1 C-Series Multifunction DC Charge Controllers - - - - - - 2
Figure 1-2 3-stage Battery Charging Process - - - - - - - - - - - - - - - 5
Figure 1-3 PV Charge Controller - - - - - - - - - - - - - - - - - - - - - - - 7
Figure 1-4 Diversion Controller - - - - - - - - - - - - - - - - - - - - - - - - 9
Figure 1-5 Load Controller - - - - - - - - - - - - - - - - - - - - - - - - - - 11
Figure 1-6 Decal Displaying Load Control Voltage Settings - - - - 12
Figure 1-7 Optional Accessories - CM/R, CM, and BTS- - - - - - - 12
Figure 2-1 Removing the Front Cover - - - - - - - - - - - - - - - - - - - 14
Figure 2-2 C-Series Dimensions and Knockout Locations
(Not to Scale)- - - - - - - - - - - - - - - - - - - - - - - - - - - - 15
Figure 2-3 Mounting the C-Series Multifunction DC Controller - 17
Figure 2-4 Jumper Positions- - - - - - - - - - - - - - - - - - - - - - - - - - 18
Figure 2-5 Circuit Board Components - - - - - - - - - - - - - - - - - - - 19
Figure 2-6 Mode of Operation Jumper- - - - - - - - - - - - - - - - - - - 20
Figure 2-7 Voltage Selection Jumper- - - - - - - - - - - - - - - - - - - - 20
Figure 2-8 EQ/LVR Jumper and Reset Switch - - - - - - - - - - - - - 21
Figure 2-9 Bulk and Float Charge Potentiometers (pots)- - - - - - - 22
Figure 2-10 Bulk and Float Charge Settings for Charge/Diversion
Control Mode- - - - - - - - - - - - - - - - - - - - - - - - - - - - 23
Figure 2-11 Potentiometers with Decal for LVR and LVD Settings 24
Figure 2-12 LVR and LVD Settings for Load Control Mode- - - - - 25
Figure 2-13 R46 Resistor Location - - - - - - - - - - - - - - - - - - - - - - 26
Figure 2-14 Voltage Settings with R46 Resistor Clipped - - - - - - - 27
Figure 2-15 Test Points for Adjusting Voltage Using a DVM - - - - 29
Figure 2-16 Manual Equalization Settings - - - - - - - - - - - - - - - - - 30
Figure 2-17 Front Panel LED and Reset Switch Location- - - - - - - 31
Figure 2-18 Auto Equalization Settings - - - - - - - - - - - - - - - - - - - 32
Figure 2-19 Terminating the Equalization Charge - - - - - - - - - - - - 33
Figure 2-20 Grounding the C-Series Chassis - - - - - - - - - - - - - - - 37
Figure 2-21 DC Connection Terminals - - - - - - - - - - - - - - - - - - - 39
Figures
Figures
xvi 975-0004-01-02 Rev D
Figure 2-22 AWG Wire Gauge Reference Chart - - - - - - - - - - - - - 40
Figure 2-23 PV Charge Control Mode Wiring - - - - - - - - - - - - - - 45
Figure 2-24 Diversion Control Mode Wiring - - - - - - - - - - - - - - - 47
Figure 2-25 Load Control Mode Wiring - - - - - - - - - - - - - - - - - - 49
Figure 2-26 Installing a Digital Display- - - - - - - - - - - - - - - - - - - 50
Figure 2-27 Installing the BTS- - - - - - - - - - - - - - - - - - - - - - - - - 51
Figure 2-28 Re-installing the CM Faceplate- - - - - - - - - - - - - - - - 52
Figure 3-1 C-Series Status LED and Reset Button Location - - - - 54
Figure 3-2 C-Series Front Panel Label- - - - - - - - - - - - - - - - - - - 55
Figure 3-3 Reset Switch - - - - - - - - - - - - - - - - - - - - - - - - - - - - 61
xvii
Table 2-1 Factory Default Settings for C-Series Controllers- - - - 19
Table 2-2 Variances in Charging Voltage based on
Battery Temperature - - - - - - - - - - - - - - - - - - - - - - - 35
Table 2-3 Minimum Wire Size - - - - - - - - - - - - - - - - - - - - - - - 41
Table 2-4 One-Way Wire Distance and Wire Size - - - - - - - - - - 43
Table 3-1 Battery Voltage LED Indicators - - - - - - - - - - - - - - - 56
Table 4-1 PV Charge Control Problems - - - - - - - - - - - - - - - - - 64
Table 4-2 Diversion Control Problems - - - - - - - - - - - - - - - - - - 66
Table 4-3 Load Control Problems - - - - - - - - - - - - - - - - - - - - - 68
Table A-1 Electrical Specifications- - - - - - - - - - - - - - - - - - - - - 70
Table A-2 Features and Options Specifications- - - - - - - - - - - - - 71
Table A-3 Environmental Specifications - - - - - - - - - - - - - - - - - 72
Table B-1 Typical Bulk and Float Setpoints for Batteries- - - - - - 79
Table C-1 Power Dissipation- - - - - - - - - - - - - - - - - - - - - - - - - 82
Tables
xviii
/