Page is loading ...

Customer Service
Americas: 800-359-5520 • 651-484-7988 • info@sanus.com
Europe, Middle East, and Africa: + 31 (0) 495 580 852 • europe.sanus@milestone.com
Asia Paci c: 86 755 8996 9226 • sanus.ap@milestone.com
SANUS • 6436 City West Parkway • Eden Prairie, MN 55344 USA
©2012 Milestone AV Technologies, a Duchossois Group Company. All rights reserved. Sanus is a division of Milestone.
All other brand names or marks are used for identi cation purposes and are trademarks of their respective owners.
sanus.com
We are here to help!
Please contact Customer Service with any questions.
(6901-002145 <00>)
FMS01 Instruction Manual

6901-002145 <00>
2
English - How to use this manual
For best results, reference both the text and illustrations.
OR
Select one item or the other.
OPT
This item is optional
English Text Pages 3-20
Français - Utilisation de ce guide
Pour obtenir de meilleurs résultats, reportez-vous à la fois au texte
et aux illustrations. Couper le long de la ligne pointillée pour faire
correspondre les illustrations à votre langue de préférence.
OR
Sélectionnez un article ou l’autre.
OPT
Cet article est facultatif.
Texte français page 22-23
Svenska - Så här använder du denna bruksanvisning
För bästa resultat, hänvisa till både text och bilder när du använder
denna bruksanvisning. Klipp längs de streckade linjerna för att
matcha ditt språk med bilderna.
OR
Välj ett objekt eller det andra.
OPT
Detta objekt är valfritt.
Svensk text sida 36-37
Deutsch - Verwendung dieses Handbuchs
Die Montage ist am einfachsten, wenn Sie den Text und die
Abbildungen zusammen verwenden. Schneiden Sie daher den Text
in Ihrer Sprache aus (gestrichelte Linien), um ihn den Abbildungen
gegenüberstellen zu können.
OR
Sie haben die Wahl zwischen einem Element oder einem anderen.
OPT
Dieses Element ist optional.
Deutscher Text Seite 24-25
Русский - Как пользоваться данной инструкцией
, ,
. ,
.
OR
.
OPT
.
: . 38-39
Español - Cómo usar este manual
Para obtener mejores resultados, consulte el texto y las ilustraciones.
Corte por las líneas discontinuas para hacer coincidir su idioma con
las ilustraciones.
OR
Seleccione uno de los elementos.
OPT
Este elemento es opcional.
Texto en español página 26-27
Polski - Jak używać tej instrukcji
W celu uzyskania najlepszych rezultatów, korzystając z tej instrukcji,
należy zwrócić uwagę zarówno na tekst, jak i na ilustracje. Przeciąć
wzdłuż przerywanych linii w celu dopasowania języka do ilustracji.
OR
Wybrać jedną pozycję lub drugą.
OPT
Ta pozycja jest opcjonalna.
Tekst w języku polskim na stronach 40-41
Português -Como usar este manual
Para obter melhores resultados, consulte o texto e as ilustrações.
Recorte nas linhas tracejadas para combinar seu idioma com as
ilustrações.
OR
Selecione um item ou o outro.
OPT
Este item é opcional.
Texto em português Página 28-29
Česky - Jak používat tuto příručku
Nejlepších výsledků dosáhnete, budete-li při používání této příručky
srovnávat text s ilustracemi. Odstřihněte podél čárkované čáry, aby
bylo možno české instrukce přiřadit k ilustracím.
OR
Vyberte si jednu nebo druhou položku.
OPT
Tato položka je volitelná.
Český text se nachází na straně 42-43
Nederlands - Gebruik van deze handleiding
Voor de beste resultaten moet u zowel de tekst als de illustraties
raadplegen. Gebruik de stippellijnen om uw taal bij de illustraties
te plaatsen.
OR
Selecteer een van beide items.
OPT
Dit item is optioneel.
Nederlandse tekst op pagina 30-31
Italiano - Uso del manuale
Per risultati ottimali, fare riferimento sia al testo che alle illustrazioni
di questo manuale. Tagliare lungo le linee tratteggiate per abbinare
il testo nella propria lingua alle illustrazioni.
OR
Selezionare uno o l’altro elemento.
OPT
Questo elemento è opzionale.
Testo in italiano alle pagine 32-33
-
OR
OPT
44-45
中文 - 如何使用本说明书
请同时参阅文字说明和插图以获得最佳阅读效果。请沿着虚线
裁剪,将您的语言与插图匹配起来。
OR
选择一项或另一项。
OPT
此项可选。
中文文字说明请参见第 46-47 页
Suomi - Oppaan käyttäminen
Saavutat parhaan tuloksen tutustumalla sekä tekstiin että kuviin.
Leikkaa katkoviivaa pitkin ja yhdistä kuvat ja suomenkielinen teksti.
OR
Valitse toinen vaihtoehdoista.
OPT
Tämä vaihtoehto on valinnainen.
Suomenkielinen teksti on sivulla
34-35

6901-002145 <00>
3
Dimensions
English
9.06
230.1
4.50
114.3
UP TO 670mm
29.00
736.6
17.50
444.5
18.50
469.9
7.00
177.8
SWIVEL
±22°
xx = in.
[xx] = mm
57.81
1468.3
1.57
40.0
51.41
1305.8
12°
12°
6.22
158.0
48.53
1232.6
38.67
982.2

6901-002145 <00>
4
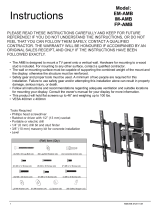
Thank you for purchasing the FMS01. This product is only intended for use with Furniture Mount System (FMS)
compatible furniture. Look for the following icon:
5.5 mm
(7/32 in.)
10 mm
(3/8 in.)
Required Tools
13 mm
(1/2 in.)
Speci cations
T V MOUNTED TO WALL
STEPS 1 AND 8-10
T V MOUNTED TO PILLAR
STEPS 1-7
WARNING: Avoid potential personal injuries and property damage!
1. Do not exceed the maximum weight capacity of 59 kg (130 lb). This includes TV and accessories.
2. Use this mounting system only for its intended use as described in these instructions. Do not use attachments
not recommended by the manufacturer.
3. The wall must be capable of supporting ve times the weight of the TV and mount combined.
4. This product is not designed for use in metal stud walls!
5. This product is for household use only.
6. Do not use this product for any purpose not explicitly speci ed by manufacturer.
7. If you do not understand these instructions, or have doubts about the safety of the installation, assembly or
use of this product, contact Customer Service or call a quali ed contractor.
8. Manufacturer is not responsible for damage or injury caused by incorrect assembly or use.
OR
IMPORTANT SAFETY INSTRUCTIONS – SAVE THESE INSTRUCTIONS – PLEASE READ ENTIRE MANUAL PRIOR TO USE
Swivel:
±
22° (only applicable if the TV is mounted to the pillar)
Tilt:
±
12°

6901-002145 <00>
5
M5 x 16mm
M5
M6 x 12mm
Supplied Parts and Hardware
WARNING: This product contains small items that could be a choking hazard if swallowed.
Before starting assembly, verify all parts are included and undamaged. If any parts are missing or damaged, do not
return the damaged item to your dealer; contact Customer Service. Never use damaged parts!
NOTE: Not all hardware included will be used.
[01] x 1
[02] x 1
[03] x 2
[04] x 1
[05] x 1
[06] x 1
[07] x 2
[08] x 4
[09] x 4
[10] x 2
[11] x 2
[12] x 4
[15] x 4
M5 x 16mm
[15] x 4
M5
[16] x 4
M4
[13] x 1
M6 x 12mm
[14] x 4
[17] x 4
[18] x 4

6901-002145 <00>
7
Your TV type will help you determine which hardware
con guration to use.
A. Installation option without spacers (TVs with at
backs)
B. Installation option using spacers (TVs with irregular
backs)
Hand thread screws into the threaded inserts on
the back of your TV to determine the correct screw
diameter (M4, M6, or M8).
CAUTION: Avoid potential personal injuries
and property damage! Verify that there are adequate
threads to secure the brackets to the monitor. If you
encounter resistance, stop immediately and contact
customer service. Use the shortest screw and spacer
combination to accommodate your needs. Using
hardware that is too long may damage your TV.
B
1-1 Select the hardware diameter and length
A
1 Select TV Hardware and Mount TV Brackets

6901-002145 <00>
8
For TVs with an irregular back
Ensure the brackets are level on the back of the TV.
Standard con gurations are shown. For special
applications, or if you are uncertain about your hardware
selection, contact Customer Service.
B
M4/M6/M8
[29],[32],[34]
[37]
[35],[36]
[04],[05]
[05]
[04]
[05]
[04]
M4/M6/M8
1-2 Attach brackets to TV
[28], [30], [31], [33]
[35],[36]
[04],[05]
For TVs with a at back
Ensure the brackets are level on the back of the TV.
If you require additional space for cables, recesses, or
protrusions, see con guration B.
A

6901-002145 <00>
9
[03]
[26] [27]
[26]
[27]
[03]
[03]
[03]
[03]
[03]
2 Attach Pillar Brackets to FMS Compatible Furniture
Determine which hardware to use - see chart on page 10.
NOTE: Not all FMS furniture is shown. If your furniture is not listed in the chart, consult the original instruction manual
included with your furniture. Use the combination that will securely fasten the pillar vertically to the back of the furniture
without touching the overhang.
CAUTION: The FMS01 can only be used on FMS compatible furniture. FMS compatible furniture will not require drilling or
modi cation to mounting hardware.
For FMS compatible furniture with:
No overhang ( at back) see option A.
A small overhang, 19 mm (3/4 in.) or less, see option B.
A large overhang, 75 mm (3 in.) or less, see option C.
CAUTION: Avoid potential personal injuries and property damage! Ensure both brackets [03] are centered, level, and
securely fastened to the furniture.
A
B C

6901-002145 <00>
10
Sanus TV
Stand
Screw ID QTY Spacer ID QTY
Standard
Hardware
ID QTY
BFAV344 1/4-20 x 5/8 in. [19] 4
BFAV48 1/4-20 x 2.25 in. [22] 4 1/4-20 barrel nut [18] 4
BFAV550 1/4-20 x 5/8 in. [19] 4
BFV146 1/4-20 x 3.5 in. [24] 4
.866 in. [26] 4
1/4-20 barrel nut [18] 4
.25 in. [25] 4
BFV157 1/4-20 x 1 1/2 in. [21] 4 .866 in. [26] 4
BFV348
1/4-20 x 1 1/2 in. [21] 2
.866 in. [26] 4
1/4-20 cap nut [17] 2
1/4-20 x 2 1/4 in. [22] 2 1/4-20 barrel nut [18] 2
BFV546 1/4-20 x 2 1/4 in. [22] 4 1/4-20 barrel nut [18] 4
DFV50 1/4-20 x 1 1/2 in. [21] 4 .866 in. [26] 4
JFV57 1/4-20 x 2.25 in. [22] 4 1/4-20 barrel nut [18] 4
JFV60 1/4-20 x 2.25 in. [22] 4 1/4-20 barrel nut [18] 4
[19]
[25]
[26]
[17]
[18]
[21]
[22]
[24]
¼-20 x ⁄ in.
¼-20 x 3¾ in.
¼-20 x 2¼ in.
¼-20 x 1½ in.
¼-20 x 3¾ in.
NOTE: Some FMS compatible furniture manuals may show 4 small “L” brackets for
use with the pillar kit. These have been replaced with 2 one piece brackets.
NOTE: Refer to the FMS furniture manual for speci c information regarding hardware combinations.
Hardware Combinations for FMS Furniture

6901-002145 <00>
12
3 Assemble Pillar
[01]
[13]
[14]
[02]
[13]
[15]
[16]
[06]
[02]
[11]
Attach feet [11] and pivot head [02] to pillar [01].
Attach wall plate [06] to pivot head [02]. Make sure to
center wall plate [06] on pivot head [02].
3-1
3-2

6901-002145 <00>
13
4 Attach Pillar to Brackets
Attach pillar [01] to brackets [03] with knobs [12].
CAUTION:
Avoid potential personal injuries or property
damage! Ensure feet [11] are level and rmly on the oor.
[01]
[11]
[03]
[03]
[11]
[11]
[11]
[03]
[12]
[12]

6901-002145 <00>
14
5 Attach and Secure TV to Wall Plate
[06]
6 Adjust Tilt Tension
Attach TV to wall plate [06].
Assistance is recommended for this
step.
Install locking screws [41].
CAUTION:
Avoid potential personal
injuries or property damage! Be sure
to install the locking screws [41].
5-1 5-2
[41]

6901-002145 <00>
16
7 Attach FMS Connections for AV Accessories
The FMS01 includes connections [07]-[10] that enable
you to secure AV accessories behind your furniture. You
can attach AV components to the pillar using:
[01]
[07]
[10]
[07]
[09]
[08]
[08]
[07]
[09]
[01]
[07],[08]
[01]
[10]
[10]
[01]
Clips [09] and rails [07] (see graphics
A1 - A4)
Blocks [08] and rails [07] (see graphics
B1 - B4)
Straps [10] (see graphic C1)
7-A
7-B
7-C
OPT

6901-002145 <00>
17
A1
A2
A3
B1 B2
B4B3
C1
A4
[01]
[08]
[07]
[10]
[10]
[07]
[07]
[07]
[07]
[07]
[09]
[09]
[07]
[08]
[28 or 29]
[28 or 29]
[28 or 29]
[01]
[01]
[01]
[01]
[01]
Leave a small
space for keyhole
mounting.
OR

6901-002145 <00>
18
8 Mount to Wall
Wood Stud
[06]
5.5mm
(7/32 in.)
13 mm
(1/2 in.)
8-1 Locate studs
8-2 Mark the wall
Level the wall plate [06] and mark the hole locations.
8-3 Drill pilot holes
8-4 Tighten lag bolts
CAUTION:
Avoid potential injuries or property damage!
Improper use could reduce the holding power of the lag bolt. To
avoid potential injuries or property damage:
DO NOT over-tighten the lag bolts [38]
Tighten the lag bolts [38] only until the washers [39] are
pulled rmly against the wall plate [06]
[06]
[38]
[39]
41cm
(16 in.)
< 16 mm
(⁄ in.)
CAUTION: Improper use could reduce the holding power of
the lag bolt. To avoid potential injuries or property damage: pilot
holes MUST be drilled to a depth of 75 mm (3 in.), using a 5.5 mm
(7/32 in.) diameter drill bit.
75 mm
3 in.
Verify the center of the stud(s) using an awl, a thin nail, or an edge to
edge stud nder.
CAUTION: Avoid potential personal injuries and property
damage!
Any material covering the wall must not exceed 16 mm (5/8 in.).
Minimum wood stud size: common 51 x 102 mm (2 x 4 in.)
(Nominal 38 x 89 mm {1½ x 3½ in.})

6901-002145 <00>
19
8 Mount to Wall
Solid concrete or concrete block
8-1 Mark the wall
8-2 Drill pilot holes
8-3 Insert anchors
8-4 Tighten lag bolts
CAUTION:
Avoid potential injuries or property damage!
Improper use could reduce the holding power of the lag bolt. To
avoid potential injuries or property damage
DO NOT over-tighten the lag bolts [38].
Tighten the lag bolts [38] only until the washers [39] are
pulled rmly against the wall plate [06].
13 mm
(1/2 in.)
10 mm
(3/8 in.)
Level the wall plate [06] and mark the hole locations.
CAUTION:
Avoid potential injuries or property damage!
Mount the wall plate [06] directly onto the concrete surface.
Minimum solid concrete thickness: 203 mm (8 in.).
Minimum concrete block size: 203 x 203 x 406 mm (8 x 8 x 16 in.).
Minimum space between fasteners: 203 mm (8 in.)
[40]
[06]
[38]
[39]
[06]
Insert lag bolt anchors [40].
75 mm
(3 in.)
CAUTION: To avoid potential injuries or property damage:
Pilot holes MUST be drilled to a depth of 75 mm (3 in.) using a
13 mm (1/2 in.) diameter drill bit.
Never drill into the mortar between blocks.

6901-002145 <00>
20
9 Attach and Secure TV to Wall Plate
[41]
[13]
[04,05]
[06]
9-1
9-2
Attach TV to wall plate [06].
Assistance is recommended for this
step.
Install locking screws [41] with hex key
[13].
CAUTION:
Avoid potential personal
injuries or property damage! Be sure
to install the locking screws [41].
10 Adjust Tilt Tension

6901-002145 <00>
48
English
Milestone AV Technologies and its a liated corporations and subsidiaries (collectively, “Milestone”),
intend to make this manual accurate and complete. However, Milestone makes no claim that the
information contained herein covers all details, conditions, or variations. Nor does it provide for every
possible contingency in connection with the installation or use of this product. The information
contained in this document is subject to change without notice or obligation of any kind. Milestone
makes no representation of warranty, expressed or implied, regarding the information contained
herein. Milestone assumes no responsibility for accuracy, completeness or su ciency of the
information contained in this document.
Français
Milestone AV Technologies et ses sociétés a liées et ses liales (collectivement dénommées
« Milestone »), se sont e orcées de rendre ce manuel précis et complet. Cependant, Milestone ne
garantit pas que les informations qu’il contient couvrent tous les détails et toutes les conditions
ou variations. Il ne pare pas non plus à toute éventualité relative à l’installation ou à l’utilisation de
ce produit. Les informations contenues dans ce document peuvent faire l’objet de modi cations
sans avertissement ou obligation préalable quelconque. Milestone ne donne aucune garantie
explicite ou implicite quant aux informations contenues dans le manuel. Milestone n’assume aucune
responsabilité quant à l’exactitude, l’exhaustivité ou la su sance des informations contenues dans
ce document.
Deutsch
Die Milestone AV Technologies und ihre angegliederten Unternehmen und Tochtergesellschaften
(Sammelbegri : “Milestone”) sind um genaue und vollständige Abfassung dieser Anleitung
bemüht. Milestone beansprucht jedoch nicht, dass die hierin enthaltenen Informationen alle
Details, Bedingungen oder Varianten umfassen. Auch sind darin nicht alle Eventualitäten in
Verbindung mit Montage oder Gebrauch dieses Produkts abgedeckt. Die in diesem Dokument
enthaltenen Informationen können ohne Ankündigung oder Verp ichtung jeder Art geändert
werden. Milestone haftet weder ausdrücklich noch stillschweigend für die in diesem Dokument
enthaltenen Informationen. Milestone übernimmt keine Haftung für Genauigkeit, Vollständigkeit
oder Hinlänglichkeit der in diesem Dokument enthaltenen Informationen.
Español
Milestone AV Technologies y sus empresas asociadas y liales (colectivamente “Milestone”) tienen
la intención de que este manual sea preciso y completo. Sin embargo, Milestone no garantiza que
la información que contiene incluya todos los detalles condiciones y variaciones, ni que contemple
toda posible contingencia en conexión con la instalación y uso de este producto. La información
contenida en este documento es susceptible de ser modi cada sin aviso ni obligación de ningún
tipo. Milestone no hace ninguna manifestación de garantía, explícita o implícita, respecto a la
información contenida este documento. Milestone no asume ninguna responsabilidad por la
exactitud, integridad o su ciencia de la información contenida en este documento.
Português
A Milestone AV Technologies e as suas companhias aliadas e subsidiárias (colectivamente: “a
Milestone”), tencionam elaborar um manual exacto e completo. No entanto a Milestone não alega
que a informação no presente manual cubra todos os detalhes, condições ou alternativas Nem
alega que o manual descreva todas as possíveis situações de contingência em relação à instalação
ou utilização deste produto. A informação contida neste documento está sujeita a alterações sem
aviso prévio ou obrigação qualquer. A Milestone não oferece garantias de natureza alguma, expressa
ou implícita, em relação à informação contida no presente documento. A Milestone não assume
responsabilidade pela precisão, integridade ou su ciência da informação contida neste documento.
Nederlands
Milestone AV Technologies en haar aangesloten bedrijven en dochterondernemingen (verder samen
te noemen: “MIlestone”) hebben de intentie deze montagehandleiding zo accuraat en volledig
mogelijk te maken. Echter, Milestone claimt niet dat de informatie in deze montagehandleiding een
weergave vormt van alle denkbare details, voorwaarden en variaties. Milestone claimt ook niet dat
het rekening heeft gehouden met iedere mogelijke eventualiteit in verband met de installatie of het
gebruik van dit product. De informatie in deze montagehandleiding is onderhevig aan verandering
zonder dat Milestone verplicht is zulks te berichten, en zonder dat Milestone dienaangaande
enigerlei andere verplichtingen heeft. Milestone doet geen enkele uitspraak van waarborg, expliciet
noch impliciet, met betrekking tot de informatie die in deze montagehandleiding is opgenomen.
Milestone aanvaardt geen enkele verantwoordelijkheid voor de accuraatheid, volledigheid of
geschiktheid van de informatie die in dit document is opgenomen.
Italiano
Milestone AV Technologies e le sue società a liate e controllate (congiuntamente denominate
(“Milestone”) si propongono di redigere il presente manuale in modo preciso e completo. Milestone,
tuttavia, non rilascia alcuna garanzia che le informazioni ivi contenute coprano tutti i dettagli, le
condizioni o le modi che, né che lo stesso preveda tutti i possibili imprevisti connessi all’installazione
o all’uso del presente prodotto. Le informazioni contenute nel presente documento sono soggette
a modi ca senza preavviso od obbligo di alcun genere. Milestone non rilascia alcuna garanzia,
espressa o implicita, circa le informazioni ivi contenute. Milestone declina ogni responsabilità
in merito all’accuratezza, completezza o su cienza delle informazioni contenute nel presente
documento.
Suomi
Milestone AV Technologies sisar- ja tytäryhtiöineen (yhdessä Milestone) on pyrkinyt tekemään
tästä oppaasta mahdollisimman kattavan ja tarkan. Milestone ei kuitenkaan takaa, että oppaan
tiedot kattavat kaikki yksityiskohdat, käyttöolosuhteet tai vaihtelut. Opas ei myöskään kata kaikkia
laitteen asennukseen ja käyttöön liittyviä mahdollisuuksia. Tämän asiakirjan tietoja voidaan muuttaa
sitoumuksetta ja ilman erillistä ilmoitusta. Milestone ei anna suoria tai epäsuoria takuita, jotka
koskevat tämän oppaan tietoja. Milestone ei ota vastuuta tämän asiakirjan tietojen tarkkuudesta,
täydellisyydestä tai riittävyydestä.
Svenska
Milestone AV Technologies och dess dotterbolag och (tillsammans under namnet “Milestone”), strävar
efter att göra denna bruksanvisning noggrann och komplett. Milestone kan dock inte garantera att
den information som ges här är fullständig och att den täcker alla detaljer, tillstånd eller variationer.
Den täcker inte heller alla tänkbara möjligheter vad det gäller monteringen av produkten.
Informationen som ingår i detta dokument kan ändras utan föregående varsel och utan förpliktelser
av något slag. Milestone gör inga föreställningar om garanti, uttryckt eller underförstådd, angående
informationen som ingår här. Milestone tar inte på sig något ansvar för hur noggrann, fullständig eller
tillräcklig information som ingår i dokumentet är.
Milestone AV Technologies
( “Milestone”)
. Milestone ,
, . ,
, .
, ,
- . Milestone , ,
, . Milestone
, , .
Polski
Zamiarem rmy Milestone AV Technologies oraz związanych z nią korporacji i lii (nazwa zbiorowa
“Milestone”) było stworzenie dokładnej i kompletnej instrukcji. Jednakże rma Milestone zastrzega,
że informacje tu zawarte nie obejmują wszystkich szczegółów, warunków lub wersji. Ani też wszelkich
innych możliwych okoliczności związanych z instalacją i użytkowaniem produktu. Informacje zawarte
w tym dokumencie podlegają zmianie bez uprzedzenia i bez żadnych zobowiązań. Firma Milestone
nie składa żadnych zapewnień gwarancyjnych, wyrażonych wprost lub dorozumianych, odnośnie
informacji tu zawartych. Firma Milestone nie bierze na siebie odpowiedzialności za dokładność,
kompletność oraz wystarczającą ilość informacji zawartych w tym dokumencie.
Česky
Společnost Milestone AV Technologies a její sesterské a dceřiné společnosti (společně nazývané
„Milestone“) si přejí, aby byla tato příručka přesná a úplná. Společnost Milestone nijak netvrdí, že
informace, které jsou zde obsaženy, zahrnují všechny podrobnosti, podmínky nebo varianty. Ani
nezajišťuje veškeré možné eventuality, které mohou nastat ve spojení s instalací nebo používáním
tohoto výrobku. Informace obsažené v tomto dokumentu se mohou měnit bez upozornění nebo
jakýchkoli povinností. Společnost Milestone nedává žádné záruky, ať výslovné či implicitní, ve spojení
se zde obsaženými informacemi. Společnost Milestone nepřebírá žádnou odpovědnost za přesnost,
úplnost nebo dostatečnost informací, které jsou v tomto dokumentu obsaženy.
Milestone AV Technologies ( Milestone)
Milestone
中文
Milestone AV Technologies 及其联营公司和子公司(通称为 “Milestone”)旨在使本手册准确而完
整。然而,Milestone 无法断言此处所含信息包括所有详情、条件或变更。Milestone 也无法保证
安装或使用本产品不会出现任何可能的意外。本文档所含信息如有变更,恕不另行通知或承担任
何义务。在此处所含信息内,无论明示或隐含,Milestone 未做出任何保修陈述。对于本文档所
含信息的准确性、完整性或充分性,Milestone 概不负责。
/