Page is loading ...


IMPORTANT
We’d love to hear from our customers. If you have any questions about the manual or would
like us to help in any way, please feel free to contact the support team. We will reply in 12
Our Vision
To create unique spaces to meet every specific need, and become a part of America's landscape.
Our Mission
To keep innovating and provide a wide range of reliable shelters and shades at consumer-grade
prices with customer-first service.
Check the Spam and your email Settings if you do not receive a reply in time as it is probably
blocked because our support team will always get back to you no later than the timeframe.
Add the following email address to your CONTACT LIST in case of any blocking.
Email: [email protected], [email protected].
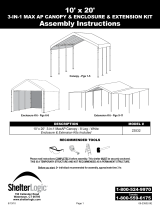
This user manual applies to Quictent carports (with sidewalls). It will help you to get to know your
carport. Please read the guidelines in this manual and keep the manual for future reference.
We may update the manual without notice in advance. You can always search “Quictent
Instructions” online for the latest version.
About Quictent
Founded in the early 21st century, Quictent has grown into a popular brand with reliable products
and excellent customer service during the past decades. We started with pop up canopies, and
2222
hours (business days).
greenhouses, garden beds, grow tents, shade sails, patio umbrellas and RV covers. Driven by the
vision to create unique spaces to meet every specific need and become a part of America's landscape,
we at Quictent would spare no effort to keep innovating.
then expanded to other more categories of shelters and the like including party tents, carports,

Our Service
The customer-centric service is what we at Quictent take great pride in. In addition to the
Safety Instructions
You should read, understand, and practice safety instructions in this chapter. For any damages
due to not obeying guidelines as instructed, the owner (user) should take full responsibility.
3
Please ALWAYS weigh down your carport with sandbags, auger anchors, and (or) pegs.
Please do NOT place something heavy on the top as the carport is designed to be a temporary
structure.
Please do NOT light a fire inside and keep any heat source away from your storage shelter.
Please do NOT throw away the original packaging cartons in case of a return or an exchange.
hassle-free warranty covering all Quictent products, an industrial-leading support team is standing
behind at all times. Whenever you need help or have any suggestions and comments, do not
hesitate to reach us via [email protected] or [email protected].
You're sure to get a to-the-point reply in 12 hours.

4
Warning
Do NOT use this product in severe weather such as high wind, heavy rain, heavy snows, etc.
Please take down the structure for any potential inclement weather. Damages caused by
improper use will NOT be covered by the warranty.


6
Rope
#D
#G
#E
#F
Part Number DescriptionDiagram Quantity
(PCS)
Bungee Cord
8
120
8
8
#H
Zipper Door
8
#J
#K
Sidewall
Screw (M6 x 50 mm)
Auger Anchor
Roof Cover
2
#I
L-Shaped Peg
1
2
Carton Number Parts Included
Table B. Package Contents for Shipping Cartons
Box #1
Box #2
9 x Part #1 (Steel Pole)
8 x Part #3 (Steel Pole)
6 x Part #4 (Steel Pole)
8 x Part #2 (Steel Pole)
6 x Part #A (3-Way Corner Connector)
6 x Part #B (4-Way Corner Connector)
8 x Part #C (Foot Base)
8 x Part #D (Rope)
120 x Part #E (Bungee Cord)
8 x Part #F (L-Shaped Peg)
8 x Part #G (M6 x 50 mm Screw)
8 x Part #H (Auger Anchor)
1 x Part #I (Roof Cover)
2 x Part #J (Sidewall)
2 x Part #K (Zipper Door)

Assembly Steps for Model #YS/TJB/TL 1102
Before the assembly, please check to make sure that you have all parts listed in the Parts Lists.
Step 1
Layout and form the top frame with poles (9 x #1 & 8 x #2) and connectors (6 x #A &
6 x #B).
Step 2 Put the Roof Cover (#I) on the assembled top frame and fix them together with the
Bungee Cords (#E).
7
1 1 1
1 1 1
1 1 1
A
A
A
A
A
A
B
B
B
B
B
B
222
2
222
2
A1
2
1

8
Step 4 Finish assembling the mainframe.
Step 3 Attach 4 x poles (#3) to the connectors (#A & #B) on one side, then lift the structure
from the other side (several adults required!).
a) Add the rest 4 x poles (#3) to the connectors (#A & #B) on the other side.
Layout the 6 x Ground Bars (#4) as shown.
Fix the ground bars (#4) with the poles (#3). Attach a Foot Base (#C) to the bottom
of each pole (#3), align the ends of the Ground Bars (#4) with their joints, and fix
each joint with a Screw (#G). You’ll use 8 x Screws (#G) for the 8 joints.
b)
c)
Reminder
Please remember to place the hook of the leg covers (attached to the roof cover)
into a proper adjusting hole on the poles (#3).
3 33 3
3

9
Step 5 Assemble the fabric and secure the whole structure.
Attach the 2 x Sidewalls (#J) and the 2 x Zipper Doors (#K) to the frame with Bungee
Cords (#E).
Insert the 8 x L-Shaped Peg s (#F) into the holes of the Foot Bases (#C). One Peg for
each foot base.
Fix the structure with the 4 x Ropes (#D) and the 4 x Auger Anchors (#H). To secure
the tent better, it is recommended that you insert the anchors diagonally into the
ground. As shown, a 45-degree to the ground is the best position.
a)
b)
c)
3
3
45°
Auger Anchor
Peg
1


11
#G
Part Number DescriptionDiagram Quantity
(PCS)
Roof Cover
Sidewall
1
2
#H
#J
#K
#L
#M
#N
Rope
Bungee Cord
Steel Cable
8
Zipper Door 2
4
#I
120
Carton Number Parts Included
Table B. Package Contents for Shipping Cartons
Box #1
Box #2
9 x Part #1 (Steel Pole)
8 x Part #3 (Steel Pole)
6 x Part #4 (Steel Pole)
8 x Part #2 (Steel Pole)
4 x Part #A (3-Way Corner Connector)
4 x Part #B (4-Way Corner Connector)
2 x Part #C (3-Way Corner Connector)
2 x Part #D (4-Way Corner Connector)
8 x Part #E (Foot Base)
8 x Part #F (L-Shaped Peg)
8 x Part #G (Auger Anchor)
8 x Part #H (M6 x 50 mm Screw)
8 x Part #I (Rope)
1 x Part #J (Roof Cover)
2 x Part #K (Sidewall)
2 x Part #L (Zipper Door)
120 x Part #M (Bungee Cord)
4 x Part #N (Steel Cable)
8
8
Screw (M6 x 50 mm)
Auger Anchor
#E
#F
Foot Base 8
L-Shaped Peg 8

Assembly Steps for Model #1115
Before the assembly, please check to make sure that you have all the parts listed in the Parts Lists.
Step 1
Layout and form the top frame with the poles (9 x #1 & 8 x #2) and the conenctors
(4 x #A, 4 x #B, 2 x #C, and 2 x #D).
Step 2 Reinforce the top frame with the 4 x Steel Cables (#N). As shown, please align and
fix the cables with the joints of the poles and connectors on the top frame.
12
1 1 1
1 1 1
1 1 1
A
C
A
A
C
A
B
D
B
B
D
B
222
2
222
2
A1
2
C
1 1 1
B
A
C1 D 1 D 1
B B
1
2 2 2 2 2 2 2
1 1B B A

3 33 3
Step 3 Put the Roof Cover (#J) on the assembled top frame with the help of Bungee Cords
(#M).
Step 4 Add 4 x poles (#3) to the connectors (#A & #B) on one side and lift the structure from
the other side.
Step 5 Finish assembling the mainframe.
a) Add the rest 4 x poles (#4) to the connectors (#A & #B) on the other side.
Place the hooks of the leg covers (attached to the roof cover) into a proper adjusting
hole on the poles (#3).
Layout the 6 x Ground Bars (#4) on the bottom as shown.
b)
c)
Connect the Ground Bars (#4) with the poles (#3). Attach a Foot Base (#E) to the bottom
of each pole (#3), align the ends of the Bars (#4) with their jointed holes, and finally fix
them together by inserting and tightening a Screw (#H, M6 x 50 mm) into each jointed
hole. You’ll use the 8 x Screws (#H) for the 8 joints.
d)
13

3
3
45°
Auger Anchor
Peg
4
14
Step 6 Attach the fabric and secure the whole structure.
Attach the 2 x Sidewalls (#K) to the top frame with the Bungee Cords (#M) and fix it
to the mainframe by wrapping up the built-in Velcros with the poles (#3).
Attach the 2 x Zipper Doors (#L) to the mainframe by connecting their edges with the
poles (#2 & #3) as shown.
b)
a)
Bundle the Ground Bars (#4) to the bottom of the sidewall with the Bungee Cords (#M).
c)
Fix the structure to the ground by inserting the L-Shaped Pegs (#F) into the holes of the
Foot Bases (#E). One peg for each foot base.
d)
Re-fix the structure with the 8 x Ropes (#I) and the 8 x Auger Anchors (#G).
e)


16
#D
#G
#E
#F
Part Number DescriptionDiagram Quantity
(PCS)
Roof Cover
Sidewall
1
2
#H
Holder
#J
#K
#L
#M
#N
Rope
Bungee Cord
Small Wrench
8
Zipper Door 2
2
#I
L-Shaped Peg 8
8
128
Carton Number Parts Included
Table B. Package Contents for Shipping Cartons
Box #1
Box #2
Box #3
9 x Part #1 (Steel Pole)
8 x Part #2 (Steel Pole)
6 x Part #4 (Ground Bar)
8 x Part #3 (Steel Pole)
4 x Part #5 (Corner Support Beam)
1 x Part #J (Roof Cover)
6 x Part #A (3-Way Corner Connector)
6 x Part #B (4-Way Corner Connector)
8 x Part #C (Foot Base)
8 x Part #D (Holder)
8 x Part #E (L-Shaped Peg)
8 x Part #F (Auger Anchor)
8 x Part #G (M6 x 45 mm Screw)
8 x Part #H (M6 x 50 mm Screw)
8 x Part #I (Rope)
2 x Part #K (Sidewall)
2 x Part #L (Zipper Door)
128 x Part #M (Bungee Cord)
2 x Part #N (Small Wrench)
8
8
8
Screw (M6 x 50 mm)
Screw (M6 x 45 mm)
Auger Anchor

Assembly Steps
Before the assembly, please check to make sure that you have all parts listed in the Parts Lists.
Step 1
Layout and form the top frame with the poles (9 x #1 & 8 x #2) and the connectors
(6 x #A & 6 x #B).
5
17
1 1 1
1 1 1
1 1 1
A
A
A
A
A
A
B
B
B
B
B
B
222
2
222
2
A1
2
Step 2 Reinforce the top frame with the 4 x Support Beams (#5).
Place the Holder (#D) on the poles (#2) as shown.
Align the hole on the end of the Support Beams (#5) with the holes of the Holder
(#D).
b)
a)
Insert the Screw (#G, M6 x 45 mm) into the jointed hole, and tighten it.
c)
Repeat what you’ve done for the other 7 joints of the poles (#2) and the support beams
(#5).
d)
#D Holder
#G Screw
(M6 X 45MM)

18
Step 4 Attach the 4 x poles (#3) to the connectors (#A & #B) on one side, then lift the structure
from the other side (several adults required!).
Step 3 Put the Roof Cover (#J) on the assembled top frame with the help of some Bungee
Cords (#M).
Step 5 Finish assembling the mainframe.
a) Connect the rest 4 x poles (#3) with the connectors (#A & #B) on the other side.
Tighten/loosen the leg covers (attached to the roof cover) by placing their hook into
a proper adjusting hole on the poles (#3).
Layout the 6 x Ground Bars (#4) as shown.
b)
c)
Connect the Bars (#4) with the poles (#3). Attach a Foot Base to the bottom of each pole
(#3), then align the ends of poles (#4) into their jointed hole, and finally fix them together
by inserting and tightening a Screw (#H, M6 x 50 mm) into each jointed hole. You’ll use 8
x Screws (#H) for the 8 joints.
d)
3 3 3 3

19
Step 6 Attach the fabric (#K for the Sidewalls & # L for the Zipper Doors) and secure the whole
structure.
Connect the upper end of the fabric to the top frame with the Bungee Cords (#M).
Fix all the fabric (Sidewalls & Zipper Doors) to the mainframe by wrapping it up with
the poles (#3). (There are Velcro straps sewed on the sidewall).
b)
a)
Insert the L-Shaped Pegs (#E) into the holes of the Foot Bases (#C). One peg for each foot
base.
c)
Attach one end of the Ropes (#I) to the connectors (#A & #B) and fix the other end to the
ground with Auger Anchors (#F).
d)
/