Page is loading ...

GENERAL
These luminaires are used in places where
emergency luminaires are needed.
Each luminaire must be permanently connected
to mains power supply In normal operation the
led strip lights and the battery is charging. In
case of a mains power supply failure the
luminaire will light the led strip automatically in
emergency mode. When the mains power
supply is restored the device turns to normal
operation.
1. Operations for installation, maintainance or
testing must be done by authorized personel
only
The device must be connected to the mains
power supply thru a fuse dependent by the total
amount of the line’s power load
It is sugested to check every month the
indication LED for battery charging, and by
pushing the TEST button (see the paragraph 8
on page 2), to check the emergency cirquit. The
lamp should light as long as the TEST button is
pressed
It is sugested to check every 6 months the
minimum autononous duration by disconnecting
the mains power supply Count the time that the
led strip lights and in case of less time than the
minimum autonomous duration the battery must
be replaced. If the measured time is
.
.
2.
.
3.
4.
.
ΑΤΤΕΝΤΙΟΝ!!!
. In the opposite condition contact the
installer.
considerably less than the minimum autonomous
duration In case of battery or
led strip replacement, these must be replaced by
parts of the same type
To install the luminaire follow the installation
instructions in page 2.
LED= Light Emitting Diode
t i
in battery recycling points. Do not
incinerate.
NOTE:
LABELING EXPLANATION:
X: Self contained
0: Non Maintained
A: Including test device
*90: 90min duration
180: 180min duration
INSTALLATION
contact the installer.
In case of inactive use for a period greater
than 2 months, disconnect the battery by pulling
out the battery’s connector.
.
5.
6. I s not allowed to discard batteries in to
common trash bins, they must be discarded
only
220-240V AC/50-60Hz
Bayblent F 3010 transparent polycarbonate
TECHNICAL CHARACTERISTICS
OPERATION TEMPERATURE RANGE
R ,
RELATIVE HUMIDITY
EXTERNAL DIMENSIONS
CONSTRUCTION MATERIALS
TYPICAL WEIGHT
GUARANTEE
OPERATION VOLTAGE
MAXIMUM POWER CONSUMPTION
BATTERIES Ni-Cd( )
CHARGING TIME
INDICATIONS CONTROLS-
BATTERY PROTECTION
MINIMUM AUTONOMOUS DURATION
DEGREES OF COVER PROTECTION
PRODUCED IN ACCORDANCE WITH
EMERGENCY ILLUMINATION
ILLUMINATION SOURCE
180min
24h
Charge indication LED TEST button,
From overcharge and full discharge
IP 65
370lm
6 power LED’s
EN 60598-1, EN 60598-2-22
0 to 40 C
o
Up to 95%
3 years year for the battery(1 )
355 x 145 x 73 mm
4.8V/1.5Ah 4.8V/3Ah 4.8V/4Ah(Ni-MH)
5 VA 6 VA4 VA
1020gr.
Pamal WP

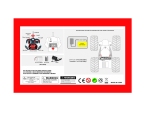
Figure1
N
L
N
L
Mains connection
230V AC
3
4
1
8 Unfasten the mounting screws step and remove the diffusor When the luminaire is supplied
by the mains press on the marking for TEST as shown in the picture below. Mount the diffusor by
using the 4 removed screws
( 7) .
,
.
TEST procedure with extra care!!
1
4
5
Remove the diffusor Place simultaneously 2 flat blade screwdrivers and pull up gently the
reflector.
Install the included plastic cover in to the unused hole and install the base plastic (with the
included mounting screws and plugs).
Instal the cable gland and pass the round cable thru.
Place the battery’s connector to the corresponding connector on the P.C.B
Connect the mains as shown in figure
Install the included tie (if needed) to fasten securely the power cables.
Refit the reflector and fasten the two small screws (included).
Finaly place the diffusor by using the 4 included screws (tightening torque 1.2Nm)
.
.
1.
.
2
3
6
7
8
INSTALLATION INSTRUCTIONS
2
7
6
8
/