Operation2
40
By pressing the
OK key, a page appears, which lets
you reset a single alarm or execute a total reset
To learn more, press the key
The display provides the following information:
- detector and its name (living room window)
- type of alarm (intrusion)
- burglar-alarm (antitheft) status when the
alarm goes on (ON-inserted)
The alarm notication is cancelled from the
display when the burglar alarm system is rear-
med. It is however saved in the "Event Memo-
ry" of the Burglar Alarm Control Unit
The Unit has detected an alarm
...
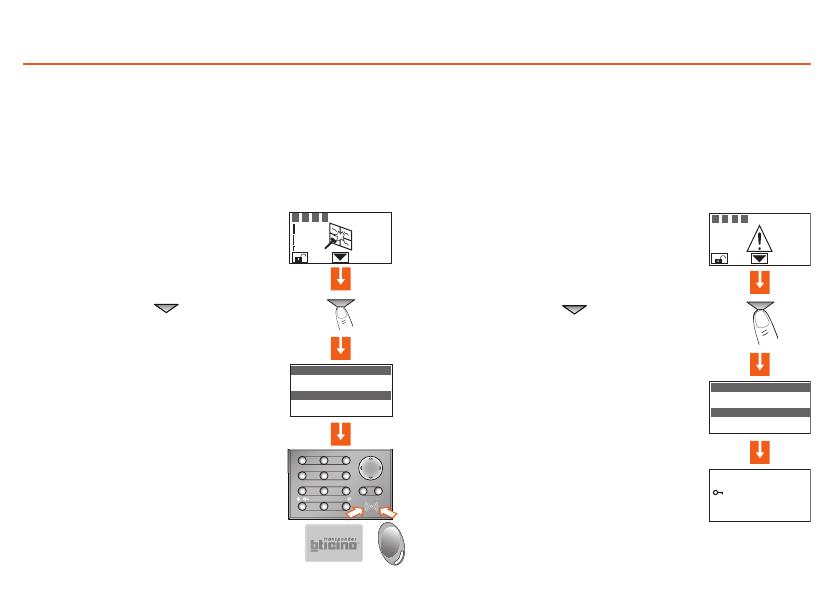
What type of alarm occurred? ■
When an alarm signal is displayed, you can nd out what type it is (intru-
sion, technical, etc.) and which detector has detected it; a name has been
given to each detector (kitchen window, entrance, etc.) by the installer for
easier identication. Press just one key to get this information.
To learn more, press the
The display provides the following information:
- device name (remote assistance)
- type of alarm (technical start)
- burglar-alarm (antitheft) status when the
alarm goes on (OFF-disconnected)
The Unit has detected a technical alarm
In case of a technical alarm (its symbol appears), you can nd out which
device has produced the alarm and reset it as well.
MEMO ALARMS
32: IR sensor
Living room window
Intrusion alarm
Inserted
1 2 3 4
1
ABC
2
5
JKL
6
MNO
DEF
3
GHI
4
7
PQRS
0
8
TUVWXYZ
9
COK
P /
/
MEMO ALARMS
42: receiver
remote assistance
start technical
Disconnected
1 2 3 4
press:
OK reset single
OK reset total


