Ethernet Wired Connection (LAN)
Connect an Ethernet cable to your broadband router and
plug the other end in to the port at the back
of your box.
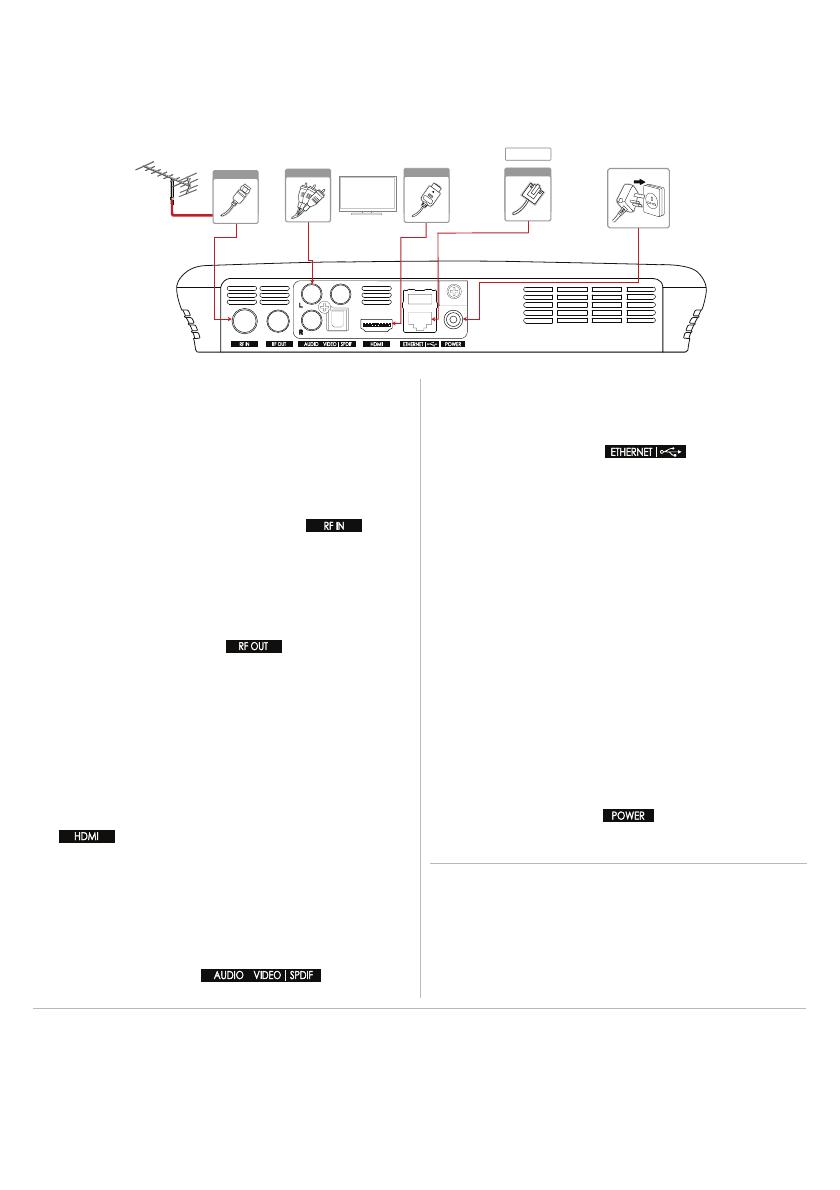
Connections
Here’s what goes where for your new Freeview Play Recorder
• Make sure all the cables are secure before you power on.
• See the system settings section for on-screen setup instructions.
• Set Power Saving Mode to OFF when using the aerial loop-through function (RF OUT).
•
Connecting your TV directly to the audio/video output of the product will assure a more vivid picture and enhance your
viewing enjoyment.
HDMI CEC
HDMI CEC (Consumer Electronics Control) lets you to
control the TV and HDMI CEC supported devices through
the HDMI input. If your TV supports this feature, it will turn
on/off automatically when the recorder is powered on/off.
Tips:
Wi-Fi Wireless Connection (WLAN)
Your product has a built-in wireless receiver.
You can configure these settings at any time by
navigating to:
Freeview Play Home > SETTINGS > Network Settings >
Configure WLAN
Connecting to the internet
Aerial
TV
RCA Cable
HDMI
6
Router
Ethernet
Using a HDMI cable
Use a HDMI cable to connect to the TV. This will provide up
to 1080p HD picture quality.
Plug one end in to your TV’s HDMI port and the other in to
the HDMI port at the back of your box.
This product is compatible with an aerial connection only.
Use the aerial connection that comes in to your house from
the main antenna. If you do not have one, you can try an
indoor aerial. (Satellite connections are not compatible.)
The cable from the aerial will plug in to the port at
the back of your box.
This recorder also supports loop-through functionality. If you
would like to receive a direct aerial signal back in to your
compatible TV, connect an aerial cable to the back of your
TV and the other end in to the RF OUT port at the back of
your box.
Use the AC adapter provided and plug in to a power socket.
Plug the other end in to the POWER port at the back of your
box.
Connecting to the TV
Connecting the aerial
Connecting the power
Using a RCA cable
For the best picture quality, we recommend using a HDMI
cable.
Alternatively use a RCA cable to connect one end to your
TV and the other in to the port on the
back of your box.
The internet should connect automatically, but if you have
trouble connecting you can find the on-screen settings later
by navigating to:
Freeview Play Home > SETTINGS > Network Settings
3


