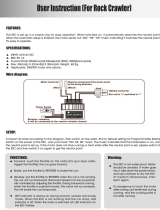
Traxxas E-Revo VXL Owner's manual

Category
Remote controlled toys
Type
Owner's manual
BRUSHLESS
BRUSHLESS
BRUSHLESS
owner
s manual
MODEL 7007
MODEL 7107
2
TRAXXAS
3 BEFORE YOU
PROCEED
4 SAFETY
PRECAUTIONS
5 TOOLS, SUPPLIES
AND REQUIRED
EQUIPMENT
5 DECORATING
YOUR MODEL
6 ANATOMY OF THE
1/16 SLASH VXL 4WD
7 ANATOMY OF THE
1/16 E-REVO VXL
8 QUICK START:
GETTING UP
TO SPEED
9 TRAXXAS TQ 2.4GHz
RADIO & VELINEON
Power SYSTEM
17 ADJUSTING THE
ELECTRONIC SPEED
CONTROL
19 DRIVING YOUR MODEL
22 TUNING
ADJUSTMENTS
27 MAINTAINING
YOUR MODEL
28 TQ 2.4GHz ADVANCED
TUNING GUIDE
INTRODUCTION
Thank you for purchasing a Traxxas 1/16 scale electric racing truck.
The 1/16 E-Revo VXL and 1/16 Slash VXL 4WD models combine
technologies proven by the 7-time National Monster Truck
Champion Revo and the innovative E-Revo electric racing monster
truck. Both Traxxas 1/16 models are designed for high-performance
driving, with a low center of gravity, balanced weight distribution,
lightweight and high-strength materials, and the precise
engineering that is the hallmark of all Traxxas trucks.
This manual contains the instructions you will need to operate and
maintain your model so that you can enjoy it for years to come.
We want you to feel condent that you own one of the best-
performing models in the market and that it is backed by a team
of professionals who aim to provide the highest level of factory
support possible. Traxxas models are about experiencing total
performance and satisfaction, not just with your model, but also
with the company that stands behind it.
We know you’re excited about getting your new model on
the road, but it’s very important that you take some time to
read through the Owner’s Manual. This manual contains all the
necessary setup and operating procedures that allow you to unlock
the performance and potential that Traxxas engineers designed
into your model. Even if you are an experienced R/C enthusiast,
it’s important to read and follow the procedures in this manual.
Thank you again for going with Traxxas. We work hard every day
to assure you the highest level of customer satisfaction possible.
We truly want you to enjoy your new model!
Traxxas Support
Traxxas support is with you every step of the
way. Refer to the next page to nd out how to
contact us and what your support options are.
Quick Start
This manual is designed with a Quick
Start path that outlines the necessary
procedures to get your model up
and running in the shortest time possible. If you are an
experienced R/C enthusiast you will nd it helpful and fast.
Be sure and read through the rest of the manual to learn
about important safety, maintenance, and adjustment
procedures. Turn to page 8 to begin.
TRAXXAS
3
BEFORE YOU PROCEED
Carefully read and follow all instructions in this and any
accompanying materials to prevent serious damage to your
model. Failure to follow these instructions will be considered
abuse and/or neglect.
Before running your model, look over this entire manual and
examine the model carefully. If for some reason you decide it is not
what you wanted, then do not continue any further. Your hobby
dealer absolutely cannot accept a model for return or exchange
after it has been run.
WARNINGS, HELPFUL HINTS, & CROSS-REFERENCES
Throughout this manual, you’ll notice warnings and helpful hints
identied by the icons below. Be sure to read them!
An important warning about personal safety or avoiding
damage to your model and related components.
Special advice from Traxxas to make things easier
and more fun.
Refers you to a page with a related topic.
SUPPORT
If you have any questions about your model or its operation,
call the Traxxas Technical Support line toll-free at:
1-888-TRAXXAS (1-888-872-9927)*
Technical support is available Monday through Friday from 8:30am
to 9:00pm central time. Technical assistance is also available at
Traxxas.com. You may also e-mail customer support with your
question at [email protected]. Join thousands of registered
members in our online community at Traxxas.com.
Traxxas offers a full-service, on-site repair facility to handle any
of your Traxxas service needs. Maintenance and replacement
parts may be purchased directly from Traxxas by phone or online
at BuyTraxxas.com. You can save time, along with shipping
and handling costs, by purchasing replacement parts from your
local dealer.
Do not hesitate to contact us with any of your product support needs.
We want you to be thoroughly satised with your new model!
Traxxas
1100 Klein Road
Plano, Texas 75074
Phone: 972-265-8000
Toll-free 1-888-TRAXXAS
Traxxas U.K.
P.O. Box 1128
Winterbourne, Bristol
BS36-2SH
England
Phone: 44-117-956-1002
Internet
Traxxas.com
Entire contents ©2009 Traxxas.
Traxxas, Ready-To-Race, Ready-
To-Win, Titan, Velineon, 1/16
Slash VXL 4WD, 1/16 E-Revo VXL
and ProGraphix are trademarks
or registered trademarks of
Traxxas. Other brand names and
marks are the property of their
respective holders and are used
only for purposes of identication.
No part of this manual may be
reproduced or distributed in print
or electronic media without the
express written permission of
Traxxas. Specications are subject
to change without notice.
*Toll-free support is available to U.S. residents only.
4
TRAXXAS
This model is not intended
for use by children under
14 years of age without the
supervision of a responsible
and knowledgeable adult.
All instructions and
precautions outlined in this
manual should be strictly
followed to ensure safe
operation of your model.
SAFETY PRECAUTIONS
Previous experience with
radio controlled models
is recommended. Models
require a higher level of
setup, maintenance, or
support equipment.
Skill Level = Myriad Semi Bold
1 2 3 3+ 4 5
bluehighway font
For Expert Drivers
Choose the Model That is Right For You. For individual Models
No previous experience with radio controlled models is required.
Models require a minimum of setup, maintenance, or support equipment.
Previous experience with radio controlled models is mandatory. These
models are capable of high speeds, requiring experienced driving control.
Models require detailed setup, and/or maintenance procedures with required
support equipment.
Previous experience with radio controlled models is mandatory.
These models are capable of very high speeds and require an even higher
level of skilled driving control. Models require detailed setup, and/or mainte-
nance procedures with required support equipment.
For Expert Drivers Only. This product is capable of extreme speed
and acceleration! It carries our highest skill level rating and is intended
for expert drivers only. Experience with nitro-powered radio controlled
models is required!
Previous experience with radio controlled models is recommended.
Models require a higher level of setup, maintenance, or support equipment.
No previous experience with radio controlled models is required.
Model requires a minimum of setup, maintenance, or support equipment.
Previous experience with radio controlled models is mandatory. This model is
capable of high speeds, requiring experienced driving control. Model requires
detailed setup, and/or maintenance procedures with required support
equipment.
Previous experience with radio controlled models is mandatory. This model is
capable of very high speeds and requires an even higher level of skilled driving
control. Model requires detailed setup, and/or maintenance procedures with
required support equipment.
For Expert Drivers Only. This product is capable of extreme speed
and acceleration! It carries our highest skill level rating and is intended
for expert drivers only. Experience with nitro-powered radio controlled
models is required!
Previous experience with radio controlled models is recommended.
Model requires a higher level of setup, maintenance, or support equipment.
BELOW TEXT HAS BEEN UPDATED on 3-14-07
Kent wants maintenance text to be at the END of the paragraph.-- KB
All of us at Traxxas want you to safely enjoy your new model.
Operate your model sensibly and with care, and it will be exciting,
safe, and fun for you and those around you. Failure to operate your
model in a safe and responsible manner may result in property
damage and serious injury. The precautions outlined in this manual
should be strictly followed to help ensure safe operation. You alone
must see that the instructions are followed and the precautions are
adhered to.
IMPORTANT POINTS TO REMEMBER
Your model is not intended for use on public roads or congested
areas where its operation can conict with or disrupt pedestrian
or vehicular trafc.
Never, under any circumstances, operate the model in crowds of
people. Your model is very fast and could cause injury if allowed
to collide with anyone.
Because your model is controlled by radio, it is subject to radio
interference from many sources that are beyond your control.
Since radio interference can cause momentary losses of radio
control, always allow a safety margin in all directions around the
model in order to prevent collisions.
The motor, batteries, and speed control can become hot during
use. Be careful to avoid getting burned.
Don’t operate your model at night, or anytime your line of sight
to the model may be obstructed or impaired in any way.
Most importantly, use good common sense at all times.
BATTERIES AND BATTERY CHARGING
Your model uses rechargeable batteries that must be handled with
care for safety and long battery life. Make sure to read and follow all
instructions and precautions that were provided with the battery
pack and your charger. It is your responsibility to charge and care
for the battery backs properly. In addition to your battery and
charger instructions, here are some more tips to keep in mind.
Use the supplied charger to charge the included
battery. See “Use The Right Charger” on page 10.
Never leave batteries to charge unattended.
Remove the battery from the model while charging.
Always unplug the battery from the electronic speed control
when the model is not in use and when it is being stored
or transported.
Allow the battery pack to cool off between runs
(before charging).
Do not use battery packs that have been damaged in any way.
Do not use battery packs that have damaged wiring, exposed
wiring, or a damaged connector.
Children should have responsible adult supervision when
charging and handling batteries.
SPEED CONTROL
Disconnect the Battery: Always disconnect the battery from the
speed control when not in use.
Transmitter on First: Switch on your transmitter rst before
switching on the speed control to prevent runaways and
erratic performance.
Don’t Get Burned: The heat sink can get extremely hot, so be
careful not to touch it until it is cool. Supply adequate airow
for cooling.
Use Stock Connectors: If you decide to change the battery
or motor connectors, only change one battery or motor connector
at a time. This will prevent damage from accidentally mis-wiring
the speed control. Please note that modied speed controls can
be subject to a rewiring fee when returned for service. Removing
the battery connector on the speed control or using connectors
with no reverse-polarity protection on the speed control will void
the product’s warranty.
Insulate the Wires: Always insulate exposed or damaged wiring
with heat shrink tubing to prevent short circuits.
No Reverse Voltage: The speed control is not protected against
reverse polarity voltage. When changing the battery and/or
motor, be sure to install the same type of connectors to avoid
reverse polarity damage to the speed control. Removing the
battery connectors on the speed control or using the same-gender
connectors on the speed control will void the product’s warranty.
No Schottky Diodes: External Schottky diodes are not compatible
with reversing speed controls. Using a Schottky diode will damage
the electronic speed control and void the 30-day warranty.
1
TRAXXAS
5
TOOLS, SUPPLIES AND REQUIRED EQUIPMENT
Your model comes with a set of specialty metric tools. You’ll need to purchase other items, available from your hobby dealer, to operate
and maintain your model.
REQUIRED EQUIPMENT
(sold separately)
Recommended Equipment
These items are not required
for the operation of your
model, but are a good idea to
include in any R/C toolbox:
• Safety glasses
• Thin, hobby-quality
cyanoacrylate instant tire
glue (CA glue)
• Hobby knife
• Side cutters and/or needle
nose pliers
• Philips screwdriver
• Soldering iron
For more information on
batteries, see Use the Right
Batteries on page 12.
SUPPLIED TOOLS AND EQUIPMENT
2.0mm “T” wrench 4-way wrench2.5mm ball driver wrench1.5mm “L” wrench
Body clips6-cell 2/3A NiMH battery
TRAXXAS
NiMH battery charger
4 AA alkaline
batteries
APPLYING THE DECALS
The main decals for your model
have been applied at the factory.
The decals are printed on self-
adhesive clear mylar and are die-
cut for easy removal. Use a hobby
knife to lift the corner of a decal
and lift it from the backing. To
apply the decals, place one end
down, hold the other end up, and
gradually smooth the decal down
with your nger as you go. This
will prevent air bubbles. Placing
both ends of the decal down and
then trying to smooth it out will
result in air pockets.
Look at the photos on the box for
typical decal placement.
TIRE GLUING
The factory tires on your model are already glued to the rims. The
tires must be glued to the rims to prevent the rims from spinning inside
the tires. The instructions here are provided to show you how to glue
replacement tires to the rims in the future. Use CA tire glue available
from your local hobby dealer. You can glue the tires without removing
the wheels from the truck. For clarity, these instructions show the process
with the wheels removed.
1. Remove a wheel from the model using
the larger (7mm) end of the universal
wrench.
2. Use your thumb to push the side of the
tire away from the rim. Place one or two
drops of CA glue into the opening and
release the tire. Capillary action will draw
the glue around the bead of the tire.
3. Repeat step two at four or five points around the rim, until the tire
is completely secured to the rim. Turn the rim over and repeat the
process for the inside of the rim/tire. Repeat for the other three wheels.
4. Reinstall the wheels, make sure none of the axle pins have fallen out
from behind the hex hubs.
DECORATING YOUR MODEL
9
Turnbuckle
6
TRAXXAS
ANATOMY OF THE 1/16 SLASH VXL 4WD
Rear Half Shaft
Rear
Bumper
Transmission
Chassis
Antenna Mount
Front
Suspension Arm
Front
Bumper
Oil Shock
(Damper)
Rear Body
Mount
Hex Hub
Rear Suspension
Arm
Axle Carrier
Pivot Ball
Turnbuckle
Receiver Box
Light Pipe
Steering Servo
Front Body
Mount
Battery Compartment Door
Battery Compartment Vent
Electronic Speed
Control (VXL-3m)
Motor (Velineon
®
380)
Battery Door Release Tab
Slipper Clutch
Rocker
Rocker
Push Rod
Push Rod
Spring Preload
Adjuster
Traxxas High-Current
Connector
Turnbuckle
7
TRAXXAS
ANATOMY OF THE 1/16 E-REVO VXL
Rear Half Shaft
Wing
Transmission
Chassis
Antenna Mount
Front
Suspension Arm
Front
Bumper
Oil Shock
(Damper)
Rear Body
Mount
Hex Hub
Rear
Suspension Arm
Axle Carrier
Pivot Ball
Turnbuckle
Light Pipe
Receiver Box
Steering Servo
Front Body
Mount
Battery Compartment Door
Battery Compartment Vent
Electronic Speed
Control (VXL-3m)
Motor (Velineon
®
380)
Battery Door Release Tab
Slipper Clutch
Rocker
Rocker
Push Rod
Push Rod
Spring Preload
Adjuster
Traxxas High-Current
Connector
8
TRAXXAS
The Quick Start Guide is
not intended to replace the
full operating instructions
available in this manual.
Please read this entire
manual for complete
instructions on the proper
use and maintenance of
your model.
Look for the Quick Start
logo at the bottom of
Quick Start pages.
The following guide is an overview of the procedures for getting your model running. Look for the Quick Start logo on the bottom
corners of Quick Start pages.
1. Read the safety precautions on page 4 9. Detail your model • See page 5
For your own safety, understand where carelessness and misuse
could lead to personal injury.
Apply other decals if desired.
2. Charge the battery pack • See sidebar, page 9 10. Drive your model • See page 19
Fully charge the battery pack included with your model. Driving tips and adjustments for your model.
3. Install the antenna • See page 12 11. Maintaining your model • See page 27
Install the antenna mast in the model. Follow these critical steps to maintain the performance
of your model and keep it in excellent running condition.
4. Install batteries in the transmitter • See page 12
The transmitter requires 4 AA alkaline or rechargeable batteries.
5. Install the battery pack • See page 12
Install the included battery pack in your model.
6. Turn on the radio system • See page 14
Make a habit of turning the transmitter on rst, and off last.
7. Check servo operation • See page 15
Make sure the steering servo is working correctly.
8. Range test the radio system • See page 15
Follow this procedure to make sure your radio system works properly
at a distance and that there is no interference from outside sources.
QUICK START: GETTING UP TO SPEED
TRAXXAS
9
TRAXXAS TQ 2.4GHz RADIO & VELINEON POWER SYSTEM
INTRODUCTION
Your model includes the latest in Traxxas 2.4GHz transmitter
technology. The transmitter’s easy-to-use design provides
instant driving fun for new R/C enthusiasts, and also offers a full
compliment of pro-level tuning features for advanced users – or
anyone interested in experimenting with the performance of
their model. The steering and throttle channels feature adjustable
Exponential, End Points, and Sub-Trims. Steering and braking
Dual Rate are also available. Many of the next-level features are
controlled by the Multi-Function knob, which can be programmed
to control a variety functions. The detailed instructions (page
28) and Menu Tree (page 30) included in this manual will help
you understand and operate the advanced functions of the new
TQ 2.4GHz radio system. For additional information and how-to
videos, visit Traxxas.com.
RADIO AND POWER SYSTEM TERMINOLOGY
Please take a moment to familiarize yourself with these radio and
power system terms. They will be used throughout this manual.
A detailed explanation of the advanced terminology and features
of your new radio system begins on page 28.
2.4GHz Spread Spectrum – This model is equipped with the latest
R/C technology. Unlike AM and FM systems that require frequency
crystals and are prone to frequency conflicts, the TQ2.4GHz system
automatically selects and locks onto an open frequency, and offers
superior resistance to interference and “glitching.”
BEC (Battery Eliminator Circuit) - The BEC can either be in the
receiver or in the ESC. This circuit allows the receiver and servos
to be powered by the main battery pack in an electric model.
This eliminates the need to carry a separate pack of 4 AA
batteries to power the radio equipment.
Brushless Motor - A D/C brushless motor replaces the brushed
motor’s traditional commutator and brush arrangement with
intelligent electronics that energize the electromagnetic
windings in sequence to provide rotation. Opposite of a brushed
motor, the brushless motor has its windings (coils) on the
perimeter of the motor can and the magnets are mounted to the
spinning rotor shaft.
Cogging - Cogging is a condition sometimes associated with
brushless motors. Typically it is a slight stutter noticed when
accelerating from a stop. It happens for a very short period as
the signals from the electronic speed control and the motor
synch with each other. The VXL-3m is optimized to virtually
eliminate cogging.
Current - Current is a measure of power ow through the
electronics, usually measured in amps. If you look at wire like a
garden hose, current is a measure of how much water is owing
through the hose.
ESC (Electronic Speed Control) - An electronic speed control is
the electronic motor control inside the model. Electronic speed
controls use power more efciently than mechanical speed
controls so that the battery runs longer. An electronic speed
control also has circuitry that prevents loss of steering and
throttle control as the battery loses its charge.
Frequency band - The radio frequency used by the transmitter to
send signals to your model.
This model operates on the 2.4GHz
direct-sequence spread spectrum.
kV Rating - Brushless motors are often rated by their kV number.
The kV rating equals no-load motor rpm with 1 volt applied.
The kV increases as the number of wire turns in the motor
decreases. As the kV increases, the current draw through the
electronics also increases.
LiPo - Abbreviation for Lithium Polymer. Rechargeable LiPo
battery packs are known for their special chemistry that allows
extremely high energy density and current handling in a
compact size. These are high performance batteries that require
special care and handling. For advanced users only.
mAh – Abbreviation for milliamp hour. A measure of the capacity
of the battery pack. The higher the number, the longer the
battery will last between recharges.
Neutral position - The standing position that the servos seek
when the transmitter controls are at the neutral setting.
NiCad - Abbreviation for nickel-cadmium. The original
rechargeable hobby pack, NiCad batteries have very high
current handling, high capacity, and can last up to 1000
charging cycles. Good charging procedures are required to
reduce the possibility of developing a “memory” effect and
shortened run times.
2
Use the Right Charger
Your model includes a ‘wall
charger’ that will charge
the supplied battery in
approximately six hours.
Unplug the battery from
the charger, and unplug the
charger from the wall, when
charging is complete.
For faster charging, the
Traxxas TRX Power Charger
(item #3030X) may be used in
combination with a Traxxas
High Current Plug adapter
(item #3062). This will reduce
charging time to about one
hour. The Power Charger will
detect when the battery pack
is fully charged, and stop
charging automatically.
Certain aftermarket chargers
may also be used to charge
the included battery, but
use caution when selecting
a charger. ‘Timer’ or
mechanical chargers with
a clockwork timer are not
recommended as they may
overcharge the battery. We
suggest you ask your local
hobby dealer to help you
select an appropriate charger,
or call 1-888-TRAXXAS so our
customer support team can
help you.
No matter which charger you
choose, never leave a battery
unattended while charging.
Always follow the charger
manufacturer’s instructions.
10
TR A X X AS
TRAXXAS TQ 2.4GHz RADIO & VELINEON POWER SYSTEM
NiMH - Abbreviation for nickel-metal hydride. Rechargeable
NiMH batteries offer high current handling, and much greater
resistance to the “memory” effect. NiMH batteries generally
allow higher capacity than NiCad batteries. They can last up to
500 charge cycles. A peak charger designed for NiMH batteries is
required for optimal performance.
Receiver - The radio unit inside your model that receives signals
from the transmitter and relays them to the servos.
Resistance - In an electrical sense, resistance is a measure of how
an object resists or obstructs the ow of current through it.
When ow is constricted, energy is converted to heat and is
lost. Traxxas power systems are optimized to reduce electrical
resistance and the resulting power-robbing heat.
Rotor - The rotor is the main shaft of the brushless motor.
In a brushless motor, the magnets are mounted to the
rotor, and the electromagnetic windings are built into the
motor housing.
Sensored - Sensored refers to a type of brushless motor that
uses an internal sensor in the motor to communicate rotor
position information back to the electronic speed control.
Sensorless - Sensorless refers to a brushless motor that uses
advanced instructions from an electronic speed control to
provide smooth operation. Additional motor sensors and wiring
are not required.
Servo - Small motor unit in your model that operates the
steering mechanism.
Solder Tabs - Accessible, external contacts on the motor that
allows for easy wire replacement. The Velineon 3500 is equipped
with solder tabs.
Transmitter - The hand-held radio unit that sends throttle and
steering instructions to your model.
Trim - The ne-tuning adjustment of the neutral position of the
servos, made by adjusting the throttle and steering trim sliders
on the face of the transmitter.
Thermal Shutdown Protection - Temperature sensing electronics
used in the electronic speed control detect overloading and
overheating of the transistor circuitry. If excessive temperature is
detected, the unit automatically shuts down to prevent damage
to the electronics.
2-channel radio system - The TQ radio system, consisting of
the receiver, the transmitter, and the servos. The system uses two
channels: one to operate the throttle and one to operate
the steering.
Voltage - Voltage is a measure of the electrical potential
difference between two points, such as between the positive
battery terminal and ground. Using the analogy of the garden
hose, while current is the quantity of water ow in the hose,
voltage corresponds to the pressure that is forcing the water
through the hose.
IMPORTANT RADIO SYSTEM PRECAUTIONS
For maximum range, always hold the
transmitter so the antenna is in a vertical
position (pointing straight up). The transmitter’s
antenna can be swiveled and angled to allow
for a vertical position if necessary.
Do not kink the receiver’s antenna wire. Kinks
in the antenna wire will reduce range.
DO NOT CUT any part of the receiver’s
antenna wire. Cutting the antenna will reduce range.
Extend the antenna wire in the model as far as possible for
maximum range. It is not necessary to extend the antenna
wire out of the body, but wrapping or coiling the antenna wire
should be avoided.
Do not allow the antenna wire to extend outside the body
without the protection of an antenna tube, or the antenna wire
may get cut or damaged, reducing range. It is recommended to
keep the wire inside the body (in the antenna tube) to prevent
the chance of damage.
To prevent loss of radio range
do not kink or cut the black wire,
do not bend or cut the metal tip,
and do not cut the white wire at
the end of the metal tip.
Correct NoNo
TRAXXAS
11
TRAXXAS TQ 2.4GHz RADIO & VELINEON POWER SYSTEM
VXL-3m Wiring Diagram
MOTOR
MOTOR
To Motor
LED
EZ-Set
Button
Heat Sinks
High-Current
Battery Connector
1/16 E-REVO VXL & SLASH VXL 4WD
WIRING DIAGRAM
Antenna
Receiver
Motor
(Velineon® 380)
High-Current
Connector
Channel 2
VXL-3m
Electronic
Speed Control
Channel 1
Steering Servo
*not used
VXL-3m ELECTRONIC SPEED CONTROL
Your model is equipped with the newest Traxxas 2.4 GHz
transmitter with Traxxas Link.
The transmitter has two channels
for controlling your throttle and steering. The receiver inside the
model has 5 output channels. Your model is equipped with one
servo and an electronic speed control.
TQ 2.4GHZ TRANSMITTER
Antenna
Steering
Trim
Multi-Function Knob
Throttle
Trigger
Throttle Neutral
Adjust
Steering Wheel
Power
Switch
Battery
Compartment
Set Button
Menu Button
Red/Green Status LED
see page 29 for more info
12
TR A X X AS
INSTALLING TRANSMITTER BATTERIES
Your TQ transmitter uses 4 AA batteries. The battery compartment
is located in the base of the transmitter.
1. Remove the battery compartment door by pressing the tab
and lifting the door up.
*
2. Install the batteries in the correct orientation as indicated in
the battery compartment.
3. Reinstall the battery door and snap it closed.
4. Turn on the transmitter and check the status indicator for a solid
green light.
If the status LED ashes red, the transmitter batteries may be
weak, discharged or possibly installed incorrectly. Replace with
new or freshly charged batteries. The power indicator light does
not indicate the charge level of the battery pack installed in the
model. Refer to the Troubleshooting section on page 29 for more
information on the transmitter Status LED codes.
SETTING UP THE ANTENNA
The receiver antenna has been set up
and installed from the factory. The
antenna is secured by a 3x4mm set
screw. To remove the antenna tube,
simply remove the set screw with the
included 1.5mm wrench.
When reinstalling the antenna, rst slide
the antenna wire into bottom of antenna
tube until white tip of antenna exits the
top of tube. Carefully curve the white
tip over the antenna tube and install
the antenna tip to hold it in place. Next
insert the antenna tube into the mount
while making sure that antenna wire
is in slot in the antenna mount, then
install the set screw next to the antenna
tube. Use the supplied 1.5mm wrench to
tighten the screw just until the antenna
tube is securely in place. Do not over tighten.
Do not bend or kink
the antenna wire! See the side bar on page 13 for more information.
INSTALLING THE BATTERY PACK
Your model includes a 7.2-volt battery pack. To properly balance the
model, it should be installed in the battery compartment on the left
side of the model. Follow these
steps to install the battery:
Battery Installation
1. Open the battery
compartment door by
pressing on the
release tabs.
2. Install the battery pack with
the battery wires facing the
rear of the model.
3. Route the battery wire through
the slot near the vent.
4. Close the battery door,
making sure not to pinch the battery wires. Be sure both release
tabs are fully engaged with the door. Do not connect the battery
pack to the ESC at this time. Note: always unplug the battery and
remove from the model after use.
Antenna
Tip
Antenna
Tube
1.5mm
Wrench
Set
Screw
Antenna
Mount
Battery Wire Slot
Battery Orientation
3, 4, 5
If the power indicator doesn’t
light green, check the polarity
of the batteries. Check
rechargeable batteries for
a full charge. If you see any
other ashing signal from the
LED, refer to the chart on page
29 to identify the code.
Use the Right Batteries
Your transmitter uses AA
batteries. Use new alkaline
batteries, or rechargeable
batteries such as NiMH
(Nickel Metal Hydride)
batteries in your transmitter.
Make sure rechargeable
batteries are fully
charged according to the
manufacturer’s instructions.
If you use rechargeable
batteries in your
transmitter, be aware
that when they begin
to lose their charge, they lose
power more quickly than
regular alkaline batteries.
Caution: Discontinue running
your model at the rst sign of
weak batteries (ashing red
light) to avoid losing control.
TRAXXAS TQ 2.4GHz RADIO & VELINEON POWER SYSTEM
*A Quick Reference Guide has been provided for you in the battery compartment of the transmitter. Always store the Quick Reference Guide in your transmitter.
TRAXXAS
13
The following Traxxas High
Current Connector packages
are available from your hobby
dealer. When using adapters, be
careful not to exceed the current
rating of the Molex connector.
Part #3060
Single Male/Female
Part #3080
2-Pack Female
Part #3070
2-Pack Male
Part #3061
Male Charge Adapter
Part #3062
Female Charge Adapter
The Traxxas High Current Connector
Your model is equipped with the patented
Traxxas High-Current Connector. Standard
connectors restrict current ow and are not
capable of delivering the power needed to
maximize the output of the Velineon Brushless Power system.
The Traxxas connector’s gold-plated terminals with a large contact
surfaces ensure positive current ow with the least amount of
resistance. Secure, long-lasting, and easy to grip, the Traxxas
connector is engineered to extract all the power your battery has
to give.
Using LiPo Packs in Your Model
The VXL-3m is compatible with 2S and 3S LiPo packs, and is
equipped with Low-Voltage Detection circuitry to prevent over-
discharging. Make certain LiPo mode is selected (see page 18 for
details) when using LiPo packs in your model.
Using an Additional Battery for Increased Run Time
Traxxas 1/16 models only require one battery pack, but the chassis
can accept two batteries. Your model can be run with two battery
packs to extend run time. The batteries must be connected in
parallel, which will combine the capacity of the two batteries
(for example, two 7.2-volt 1000mAh packs connected in parallel
will deliver a total capacity of 2000mAh, but total voltage will
remain 7.2 volts). This is easily done with a parallel Y-harness (Part
#3064, sold separately). Be sure to only use the Y-harness with
identical battery packs; do not mix batteries of different chemistries
or capacities.
Using an Additional Battery For Increased Speed
An additional battery may also be used to increase the top speed
of your model, by connecting the batteries in series using a Traxxas
series connector (Part #3063, sold separately). This also requires
a gearing change using the supplied, optional pinion gear as
described on page 25.
Precautions
The High Speed dual-battery battery and gearing
conguration is for high-speed running on smooth
surfaces only. Avoid repetitive hard acceleration to prevent
overstressing the motor, speed control and batteries.
Failure to install the appropriate gearing can cause failure
of the motor, speed control and batteries when running the
model on 12 NiMH cells. See the gearing chart on page 24 for
more information about properly gearing your model.
Make certain both batteries are fully charged before
installing them in your model. Installing a fully charged pack
and a partially discharged pack may lead to overdischarging
and damage to the partially discharged battery.
Do not mix batteries of different brands, chemistries or
capacities. Only genuine Traxxas batteries are approved for
dual-battery use in this model.
Stop running your model and allow it to cool if the speed
control’s thermal overload protection activates or if the
motor temperature exceeds 200° F.
When operating your model with two batteries, be careful
to monitor the temperature of the speed control and motor
to prevent overheating. Stop running your model and allow
it to cool if the speed control’s thermal overload protection
activates or if the motor temperature exceeds 200° F.
For best off-road handling with two battery packs, consider
installing stiffer springs on your model. Traxxas offers
accessory springs for this purpose; see the parts list included
with your model for part numbers.
TRAXXAS TQ 2.4GHz RADIO & VELINEON POWER SYSTEM
To prevent loss of radio range
do not kink or cut the black wire,
do not bend or cut the metal tip,
and do not cut the white wire at
the end of the metal tip.
Correct NoNo
14
TR A X X AS
Remember, always turn the
TQ transmitter on rst and
off last to avoid damage to
your model.
Automatic Fail-Safe
The TQ 2.4GHz transmitter
and receiver are equipped
with an automatic fail-
safe system that does not
require user programming.
In the event of signal loss
or interference, the throttle
will return to neutral and
the steering will hold its
last commanded position. If
Fail-Safe activates while you
are operating your model,
determine the reason for
signal loss and resolve the
problem before operating
your model again.
When rechargeable batteries
begin to lose their charge,
they will fade much faster
than alkaline dry cells. Stop
immediately at the rst sign
of weak batteries. Never turn
the transmitter off when the
battery pack is plugged
in. The model could run out
of control.
TQ RADIO SYSTEM RULES
Always turn your TQ 2.4GHz transmitter on first and off last. This
procedure will help to prevent your model from receiving stray
signals from another transmitter, or other source, and running out
of control. Your model has electronic fail-safes to prevent this type
of malfunction, but the first, best defense against a runaway model
is to always turn the transmitter on first, and off last.
In order for the transmitter and receiver to bind to one another,
the receiver in the model must be turned on within 20 seconds
of turning on the transmitter. The transmitter LED will flash fast
red indicating a failure to link. If you miss it, simply turn off the
transmitter and start over.
Always turn on the transmitter before plugging in the battery.
Always use new or freshly charged batteries for the radio
system. Weak batteries will limit the radio signal between the
receiver and the transmitter. Loss of the radio signal can cause
you to lose control of your model.
TQ 2.4GHz RADIO SYSTEM BASIC ADJUSTMENTS
Throttle Neutral Adjustment
The throttle neutral adjustment is located
on the transmitter face and controls the
forward/reverse travel of the throttle trigger.
Change the adjustment by pressing the
button and sliding it to the desired position.
There are two settings available:
50/50: Allows equal travel for both forward and reverse.
70/30: Allows more forward travel (70%) and less reverse travel (30%).
Note:
We strongly recommend to leave this control in its factory
location until you become familiar with all the adjustments and
capabilities of your model.
To change the throttle neutral adjust
position, turn the transmitter off before adjusting the neutral
position. You will need to reprogram your electronic speed control
to recognize the 70/30 setting. Turn to ESC Setup Programming on
page 17 for instructions.
Steering Trim
The electronic steering trim located on the face of the
transmitter adjusts the neutral (center) point of the
steering channel.
Multi-Function Knob
The Multi-Function knob can be programmed to
control a variety of functions. From the factory, the
Multi-Function knob controls steering sensitivity,
also known as exponential or “expo.” When the knob
is turned counterclockwise all the way to the left
(default position), expo is off and steering sensitivity will be linear
(the most commonly used setting). Turning the knob clockwise will
“add expo” and decrease the steering sensitivity in the initial range
of steering wheel travel left or right from center. For more detail on
steering exponential, refer to page 16.
TQ 2.4GHz RADIO SYSTEM CONTROLS
Always turn your
transmitter on rst.
Turn on the model.
1
2
Plug in the battery.
3
6
TRAXXAS TQ 2.4GHz RADIO & VELINEON POWER SYSTEM
THROTTLE TRIM
100100
00
THROTTLE TRIM
100100
00
TRAXXAS
15
7, 8
USING THE TQ 2.4GHz RADIO SYSTEM
The TQ 2.4GHz Radio System has been pre-adjusted at the factory. The
adjustment should be checked before running the model, in case of
movement during shipping. Here’s how:
1. Turn the transmitter switch on. The status LED on the transmitter
should be solid green (not flashing).
2.
Elevate the model on a block or a stand so that all the tires are
off the ground. Make sure your hands are clear of the moving
parts of the model.
3.
Plug the battery pack in the model into the speed control.
4.
The on/off switch is integrated into the speed control. With the
transmitter on, press and release the EZ-Set button (.25 seconds).
The LED will shine RED (see note, below). This turns the model
on. To turn the VXL-3m off, press and hold the EZ-Set button
until the LED turns off (.5 seconds). Note: If the LED shines
green, Low-Voltage Detection is activated. This may cause poor
performance from the included NiMH battery pack. The default
factory setting is for Low-Voltage Detection to be disabled
(LED shines red). Make sure to turn the Low-Voltage Detection
on when using LiPo batteries. Never use LiPo batteries while
Low-Voltage Detection is turned off. See page 18 for more
information.
5.
Turn the steering wheel on the transmitter back and forth and
check for rapid operation of the steering servo. Also, check that
the steering mechanism is not loose or binding. If the steering
operates slowly, check for weak batteries.
6.
When looking down at
model, the front wheels
should be pointing
straight ahead. If the
wheels are turned slightly
to the left or right, slowly
adjust the steering trim
control on the transmitter
until they are pointing straight ahead.
7.
Gently operate the throttle trigger to ensure that you have
forward and reverse operation, and that the motor stops when
the throttle trigger is at neutral. Warning: Do not apply full
throttle in forward or reverse while the model is elevated.
8. Once adjustments are made, turn off the receiver on your model,
followed by the hand-held transmitter.
Range-Testing the Radio System
Before each running session with your model, you should range-test
your radio system to ensure that it operates properly.
1.
Turn on the radio system and check its operation as described in
the previous section.
2.
Have a friend hold the model. Make sure hands and clothing are
clear of the wheels and other moving parts on the model.
3.
Make sure your transmitter antenna is straight up, and then walk
away from the model with the transmitter until you reach the
farthest distance you plan to operate the model.
4.
Operate the controls on the transmitter once again to be sure
that the model responds correctly.
5.
Do not attempt to operate the model if there is any problem
with the radio system or any external interference with your
radio signal at your location.
• Higher Speeds Require Greater Distance
The faster you drive your model, the more quickly it will near the
limit of radio range. At 60mph, a model can cover 88 feet every
second! It’s a thrill, but use caution to keep your model in range.
If you want to see your model achieve its maximum speed, it
is best to position yourself in the middle of the truck’s running
area, not the far end, so you drive the truck towards and past
your position. In addition to maximizing the radio’s range, this
technique will keep your model closer to you, making it easier to
see and control.
No matter how fast or far you drive your model, always leave
adequate space between you, the model, and others. Never drive
directly toward yourself or others.
Using Reverse: While driving,
push the throttle trigger
forward to apply brakes.
Once stopped, return the
throttle trigger to neutral.
Push the throttle trigger
forward again to engage
proportional reverse.
TRAXXAS TQ 2.4GHz RADIO & VELINEON POWER SYSTEM
16
TR A X X AS
TQ 2.4GHz Binding Instructions
For proper operation, the transmitter and receiver must be
electronically ‘bound.’ This has been done for you at the factory.
Should you ever need to re-bind the system or bind to an
additional transmitter or receiver, follow these instructions.
Note: the receiver must be connected to a 4.8-6.0v (nominal) power
source for binding and the transmitter and receiver must be within
5 feet of each other.
1. Press and hold the transmitter’s SET button as you switch
transmitter on. The transmitter’s LED will flash red slowly.
Release the SET button
2. Press and hold the receiver’s LINK button as you switch on
the speed control by pressing the EZ-Set button. Release the
LINK button.
3. When the transmitter and receiver’s LEDs turn solid green, the
system is bound and ready for use. Confirm that the steering and
throttle operate properly before driving your model.
Steering Sensitivity (Exponential)
The Multi-Function knob on the TQ 2.4GHz transmitter has
been programmed to control Steering Sensitivity (also known
as exponential). The standard setting for Steering Sensitivity is
“normal (zero exponential),” with the dial full left in its range of
travel. This setting provides linear servo response: the steering
servo’s movement will correspond exactly with the input from
the transmitter’s steering wheel. Turning the knob clockwise from
the left will result in “negative exponential” and decrease steering
sensitivity by making the servo less responsive near neutral, with
increasing sensitivity as the servo nears the limits of its travel range.
The farther you turn the knob, the more pronounced the change
in steering servo movement will be. The term “exponential” comes
from this effect; the servo’s travel changes exponentially relative
to the input from the steering wheel. The exponential effect is
indicated as a percentage—the greater the percentage, the greater
the effect. The illustrations to the right show how this works.
Normal Steering Sensitivity (0% exponential)
In this illustration, the steering servo’s travel (and with it, the steering
motion of the model’s front wheels) corresponds precisely with the
steering wheel. The ranges are exaggerated for illustrative purposes.
Decreased Steering Sensitivity (Negative Exponential)
By turning the Multi-Function knob clockwise, the steering sensitivity
of the model will be decreased. Note that a relatively large amount of
steering wheel travel results in a smaller amount of servo travel. The
farther you turn the knob, the more pronounced the effect becomes.
Decreased steering sensitivity may be helpful when driving on low-
traction surfaces, when driving at high speed, or on tracks that favor
sweeping turns where gentle steering inputs are required.
The ranges are exaggerated for illustrative purposes.
Experiment! Try varying degrees of exponential. It’s easy to go back
to “zero” if you don’t like the effect. There’s no wrong way to adjust
exponential. Any setting that makes you more comfortable with
your car’s handling is the “right setting.”
Turning Range
at Transmitter
Effective Turning
Range on Model
TRAXXAS TQ 2.4GHz RADIO & VELINEON POWER SYSTEM
TRAXXAS
17
The electronic speed control is factory set and should not require any
adjustments. These instructions are provided for your reference.
Transmitter Adjustments for the electronic speed control
Before attempting to program your ESC, it is important to make
sure your TQ transmitter is properly adjusted (set back to the factory
defaults). Otherwise, you may not get the best performance from your
speed control.
The transmitter should be adjusted as follows:
If the transmitter setting have been adjusted, reset them to the factory
defaults.
1. Turn transmitter off.
2. Hold both MENU and SET.
3. Turn transmitter on.
4. Release MENU and SET. The transmitter LED will blink red.
5. Press SET to clear settings. The LED will turn solid green and the
transmitter is restored to default.
Setup Programming (Calibrating your ESC and transmitter)
Read through all of the following programming steps before you
begin. If you get lost during programming or receive unexpected
results, simply unplug the battery, wait a few seconds, plug the battery
back in, and start over.
1. Disconnect each of the motor wires between the ESC and the
motor. This is a precaution to prevent runaway when the speed
control is turned on before it is programmed.
2. Connect a fully charged battery pack to the ESC.
3. Turn on the transmitter (with the throttle at neutral).
4. Press and hold the EZ-Set button (A). The LED
will rst turn green and then red. Release the
EZ-Set button.
5. When the LED blinks RED ONCE.
Pull the throttle trigger to the
full throttle position and hold it
there (B).
6. When the LED blinks RED TWICE.
Push the throttle trigger to the
full reverse and hold it there (C).
7. When the LED starts ashing GREEN,
programming is complete. After the throttle is
returned to neutral, the LED will then shine solid
green or red (depending on the
Low-Voltage
Detection
setting, see note below) indicating the
VXL-3m is on and at neutral (D).
ESC Operation
Note: In steps 1-7 below, Low-Voltage Detection is turned off (factory
default) and the LED shines RED. If Low-Voltage Detection is on, the
LED will shine GREEN instead of RED in steps 1-7 below.
To operate the speed control and test the programming, place the
vehicle on a stable block or stand so all of the driven wheels are off the
ground. Reconnect the motor wires. Always make sure that objects and
ngers are clear of the wheels.
1. With the transmitter on, press the EZ-Set button for ½ second,
until the LED shines GREEN, then immediately release the button.
This turns on the ESC. If you press and release too quickly, you
may hear the steering servos jump but the LED may not stay on.
2. Apply forward throttle. The LED will turn off until full throttle
power is reached. At full throttle, the led will shine RED.
3. Move the trigger forward to apply the brakes. Note that braking
control is fully proportional. The LED will turn off until full
braking power is reached. At full brakes, the LED will shine RED.
4. Return the throttle trigger to neutral. The LED will shine RED.
5. Move the throttle trigger forward again to engage reverse
(Prole #1). The LED will turn off. Once full reverse power is
reached, the LED will shine RED.
6. To stop, return the throttle trigger to neutral.
7. To turn the ESC off, press the EZ-Set button until the RED LED
turns off.
VXL-3m Thermal Shutdown Protection
The
VXL-3m
is also equipped with thermal shutdown protection. If the
operating temperature exceeds safe limits, the ESC will reduce power
to 50% and the LED will ash red. Additional heating will cause the
speed control to shut down completely until it reaches a safe operating
temperature. Traxxas encourages you to stop driving as soon as the
thermal overload protection is activated.
ADJUSTING THE ELECTRONIC SPEED CONTROL
A
Green then Red
D
Solid
Once Red
B
Twice Red
C
VXL-3m LED codes
Solid Green: VXL-3m power on
light. Low-Voltage Detection is
ON (LiPo setting).
Solid Red: VXL-3m power on light.
Low-Voltage Detection is OFF
(NiCad/NiMH setting).
Fast Blinking Red: Thermal Shutdown
Protection Stage 1. If the motor has
lower than normal power and the VXL-3m
is hot, the VXL-3m has entered Stage 1
Thermal Shutdown Protection to guard
against overheating caused by excessive
currentow. If the motor has no power
and the VXL-3m is very hot, the VXL-3m
has entered Stage 2 Thermal Shutdown
Protection and has automatically shut
down. Let the VXL-3m cool. Make sure
your model is properly geared for the
conditions (see page 24).
Slow Blinking Red (with Low-Voltage
Detection on): The VXL-3m has entered
Low-Voltage Protection. When the
battery voltage begins to reach the
minimum recommended discharge
voltage threshold for LiPo battery packs,
the VXL-3m will limit the power output
to 50% throttle. When the battery
voltage attempts to fall below the
minimum threshold, the VXL-3m will
shut down all motor output. The LED on
the speed control will slowly blink red,
indicating a low-voltage shutdown. The
VXL-3m will stay in this mode until a fully
charged battery is connected.
Alternating; Blinks Red then Green: If
the motor has no power, the VXL-3m
has entered Over Voltage Protection.
If a battery with too high voltage is
used, the VXL-3m will go into a failsafe
mode. Warning: If input voltage exceeds
approximately 20 volts, the ESC may be
damaged. Maximum peak input voltage
limits are 12.6V in LiPo Mode (see page
18) and 18V in NiMH Mode.
Blinking Green: The VXL-3m is indicating
the transmitter Throttle Trim (see page
28) is incorrectly set. Adjust the Throttle
Trim to the middle “0” setting.
18
TR A X X AS
ESC Prole Selection
The speed control is factory set to Prole #1. To change the prole,
follow the steps on described on the next page. The speed control
should be connected to the receiver and battery, and the transmitter
should be adjusted as described previously. The proles are selected
by entering the programming mode.
ESC Prole Description
Prole #1 (Sport Mode): 100% Forward, 100% Brakes, 100% Reverse
Prole #2 (Race Mode): 100% Forward, 100% Brakes, No Reverse
Prole #3 (Training Mode): 50% Forward, 100% Brakes, 50% Reverse
Selecting Sport Mode (Prole #1)
1. Connect a fully charged battery
pack to the ESC and turn on
your transmitter.
2. With the ESC off, press and hold
the EZ-Set button until the light
turns solid green, then solid red
and then begins blinking red
(indicating the Prole numbers).
3. When the light blinks red once, release the EZ-Set button.
4. The light will then turn red and the model is ready to drive.
Selecting Race Mode (Prole #2)
1. Connect a fully charged battery
pack to the ESC and turn on
your transmitter.
2. With the ESC off, press and hold
the EZ-Set button until the light
turns solid green, then solid red
and then begins blinking red
(indicating the Prole numbers).
3. When the light blinks red twice, release the EZ-Set button.
4. The light will then turn red and the model is ready to drive.
Selecting Training Mode* (Prole #3)
1. Connect a fully charged battery
pack to the ESC
and turn on your transmitter.
2. With the ESC off, press and hold
the EZ-Set button until the light
turns solid green, then solid red
and then begins blinking red
(indicating the Prole numbers).
3. When the light blinks red three times, release the EZ-Set button.
4. The light will then turn red and the model is ready to drive.
Note: If you missed the mode you wanted, keep the EZ-Set button
pressed down and the blink cycle will repeat until a Mode is selected.
LiPo Battery Mode with Low-Voltage Detection
The VXL-3m ESC is equipped with built-in Low-Voltage Detection
for safe use with Lithium Polymer (LiPo) batteries. The Low-Voltage
Detection circuitry constantly monitors the battery voltage. When the
battery voltage begins to reach the minimum recommended discharge
voltage threshold for LiPo battery packs, the
VXL-3m
will limit the
power output to 50% throttle. When the battery voltage attempts to fall
below the minimum threshold, the
VXL-3m
will shut down all motor
output. The LED on the speed control will slowly blink red, indicating a
low-voltage shutdown. The
VXL-3m
will stay in this mode until a fully
charged battery is connected. The electronic speed control is factory
set with Low-Voltage Detection disabled. Be certain to activate Low-
Voltage Detection if you install LiPo batteries in your model.
To activate Low-Voltage Detection (LiPo setting):
1. Make sure the LED on the ESC is on and red.
2. Press and hold the EZ-Set button for ten seconds. The LED will
turn off and then light green. Also, a “rising” musical tone will be
emitted from the motor.
3. Low-Voltage Detection is now ACTIVATED.
To disable Low-Voltage Detection (NiMH setting):
1. Make sure the LED on the ESC is on and green.
2. Press and hold the EZ-Set button for ten seconds. The LED will
turn off and then light red. Also, a “falling” musical tone will be
emitted from the motor.
3. Low-Voltage Detection is now DISABLED.
Never use LiPo batteries while Low-Voltage Detection is disabled.
ADJUSTING THE ELECTRONIC SPEED CONTROL
*Patent-pending
Patent Pending Training
Mode (Prole #3) reduces
forward and reverse throttle
by 50%. Training Mode
is provided to reduce the
power output allowing
beginning drivers to better
control the model. As driving
skills improve, simply change
to Sport or Race Mode for
full-power operation.
Tip For Fast Mode Changes
The ESC is set to Prole 1
(Sport Mode) as the default.
To quickly change to Prole 3
(Training Mode), with the
transmitter on and the ESC
turned off, press and hold
the SET button until the light
blinks red three times and then
release. For full power, turn off
the ESC then quickly change
back to Prole 1 (Sport
Mode) by pressing and
holding the SET button until
the light blinks red one time
and then releasing.
Green to Red to Off
Release
One blink Red
Solid Red
Green to Red to Off
Release
Two blinks Red
Solid Red
Green to Red to Off
Release
Three blinks Red
Solid Red
TRAXXAS
19
DRIVING YOUR MODEL
Now it’s time to have some fun! This section contains instructions on
driving and making adjustments to your model. Before you go on, here
are some important precautions to keep in mind.
Allow the model to cool for a few minutes between runs. This is
particularly important when using high capacity battery packs that
allow extended periods of running. Monitoring temperatures will
extend the lives of the battery and motor.
Do not continue to operate the model with low batteries or you
could lose control of it. Indications of low battery power include
slow operation and sluggish servos (slow to return to center). Stop
immediately at the rst sign of weak batteries. When the batteries in
the transmitter become weak, the red power light will begin to ash.
Stop immediately and install new batteries.
Do not drive the model at night, on public streets, or in large crowds of people.
If the model becomes stuck against an object, do not continue to run
the motor. Remove the obstruction before continuing. Do not push or
pull objects with the model.
Because the model is controlled by radio, it is subject to radio
interference from many sources beyond your control. Since radio
interference can cause momentary losses of control, allow a safety
margin of space in all directions around the model in order to
prevent collisions.
Use good, common sense whenever you are driving your model.
Intentionally driving in an abusive and rough manner will only result
in poor performance and broken parts. Take care of your model so
that you can enjoy it for a long time to come.
High performance vehicles produce small vibrations which may
loosen hardware over time. Frequently check wheel nuts and other
screws on your vehicle to ensure that all hardware remains properly
tightened.
About Run Time
A large factor affecting run time is the type and condition of your
batteries. The milliamp hour (mAh) rating of the batteries determines
how large their “fuel tank” is. A 2000 mAh battery pack will theoretically
run twice as long as a 1000 mAh pack. Because of the wide variation in
the types of batteries that are available and the methods with which they
can be charged, it’s impossible to give exact run times for the model.
Another major factor which affects run time is how the model is driven.
Run times may decrease when the model is driven repetitively from a
stop to top-speed and with repetitive hard acceleration.
Tips for Increasing Run Time
Use batteries with the highest mAh rating you can purchase.
Use the included charger or a high-quality peak-detecting charger.
Read and follow all maintenance and care instructions provided by
the manufacturer of your batteries and charger.
Keep the ESC cool.
Get plenty of airow across the ESC heat sinks.
Lower your gear ratio. Installing smaller pinion gears will lower your
gear ratio and cause less power draw from the motor and batteries,
and reduce overall operating temperatures.
Maintain your model. Do not allow dirt or damaged parts to cause
binding in the drivetrain. Keep the motor clean.
mAh Ratings and Power Output
The mAh rating of the battery can effect your top speed performance.
The higher capacity battery packs experience less voltage drop under
heavy load than low mAh rated packs. The higher voltage potential allows
increased speed until the battery begins to become discharged
RUNNING IN WET CONDITIONS
The 1/16 Slash VXL 4WD and 1/16 E-Revo VXL are designed with water-
resistant features to protect the electronics in the model (receiver,
servos, electronic speed control). This gives you the freedom to have
fun driving your model through puddles, wet grass, snow, and other
wet conditions. Though highly water resistant, the model should not be
treated as though it is submersible or totally, 100% waterproof. Water
resistance applies only to the installed electronic components. Running
in wet conditions requires additional care and maintenance for the
mechanical and electrical components to prevent corrosion of metal
parts and maintain their proper function.
Precautions
Without proper care, some parts of your model can be seriously
damaged due to contact with water. Know that additional
maintenance procedures will be required after running in wet
conditions in order to maintain the performance of your model. Do
not run your model in wet conditions if you are not willing to accept
the additional care and maintenance responsibilities.
10
20
TR A X X AS
DRIVING YOUR MODEL
Not all batteries can be used in wet environments. Consult your
battery manufacturer to see if their batteries can be used in
wet conditions.
The Traxxas TQ transmitter is not water resistant. Do not subject it to
wet conditions such as rain.
Do NOT operate your model during a rain storm or other inclement
weather where lightning may be present.
Do NOT allow your model to come in contact with salt water (ocean
water), brackish water (between fresh water and ocean water), or
other contaminated water. Salt water is highly conductive and highly
corrosive. Use caution if you plan to run your model on or near a beach.
Even casual water contact can reduce the life of your motor. Special
care must be taken to modify your gearing and/or your driving style
in wet conditions to extend the life of the motor (details below).
Before Running Your Vehicle in Wet Conditions
1.
Consult the section “After Running Your Vehicle in Wet Conditions”
before proceeding. Make sure you understand the additional
maintenance required with wet running.
2.
The wheels have small holes molded in to allow air to enter and exit
the tire during normal running. Water will enter these holes and get
trapped inside the tires if holes are not cut in the tires. Cut two small
holes (4mm or 3/16” diameter) in each tire. Each hole should be near
the tire centerline, 180 degrees apart.
3.
Conrm that the receiver box O-ring and cover are installed correctly
and secure. Make sure the screws are tight and the blue O-ring is not
visible protruding from the edge of the cover.
4.
Conrm that your batteries can be used in wet conditions.
5.
Use lower gearing (smaller pinion gears) when running in mud, deep
puddles, snow, or other similar situations that will restrict the tires
and put much higher loads on the motor.
Motor Precautions
Motor life can be greatly reduced in mud and water. If the motor
get excessively wet or submerged, use very light throttle (run the
motor slowly) until the excess water can run out. Applying full
throttle to a motor full of water can cause rapid motor failure. Your
driving habits will determine motor life with wet motor. Do not
submerge the motor under water.
Do not gear the motor by temperature when running in wet
conditions. The motor will be cooled by water contact and will not
give an accurate indication of appropriate gearing.
After Running Your Vehicle in Wet Conditions
1. Drain the tires by spinning the tires at full throttle to “sling” the water
out. An easy way to do this is to remove the body and set the truck
upside down on a at surface. Apply full throttle so the tires spin and
throw the excess water out of the holes you cut into the tires.
2. Remove the battery.
3. Rinse excess dirt and mud off the truck with low-pressure water, such
as from a garden hose. Do NOT use pressure washer or other high-
pressure water. Avoid directing water into the bearings, transmission,
differentials, etc.
4. Blow off the truck with compressed air (optional, but recommended).
Wear safety glasses when using compressed air.
5. Remove the wheels from the truck
6. Spray all the bearings, drivetrain, and fasteners with WD-40
®
or similar
water displacing light oil
7. Let the truck stand or you may blow off with compressed air. Placing
the truck in a warm sunny spot will aid drying. Trapped water and oil
will continue to drip from the truck for a few hours. Place it on a towel
or piece of cardboard to protect the surface underneath.
8. As a precautionary step, remove the sealed receiver box cover. While
unlikely, humidity or tiny amounts of moisture or condensation may
enter the receiver box during wet running. This can cause long-term
problems with the sensitive electronics in the receiver. Removing
the receiver box cover during storage allows the air inside to dry. This
step can improve the long-term reliability of the receiver. It is not
necessary to remove the receiver or unplug any of the wires.
9. Additional Maintenance: Increase your frequency of disassembly,
inspection and lubrication of the following items: This is necessary
after extended wet use or if the vehicle will not be used for an
extended period of time (such as a week or longer). This additional
maintenance is needed to prevent any trapped moisture from
corroding internal steel components.
Stub axle housing bearings: Remove, clean, and re-oil the bearings.
Front and rear differential: Remove, disassemble, clean, and re-
grease the differentials. Refer to your exploded view diagrams for
help with disassembly and reassembly.
  • Page 1 1
  • Page 2 2
  • Page 3 3
  • Page 4 4
  • Page 5 5
  • Page 6 6
  • Page 7 7
  • Page 8 8
  • Page 9 9
  • Page 10 10
  • Page 11 11
  • Page 12 12
  • Page 13 13
  • Page 14 14
  • Page 15 15
  • Page 16 16
  • Page 17 17
  • Page 18 18
  • Page 19 19
  • Page 20 20
  • Page 21 21
  • Page 22 22
  • Page 23 23
  • Page 24 24
  • Page 25 25
  • Page 26 26
  • Page 27 27
  • Page 28 28
  • Page 29 29
  • Page 30 30
  • Page 31 31
  • Page 32 32

Traxxas E-Revo VXL Owner's manual

Category
Remote controlled toys
Type
Owner's manual

Ask a question and I''ll find the answer in the document

Finding information in a document is now easier with AI