Page is loading ...

Read Carefully – This instruction sheet contains vital informa-
tion for the proper installation, use, and efficient operation of the
heater described. Carefully read this manual before installa-
tion, cleaning, or operation of the heater. Failure to adhere to
the instructions could result in fire, electrical shock, death, seri-
ous personal injury, or property damage. Save these instruc-
tions and review frequently for continuing safe operation and
instructing future users.
CAUTION – TO REDUCE RISK OF FIRE AND ELEC-
TRIC SHOCK:
1. Disconnect all power coming to the heater at main service
panel before wiring, installing elements, servicing, or disas-
sembling heater.
2. All wiring must be in accordance with local and National
Electrical Codes and the heater must be grounded as a pre-
caution against possible electrical shock.
3. Verify the power supply voltage coming to the heater match-
es the rating printed on the elements before energizing.
4. Supply wire coming to the heater must be rated at least 90
degrees C. USE COPPER WIRE ONLY.
5.Minimum clearances, as specified in Figure 1, must be main-
tained. Keep combustible material, such as boxes, crates,
etc., away from heater.
6. This heater is not suitable for use in hazardous locations as
described by the NFPA. Do not use in areas where paint,
gasoline, or other flammable liquids are used or stored.
7. Do not use TYPE RP heaters in areas where corrosive
agents are present, such as marine, green houses, or chem-
ical storage areas. TYPE RS heaters are better suited for
these applications.
8. The mounting structure and anchoring hardware must be
capable of reliably supporting the total weight of the heater
and all accessories used. See selection chart for heater
weight.
9. This heater is intended for ceiling mounting (or wall mount-
ing, with accessory –WMB Wall Mounting Bracket) only.
Elements must be horizontal.
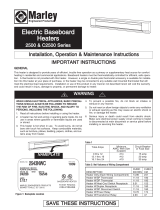
FIXTURE SELECTION CHART
( Enclosure only - Select Appropriate Element from Element Selection Chart )
Type RP3 & RS3
3 Element
Infrared Heaters
Installation Instructions
WARNING
!
SAVE THESE INSTRUCTIONS
REFLECTOR DESIGN DIMENSIONS
30 DEG. 60 DEG. 90 DEG. HEIGHT WIDTH LENGTH WT.
ENCLOSURE SYMMETRICAL ASYMMETRICAL SYMMETRICAL ASYMMETRICAL SYMMETRICAL in. (mm) in. (mm) in. (mm) lbs. (kg)
PAINTED STEEL RP323SA RP323ASA RP326SA RP326ASA RP329SA
24 (610) 19 (8.6)
STAINLESS STEEL RS323SA RS323ASA RS326SA RS326ASA RS329SA
PAINTED STEEL RP333SA RP333ASA RP336SA RP336ASA RP339SA
7.125 (181) 21.5 (546) 33 (838) 24 (10.9)
STAINLESS STEEL RS333SA RS333ASA RS336SA RS336ASA RS339SA
PAINTED STEEL RP343SA RP343ASA RP346SA RP346ASA RP349SA
46 (1168) 31 (14.1)
STAINLESS STEEL RS343SA RS343ASA RS346SA RS346ASA RS349SA

General
These heaters are designed for: Indoor chain or conduit
mounting, or outdoor conduit mounting. Not for recess instal-
lation. Element may be installed prior to mounting unit.
Mounting Limitations – Refer to Figure 1 for mounting lim-
itations. Observe all minimum dimensions from ceiling,
walls, floor, and combustible material.
Maintain minimum clearances of:
- 24" (610 mm) to vertical wall surfaces
- 36" (914 mm) between heaters mounted side by side.
Heaters may be mounted end to end.
- 6" (152 mm) to ceiling
- 84" (2134 mm) to floor
Refer to Figure 2. When heater is mounted the minimum dis-
tance to the wall, do not angle the heater toward the wall,
and do not direct an asymmetrical heater toward the wall.
Heaters are designed for mounting only with elements hori-
zontal, (for ceiling or wall mounting, used type RP–WMB or
type RS-WMB wall mounting bracket.)
Refer to front page for additional important safety instruc-
tions.
Chain Mounting (Indoor only)
Refer to Figure 3 and proceed as follows.
Conduit, connectors, chain loops, and hooks are supplied by
others in the following instructions.
1.Do not attach supplied mounting brackets.
2.Attach loop chains (not furnished) on each end of wire
cover as shown in Figure 3.
3.Attach chains (not furnished) to ceiling at desired height
above floor and connect to the center point of loop chains
on wireway cover.
4.Remove screws (see Figure 3) from front of wireway cover
and allow heater to rotate down for wiring.
5.Remove knockout from top or either end of wireway cover
and install conduit connector and conduit.
6.Route supply wire to heater.
7.Proceed to wiring section (see Figure 6).
Surface Mounting (Indoor or Outdoor)
Refer to Figure 4 and proceed as follows.
CEILING
(194 mm)
7.625"
15"
WALL
(381 mm)
FLOOR
(2134 mm)
MIN.
84"
KNOCK OUT
1/2"
11"
(279 mm)
(610 mm)
WALL
FLOOR
84"
MIN.
(
2134 mm)
24"
MIN.
CEILING
MIN.
(914 mm)
36"
WALL
FLOOR
CEILING
(152 mm)
6"
MIN.
(610 mm)
MIN.
24"
Figure 1
Do not direct
WALL
Wrong
asymmetrical beam
towards wall as shown
WALL
Do not
tilt heater
towards wall as shown
Wrong
Figure 2
2
Wireway cover
Remove
screws for wiring
s
Figure 3
screws for wiring
Remove
Wireway cover
(Typical 4 Locations)
Figure 4A
“A”
2.5
(64 mm)
Figure 4
MODEL “A” in. (mm)
RP32 / RS32 24.625 (625)
PR33 / RS33 33.625 (854)
RP34 / RS34 46.625 (1184)
21.5”
(
546mm)

Conduit, conduit connectors, and fasteners to secure heater
to ceiling are supplied by others in the following instructions.
1.On a workbench or other flat surface, attach mounting
brackets to ends of wireway cover (see Figure 4A) using
bolts, star washers, and nuts supplied.
2. Remove screws (see Figure 4) from front of wireway
cover, rotate wireway cover back, and remove from wire-
way base.
3.Mount wireway cover/mounting brackets to ceiling and
secure using fasteners (by others) sized to sufficiently
support heater and any optional accessories used.
4.Remove knockout from top or either end of wireway cover
and install conduit connector and conduit.
5. Route supply wire to heater.
6. Align "T" tabs on wireway base with slots in wireway cover
and hang heater assembly on wireway cover. Allow to
hang open.
7. Proceed to wiring section (see Figure 6).
Conduit Mounting (Indoor or Outdoor)
Refer to Figure 5 and proceed as follows.
Conduit and conduit connectors supplied by others in the fol-
lowing instructions.
1.Do not attach supplied mounting brackets.
2.Mount field supplied conduit to building structure, secure
using fasteners (by others) sized to sufficiently support
heater and any optional accessories used.
3.Route supply wire to heater.
4.Remove screws (see Figure 5) from front of wireway cover,
rotate wireway cover back, and remove from wireway
base.
5.Remove knockout from top of wireway cover and attach
wireway cover to conduit connector and conduit.
6.Align "T" tabs on wireway base with slots in wireway cover
and hang heater assembly on wireway cover. Allow to
hang open.
7.Proceed to wiring section (see Figure 6).
Wiring
Refer to Figure 6 and proceed as follows.
1.Connect heater wiring to power supply wiring as shown in
Figure 6.
2.Connect the power supply ground wire to the heater green
grounding lead wire.
3.Carefully fold the wires into the wiring compartment so
they will not be pinched by the wiring compartment cover.
4.Pivot the heater assembly until the wiring compartment
base rotates into place in the wiring compartment.
5.Secure the wiring compartment cover to the base with the
screws removed previously.
Installation of Quartz
Lamp Element
1.Remove terminal cover at each end of fixture to gain
access to terminal blocks. Loosen #10 hex nuts on termi-
nal studs. Then wrap element leads around terminals one
full turn as shown in Figure7. Tighten nuts, making sure
there is some slack in the lead after the attachment is
made. Cut off and discard extra wire.
3
screws for wiring
Remove
Wireway cover
Conduit &
Connector
1/4 (Min)
Solid Steel Rod
Typical 4 Places
Figure 5
1 2
4
6
5
3
SUPPLY POWER
ELEMENT 1
ELEMENT 2
ELEMENT 3
SINGLE PHASE
1 2
4
6
5
3
SUPPLY POWER
ELEMENT 1
ELEMENT 2
ELEMENT 3
THREE PHASE
Figure 7
Figure 8
Figure 6

Installation of Quartz
Tube Element
1.Remove terminal cover at each of fixture to gain access to
terminal blocks. Loosen #10 hex nuts and install element
as shown in Figure 8.
Installation of Metal
Sheath Element
1.Remove terminal cover at each end of fixture to gain
access to terminal blocks. Loosen #10 hex nuts, then
attach one end of element as shown in Figure 8. (Note for
33” and 46” length unit only: With one end of element
attached to terminal, slide insulator over metal sheath ele-
ment and attach opposite end of element.) Complete
assembly as shown in Figure 9 using bracket with one
mounting hole for outside reflectors and bracket with 2
mounting holes in center reflector.(Discard other brackets).
LIMITED WARRANTY
All products manufactured by Marley Engineered Products are warranted against defects in workmanship and materials for one
year from date of installation, except metal sheath elements which are warranted against defects in workmanship and materials
for five years and quartz tube / quartz lamps for two years from date of installation. This warranty does not apply to damage from
accident, misuse, or alteration; nor where the connected voltage is more than 5% above the nameplate voltage; nor to equipment
improperly installed or wired or maintained in violation of the product’s installation instructions. All claims for warranty work must
be accompanied by proof of the date of installation.
The customer shall be responsible for all costs incurred in the removal or reinstallation of products, including labor costs, and ship-
ping costs incurred to return products to Marley Engineered Products Service Center.Within the limitations of this warranty, inop-
erative units should be returned to the nearest Marley authorized service center or the Marley Engineered Products Service
Center, and we will repair or replace, at our option, at no charge to you with return freight paid by Marley. It is agreed that such
repair or replacement is the exclusive remedy available from Marley Engineered Products.
THE ABOVE WARRANTIES ARE IN LIEU OF ALL OTHER WARRANTIES EXPRESSED OR IMPLIED, ANDALL IMPLIED WAR-
RANTIES OF MERCHANTABILITY AND FITNESS FOR A PARTICULAR PURPOSE WHICH EXCEED THE AFORESAID
EXPRESSED WARRANTIES ARE HEREBY DISCLAIMED AND EXCLUDED FROM THIS AGREEMENT. MARLEY ENGI-
NEERED PRODUCTS SHALL NOT BE LIABLE FOR CONSEQUENTIAL DAMAGES ARISING WITH RESPECT TO THE PROD-
UCT, WHETHER BASED UPON NEGLIGENCE, TORT, STRICT LIABILITY, OR CONTRACT.
Some states do not allow the exclusion or limitation of incidental or consequential damages, so the above exclusion or limitation
may not apply to you. This warranty gives you specific legal rights, and you may also have other rights which vary from state to
state.
For the address of your nearest authorized service center, contact Marley Engineered Products in Bennettsville, SC, at 1-800-642-
4328. Merchandise returned to the factory must be accompanied by a return authorization and service identification tag, both avail-
able from Marley Engineered Products. When requesting return authorization, include all catalog numbers shown on the products.
Part No. 5200-2397-001 02/07
ECR 36934
EXCESS ELEMENT LEAD WIRES COULD COME IN CONTACT
WITH THE HEATER ENCLOSURE AND CREATE A SHOCK OR
FIRE HAZARD. CUT OFF ALL EXCESS LEAD MATERIAL.
WARNING
DO NOT HANDLE QUARTZ LAMP OR QUARTZ TUBE HEATING
ELEMENTS WITH BARE HANDS AS SALT IN PERSPIRATION MAY
DETERIORATE THE QUARTZ.
CAUTION
4
!
!
Figure 9
470 Beauty Spot Rd. East
Bennettsville, SC 29512 USA
HOW TO OBTAIN WARRANTY SERVICE AND
WARRANTY PARTS PLUS GENERAL INFORMATION
1. Warranty Service or Parts 1-800-642-4328
2. Purchase Replacement Parts 1-800-654-3545
3. General Product Information www.marleymep.com
Note: When obtaining service always have the following:
1. Model number of the product
2. Date of manufacture
3. Part number or description
/