Page is loading ...

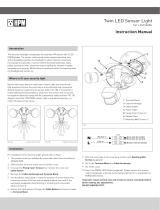
LED PIR Floodlight
Models:
STFL10PIRB
STFL20PIRB
STFL30PIRB
STFL50PIRB

1
1. General Information
These instructions should be read carefully and retained for further reference
and maintenance.
2. Safety
• Before installation or maintenance, ensure the mains supply to the luminaire
is switched off and the circuit supply fuses are removed or the circuit breaker
turned off.
• It is recommended that a qualified electrician is consulted or used for
the installation of this luminaire and install in accordance with the
current IEE wiring and Building Regulations.
• Check that the total load on the circuit including when this luminaire is fitted
does not exceed the rating of the circuit cable, fuse or circuit breaker.
3. Technical Specifications
• Energy Usage: 10kWh/1000h
• 230V AC, 50Hz
• These luminaires are of class I construction and must be earthed
• Colour Temperature: 4000K
• IP65 Rated suitable for restricted external applications
• Detection Angle: 110°
• Detection Range: Up to 10 metres
• Time On Adjustment: 3 seconds to 18 minutes
• Dusk Level Adjustment: Day and Night or Night only operation
STFL10PIRB
• 10W LED Non replaceable lamp
STFL30PIRB
• 30W LED Non replaceable lamp
• Energy Usage: 30kWh/1000h
• Lumen Output: 2700lm
STFL50PIRB
• 50W LED Non replaceable lamp
• Energy Usage: 50kWh/1000h
• Lumen Output: 4500lm
• Lumen Output: 900lm
STFL20PIRB
• 20W LED Non replaceable lamp
• Energy Usage: 20kWh/1000h
• Lumen Output: 1800lm
• Energy Efficiency: This product contains a light source of energy
effciency class: F

2
4. Installation Advice
As the detector responds to changes in temperature, avoid the following situations:
• Pointing the detector towards objects with highly reflective surfaces,
such as pools of water or white-painted walls.
• Mounting the detector near heat sources, such as heating vents,
air conditioning units, lights etc.
• Pointing the detector towards objects that may move in the wind,
such as curtains, tall plants etc.
• Recommended installation height is 2.5m above ground, the maximum
detection range about 10 m and at the angle of about 110°.
up to 10m
2m
110°
2m
2.5m
110°
up to 10m
up to 6m
2m
110°
Walk across
Walk towards

3
5. Installation Procedure
5.1 Mark the position of the mounting holes
on the wall using the U bracket supplied
as a template.
5.2 Drill the holes for the wall plugs ensuring
not to infringe with any gas/water pipes
or electrical cables that may be hidden
below the surface.
5.3 Fix the U bracket to the wall using
the correct screws for the wall
plugs installed.

4
6. Connection Diagram
7. Operation
• Turn the power on to the isolating switch and test for correct operation.
Connect the 3 core mains supply cable from the unit as follows:-LIVE (Brown or
Red) L
NEUTRAL (Blue or Black) N
EARTH (Green/Yellow) E
connect to main power
brown
blue
yellow & green
brown
blue
yellow & green
L
N
E

5
8. Walk Test and Adjustment
• The purpose of the Walk is used to test and adjust the detection coverage
of the floodlight under auto mode.
Test Procedure
• Adjust the Time knob to (fully anti-clockwise), and Lux knob is set to the
‘Sun’ setting.
• Switch the power On.
• Walk across the detection area, once to detector is triggered the lamp
will turn ON for 2 seconds.
Note walking direction when performing test.
3 sec 18 min
3
18

6
• The detector head can be turned 90°
left or right by hand, and can be
tilted 70° downward.
Tilt upward 70°
Tilt downward 70°
Tilt
upward
40°
Tilt downward 70° Pan right 90°
Pan left 90°

7
Knob Settings
The floodlight has two adjustment knobs:
Time and Lux at the bottom of the detector head.
• Adjust the knobs carefully with flat blade screwdriver.
TIME knob setting
• Adjust the knob as desired.
LUX knob setting
• When setting the Lux knob at ‘MOON’, the floodlight
will only operate in the dark.
• When setting the Lux knob at ‘SUN’, the floodlight
will operate in any light level.
• You can set the time knob from 3 seconds to about 18
minutes, the floodlight will switch the lamp ON, for the time
duration set after each detected movement.
3 sec 18 min
3
18

8
9. Manual Override Mode
The light can be switched on for longer time periods by use of the
Manual Override Mode. This can be activated at night by using
the internal wall switch or circuit breaker.
• The unit will now illuminate continuously for 6 hours, then switched
back into Auto Mode.
• Switch the internal wall switch/circuit breaker once (OFF/ON)
within 2 seconds.
• To switch the unit back into Auto Mode, switch the internal wall switch/circuit
breaker once (OFF/ON) within 2 seconds. The unit will operate as set up after
the walk test procedure.
Activation
within 2s
AutomodeDeactivation
6hr
or
within 2s

9
Lamp stays ON all
the time at night.
The unit may be suffering from false activation.
Cover the sensor lens completely with a thick cloth.
This will prevent the sensor from ‘seeing’ anything.
If the unit now switches off after the set time duration
and does not re-activate, this indicates that the problem
was caused by false activation.
PIR keeps activating
for no reason/
at random.
You may not be allowing the unit time to complete its
warm-up period. Stand well out of the detection range
and wait (the warm-up period should never exceed
5 minutes).
Occasionally, winds may activate the sensor.
Sometimes passages between buildings etc. can cause
a ‘wind tunnel’ effect.
Ensure the unit is not positioned so as to allow detection
of cars/people using public thoroughfares adjacent to
your property.
PIR sensor will not
operate at all.
Check that the power is switched ON at the circuit
breaker/internal wall switch.
Turn OFF the power to the unit and check
the wiring connections as per the diagram.
Ensure no connections are loose.
The PIR sensor will
not operate at night.
The level of ambient light in the area may be too bright
to allow operation at the current DUSK setting.
During the hours of darkness, adjust the DUSK control
slowly clockwise until the lamp illuminates.
Refer to the previous section for more details.
10. Troubleshooting Guide

01
PIR coverage is
poor/sporadic.
Unit may be poorly located. See previous section –
‘Selecting The Location’ and re-locate the unit.
Detection range
varies from day
to day.
PIR sensors are influences by climatic conditions.
The colder the ambient temperature, the more effective
the sensor will be.
The floodlight
will only activate
for a maximum
of 15 seconds
when in normal
operating mode.
The floodlight could be affected by its own light output.
Tilt the PIR sensor further downwards and away from
the floodlight. Once the floodlight has settled into the
new time settings, re-angle the PIR sensor back to your
desired position.
Unit activates during
the daytime.
The level of ambient light in the area may be too dark
for the current DUSK setting. During daylight, adjust the
DUSK control slightly anti-clockwise. When the lamp
turns off, enter the detection area. If the PIR still activates,
the setting is still too high. Repeat the above procedure
until the PIR does not activate when you enter the
detection area. Refer to the previous section for
more details.

11
2 Year Guarantee
In the unlikely event of this product becoming faulty due to defective material or
manufacture within 2 years of the date of purchase, please return it to your supplier
in the first year with proof of purchase and it will be replaced free of charge.
For year 2 or any difficulty in the first year, telephone the helpline on 020 8450 0515.
Note: A proof of purchase is required in all cases. For all eligible replacements (where
agreed by Timeguard) the customer is responsible for all shipping/postage charges
outside of the UK. All shipping costs are to be paid in advance before a replacement
is sent.

Deta Electrical Co Ltd
Panattoni Park, Luton Road,
Chalton, Bedfordshire, LU4 9TT
Sales Office: 020 8452 1112
or email csc@timeguard.com
www.timeguard.com
67.058.711 - Issue 3
TW - August 2023
/