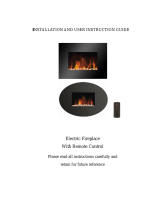
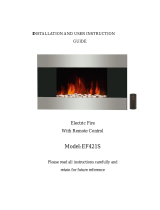
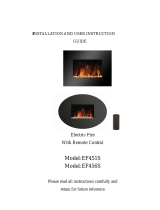
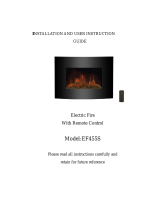
Page is loading ...

INSTALLATION & USER INSTRUCTIONS
All instructions must be handed to the user for
safekeeping.
MODELS COVERED BY THESE INSTRUCTIONS
LIBRA ELECTRIC EF451SLB
WALL MOUNTED ELECTRIC FIRE
Please note : Except where otherwise stated, all rights,
including copyright in the text, images and layout of this
booklet is owned by Focal Point Fires plc. You are not per-
mitted to copy or adapt any of the content without the
prior written permission of Focal Point Fires plc.
1
Revision B - 04/13
© 2013 Focal Point Fires plc.
LIBRA ELECTRIC
GB IE
Focal Point Fires plc.
Christchurch, Dorset BH23 2BT
Tel: 01202 499330
Fax: 01202 499326
www.focalpointfires.co.uk
e : sales@focalpointfires.co.uk

IMPORTANT: THESE INSTRUCTIONS SHOULD BE READ CAREFULLY AND
RETAINED FOR FUTURE REFERENCE.
When using this electrical appliance, basic precautions should be followed to reduce the risk of fire, electric shock and injury to person, including the following:
• This heater must be used on an AC supply only and the voltage marked on the heater’s rating label must correspond to the supply voltage.
•
DO NOT switch the appliance on until it is properly installed as described in this manual.
• The heater must not be located immediately below a socket outlet.
• Keep furniture, curtains and other fabric material at least 1 metre away from the appliance.
•
DO NOT leave the appliance unattended during use.
• This appliance is intended for household use and should not be used for industrial purposes.
• From time to time, check the cord for damage. Never use the appliance if the cord or any part of the appliance shows signs of damage. A damaged cord
must only be replaced by a qualified person.
•
DO NOT operate this appliance with a damaged plug or cord, after a malfunction or after being dropped or damaged in any way.
• Repairs to electrical appliances should only be performed by a qualified electrician. Improper repairs may place the user at serious risk.
•
DO NOT run the mains cable under carpets, rugs etc.
•
DO NOT cover or obstruct the heater in any way. Overheating will result if it is accidentally covered.
• Never immerse the product in water or any other liquids.
•
DO NOT use this heater where it may come into contact with water e.g. in bathrooms, shower rooms etc.
•
DO NOT use the appliance outdoors.
• Before cleaning the appliance, ensure it is unplugged from the power and that it is completely cool.
•
DO NOT clean the appliance with abrasive chemicals.
• Never use accessories that are not recommended or supplied by the manufacturer. It could cause danger to the user or damage to the appliance.
• This appliance is not intended for use by persons (including children) with reduced physical, sensory or mental capabilities, or lack of experience and knowl-
edge unless they have been given supervision or instruction concerning use of the appliance by a person responsible for their safety.
• Children should be supervised to ensure that they do not play with the appliance.
•
DO NOT lift the appliance by the front panel.
•
CAUTION!In order to avoid a hazard due to inadvertent resetting of the thermal cut out, this appliance must not be supplied through an exter-
nal switching device such as a timer or connected to a circuit that is regularly switched on and off by the utility.
•
DO NOT insert or allow foreign objects to enter the inlet or outlet vents as this may result in electric shock, fire or damage to the appliance.
•
DO NOT install the fire using an extension cord.
• Unplug from the mains supply if the appliance is not to be used for long periods.
•
WARNING! This heater is not equipped with a device to control the room temperature. Do not use this heater in small rooms when they are
occupied by persons not capable of leaving the room on their own, unless constant supervision is provided.
WARNING!
Children of less than 3 years should be kept away unless continuously supervised. Children aged from 3 years and less
than 8 years shall only switch on/off the applaince provided that it has been placed or installed in its intended normal operating position and
they have been given supervision or instruction concerning use of the appliance in a safe way and understand the hazards involved. Children aged
from 3 years and less than 8 years shall not plug in, regulate and clean the appliance or perform user maintenance.
The appliance is supplied with a pre-wired three pin plug, (13Amp fuse rated), and 2 metres of electrical cable. It is therefore necessary for a
suitable electrical socket to be located within this distance and be easily accessible. This appliance is designed to be wall-hung, using the wall
fixtures/fixings provided. DO NOT recess any part of appliance into the wall.
I N S TA L L AT I O N & U S E R I N S T R U C T I O N S
' 2013 Focal Point Fires plc.
2
GB IE
Section Contents Page No.
1.0 Important Notes 2
2.0 Installation Requirements 2
3.0 Appliance Data 2
4.0 Unpacking the Appliance 3
5.0 Component Checklist 3
6.0 Site Requirements 3
7.0 Clearances to Combustibles 3
Section Contents Page No.
8.0 Fixing the Appliance 3
9.0 Fitting the Frame and Fuel Bed 4
10.0 Operating the Appliance 4
11.0 Safety Cut-Out System 5
12.0 Cleaning and Maintenance 5
13.0 Spares 5
1.0 IMPORTANT NOTES
2.0 INSTALLATION REQUIREMENTS
3.0 APPLIANCE DATA
Supply Voltage: 220/240V AC, 50Hz Fuse Rating: 13 Amp
Heating Elements: 1800W Lighting: LED bulbs

Read all the instructions before continuing to unpack or install this appliance. Carefully remove the appliance from its packaging and lay on the
floor with it`s back surface downward. Note: DO NOT stand the appliance on its frame as this may cause distortion. Check that the remaining
packaging contents correlate with the component checklist below. Please dispose of all packaging with care at your local recycling centre.
QUANTITY DESCRIPTION
1 Wall Heater
1 Decorative Facia
1 Instruction Booklet
1 Remote Control
1 Pack of Fixing Screws and Wall Plugs
1 Wall Mounting Bracket
1 Pack of Pebbles
This appliance is designed to be wall mounted using the mounting bracket and fixings provided. The wall should be relatively flat and not inter-
fere with any of the ventilation slots in the rear panel.
The wall must be structurally sound and of a material capable of withstanding moderate heat. Finished plaster, conventional wallpaper, dry-lined
plaster board are examples of suitable materials. Materials such as flock, blown vinyl, embossed paper and cloth wall coverings which are sensi-
tive to even small amounts of heat should be avoided, as some discolouration may occur.
It should be noted that the appliance creates warm convected air currents. These currents move heat from the room surroundings to, and up
the wall surfaces adjacent to the heater.
Installing the heater next to these types of wall coverings or operating the heater where impurities in the air, (such as tobacco smoke) exist,
may slightly discolour wall finishing.
If the appliance is to be mounted on a dry lined or timber framed construction then the integrity and ability of the wall to carry the weight of
the appliance must be confirmed. It is important in these circumstances that any vapour barrier and/or structural members of the house frame
are not damaged.
If you are unsure of the ability of the wall to carry the weight and/or which type of wall fixing to use, you should take professional advice and
obtain the correct fixings. Alternatively, find a more suitable wall location.
DO NOT - mount on a ceiling or floor.
- recess any part of the appliance into the wall.
- site any electrical equipment e.g. plasma screen TV sets etc,
on the wall above the appliance, unless a suitable heat deflector has been fitted.
- site in a position where curtains or drapes could cover the appliance.
- site in a position where other soft materials could cover e.g. below a coat rack.
- site behind an opening door where mechanical impact/damage could occur.
- site where the supply cable would become a trip hazard.
- sit, stand or forcefully pull on the appliance.
- obstruct, cover or force items into the openings.
- use the heater to dry clothes.
- site/use in an outdoor location(s).
- run the supply cable under carpets.
It is important that the following clearances are maintained from the appliance to combustible
materials. These clearances are dependant on the mounting location as defined below:
The minimum distance from the top of the appliance to a ceiling is 1000mm.
The minimum distance from the bottom of the appliance to the floor is 100mm.
The minimum distance to the sides of the appliance is 100mm.
The minimum distance to the front of the applaince is 500mm.
CAUTION: DO NOT CONNECT THE APPLIANCE TO THE
ELECTRICAL SUPPLY AT THIS TIME.
Focal Point Fires plc. assumes absolutely no responsibility for injuries and damages that may occur due to improper installation or handling. The
appliance should not be installed until all wet plastering and/or dry wall sanding and wall painting has been completed. Do not block the ven-
tilation holes of the appliance. The wall onto which the appliance is installed must be flat. Install only on a vertical surface. Avoid sloped sur-
faces. Installation onto anything other than a vertical wall may result in fire, damage or injury.
6.0 SITE REQUIREMENTS
7.0 CLEARANCES TO COMBUSTIBLE MATERIALS
' 2013 Focal Point Fires plc.
3
Figure 1
100
660
520
95
4.0 UNPACKING THE APPLIANCE
5.0 COMPONENT CHECKLIST
GB IE
8.0 FIXING THE APPLIANCE

4
8.0 FIXING THE APPLAINCE - CONTINUED
GB IE
' 2013 Focal Point Fires plc.
For optimum viewing, mark the top four screws fixing positions on wall in accordance with
the recommend fixing dimensions- see figure 2.
NOTE: Ensure that the bracket is level by using a Spirit level whilst marking out the hole posi-
tions.
Drill holes with a 5mm drill bit. Fix the wall bracket using the plugs and screws provided.
Attach the lower fixing bracket to the base of the fire using the two small black screws sup-
plied; ensure the bracket is fitted so that it is level with the back.
Carefully lift the heater up ensuring that the top rear ledge of heater engages with the wall
bracket (see figure 2 in circle) and is sitting centrally. This process should be carried out by
two people to avoid injury or damage to property or the appliance.
Gently bring the heater down against the wall.
Mark the lower fixing bracket two fixing hole positions on the wall (see figure 3), remove the
heater.
Drill the wall and insert the wall plugs.
Refit the heater to the wall and fasten the bottom fixing bracket to the wall using the screws
provided to permanently fix the heater in place.
Unpack the pebbles from the bag and place them along the light unit in the desired position.
Place the front surround over the front of the fire aligning the slots in the brackets at each
side of the front panel with the lugs on the sides of the fire. See figure 4.
Again two people will be required for this operation.
READ ALL INSTRUCTIONS BEFORE USE!
Check that the heater outlet grille, mounted at the top of the appliance, is not covered or obstructed in any way, and ensure the power to the
fire is switched on.
Manual Operation
• The switches located at the top right hand side of the fire .The standby switch must be first switch on.
• Press once the O/I button to turn on the appliance and fire effect. A red indicator light will appear to indicate that the function is ON. Press
the O/I button for 3 seconds this will operate the dimmer mode. There are 5 levels flame brightness available.
• Press once the POWER button for the low heat settings 900W, a red indicator light will appear to indicate the function; press twice for high
heat settings 1800W, a red indicator light will appear to indicate the function; press third to switch off the heat setting.
• Press BACKLIGHT button to operate backlight function. 7 colors backlights available.
Remote Operation
• The standby switch located at the top right hand side of the fire must be first switch on..
• It takes some time for the receiver to respond to the transmitter. Do not PRESS the buttons more than once within two seconds for cor-
rect operation.
• Press once the button ON/OFF on the remote control this turns ON/OFF the appliance and fire effect.
• Press once the 900W/1800W button for the low heat settings 900W, a red indicator light on manual operation panel will appear to indicate
the function; press twice for the high heat settings 1800W, a red indicator light on manual operation panel will appear to indicate the function;
press third to switch off the heat setting.
• Press BACKLIGHT button to operate backlight function. 7 colors backlights available.
• Press the DIMMER button for operate the dimmer mode. There are 5 levels flame brightness available.
10.0 OPERATING THE APPLIANCE
Figure 4
Figure 2
460
160
1045
Figure 3
9.0 FITTING THE FRAME AND FUEL BED

This appliance is fitted with a safety cut-off which will operate if the fire overheats (e.g. due to blocked air vents). For safety reasons, the fire
will NOT automatically reset.
To reset the appliance, disconnect the appliance from the mains supply for at least 15 minutes. Reconnect to the mains supply and switch on
the appliance.
ALWAYS DISCONNECT THE APPLIANCE FROM THE MAINS SUPPLY OUTLET
SOCKET BEFORE UNDERTAKING ANY CLEANING OR MAINTENANCE!
Warning: Before any maintenance and/or cleaning the exterior of the fireplace, disconnect the unit form the power supply and leave until cooled
off.
For general cleaning use a soft clean duster - never use harsh abrasive or cleaners.
The glass viewing screen should be cleaned carefully with a soft cloth. DO NOT use proprietary glass cleaners.
• Remote control battery replacement: this remote control uses 2x1.5V AAA battery. Make
sure the batteries are installed correctly in the remote control.
• This product does not use a standard bulb for its flame effect. The appliance uses an electronically controlled LED system to create the flame
effect therefore no parts need to be replaced. There are no user-serviceable parts on this appliance. Under no circumstances should the appli-
ance be serviced by any one other than a qualified electrician.
Electrical Connections - Plug Wiring Instruction
If the plug has to be changed, please follow the wiring instructions shown below.
The wires in the mains lead are coloured in accordance with the following code:
BROWN : LIVE (L)
BLUE : NEUTRAL (N)
GREEN/YELLOW : EARTH (E)
If the colours of the wires in the mains lead of this appliance do not correspond with the
coloured markings identifying the terminals in your
plug, then wire the plug as follows:
• The BLUE wire is the NEUTRAL and must be connected to the terminal which is marked
with the letter N or coloured BLACK.
• The BROWN wire is the LIVE and must be connected to the terminal that is marked with
the letter L or coloured RED.
• The wire which is coloured GREEN/YELLOW must be connected to the terminal which is
marked E or the earth symbol or coloured GREEN or GREEN/YELLOW.
• Always ensure that the cord grip is positioned and securely fastened.
WARNING: THIS APPLIANCE MUST BE EARTHED.
If a 13A (BS1363) fused plug is used it must be fitted with a BS1362 13A fuse.
If in doubt consult a qualified electrician.
Refer to Section 3.0 Appliance Data for lamp and fuse specification. Excluding lamps and fuses, use only genuine manufacturers spare parts avail-
able from your supplier.
11.0 SAFETY CUT-OUT SYSTEM
GB IE
5
' 2013 Focal Point Fires plc.
12.0 CLEANING AND MAINTENANCE
Figure 5
13.0 SPARES
As our policy is one of continuous improvement and development, we therefore hope that you will understand we must retain the right to amend details and/or specifica-
tions without prior notice.
Waste electrical products should not be disposed of with household waste. Please recycle where facilities exist. Check with your local authority or retailer for recycling advice.
F861106
/
