Page is loading ...

WARNING: OPERATOR MUST READ AND UNDERSTAND THIS MANUAL
COMPLETELY BEFORE OPERATING THIS EQUIPMENT.
Flood Pump System
OPERATORS MANUAL AND PARTS LIST
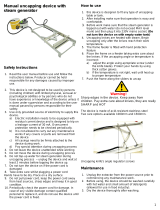
Model PF85 and PF85DX
X9209 12-05
READ ALL INSTRUCTIONS BEFORE OPERATING
Shown With Optional Wand
X9209 Manual 12/12/05 9:34 AM Page 1

Save These Instructions 2
DANGER: Improper use of the
grounding plug can result in a risk of
electric shock.
GROUNDING INSTRUCTIONS
GROUNDING METHODS
This flood pump must be properly grounded. If it should
malfunction or breakdown, grounding provides a path of
least resistance for electrical current to reduce the risk of
electric shock. This machine is equipped with a pigtail
cord having an equipment-grounding conductor and
grounding plug. The pigtail must be inserted into an
appropriate 12 gauge 3 prong extension cord.
WARNING!
Improper connection of the equipment-grounding conduc-
tor can result in a risk of electric shock. Check with a qual-
ified electrician or service person if you are in doubt as to
whether the outlet is properly grounded. DO NOT modify
the plug provided with the appliance. If it will not fit the out-
let, have a proper outlet installed by a qualified electrician.
IMPORTANT SAFETY PRECAUTIONSIMPORTANT SAFETY PRECAUTIONS
WWAARRNNIINNGG!!:: To reduce the risk of fire, electric shock, or injury
When using this floor pump, basic precautions should always be fol-
lowed, including the following:
1) DO NOT leave unit when plugged in. Unplug from
outlet when not in use and before servicing.
2) Close attention is necessary when used around
or near children.
3) Use only as described in this manual. Use only
manufacturer’s recommended attachments.
4) DO NOT use with damaged cord or plug. If unit is
not working properly because it has been dropped,
dropped into water, left outdoors, or damaged in any
way, contact a service center of Powr-Flite.
5) DO NOT handle plug or appliance with wet hands.
6) DO NOT pick up anything that is smoking or
burning such as cigarettes, matches, or hot ashes.
7) DO NOT use to pick up hazardous chemicals.
8) Turn off all controls before unplugging.
9) DO NOT use to pick up flammable or combustible liq-
uids such as gasoline or use in areas where they may
be present.
10) DO NOT use where oxygen or anesthetics are used.
11) Replace damaged or worn parts immediately with gen-
uine original equipment parts to maintain safety.
12) This unit must be connected to a properly grounded
outlet only.
13) If foam or liquid leaks from appliance, switch
off immediately.
WARNING
To avoid fire, DO NOT
use with a flammable
or combustible liquid
to clean floor.
WARNING
To avoid electric
shock, DO NOT
expose to rain.
Store Indoors.
This unit is for use on a nominal 120 volt circuit and has a
grounded plug that looks like the plug illustrated in (Fig. A).
X9209 Manual 12/12/05 9:34 AM Page 3

3Save These Instructions
Flood Pump System
DO NOT OPERATE MACHINE UNTIL
YOU HAVE READ THIS SECTION.
IMPROPER USE OF THE FLOOD PUMP
WILL VOID THE WARRANTY
1. Never operate the pump without first removing the cap on
the pump-out fitting and connecting the dump hose.
2. Keep filter clean. Do not operate machine if filters
are clogged.
3. All extension cords must be at least 12 gauge, three wire
and no longer than 50 ft.
4. Always use a defoamer when excessive foaming occurs
to prevent damage to vacuum motors.
5. Keep the machine, tools, and hoses from extremes in
temperature. Do not allow the machine, tools or hoses
to freeze.
GENERAL INSTRUCTIONS
INSPECTION:
Carefully unpack and inspect the PF85DX for shipping dam-
age. Each machine is tested and inspected before shipment.
Any damage incurred during shipping is the responsibility of
the carrier, who should be notified immediately.
OPERATION
Prior to each job, inspect the recovery tank inlet filter. The filter
should be thoroughly cleaned after each use. Do not operate
the machine without the filter in place, damage to the vacuum
motor and pump can occur.
1. Unscrew the discharge connector on the front of the machine.
Connect a standard garden hose to the discharge connector.
Place the opposite end of the hose outside or to a drain that
will handle large volumes of water.
CAUTION: Check hose connection regularly to make sure it is
securely fastened. The pump discharges water at high pres-
sure. If the hose should come loose, water in the hose will con-
tinue to flow until the suction is decreased.
2. Attach a wand or hand tool to the intake hose.
3. Connect an extension cord to the pig tail on the back of the
machine and plug into a grounded circuit.
4. Turn the ON/OFF switch on the vacuum motors and pump to
the on position. Do not turn the vacuum motors on with the
hose submerged in water. The vacuum motor must have air-
flow for proper use.
CAUTION: Never turn the pump on before uncapping the dis-
charge fitting and connecting the hose. Failure to do so may
result in internal plumbing leaks and could damage compo-
nents. Do not let the pump run dry for long periods of time.
X9209 Manual 12/12/05 9:34 AM Page 4

Save These Instructions 4
Flood Pump System
5. Begin vacuuming the water. The pump will automatically dis-
charge water when the water level reaches the proper height in
the recovery tank. If the water level falls too low. The pump will
automatically shut off to prevent itself from running dry.
CAUTION: Check the recovery tank for excessive foam while
operating. Foam could result in motor damage.
6. When the recovery tank is full, the float system will shut off
power to the vacuum motor and prevent water from entering
the motor. The float may not work properly if it is extremely
dirty or if there is excessive foam in the tank. Once the tank
is sufficiently emptied, the vacuum will automatically come
back on.
MAINTENANCE
To keep the machine in good working condition, maintenance
procedures should be followed after each use.
CAUTION: When servicing machine turn the power off and
unplug the machine from the
wall outlet.
1. Drain and flush the recovery
tank, intake hoses, and any
wand or hand tool used with
clean water. Make sure the
discharge connector is
closed.
2. Thoroughly clean the inlet basket filter.
3. Inspect power cords for damage. Replace damaged cords and
plugs immediately. Do not use the machine with a damaged
cord or plug.
4. Inspect vacuum hoses for holes and loose cuffs.
5. Clean machine housing with an all purpose cleaner and damp
cloth.
6. Inspect the machine for leaks and loose hardware.
7. Lubricate wheels and casters with oil or grease .
STORING
1. Machine should be completely empty and dry
before storing.
2. Store machine in a dry area in the upright
position.
3. Open recovery tank cover to promote
air circulation.
CAUTION: Do not expose to rain or
freezing temperatures, store indoors.
TROUBLESHOOTING
PROBLEM CAUSE SOLUTION
Poor pick up. Inlet basket filter is clogged. Clean filter.
Loose drain hose connection. Tighten drain hose.
Loose recovery tank lid. Position the lid correctly.
Damaged hose. Replace hose.
Vacuum motor does Unplugged cord. Check connection to pigtail and wall
not operate. Faulty switch or loose wiring. Contact Service Center.
Tripped building circuit breaker. Reset breaker.
Defective vacuum motor. Contact Service Center.
Discharge pump does Unplugged cord. Check connection to pigtail and wall
not operate. Faulty pump switch. Contact Service Center.
Tripped building circuit breaker. Reset breaker.
Defective pump motor. Contact Service Center.
Amount of discharge Worn impeller.Contact Service Center.
water dwindles.
X9209 Manual 12/12/05 9:34 AM Page 5

5Save These Instructions
ITEM PART # DESCRIPTION
01 72620A Base
02 72633A Axle, 23.375” Long
03 X9066 Wheel, 12” x 1.75”
04 7GL002 Push Nut, 1/ 2”
05 7CM007 Washer, 1/ 2 USS Flat
06 72635A Spacer, 1/ 2” ID x 3/ 4”
07 72641A Gasket, VAC Manifold, Short
08 72630A Cover, Vacuum Maniflod, Flat
09 70020B Gasket, Vacuum Motor Seal
10 X9204 Rod, 10-24, “T” Bolt
11 72605A Spacer, 1/ 8
12 7BF030 nut, 10-24 nylon Insert Lock,
13 72365A Vacuum Motor, 3-Stage
14 7CM003 Washer, #10 USS Flat
15 7BF003 Nut, kep, #10-24 Zinc
16 72000A Rod, 3/16 x 5-1 /2
17 7CM002 Screw, #6x3/ 4 Phil Pan TS
18 72662A Screw, #10 x 1/ 2”
19 72661A Wand holder
20 X9157 Cover, Pressure Regulator
21 72636A Cover Plate, Bottom
22 72388A Screw, #10 x 5/8, 5/8
23 PX65 Caster, 4” black
ITEM PART # DESCRIPTION
24 7DT001 Screw, 5/16- 18 x 5/8
25 Px154 Garden Hose Fitting
26 PX153 Nipple, 1/ 2 NPT x 1- 1/ 2”
27 X8239 Washer, 1/ 2 USS Flat Zinc
28 PX152 Coupling, 1/ 2 NPT
29 PC25 1/ 2” to 1/ 2” male / Male
30 72665A Insert, Tee Nut
31 72642A Gasket, VAC Manifold, Circle
32 72625A Cover, Vacuum Manifold
33 X9069+ End Loop, SS, W/ 2 holes
34 71644A Screw, #10 x 1 Phil Head TS
35 72667A Washer, Rubber, .29 ID,
36 X9199 Pump, Self-priming Impeller
37 7BF004 Nut, Kep, 1/ 4 -20 Zinc
38 7DL008 Clamp, 1/ 2” Worm Gear
39 70079C Hose, 1 /2” Wire Reinforced
40 71237A Bracket, Motor Mount, S-V
41 7GF033 Pad, Motor Mount
42 X8268 Bolt, 1 /4-20 x 3/ 4, Hex Tap
43 X9014 Hinge
44 7BS003 Screw, 1 /4-20 x 1 /2
45 7CY006 Washer, #8 Internal Tooth
46 71743A Screw, 8-32 x 3/ 16 PHMS
ITEM PART # DESCRIPTION
47 72702A Cover, Pan
48 72703A Screw, 8-32 x2” L
49 72142A Plug, 7/8 Black Nylon
50 PD8 Strain Relief, 1/ 2” NPT
51 7CF010 Circuit Breaker, 8A, PF85DX
70768D Circuit Breaker 3A, For PF85
52 PX87 Rocker Switch, DPST, 20A
53 X9173+ Hole Plug, Switch Hole
54 72116A Switch Cover, Black
55 72387A Screw, #8 x 5/8, Black
56 Px112 Pigtall, Black
57 72632B Switch Panel, With Fan
58 X8008N Nut, Lock, 1/ 2” Steel Conduit
59 X8151B Plug, Plastic, Black
60 72684A Screw, 1/ 4 -20 x 2 1/ 2’ Phil
61 X8260 Nut, 8-32 Lock
62 X9168 Spacer, Pad Hinge
63 72700A Fan, Cooling, 115V, 92MM
64 72699A Foam, Switch Panel
65 FP8 Cap with Chain
66 X9253 Pump, Impeller 5GPM
67 71507A Elbow 1 /2H -1/ 3MPT
68 71379A Relay, 120V 25A
Flood Pump System
X9209 Manual 12/12/05 9:34 AM Page 6

ITEM PART # DESCRIPTION
01 72619A Tank, Recycling, New Pro
02 PX25 Fitting, Plastic Bulkhead
03 72656A Hose, 1-1 /2 Wire
04 7DL005 Clamp, 1-1 /2 Worm Gear
05 X9224 Adapter, 1/ 2 to 1/ 4 NPT
06 X9014 SCE Tank Hinge
07 7BS003 Screw, 1/ 4 -20 x 1 /2” NPT
08 PD8 Strain Relief, 1 /2” NPT
09 72274A Washer, 3/ 4” Neoprene
10 PX48 Fitting, Brass, Bulkhead, 3 /4”
11 7AT004 Barb, 1/ 2 Hose, 1/ 4 Male
12 72660A Rope
13 72388A Screw, #10 x 5/8
14 72631A Latch Bracket
15 X9223 Inlet Fitting Assembly
16 PX14A Dump Valve Gasket
ITEM PART # DESCRIPTION
17 7BH004 Screw, 10-32 x 3 /8
18 72713A Spring Clip
19 71495 Pump protection Filter
20 72326A Inlet Filter
21 X9221 Hold-Down Latch
22 72323B Gasket, Lid 43”
23 72321A Lid, Tank
24 X9236 Filter, VAC inlet Protection
25 71644A Screw, #10x1- 1/ 4”
26 X9213 Float Switch
27 X8154 Pipe, PVC
28 PX48G Gasket, Filte
29 PX14 Dump Valve Gasket
30 PX33 Vacuum Tube
31 72615A Coupling, PVC, 1- 1 /2”
32 PX63 Coupler, Plastic, 1-1 /2” Slip
ITEM PART # DESCRIPTION
33 X8235 Washer, 1/ 4” Flat, USS Zinc
34 72486A Spacer, 1.625
35 72679A Gasket, Drain Inner
36 72680A Gasket, Drain Outte
37 PAS37+ Drain Hose
38 PAS36+ Expansion Plug Drain
39 72678A Tubing, Vinyl, 1 ID, 1-1 /4 OD
40 72677A Drain Fitting, 1”
41 72645A Bolt, 5/16-18x 2-1 /4, Hex
42 X8025+ Wheel, Black, 4” x 1-1 /4”
43 X9239+ Elbow, PVC, 1 /2 NPT
44 70343A Float Switch, Pump.
45 71328A Shield Float Switch
46 7AJ004 Bulkhead 5/8
47 72115A Wahser seal
Save These Instructions 6
Flood Pump System
X9209 Manual 12/12/05 9:34 AM Page 7

AT
acony Company
3101 Wichita Court • Ft. Worth, TX 76140-1755
800.880.2913
Conditional Guarantee
The manufacturer warrants that products manufactured are free from defects in material and workmanship under nor-
mal use and service for a period of one year from date of purchase provided such goods are installed, operated and main-
tained in accordance with written manuals and/or other instructions on housings and parts and workmanship, two years
on motor. We will repair or replace without cost, any part of the unit, which when examined by our authorized repair sta-
tion or at our factory, is found to be legitimately defective. This guarantee is null and void on any part which has been
subject to alteration, accident, abuse or misuse. The guarantee is valid only to the original using purchaser.
X9209 Manual 12/12/05 9:34 AM Page 8
/