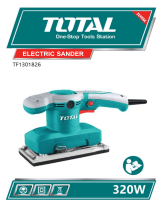
TROSLI2001

Total TROSLI2001, TROSLI2001 20V Battery Orbit Sander Owner's manual

  • Hello! I am an AI chatbot trained to assist you with the Total TROSLI2001 Owner's manual. I’ve already reviewed the document and can help you find the information you need or explain it in simple terms. Just ask your questions, and providing more details will help me assist you more effectively!
  • What safety precautions should be taken when using the sander?
    How do I attach the sandpaper to the sanding base?
    Is it mandatory to use the dust bag with the sander?
    How often should I empty the dust bag?
    How do I turn on and off the sander?
1
v
BATTERY ORBIT SANDER
2
Security instructions
Caution
Read all safety warnings and all instructions. Failure to follow the warnings and
instructions may result in electric shock, fire, and/or serious injury.
Note: Save all warnings and instructions for future reference. Due to the continuous R+D+I
development of the brand, this manual and the technical specifications may undergo changes
without prior notice.
1) Work area safety
a. Keep the work area clean and well lit to prevent accidents.
b. Do not use power tools in explosive atmospheres, such as in the presence
of flammable liquids, gases, or dust that can cause fires.
c. Keep children and other unauthorized persons away while using a battery
tool. Distractions can cause you to lose control of the tool.
2) Electrical safety
a. Charger plugs must match the outlet. Never modify the plug in any way.
Using a suitable plug reduces the risk of electric shock.
b. Avoid bodily contact with grounded surfaces such as pipes, radiators,
ranges, and refrigerators. There is an increased risk of electric shock if
your body is grounded.
c. Do not expose tools to rain or wet conditions. Water entering a battery-
powered tool will increase the risk of electric shock.
d. Never use the cord to carry, pull, or unplug the charger from the tool. Keep
the cable away from heat or oil.
e. If using the tool in a damp location is unavoidable, use a Residual Current
Device (RCD) protected supply to reduce the risk of electric shock.
f. Make sure the mains voltage is the same as the voltage on the tool's
nameplate. Remove plug from outlet before making any adjustments or
servicing.
3) Personal security
a. Always stay alert, watch what you are doing and use common sense
when using the tool.
b. Do not use a battery tool if you are tired or under the influence of
medication or other substances.
c. Wear personal protective equipment. Always wear eye protection.
Protective equipment such as a dust mask, non-slip safety shoes, hard
hat, or hearing protection used in the proper conditions will reduce
personal injury. Also don't wear loose clothing or jewelry.
d. Prevent the tool from turning on unintentionally. Make sure the switch is
in the off position before connecting to power source and moving.
e. Remove any adjusting wrenches or wrenches before turning on the
battery tool. An adjustable wrench or wrench placed in a rotating part of
the battery tool can cause serious injury.
f. If devices are used for dust extraction and collection, make sure they are
properly connected. Properly use these devices and you will reduce dust-
3
related hazards. Contact or inhalation of these dusts can endanger the
health of the operator and bystanders.
4) Use and care of battery tools
a. Recharge the battery only with the charger specified by the manufacturer.
An unsuitable charger can create a fire hazard.
b. Use power tools only with specifically designated batteries. Use of other
batteries may create a risk of injury or fire.
c. When the batteries are not in use, keep it away from other metal objects,
such as paper clips, coins, keys, nails, screws, or other small metal
objects, that can make a connection from one terminal to another.
Shorting the battery terminals can cause burns or fire.
d. Abusive conditions can cause expulsion of liquid from the battery; avoid
contact. If accidentally contacted, rinse immediately with water. If the
liquid comes into contact with the eyes, also seek medical help. Liquid
expelled from the battery can cause irritation or burns.
e. Do not use a battery or tool that is damaged or modified. They may exhibit
unpredictable behavior resulting in fire, explosion, or risk of injury.
f. Do not expose a battery or tool to fire or excessive heat. Exposure to fire
or temperature above 130°C may cause an explosion.
g. Follow all charging instructions. Do not charge the battery or tool outside
the temperature range specified in the instructions. Improper charging or
charging at temperatures outside the specified range may damage the
battery or increase the risk of fire.
5) Service
a. Have your battery tool serviced by a qualified person and use
replacement parts recommended by the manufacturer. This will ensure
the safety of the battery tool is maintained.
4
Safety rules for correct use
Double insulation for additional protection.
Please read the instruction manual before use.
CE conformity.
Wear safety glasses, hearing protection and a dust mask.
Waste from battery-
powered products must not be disposed of with
household waste. Please recycle at the appropriate facilities. Check with
your local authority or retailer for recycling advice.
Security alert. Use only accessories supported by the manufacturer.
For indoor use only.
Batteries can enter the water cycle if not disposed of properly, which can
be dangerous for the ecosystem. Do not dispose of batteries as unsorted
municipal waste.
Do not expose the battery and tool to fire or high temperatures.
Lithium ion battery. Battery packs can be dangerous for the environment
and human health as they contain hazardous substances. They must be
recycled properly to reduce the impact on the environment.
Fuse
positive terminal
negative terminal
RCM mark
5
Additional security warnings
Use the machine for dry sanding only. Never use this sander for wet sanding or
liquid polishing. Failure to follow this rule may result in risk of electric shock.
The penetration of water into the machine increases the risk of electric shock.
Apply the machine to the workpiece only when it is turned on and turn the
machine off only after it has been lifted from the workpiece. The battery tool can
move suddenly.
Never touch sandpaper during operation, risk of injury.
Make sure the work piece is firmly supported to prevent it from moving.
Never stop the sander by applying force to the base plate.
Use only sandpaper in good condition. Do not use torn or worn sandpaper.
Do not sand materials that may cause health problems or fire or other hazards
(such as magnesium, asbestos, lead-based paint, etc.).
Keep your attention on the work and the tool at all times.
Do not allow people to enter the work area without wearing adequate PPE.
Whenever possible, seal off the work area to contain dust for later disposal.
Remove the battery pack before performing any maintenance or adjustments on
the machine.
Always inspect and remove all nails, screws, etc. of the wood before sanding.
Avoid overheating the object being sanded as well as the sander.
Always empty the dust collector after and before each use.
Under unfavorable conditions such as when sparks are emitted when sanding
metals, sanding debris in the dust bag, microfilter or paper bag can self-ignite.
Particularly when mixed with remains of varnish, polyurethane or other chemical
materials and when sanding residues are hot after long periods of work.
Other risks
Even when the battery tool is used as prescribed, it is not possible to eliminate all residual
risk factors:
a. Health defects resulting from vibration emission if the battery tool is used for a
longer period of time or if it is not managed and maintained properly.
b. Injuries and property damage due to broken fixtures breaking suddenly.
Caution
This battery-powered tool produces an electromagnetic field during operation.
This field can, in some circumstances, interfere with active or passive medical
implants.
To reduce the risk of serious injury, we recommend that people with medical implants
consult their physician before using this battery-powered tool.
If the charger cable is damaged or cut during charging, do not touch the cable,
immediately unplug the charger.
The machine must not be damp and must not be used in a humid environment.
6
Attention
Safe operation of this machine is only possible when the operating or safety
information is fully read and the instructions contained therein are strictly
followed.
Technical data
Data sheet
Voltage
20V
No load speed
10000/min
Orbital sanding base
125mm
Product description
1. ON/OFF switch
2. Handle
3. Dust collection bag
4. Rotary sanding base
5. dust collector
6. sandpaper
The machine is designed for dry
sanding of wood, plastic, metal,
filler material and coated surfaces.
Machines with electronic speed
control are also suitable for finer
sanding.
Note: Not all accessories illustrated or
described need to be included in the
standard delivery.
Note 2: Double insulation: The tool is
double insulated. This means that all
external metal parts are electrically isolated from the mains. This is done by placing
isolation barriers between electrical and mechanical components, making it
unnecessary to ground the tool.
Assembly and operation
Mounting
Mounting the sandpaper (see fig. A)
Remove dust or other objects from the sanding base and sandpaper.
7
The sandpaper has dust extraction holes, you need to align them with the holes
on the sanding base, otherwise the dust extraction will not work.
Dust Bag Assembly
Attaching the dust bag (see fig. B)
Always use your sander with the dust bag attached.
To attach, fit the dust bag onto the tool.
Caution
To avoid the possibility of sanding dust or a foreign body getting in your face or eyes,
never attempt to use the sander without the dust bag properly installed. Also, use the
appropriate PPE for this type of sanding work.
Empty the dust bag (see fig. C1, C2)
For the most efficient operation, empty the dust bag every 5-10 minutes.
To empty the dust bag, pull out the dust bag and shake out the dust.
Battery Pack Installation and Release
Slide the fully charged battery pack into the tool with light pressure until it clicks
into position. (see figure D1)
Firmly press the battery pack release button first, and then slide the battery pack
out of your tool. (see figure D2)
8
Set up
ON/OFF switch (see fig. E)
To turn on your sander, press the protective cover over the switch indicated by
the "I" mark.
To stop your sander, press the protective cover indicated by the "0" mark.
Note: Before using the tool, please read the instruction book carefully.
Surface sanding
Place the machine with the full sandpaper on the surface to be worked on.
Ensure even sanding pressure:
Less sanding pressure increases sanding capacity and protects the machine and
sanding tool.
Sanding capacity and pattern are primarily determined by sandpaper selection
(grit size), sanding pad spin speed, and applied pressure.
Coarse sanding
Place coarse grit sandpaper in the machine.
Apply only light sanding pressure to achieve greater stock removal.
Fine sanding
Put a fine grit sandpaper on the machine.
Using moderate pressure, move the machine in a circular pattern or alternately
in the longitudinal and transverse directions over the work piece.
Do not tilt the machine to avoid sanding through the workpiece (eg when sanding
sheet metal).
After finishing work, turn off the machine and lift it off the workpiece.
Orbital sanding
Guide your sander parallel to the work surface and move it in circles or in a cross
pattern.
Do not pick up the tool to avoid unwanted deep sanding marks.
The amount of material removed is determined by the speed of the sanding disc
and the grit size used.
The speed of the sanding disc decreases in relation to the pressure applied to
the tool.
For faster removal, don't increase the pressure on the tool, but use a coarser grit
size.
9
Select the correct grit grade of sandpaper
Different grits of sandpaper can be used differentiating between coarse, medium
and fine.
Use coarse grits for rough finish sanding, medium grits for smooth work, and fine
grits for finishing.
The higher the grade number, the finer the grain. For rough work, start with a low
grit grade (e.g., 60 grit) and move to a higher, finer grade (e.g., 120 grit) for
finishing. If you use a fine grade for rough surfaces, it will soon clog and need to
be replaced.
It is best to do a test run on a piece of scrap material to determine the optimum
grades of sandpaper for a particular job.
Work tips
If your battery tool gets too hot, especially when used at low speed, set the speed
to maximum and let it run without load for 2-3 minutes to cool down the motor.
Avoid prolonged use at very low speeds. Always use sandpaper suitable for the
material you want to sand.
Always make sure the workpiece is securely supported to prevent movement of
the workpiece.
Any movement of the material can affect the quality of the sanding finish.
Turn your sander on before sanding and turn it off only after you stop sanding.
For best results, sand the wood in the direction of the grain.
Do not start sanding without sandpaper in place.
Do not allow the sandpaper to wear away as it will damage the base. The
warranty does not cover the wear of the base.
Use coarse grit paper for sanding rough surfaces, medium grit for smooth
surfaces, and fine grit for final surfaces. If necessary, carry out a test with scrap
material first.
Use only replacement parts and accessories approved by the manufacturer.
The sandpaper controls the efficiency of the sanding, not the amount of force you
apply to the tool. Excessive force will reduce sanding efficiency and cause motor
overload. Replacing sandpaper regularly will maintain optimum sanding
efficiency.
Attention
1. At all times, let the sander do the work; do not force or apply excessive pressure
to the sander. Preferably use a light circular motion. Pressing too hard will slow
down the movement of the machine and affect the quality of work by reducing
tool life.
2. If the sandpaper absorbs too much wax, it won't last as long and polishing will be
harder and take longer. If the wax seems hard to buff, you may have used too
much wax.
3. If the sandpaper keeps coming off the base, try a new one.
Maintenance and cleaning
Attention
Remove the battery pack from the tool before performing any adjustments, service, or
maintenance.
10
Maintenance
Your battery tool requires no additional lubrication or maintenance. There are no
user serviceable parts in your battery tool.
Always store your battery tool in a dry place.
Keep the motor ventilation slots clean.
Keep all work controls free of dust.
If you see sparks in the ventilation slots, this is normal and will not harm your
battery tool.
If the charger power cord is damaged, it must be replaced with a special cord or
assembly available from the manufacturer or its service agent.
Always store your battery tool in a dry place.
Cleaning
Keep tool air vents unclogged and clean at all times.
Never use water or chemical cleaners to clean your battery tool. Clean with a dry
towel.
Remove dust and dirt regularly. Cleaning is best done with a soft brush or cloth.
If the body of the sander needs to be cleaned, wipe it with a soft, damp cloth. A
mild detergent can be used, but nothing like rubbing alcohol, gasoline, or other
cleaning agents.
Never use caustic agents to clean plastic parts.
Water must not come into contact with this tool.
Problem solving
If your tool does not work, check to see if the battery is charged and properly
fitted to the tool.
If the sander does not abrade the surface, check the sandpaper. If the sandpaper
has worn off, replace with new paper and try again. The paper should be kept in
a dry place, if it is allowed to get wet the abrasive particles will lose their adhesion
to the backing paper and will not wear off.
If the bottom of the sander does not move smoothly, the sandpaper may be loose,
damaged, or wrinkled. Replace and try again.
If after checking these recommendations it still does not work, take it to a Total
Authorized Service Center.
Environment
Do not dispose of electrical appliances as unsorted municipal waste, use
separate collection facilities.
Contact your local authority for information on available collection systems.
If electrical appliances are disposed of in landfills, hazardous substances can
seep into the groundwater and enter the food chain, harming your health and
well-being.
Recycle raw materials instead of disposing of them as waste.
11
The machine, accessories and packaging must be sorted for environmentally
friendly recycling.
Plastic components are labeled for categorized recycling.
Exploded view
12
BATTERY ORBIT SANDER
/