Page is loading ...

KMC
MEDIA CENTER
Owner’s Manual
KMC100
KMC MULTI-MEDIA RECEIVER WITH USB,
BLUETOOTH and SiriusXM-Ready™

2
KMC100
Owner’s Manual
Media Center
Multi-Media Receiver w/ USB, Bluetooth and SiriusXM-Ready™
Thank you for purchasing the KMC100 Media Center. We recommend
reading through the entire manual for detailed instructions on how to install
and operate the unit. For support please call: 1-800-844-2774
Purchase Date:
Serial Number:
SiriusXM Radio ID:
(SiriusXM® Connect Tuner sold separately)
ITEMS INCLUDED:
(1) KMC100 (1) Trim Ring (1) Wiring Harness (1) UV Cover
(1) Mounting Gasket (1) Owner’s Manual
FCC Compliance Statement
This equipment has been tested and found to comply with the limits for a
Class B digital device, pursuant to part 15 of the FCC Rules. These limits are
designed to provide more reasonable protection against harmful interference
in a residential installation.
Operation is subjected to the following two conditions: (1) This device may
not cause harmful interference, and (2) the device must accept any interference re-
ceived, including interference that may cause undesired operation.
This equipment generates, uses, and can radiate radio frequency energy
and, if not installed and used in accordance with the instructions, may cause
harmful interference to radio communications. However, there is no guarantee that
interference will not occur in a particular installation. If this equipment does cause
harmful interference to radio or television reception, which can be determined by turn-
ing the equipment off and on, you are encouraged to try to correct the interference by
one of the following measures:
• Reorient or relocate the receiving antenna.
• Increase the separation between the equipment and receiver.
• Connect the equipment into an outlet on a circuit different from that to which the
receiver is connected.
• Consult the dealer or an experienced radio/TV technician for help
Changes or modications not expressly approved by the party responsible for compli-
ance could void the user’s authority to operate the equipment.
The equipment should be installed and operated with minimum distance 20cm between
the radiator & your body.
CE
Operation temperature: (-25°C~55°C )
Bluetooth: 2402-2480MHz
Bluetooth transmitter power: 4.33dBm
Hereby declares that this equipment is in compliance with essential requirements and
other relevant provisions of Directive 2014/53/EU.
All radio frequencies can be used in all EU member safe without restrictions.

3
KMC100
Installation Overview
3” Hole Cutout
1- Red, Switched 12V+
2- White/Blk, Left Front Spkr, Negative
3- White, Left Front Spkr, Positive
4- Orange, Dimmer
5- Grey/Blk, Right Front Spkr, Negative
6- Grey, Right Front Spkr, Positive
7- Blue/Wht, Amp Turn-on
8- Green/Blk, Left Rear Spkr, Negative
9- Green, Left Rear Spkr, Positive
10- Black, Ground
11- Purple/Blk, Right Rear Spkr, Negative
12- Purple, Right Rear Spkr, Positive
1- RGB Black +12v
2- RGB Red GND
3- RGB Green GND
4- RGB Blue GND
1- Zone 2 Brown/Blk, Right Negative
2- Zone 2 Brown, Right Positive
3- Zone 2 Pink/Blk, Left Negative
4- Zone 2 Pink, Left Positive
1
2
3
4
5
6
7
8
9
10
11
12
13
14
15
16
1. Main Harness
2. Zone 2 Harness
3. RGB Input Harness
4. USB Port
5. NMEA Port
6. SiriusXM Port
7. Digital Remote Port
8. Antenna Input
9. Remote Port
10. Video RCA Input
11. Reverse Trigger Wire
12. AUX Input
13. Front RCA Output
14. Rear RCA Output
15. Subwoofer RCA Output
16. Zone 2 RCA Output
5.5”
3.5”

4
OPERATION
The button layout below will give you a quick overview of the button functionality.
BUTTONS:
1 - Source
2 - Favorites
3 - Menu
4 - Back/Return
5 - Seek/Tune Down
6 - Play/Pause
7 - Seek/Tune Up
8 - Volume Knob
Function: How To:
Power On Hold the Source (1) button for 2 seconds.
Power Off Hold the Source (1) button for 2 seconds.
Volume Up Turn the knob (8) clockwise.
Volume Down Turn the knob (8) counter-clockwise.
Seek Up Press Seek Up (7) once.
Seek Down Press Seek Down (5) once.
Tune Up Hold down Seek Up (7).
Tune Down Hold down Seek Down (5).
Enter/Select Press the Knob (8) inward once.
Pause/Play Press Play/Pause (6) once.
Mute Press Play/Pause (6) once.
Back Press Back (4) once.
1
2
3
8 4 5 6 7
DISPLAY
KMC100 Settings MENU
To enter the Settings Menu : Hold the MENU (3) button for 2 seconds.
Rotate the knob to scroll between menu items and press enter on knob
to select.
Available Settings are:
Day/Night:
The Day/Night feature allows you to change the color scheme from Day
Mode to Night Mode. The unit is defaulted to auto switch when your lights
are turned on. In order for the unit to automatically switch between day
and night modes, the orange illumination wire must be connected. You can
also set the unit to stay in either Day mode or Night mode by rotating the
knob and selecting the desired setting.
Dimmer:
The Dimmer allows you to adjust the brightness of the screen, and buttons.
You can adjust the brightness from 0 to +12.
Low Battery Alert:
The Low Battery Alert setting allows you to turn ON/OFF the Low Battery
Alert. When set to ON, if the unit drops below 10.5V, the unit will display a
visual and audible alert warning that your batteries need charged.
Tuner:
Allows you to change the region for the tuner.
Your available options: USA, EUROPE

5
OPERATION
KMC100 Settings MENU Cont.
Zone 2:
The Zone 2 feature gives you the ability to have a secondary volume control.
Within Zone 2 there are 4 additional settings:
High Pass Crossover:
Adjusts the high-pass crossover for internal channels and Front, Rear,
Zone 2 RCA outputs.
Your available options: OFF, 50Hz, 80Hz, 120Hz.
Loudness:
Turns the loudness setting ON/OFF.
Voltmeter:
Turns the voltmeter display ON/OFF.
ON/OFF:
Allows you to turn the 2nd Zone volume control ON and OFF.
NAMING:
Allows you to change the Zone 2 name.
Your available options: Zone 2, Tower, Transom, Cockpit, Interior.
Control:
Allows you to select which connection is controlled by the Zone 2 volume.
a. Internal Power- Zone 2 internal channels are controlled by Zone 2 volume.
Zone 2 RCA is controlled by Zone 1 volume.
b. Preamp- Zone 2 RCA is controlled by the Zone 2 volume. Zone 2 internal
channels are controlled by Zone 1 volume.
c. Both- Zone 2 internal channels and Zone 2 RCA are controlled by Zone 2
volume.
Absolute/Relative:
The Absolute and Relative setting for Zone 2 change the behavior of the Zone
2 volume control with regard to the main zone volume.
a. Relative- When the main zone volume is increased or decreased, Zone 2
volume will adjust up or down accordingly.
b. Absolute- When the main zone volume is increased or decreased, Zone 2
volume will remain at the same level until adjusted independently.

6
Sources
To change any of the sources, press the Source button on the KMC100.
Rotating the knob left or right will scroll through the available sources and
pressing enter will select the source.
FM Source:
AM Source:
Weatherband (WX) Source:
USB Source:
Function: How To:
Seek Up: Press the Seek Up (7) button once.
Seek Down: Press the Seek Down (5) button once.
Tune Up: Hold the Tune Up (7) button for 2 seconds. Then press (7) once.
Tune Down: Hold the Tune Down (5) button for 2 seconds. Then press (5) once.
Mute: Press the Play/Pause button.
Function: How To:
Seek Up: Press the Seek Up (7) button once.
Seek Down: Press the Seek Down (5) button once.
Tune Up: Hold the Tune Up (7) button for 2 seconds. Then press (7) once.
Tune Down: Hold the Tune Down (5) button for 2 seconds. Then press (5) once.
Mute: Press the Play/Pause button.
Function: How To:
Seek Up: Press the Seek Up (7) button once.
Seek Down: Press the Seek Down (5) button once.
Tune Up: Hold the Tune Up (7) button for 2 seconds. Then press (7) once.
Tune Down: Hold the Tune Down (5) button for 2 seconds. Then press (5) once.
Mute: Press the Play/Pause button.
Function: How To:
Next Track: Press the Seek Up (7) button once.
Previous Track: Press the Seek Down (5) button once.
Fast Forward: Hold the Tune Up (7) button.
Rewind: Hold the Tune Down (5) button.
Pause: Press the Play/Pause button.
OPERATION
AUX Input Source:
Function: How To:
Mute: Press the Play/Pause button.
Bluetooth Source:
Function: How To:
Next Track: Press the Seek Up (7) button once.
Previous Track: Press the Seek Down (5) button once.
Pause: Press the Play/Pause button.
Bluetooth Device Name: Media Center. There is no password required.
SiriusXM Source:
Function: How To:
Channel Up: Press the Seek Up (7) button once.
Channel Down: Press the Seek Down (5) button once.
Fast Browse Up: Hold the Tune Up (7) button.
Fast Browse Down: Hold the Tune Down (5) button.
Mute: Press the Play/Pause button.
The SiriusXM source allows you to access SiriusXM satellite radio. SiriusXM
Connect Tuner and subscription required and sold separately.

7
OPERATION
FAVORITES
Camera/Video Input
The Favorites button will allow you to view and set your favorite station from the
following sources: FM - AM - WX - SXM 16 favorites can be set.
This feature allows you to connect an external camera or video source and view
it though the KMC100. A reverse trigger is provided to activate the camera
when putting the vehicle in reverse or you may select the video input manually.
The reverse trigger is a +12v trigger.
Setting a Favorite
1. Select the station you wish to add to the favorites list.
2. Press the Favorites button and select the Favorites preset you wish to set.
3. Press and Hold the knob (8) button for 2 seconds to set.
Entering Video Input Manually
1. Press and Hold the Favorites button to display the connected device on
the screen.
2. Press and Hold the Favorites button to exit the video input mode.
Audio Settings
Audio Settings Cont.
Audio Menu: Press the knob for 2 seconds from any source screen to enter the
Audio Settings Menu. Rotating the knob left and right will scroll between the
available settings. Pressing the knob will select highlighted setting.
Equalizer: When the EQ is ON, Bass, Mid & Treble controls are not
accessible. The KMC100 has the following preset options for the EQ:
OFF - ROCK - POP - JAZZ - CUSTOM. Rotating the knob left and
right to scroll between the options and press knob (8) to select. To en-
able Bass, Mid & Treble controls, EQ must be set to OFF.
Bass: Rotate the knob left and right to adjust the Bass. Pressing
enter will conrm setting. Adjustment is from -6 to +6.
Mid: Rotate the knob left and right to adjust the Midrange.
Pressing enter will conrm setting. Adjustment is from -6 to +6.
Treble: Rotate the knob left and right to adjust the Treble. Pressing
enter will conrm setting. Adjustment is from -6 to +6.
Balance: Rotate the knob left and right to adjust the Balance. Pressing
enter will conrm setting. Adjustment is from Left 6 to Right 6.
Fader: Rotate the knob left and right to adjust the Fader. Pressing
knob (8) will conrm setting. Adjustment is from Front 6 to Rear 6.
Sub: Rotate the knob left and right to adjust the Subwoofer level.
Pressing enter will conrm setting. Adjustment is from 0 to +12.
When using the CUSTOM EQ you can adjust the following frequencies:
50Hz - 125Hz - 250Hz - 500Hz - 1kHz - 3kHz - 8kHz
In each of these frequencies you can adjust the values from -6 to 6.

8
Source Specic Menus Source Specic Menus Cont.
Press and release the Menu button while in the following sources will bring
up Source Specic Menu items: WX - USB - BT - AUX - SiriusXM. Rotate
the knob to adjust the settings and press enter to conrm.
WX Menu:
Auto-Alert On and OFF - this feature will automatically interrupt any source
and tune to Weatherband for an alert message.
USB Menu:
BROWSE: Displays all les/folders available for playback. Rotate the knob
to scroll through the items and press knob (8) to begin playback of selected
track.
REPEAT: Allows you to select Repeat for Current Playlist or Repeat Off.
SHUFFLE: Allows you to turn Shufe tracks for Current Playlist,
All Tracks or Off.
DME: Digital Music Enhancer. This feature will enhance the sound quality
of compressed music les. Setting is ON/OFF.
OPERATION
BLUETOOTH Menu:
ENTER PAIRING MODE: Places the device in to pairing mode.
Device Name: Media Center
In order to pair your phone to the Media Center you must:
1. Make sure the Bluetooth is turned “ON”, on your device.
2. Search for “Media Center”.
3. Connect/ Trust the device to begin streaming music.
(No password required)
Select Device: Allows you to view all paired devices and select the device
you wish to use for playback.
Disconnect Current Device: Disconnects the current paired device and
connects to the next device on the list.
Delete Device: Allows you to view all paired devices and select the device
you wish to delete.
Delete All Devices: Deletes all stored Bluetooth® devices from memory
and puts the unit into pairing mode.

9
OPERATION
ENTER PAIRING MODE: Places the device in to pairing mode.
Device Name: Media Center
In order to pair your phone to the Media Center you must:
1. Make sure the Bluetooth is turned “ON”, on your device.
2. Search for “Media Center”.
3. Connect/ Trust the device to begin streaming music.
(No password required)
SiriusXM® Radio Operation
Only SiriusXM® brings you more of what you love to listen to, all in one place. Get over
140 channels, including commercial-free music plus the best sports, news, talk, comedy and entertainment. Welcome to the world of satellite radio. A SiriusXM
Connect Tuner and Subscription are required. For more information, visit www.siriusxm.com
Activating your SiriusXM Subscription
After installing your SiriusXM Connect Tuner and antenna, power on your KMC100 and select SiriusXM mode. You should be able to hear the SiriusXM preview
channel on Channel 1. If you cannot hear the preview channels, please check the installation instructions to make sure your SiriusXM Connect Tuner is properly
installed.
After you can hear the Preview channel, tune to Channel 0 to nd the Radio ID of your tuner. In addition, the Radio ID is located on the bottom of the SiriusXM
Connect Tuner. You will need this number to activate your subscription. Write the number down for reference.
Note: the SiriusXM Radio ID does not include the letters I, O, S or F.
In the USA, you can activate online or by calling SiriusXM Listener care:
• Visit www.siriusxm.com/activatenow
• Call SiriusXM Listener Care at 1-866-635-2349
For Canadian Subscriptions, please contact:
• Visit www.siriusxm.ca/activatexm
• Call XM customer Care at 1-877-438-9677
When your radio detects that the tuner has received the activation message, your radio will display: “Subscription Updated”. Once subscribed, you can tune to
channels in your subscription plan. Note, the activation process usually takes 10 to 15 minutes, but may take up to an hour. Your radio will need to be powered
on and receiving the SiriusXM signal to receive the activation message.

10
OPERATION
SiriusXM Radio Operation Cont.
Alternate tuning options and settings
Press MENU and rotate the knob to select an alternate tuning method or
system setting below:
Channel Browse: Allows users to browse SiriusXM channels before selec-
tion. Rotating the knob left and right will scroll through the channel lineup.
Pressing enter will select highlighted channel and begin playback.
Category Browse: Allows users to browse SiriusXM categories. Rotating
the knob left and right will scroll through the different categories. Pressing
the knob (8) on the highlighted category will show a list of available channels
within that category. Pressing the knob (8) again will select the highlighted
channel and begin playback.
DIRECT TUNING: Allows you to manually enter in the channel number you
wish to tune to. Rotate the volume knob to adjust the digit, then press the
knob (8) to select the next digit. Once the channel number has been entered,
the unit will tune to that channel and begin playback.
RESET: Allows you to Reset the KMC100 to the SiriusXM factory defaults.
Parental Controls will be disabled and lock code restored to the default.
PARENTAL CONTROLS: Allows you to limit access to SiriusXM channels
with mature content. When enabled, the Parental Control feature requires
you to enter a passcode to tune to the locked channels.
INFORMATION: Displays SiriusXM Radio ID.
SiriusXM Parental Controls Cont.
ENABLE PARENTAL CONTROLS: After choosing to enable the parental
controls, you will be prompted to enter a 4-Digit passcode: Default Pass-
code is 0000. Rotate the volume knob to adjust the digit, then press the
knob (8) to select the next digit.
MANAGE PASSWORD: With the password set, you will also be given the
option to MANAGE your password, which allows you to change/reset the
current passcode.
DISABLE PARENTAL CONTROLS: Select Disable Parental Controls, to
remove all mature channel restrictions.
SiriusXM Connect Tuner and Subscription sold separately.
www.siriusxm.com
Sirius, XM and all related marks and logos are trademarks of Sirius XM
Radio Inc. All rights reserved.

11
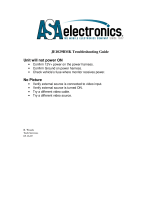
TROUBLESHOOTING
The following checklist will help you remedy problems you may encounter with your unit. Before going through the checklist below, check
the connection and operating procedures. If the problem is not solved, please contact your local KICKER retailer or call 1-800-844-2774.
General
Radio Reception
No power is being supplied to the unit- Check to ensure 12V is being supplied to the red wire and the black wire has a good ground.-
Press the Source button.
No Sound- Check to ensure ampliers (if applicable) are on.- Check to ensure fader is in the middle (0) position.
The buttons will not function- Perform Master Reset by holding the Play/Pause button down for 10 seconds.
Stations cannot be received- Check Antenna for proper connection.- The broadcast signal is too weak.- Ensure Tuner in Settings Menu is set
to proper region.
RDS
RDS Information is not displayed- The current station is not an RDS station.- RDS data has not been received.
USB playback
You cannot play back items via a USB hub.- This unit cannot recognize USB devices via a USB hub.
A USB device takes longer to play back.- The USB device contains les with a complicated tree structure or contains a large amount of les.
The sound is intermittent.- The sound may be intermittent at a high-bit-rate of more than 320 kbps.

12
TROUBLESHOOTING
Channel Locked- The channel that you have requested is Locked by the radio Parental Control feature. See page 10 for more information on the Parental Con-
trol feature and how to access locked channels. Default Passcode is 0000.
Channel Not Available- The channel you have requested is not a valid SiriusXM channel or the channel that you were listening to is no longer available. You
may also see this message briey when rst connecting a new SiriusXM Connect Tuner.- Visit www.siriusxm.com for more information about the SiriusXM
channel lineup.
Channel Not Subscribed- The channel that you have requested is not included in your SiriusXM subscription package or the channel that you were listening
to is no longer included in your SiriusXM subscription package.- Visit www.siriusxm.com or call 866-635-2349 if you have questions about your subscription
package or would like to subscribe to this channel.
Check Antenna- The radio has detected a fault with the SiriusXM antenna. The antenna cable may be either disconnected or damaged.- Verify that the antenna
cable is connected to the SiriusXM Connect Tuner.- Inspect the antenna cable for damage and kinks. Replace the antenna if the cable is damaged. SiriusXM
products are available at your local retailer or online at www.shop.siriusxm.com
Check Tuner- The radio is having difculty communicating with the SiriusXM Connect Tuner.- The tuner may be disconnected or damaged.- Verify that the
SiriusXM Connect Tuner cable is securely connected to the radio.
Subscription Updated- The radio has detected a change in your SiriusXM subscription status. Press the knob (8) to clear the message. Visit www.
siriusxm.com or call 866-635-2349 if you have questions about your subscription.
No Signal- The SiriusXM Connect Tuner is having difculty receiving the SiriusXM satellite signal.- Verify that your vehicle is outdoors with a clear view of the
sky.- Verify that the SiriusXM antenna is mounted on the outside of the vehicle.- Move the SiriusXM antenna away from any obstructions.- Inspect the antenna
cable for damage and kinks.- Consult the SiriusXM Connect Tuner installation manual for more information on antenna installation. Replace the antenna if the
cable is damaged. SiriusXM products are available at your local retailer or online at www.shop.siriusxm.com
For SiriusXM Radio operation:

13
Warranty
WARRANTY
Electronics Limited Warranty (including KICKER Accessories)
When purchased from an Authorized KICKER Dealer, CPS warrants this product to be free from defects in material and workmanship under normal use for
a period of ONE (1) YEAR from date of original purchase with receipt. If this product is identied as “Refurbished” or “B Goods”, the warranty is limited to
a period of THREE (3) MONTHS from the date of original purchase. In all cases you must have the original receipt. Should service be necessary under this
warranty for any reason due to manufacturing defect or malfunction during the warranty period, CPS will repair or replace (at its discretion) the defective
merchandise with equivalent merchandise. Warranty replacements may have cosmetic scratches and blemishes. Discontinued products may be replaced
with more current equivalent products. Warranty is valid only for the original purchaser and is not extended to owners of the product subsequent to the
original purchaser. Any applicable implied warranties are limited in duration to a period of the express warranty as provided herein beginning with the date of
the original purchase at retail, and no warranties, whether express or implied, shall apply to this product thereafter.
© 2019 CPS Distributors, Inc.
6024 Parretta Dr. Kansas City, MO 64120
800-844-2774

14
Notes

15
Notes

KMC100 v1.0
/