Page is loading ...
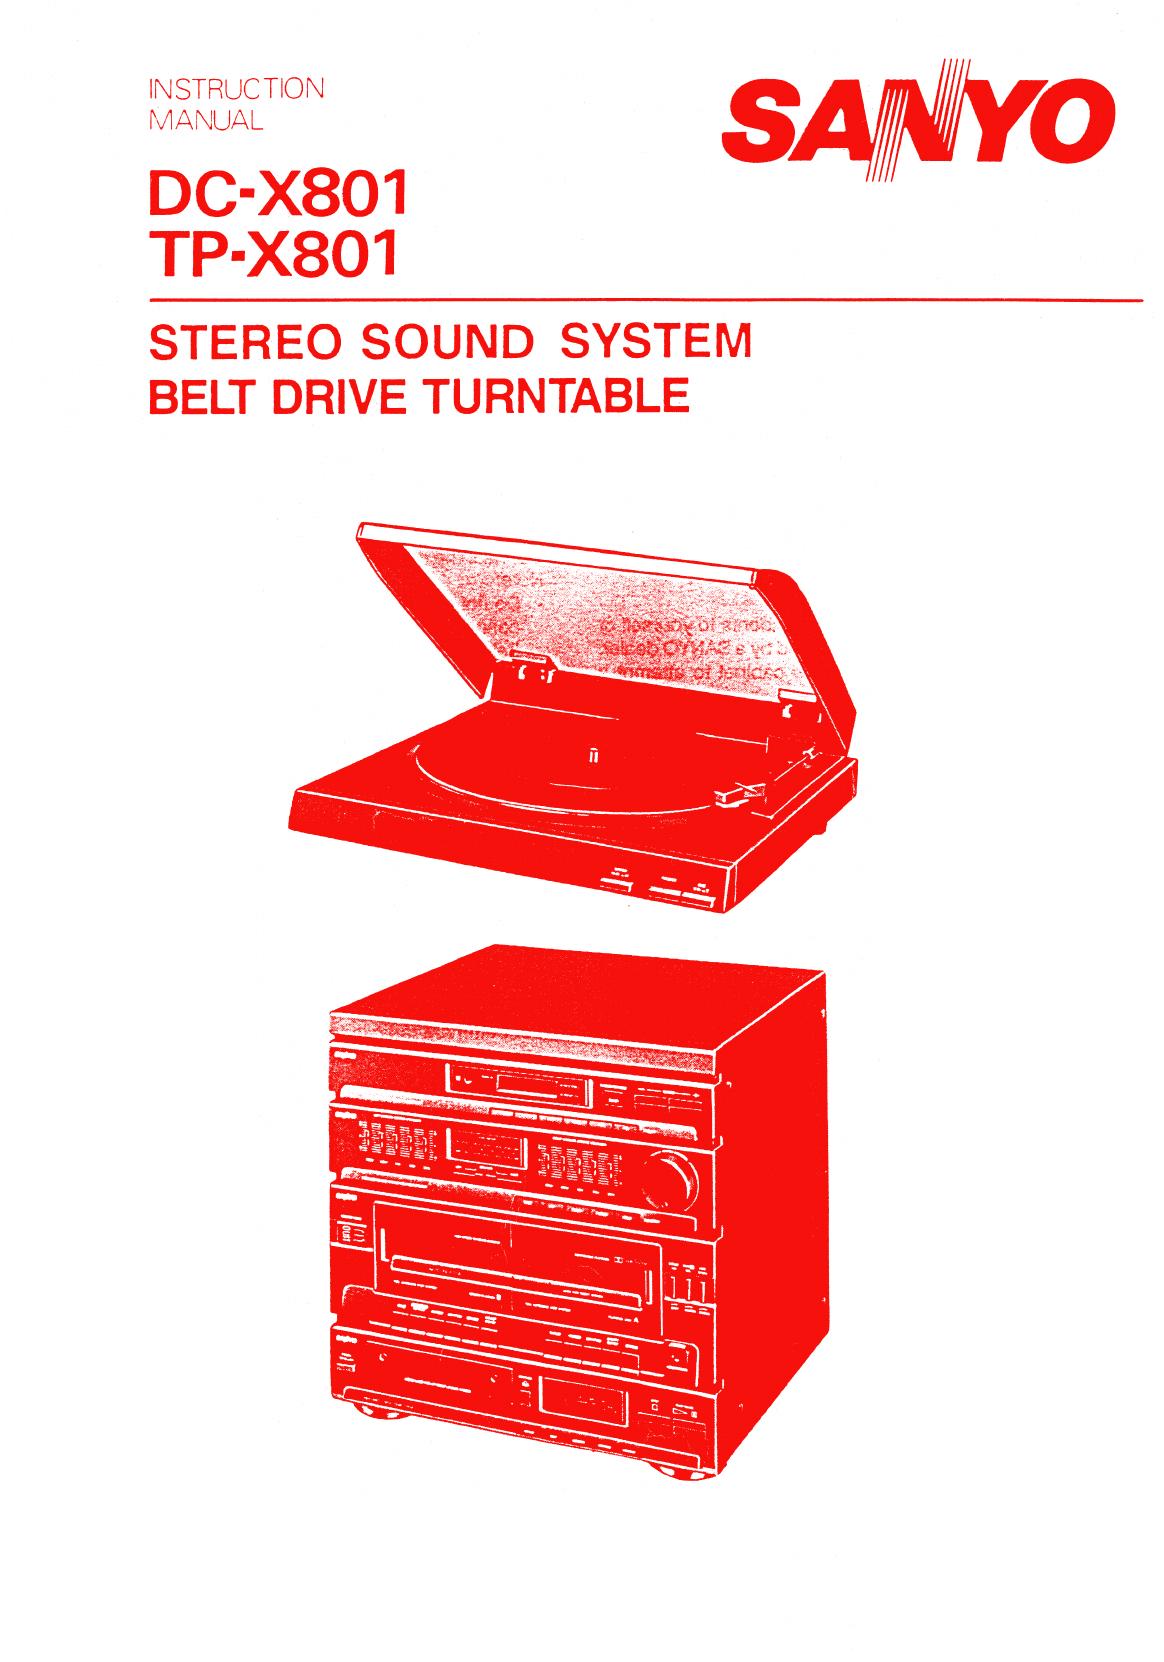
INSTRUCTION
MANUAL
DC-X801
TP-X801
STEREO SOUND SYSTEM
BELT DRIVE TURNTABLE
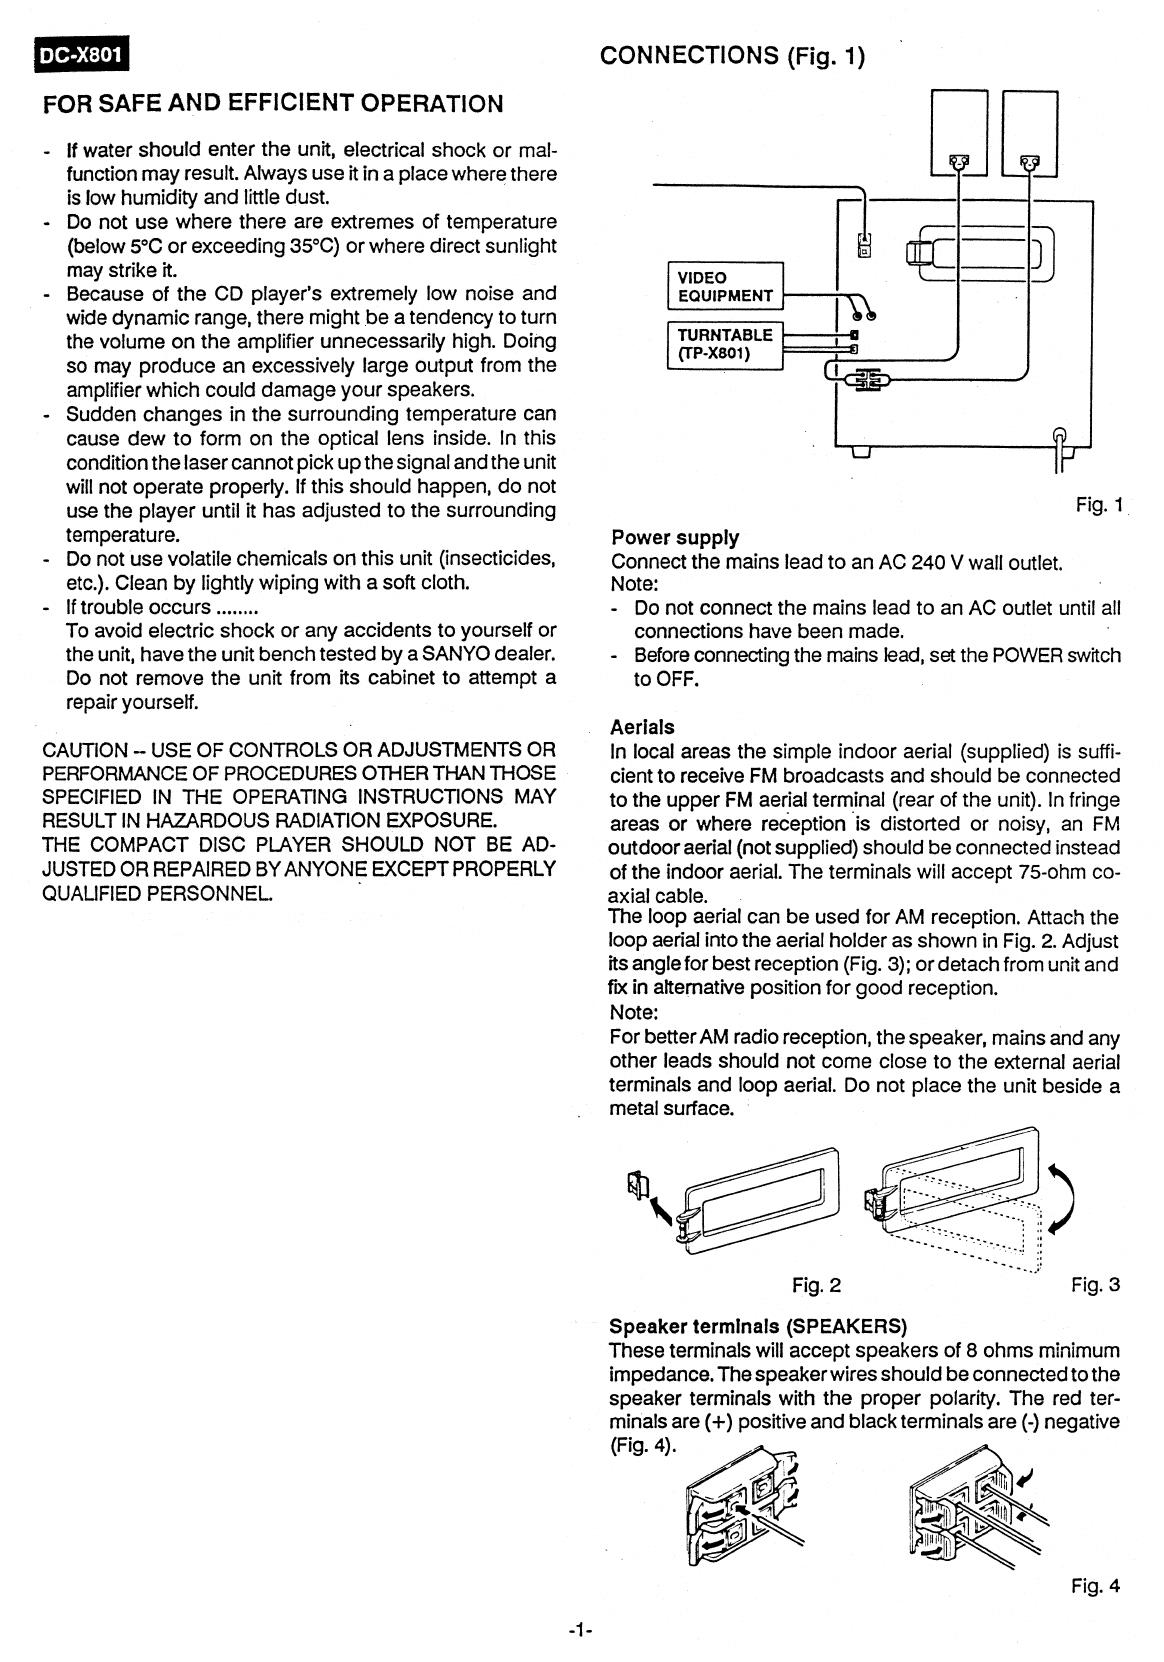
VIDEO
EQUIPMENT
TURNTABLE
(TP-X801)
DC4801
CONNECTIONS (Fig. 1)
FOR SAFE AND EFFICIENT OPERATION
- if water should enter the unit, electrical shock or mal-
function may result. Always use it in a place where there
is low humidity and little dust.
- Do not use where there are extremes of temperature
(below 5°C or exceeding 35°C) or where direct sunlight
may strike it.
- Because of the CD player's extremely low noise and
wide dynamic range, there might be a tendency to turn
the volume on the amplifier unnecessarily high. Doing
so may produce an excessively large output from the
amplifier which could damage your speakers.
- Sudden changes in the surrounding temperature can
cause dew to form on the optical lens inside. In this
condition the laser cannot pick up the signal and the unit
will not operate properly. If this should happen, do not
use the player until it has adjusted to the surrounding
temperature.
- Do not use volatile chemicals on this unit (insecticides,
etc.). Clean by lil wiping with a soft cloth.
If trouble occurs
.....
.
To avoid electric shock or any accidents to yourself or
the unit, have the unit bench tested by a SANYO dealer.
Do not remove the unit from its cabinet to attempt a
repair yourself.
CAUTION — USE OF CONTROLS OR ADJUSTMENTS OR
PERFORMANCE OF PROCEDURES OTHER THAN THOSE
SPECIFIED IN THE OPERATING INSTRUCTIONS MAY
RESULT IN HAZARDOUS RADIATION EXPOSURE.
THE COMPACT DISC PLAYER SHOULD NOT BE AD-
JUSTED OR REPAIRED BY ANYONE EXCEPT PROPERLY
QUALIFIED PERSONNEL.
Fig. 1
Power supply
Connect the mains lead to an AC 240 V wall outlet.
Note:
- Do not connect the mains lead to an AC outlet until all
connections have been made.
- Before connecting the mains lead, set the POWER switch
to OFF.
Aerials
In local areas the simple indoor aerial (supplied) is suffi-
cient to receive FM broadcasts and should be connected
to the upper FM aerial terminal (rear of the unit). In fringe
areas or where
reception
is distorted or
noisy,
an FM
outdoor aerial (not supplied) should be connected instead
of the indoor aerial. The terminals will accept 75-ohm co-
axial cable.
The loop aerial can be used for AM reception. Attach the
loop aerial into the aerial holder as shown in Fig. 2. Adjust
its angle for best reception (Fig. 3); or detach from unit and
fix in alternative position for good reception.
Note:
For better AM radio reception, the speaker, mains and any
other leads should not come close to the external aerial
terminals and loop aerial. Do not place the unit beside a
metal surface.
Fig. 2
Fig. 3
Speaker terminals (SPEAKERS)
These terminals will accept speakers of 8 ohms minimum
impedance. The speaker wires should be connected to the
speaker terminals with the proper polarity. The red ter-
minals are (+) positive and black terminals are (-) negative
(Fig. 4).
Fig. 4
-1-
16 18 20 22 23 25 27
29
17
19 21
24 26 28
Fig. 5
-2-
38 40 42 44
35
36
37 39 41 43 45 46
Note:
With incorrect polarity connections, proper stereo repro-
duction cannot be obtained.
Video equipment Input sockets (VIDEO)
Connection for the audio output sockets of a video equip-
ment.
Turntable sockets (TURNTABLE)
Connect the output lead and power supply lead of the TP-
X801 turntable to the PHONO and DC 12V sockets of the
unit respectively.
Headphones socket (HEADPHONES)
Connect stereo headphones (8 ohms to 10 kohms, op-
tional) for monitoring or for private listening. The speakers
are automatically disconnected when headphones are
connected to the HEADPHONES socket.
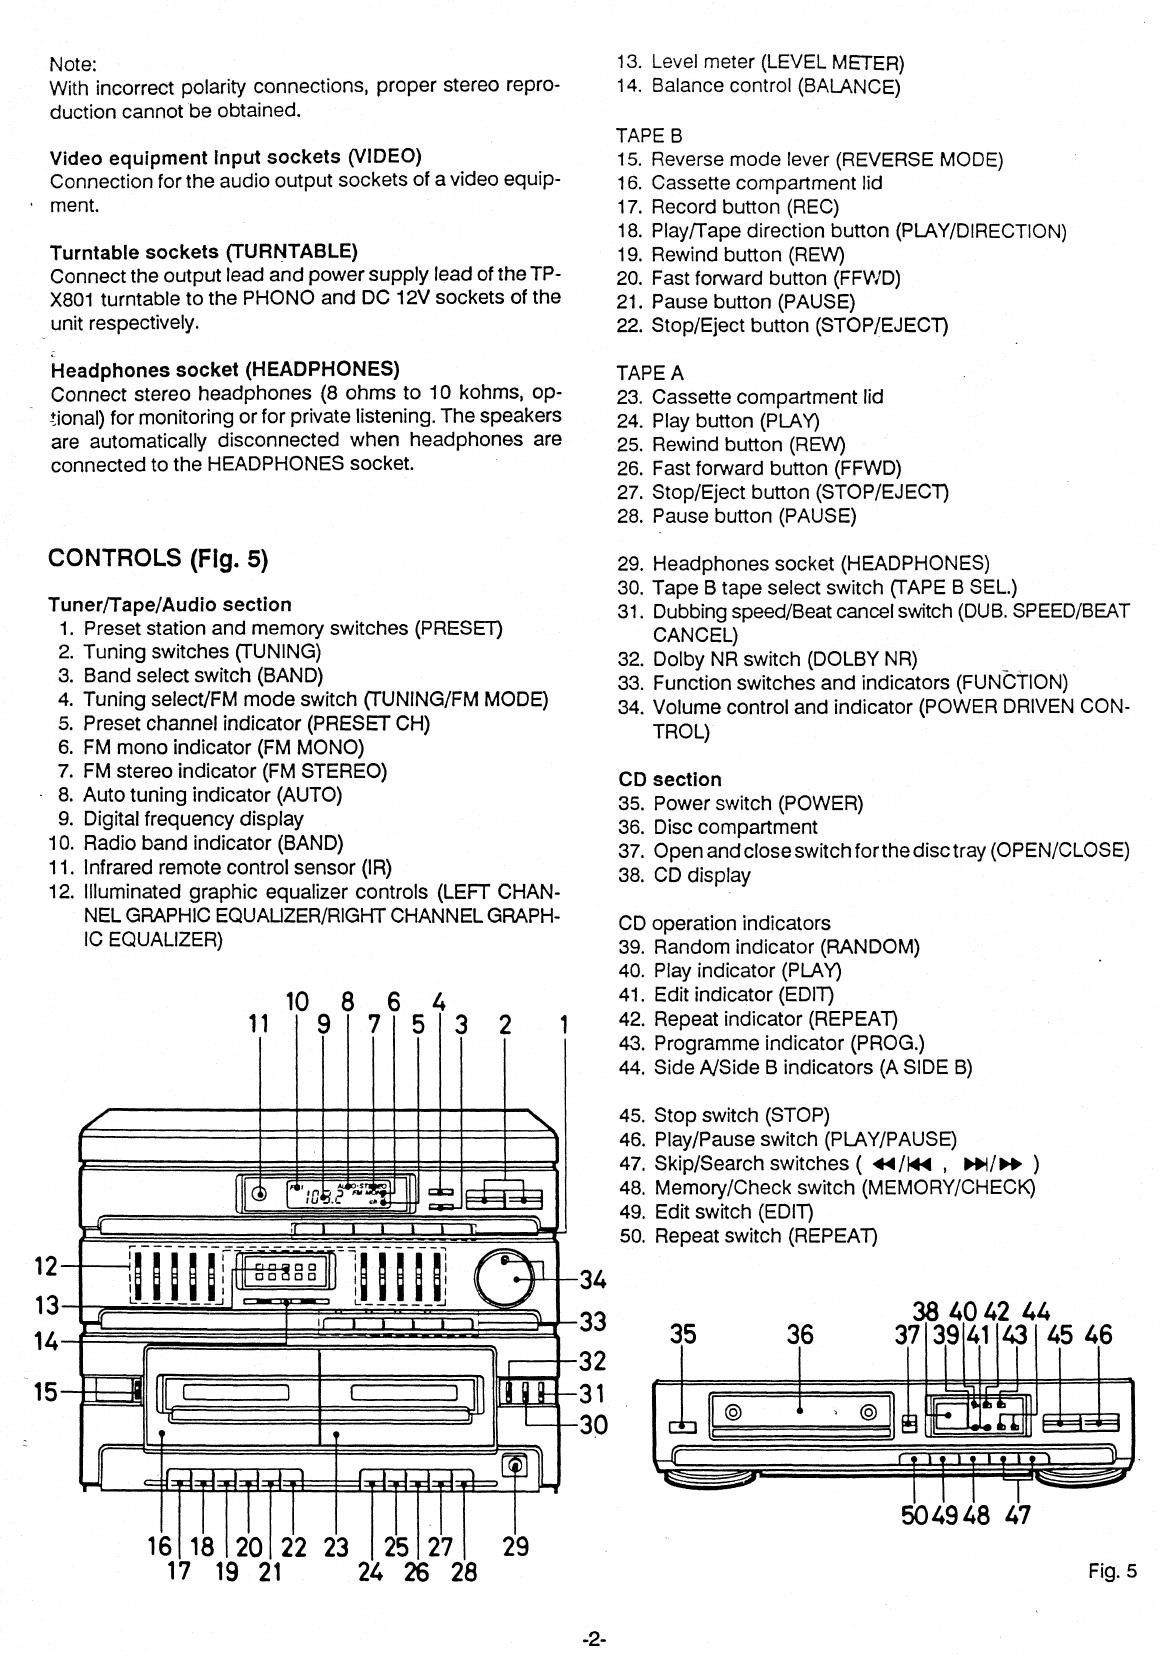
CONTROLS (Fig. 5)
Tuner/Tape/Audio section
1.
Preset station and memory switches (PRESET)
2.
Tuning switches (TUNING)
3.
Band select switch (BAND)
4.
Tuning select/FM mode switch (TUNING/FM MODE)
5.
Preset channel indicator (PRESET CH)
6.
FM mono indicator (FM MONO)
7.
FM stereo indicator (FM STEREO)
8.
Auto tuning indicator (AUTO)
9.
Digital frequency display
10.
Radio band indicator (BAND)
11.
Infrared remote control sensor (IR)
12.
Illuminated graphic equalizer controls (LEFT CHAN-
NEL GRAPHIC EQUAL1ZER/RIGHT CHANNEL GRAPH-
IC EQUALIZER)
10 8 6 4
11 9 7 5
1
13.
Level
meter (LEVEL METER)
14.
Balance control (BALANCE)
TAPE B
15.
Reverse mode lever (REVERSE MODE)
16.
Cassette compartment lid
17.
Record button (REC)
18.
Play/Tape direction button (PLAY/DIRECTION)
19.
Rewind button (REW)
20.
Fast forward button (FFWD)
21.
Pause button (PAUSE)
22.
Stop/Eject button (STOP/EJECT)
TAPE A
23.
Cassette compartment lid
24.
Play button (PLAY)
25.
Rewind button (REW)
26.
Fast forward button (FFWD)
27.
Stop/Eject button (STOP/EJECT)
28.
Pause button (PAUSE)
29.
Headphones socket (HEADPHONES)
30.
Tape B tape select switch (TAPE B SEL.)
31.
Dubbing speed/Beat cancel switch (DUB. SPEED/BEAT
CANCEL)
32.
Dolby NR switch (DOLBY NR)
33.
Function switches and indicators (FUNCTION)
34.
Volume control and indicator (POWER DRIVEN CON-
TROL)
CD section
35.
Power switch (POWER)
36.
Disc compartment
37.
Open and close switch for the disc tray (OPEN/CLOSE)
38.
CD display
CD operation indicators
39.
Random indicator (RANDOM)
40.
Play indicator (PLAY)
41.
Edit indicator (EDIT)
42.
Repeat indicator (REPEAT)
43.
Programme indicator (FROG.)
44.
Side A/Side B indicators (A SIDE B)
45.
Stop switch (STOP)
46.
Play/Pause switch (PLAY/PAUSE)
47.
Skip/Search switches (
44/44 ,
48.
Memory/Check switch (MEMORY/CHECK)
49.
Edit switch (EDIT)
50.
Repeat switch (REPEAT)
•
5049 48 47
.41
ON
Ink
11111
12
13
14
E182i8,9
NMI
elle • •
OM
34
33
32
31
30
DC-X801
Within approx. 7 meters
RB-X801
RB-X801 REMOTE CONTROLLER
Controls (Fig. 6)
Fig. 6
1. CD player function buttons
CD: CD function button
REPEAT: Repeat button
RANDOM: Random play button
MEMO: Memory/Check button
0 - 9 and +10: Track number buttons
44/44
and Wsi•i : Skip/Search buttons
■
: Stop button
►
/11 : Play/Pause button
2.
Tuner function buttons
BAND: Band button
PRESET: Preset button
- TUN +: Tuning buttons
3.
Amplifier function buttons
TUNER: Tuner function button
TAPE: Tape function button
PHONO: Phono function button
VIDEO: Video function button
VOLUME - +: Volume buttons
The motor drive volume control can be adjusted by
using this remote controller.
" - " = decreased, "-i-" = increased
4.
Battery compartment lid (back of the unit)
By using the remote controller, you can operate the system
in almost the same way as with the controls of the main unit.
Inserting batteries
1.
Open the battery compartment lid by sliding the lid.
2.
Install 2 "AA/SUM-3/R6" size batteries into the battery
compartment matching the polarity as shown in the
battery compartment.
3.
Close the battery compartment lid.
Note:
Always remove batteries if the remote controller is not
going to be used for a month or more. Batteries left in the
unit may leak and cause damage.
Remote
control range
Use the remote controller within an angle of 30° at the left
and right horizontally and over distances up to about 7
meters straight ahead (Fig. 7).
Fig. 7
RADIO RECEPTION
Automatic or manual tuning operation
1.
Turn on the power by pressing the POWER switch.
2.
Press the TUNER FUNCTION switch.
(The last received station will be selected.)
-
If any control switch of the tuner section are pressed,
source automatically switches to TUNER.
3.
Select the desired radio band (FM1, FM2, FM3 or AM) by
pressing
the
BAND switch.
4.
a. For automatic tuning, set the TUNING/FM MODE
switch to auto/stereo. (The AUTO indicator illumi-
nates.) Press either the "+" or " - " TUNING switch,
the unit will now search until it finds a radio broadcast.
Having done so it will stop on the best reception
frequency. Press either the "+" or " - " TUNING
switch again, for tuning the next broadcast station.
The automatic tuning may not receive a distant sta-
tion or weak-signal station.
b. For manual tuning, set the TUNING/FM MODE switch
to manual/mono. (The AUTO indicator goes out.)
Select the frequency of a desired station by means of
the TUNING switches. Press either the "+" or " - "
switch continuously until you are close to the desired
frequency and then briefly (and if required, repeat-
edly), press the appropriate switch until you have
reached the desired frequency.
5.
For receiving an FM stereo broadcast, set the TUNING/
FM MODE switch to auto/stereo.
When an FM stereo broadcast is received, the FM STEREO
indicator illuminates. When a weak-signal FM broadcast
is received in stereo, press the TUNING/FM MODE
switch to manual/mono to improve reception. The FM
STEREO indicator goes out and the FM MONO indicator
illuminates.
6.
Adjust the volume (POWER DRIVEN CONTROL), BAL-
ANCE and GRAPHIC EQUALIZER controls to the de-
sired sound level and sound equalization.
-3-
To preset stations and preset tuning operation
For presetting a station, the unit has an electronic memory
circuit which is capable of memorizing up to 24 stations.
(e.g. 6 FM1, 6 FM2, 6 FM3 and 6 AM stations).
1.
Press the TUNER FUNCTION switch.
2.
Select the desired radio band.
3.
Tune in the desired station.
4.
Press and hold in the desired PRESET switch until the
flashing PRESET CH indicator is illuminated (more than
2 seconds). The radio broadcast is now preset.
Note:
The PRESET button on the remote controller cannot be
used for presetting stations.
5.
To preset the other stations, follow the same procedure
of steps 2 to 4.
6.
Now, you can receive the desired FM or AM broadcast
station quickly and accurately. Select the desired band.
Press and release the PRESET switch in one touch (less
than 2 sec.), and the preset station will be heard.
(For the remote controller operation)
Press the PRESET button on the remote controller to
receive the desired preset station. Every time the button
is pressed, the preset channel display changes as:
ch 1, ch 2, ch 3, ch 4, ch 5, ch 6, ch 1, ...
Note:
Once you have preset desired stations, even if the unit is
turned off, station memories will remain. But if the unit is
turned off for a long time, the station memories may not
remain. In this case you must preset the stations again.
- To avoid noisy radio reception, do not operate the
turntable during radio reception.
Graphic equalizer controls (LEFT CHANNEL GRAPHIC
EQUALIZER/RIGHT CHANNEL GRAPHIC EQUALIZER)
By means of five independent frequency (100Hz/300Hz/
1kHz/3kHz/12kHz) controls, you can get your favourite
sound shape flexibly. Flat response is obtained by setting
the controls to the centre positions.
Level meter (LEVEL METER)
This level meter shows the amplifier input levels which are
being monitored.
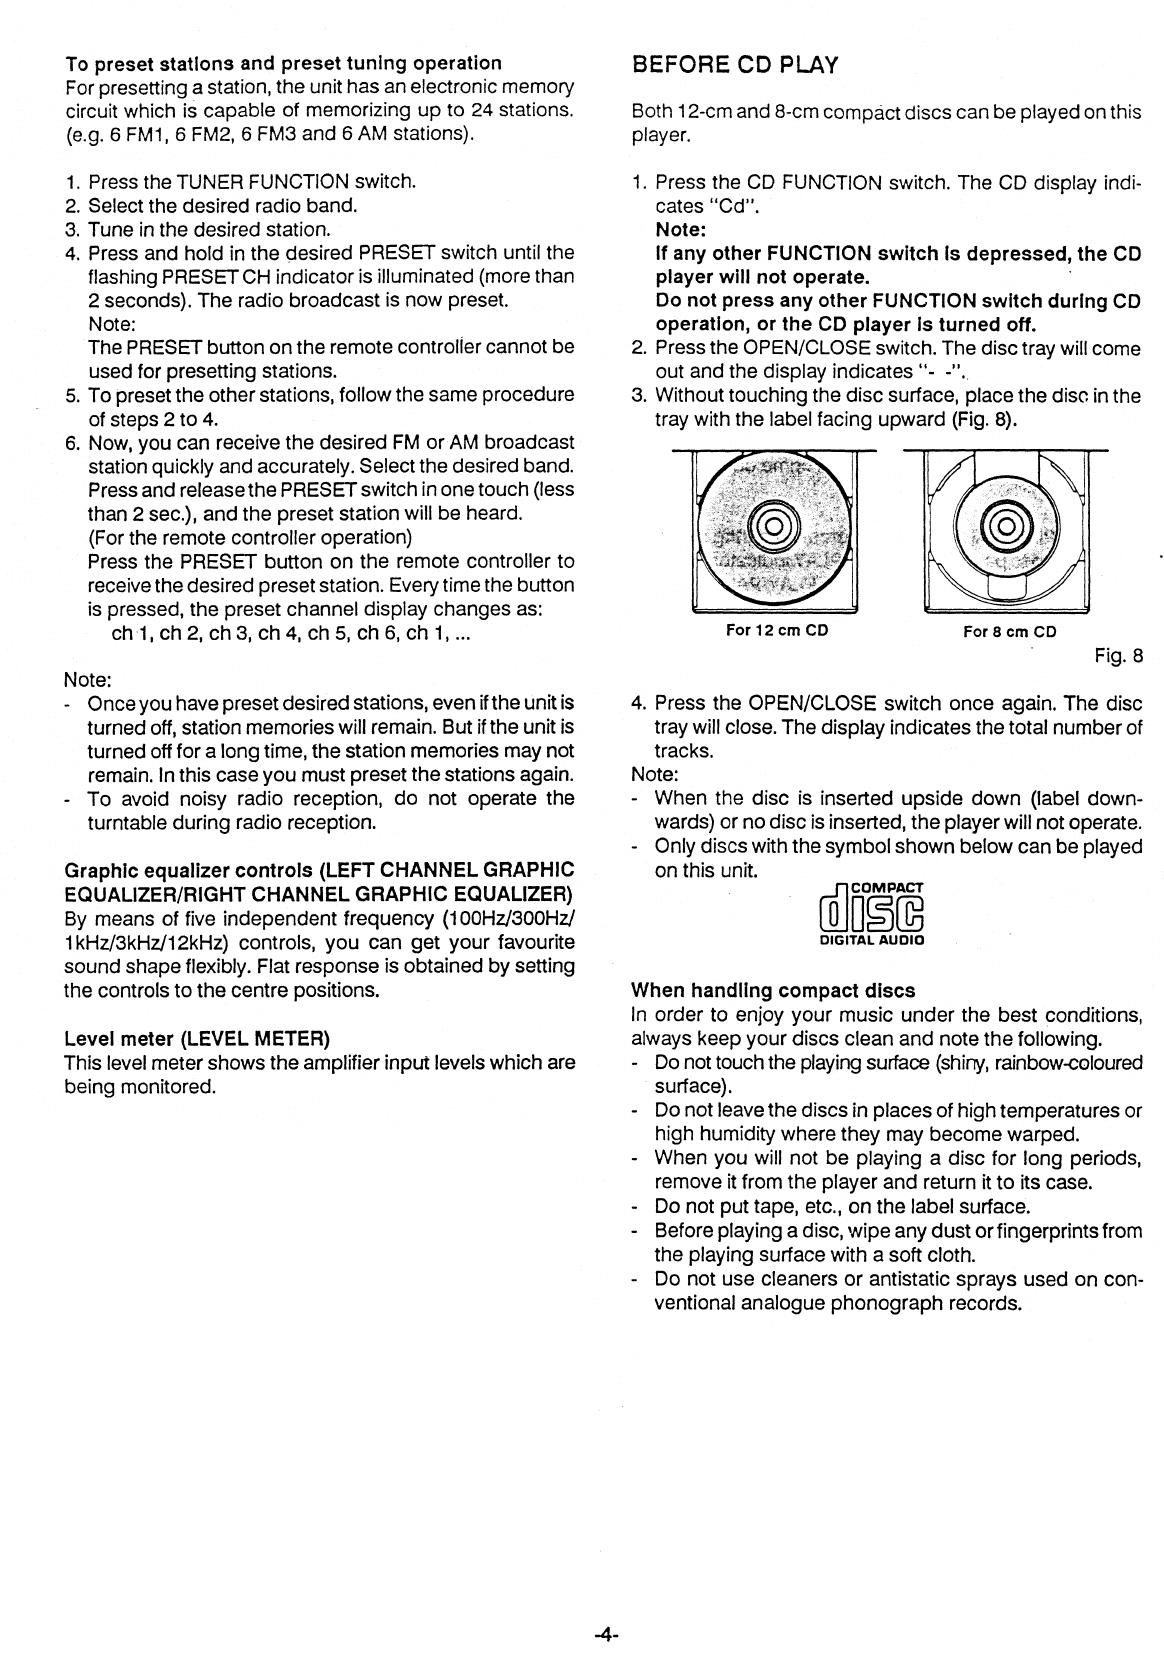
BEFORE CD PLAY
Both 12-cm and 8-cm compact discs can be played on this
player.
1.
Press the CD FUNCTION switch. The CD display indi-
cates "Cd".
Note:
If any other FUNCTION switch Is depressed, the CD
player will not operate.
Do not press any other FUNCTION switch during CD
operation, or the CD player Is turned off.
2.
Press the OPEN/CLOSE switch. The disc tray will come
out and the display indicates "-
3.
Without touching the disc surface, place the disc in the
tray with the label facing upward (Fig. 8).
For 12 cm CD
For 8 cm CD
Fig. 8
4.
Press the OPEN/CLOSE switch once again. The disc
tray will close. The display indicates the total number of
tracks.
Note:
- When the disc is inserted upside down (label down-
wards) or no disc is inserted, the player will not operate.
- Only discs with the symbol shown below can be played
on this unit.
COMPACT
DIGITAL AUDIO
When handling compact discs
In order to enjoy your music under the best conditions,
always keep your discs clean and note the following.
- Do not touch the playing surface (shiny, rainbow-coloured
surface).
-
Do not leave the discs in places of high temperatures or
high humidity where they may become warped.
- When you will not be playing a disc for long periods,
remove it from the player and return it to its case.
- Do not put tape, etc., on the label surface.
-
Before playing a disc, wipe any dust or fingerprints from
the playing surface with a soft cloth.
- Do not use cleaners or antistatic sprays used on con-
ventional analogue phonograph records.
-4-

CD PLAY
NORMAL PLAY
1.
Press the PLAY/PAUSE switch. The PLAY indicator illu-
minates and the first selection (TRACK no.1) will begin
playing.
The CD display indicates the track no. which is playing.
2.
Adjust the volume, BALANCE and GRAPHIC EQUAL-
IZER controls to the desired sound level and sound
equalization.
3.
Press the STOP switch to stop play at any time.
4.
When the last track has played, the player will go to stop
mode. The display indicates "0".
5.
When play is finished, open the disc tray, remove the
disc, close the disc tray.
When the OPEN/CLOSE switch is pressed during play,
play will stop and the disc tray will come out.
Pause
When the PLAY/PAUSE switch is pressed during play, the
player will go to pause mode. (The PLAY indicator flashes.)
In order to cancel pause, press the PLAY/PAUSE switch
once again, and play will begin from where it had stopped.
Track search
When the Of•li
to*
or 44/ 44 skip/search switch is pressed
during play, the player will quickly advance or reverse while
the switch is being pressed. When the switch is released,
play will begin again at that point.
-
If track search is performed during pause, the player will
return to pause when that switch is released.
- During track search operation, the display indicates the
elapsed playing time of the track which is searching. The
left-hand digit indicates the last place of minutes and the
right-hand digit indicates ten's place of seconds.
eg. 15:30 = 5.3, 1:32 = 1.3
Track skip
By using the skip mode during play, the beginning of
desired tracks can easily be found. The number of the track
to be searched is displayed on the display.
Press the 0404
,
or 44/ 44 skip/search switch with
one touch (or if required, repeatedly) until the desired track
no. is displayed. The player will start playing from the
desired track.
- The track no. will change every time by pressing the
skip/search switch.
- If in pause before pressing the skip/search switch, the
player will go to pause (standby) after beginning of the
track is located.
Direct track selection play
Using the track number (0 - 9 and +10) buttons on the
remote controller, play can be started immediately from the
desired track.
While a disc is being played, it is possible to switch imme-
diately to a particular track.
Examples:
To play from the track 3 on the disc, press button 3.
To play from the track 10, press +10 and then 0.
To play from the track 25, press +10 twice and then 5.
Play can also be started by selecting the track number
using one of the skip/search buttons (
/N or t.i./
io
,
o; ) and pressing the play/pause (
is) button. When
using the controls on the main unit, select the track
number using the skip/search switch and then press the
PLAY/PAUSE switch.
A track number greater than the number of
tracks on the
disc is not selected.
- This operation is not possible during
programmed play.
Random play
(automatic
programmed play by microcom-
puter)
When the RANDOM
button on the remote confer is
pressed, the PLAY and RANDOM indicators illuminate and
the tracks on the disc will be played automaticaN at
random by the microcomputer.
- Random play results when the RANDOM btrcrl s pres
s
ed
during normal play.
- When the RANDOM button is pressed
durreg random
play, operation moves to the next random
prog-ammed
track.
- This operation is not possible
during prograr=ed
Repeated play
When the REPEAT switch is pressed dung
REPEAT indicator illuminates. The player 'Al pay
the
tracks, all the programmed tracks or the 7
-
an=
tracks repeatedly.
To cancel repeated play, press the REPEAT stivit corra
again. (The REPEAT indicator goes out) Whew: the STa?
or OPEN/CLOSE switch is pressed, the repeated =Eatlor 04.21
be cancelled.
PROGRAMMED PLAY
The tracks (up to 16) on a
disc can be
played in army dte§r=.
•
sequence whatsoever.
- The same tracks can be
programmed ever and z.i-er
again.
- Make sure that the CD player is in the nr a step 7ode.
If not, press the STOP switch of the CD aaier.
Programming procedure (using the
remote corn fro:'
Example:
Programming play in the sequence of tracks 5, 2, 6 and 10
1.
Press the MEMO button. The PROG. indicator Elurni-
nates and track number "1" flashes on the CD display.
2.
Set track 5 which is to be played first by pressing the
track number button 5. "5" flashes.
3.
Press the MEMO button. "5" illuminates.
4.
Set track 2 which is to
be played second by pressing the
button 2. "2" flashes.
5.
Press the MEMO button. "2" illuminates. The PROG.
indicator remains illuminated.
The remaining tracks are programmed in the same way.
- The tracks can also be selected using the skip/search
button.
- When programming using the controls on the main unit,
use the skip/search and MEMORY/CHECK switches.
- Any attempt to programme more than 16 tracks will
result in discontinuation of the programming.
-5-
Programmed checking and play
1.
Press the MEMORY/CHECK switch to confirm program-
ming during stop mode.
When the MEMORY/CHECK switch is pressed once, the
programmed track numbers appear sequentially on the
CD display.
2.
Press the PLAY/PAUSE switch. Play will begin from the
first programmed track.
3.
When the last programmed track has played, the player
will go to stop mode.
The programmed memories will remain.
Note:
The programme is cleared in the following cases:
- When the STOP switch is pressed in the stop mode
- When the EDIT switch is pressed in the stop mode
When the OPEN/CLOSE switch is pressed
- When other source is selected
- When the power is switched off
Adding onto a programme
If you want to add more programme numbers to the next
free memory position during stop mode, select the track
number then press the MEMORY/CHECK switch.
It is impossible to change the programmed entry or to add
a programme between the previous programmes.
Note:
You may find that the unit accidentally functions incor-
rectly, even if you press the appropriate switch(es). When
this occurs, turn the player off. After a few seconds, turn the
player on and resume operation.
RECORD OR VIDEO EQUIPMENT PLAY
1.
Press the PHONO or VIDEO FUNCTION switch.
2.
Adjust the volume, BALANCE and GRAPHIC EQUAL-
IZER controls to the desired sound level and sound
equalization.
COMPACT CASSETTE
Note:
Do not use any endless tape with this unit.
Inserting and removing the cassette
Open the cassette compartment lid by pressing the STOP/
EJECT button. Insert the cassette placing the exposed
section of tape at the bottom. Close the lid.
Press the STOP/EJECT button, to remove the cassette.
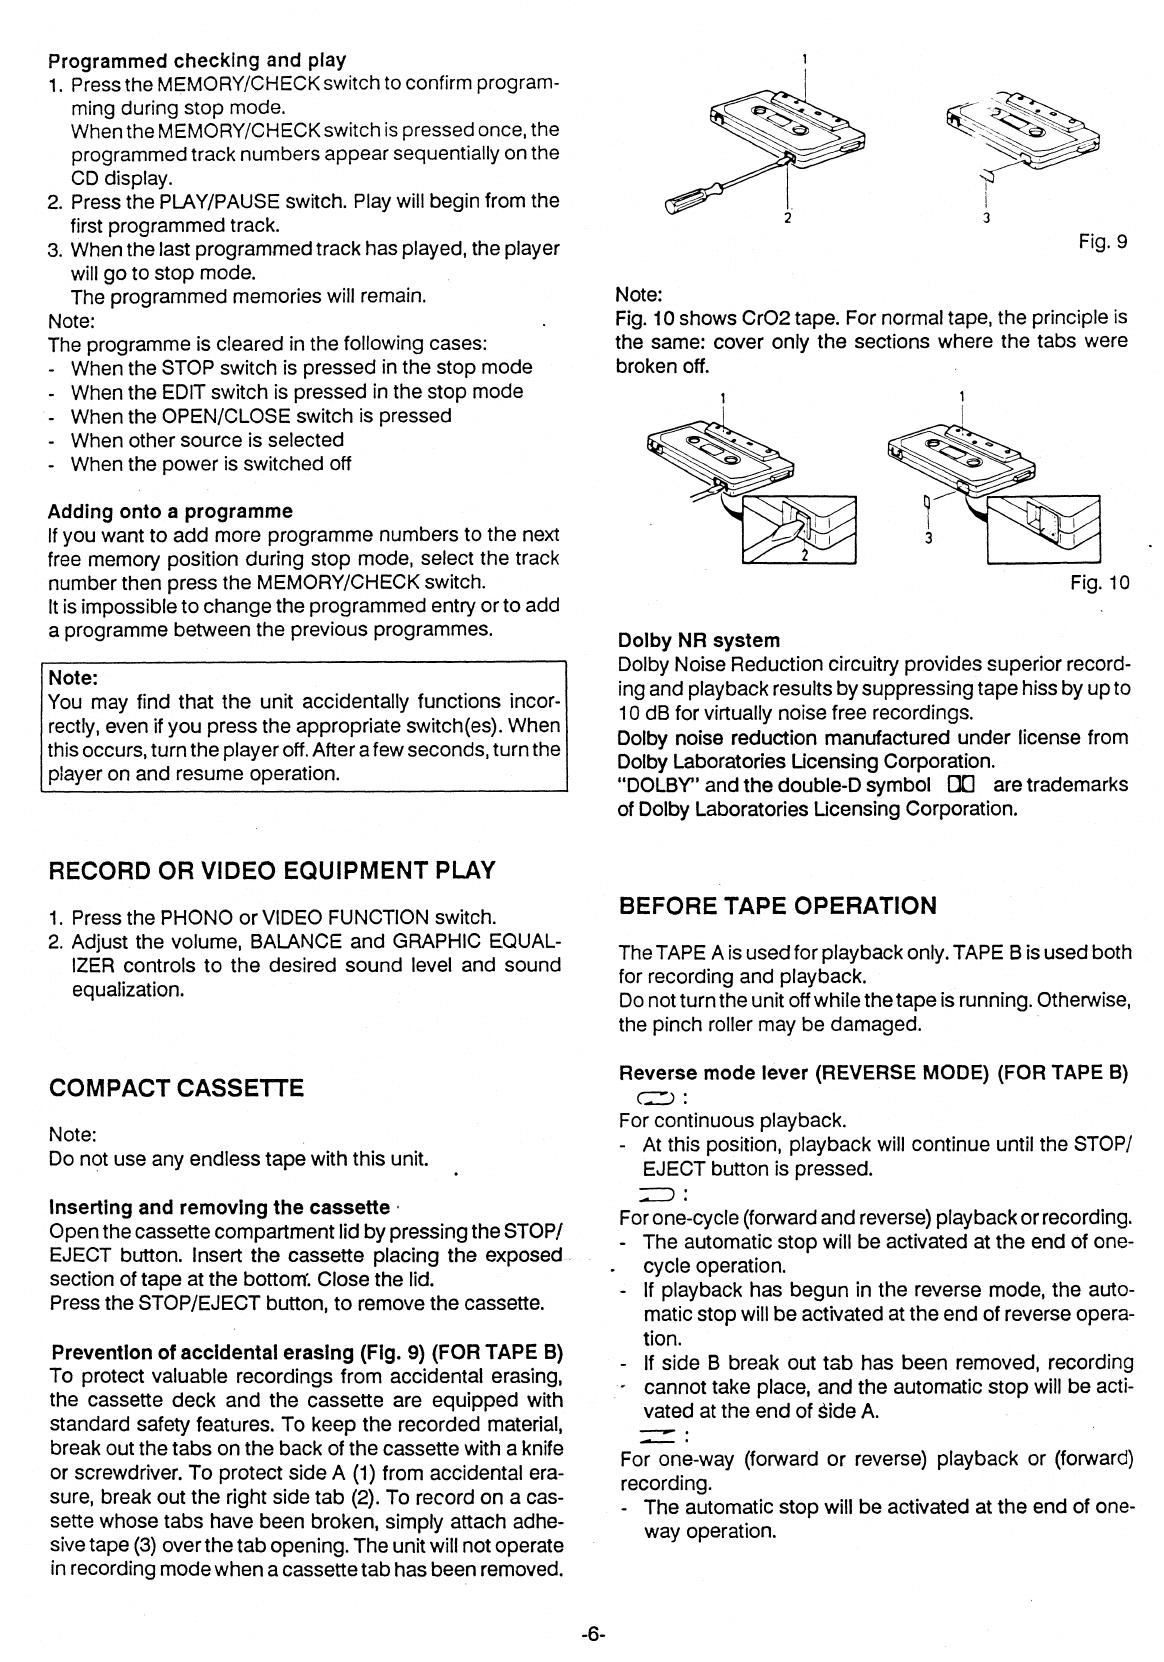
Prevention of accidental erasing (Fig. 9) (FOR TAPE B)
To protect valuable recordings from accidental erasing,
the cassette deck and the cassette are equipped with
standard safety features. To keep the recorded material,
break out the tabs on the back of the cassette with a knife
or screwdriver. To protect side A (1) from accidental era-
sure, break out the right side tab (2). To record on a cas-
sette whose tabs have been broken, simply attach adhe-
sive tape (3) over the tab opening. The unit will not operate
in recording mode when a cassette tab has been removed.
3
Fig. 9
Note:
Fig. 10 shows Cr02 tape. For normal tape, the principle is
the same: cover only the sections where the tabs were
broken off.
Fig. 10
Dolby NR system
Dolby Noise Reduction circuitry provides superior record-
ing and playback results by suppressing tape hiss by up to
10 dB for virtually noise free recordings.
Dolby noise reduction
manufactured under license from
Dolby Laboratories Licensing Corporation.
"DOLBY"
and
the double-D symbol
DO
are
trademarks
of Dolby Laboratories Licensing Corporation.
BEFORE TAPE OPERATION
The TAPE A is used for playback only. TAPE
B
is used both
for recording and playback.
Do not turn the unit off while the tape is running. Otherwise,
the pinch roller may be damaged.
Reverse mode lever (REVERSE MODE) (FOR TAPE B)
C.
-
1) :
For continuous playback.
- At this position, playback will continue until the STOP/
EJECT button is pressed.
) :
For one-cycle (forward and reverse) playback or recording.
- The automatic stop will be activated at the end of one-
.
cycle operation.
- If playback has begun in the reverse mode, the auto-
matic stop will be activated at the end of reverse opera-
tion.
If side B break out tab has been removed, recording
cannot take place, and the automatic stop will be acti-
vated at the end of side A.
..•••••••11.11.
•
For one-way (forward or reverse) playback or (forward)
recording.
- The automatic stop will be activated at the end of one-
way operation.
-6-

U
ri
LO
CT1
Automatic tape selector (FOR TAPE A)
This system automatically selects the equalizer setting cor-
responding to the type of tape used (Normal or Cr02). The
unit chooses the tape setting according to the shape of the
holes on the back face of the cassette inserted. See Fig.
11
for the type tabs and holes in normal and Cr02 tape.
NORMAL TAPE
Cr02 TAPE
Fig. 11
Beat cancel switch (DUB. SPEED/BEAT CANCEL)
When recording a radio programme on the tape, an irritat-
ing beat sound (high pitched tone) may sometimes be
heard. In such cases, simply set this switch to the other
position.
CASSETTE PLAYBACK
1.
Press the appropriate STOP/EJECT button and insert a
recorded cassette.
2.
Press the TAPE FUNCTION switch.
3.
Set the DOLBY NR switch to ON or OFF, according to
whether the tape has been recorded with the Dolby NR
system or not.
4.
For TAPE B:
Set the TAPE B tape select (TAPE B SEL.) switch for the
type of tape being used.
Set the REVERSE MODE lever as desired.
5.
For TAPE A:
Press the PLAY button.
For TAPE B:
Press the PLAY/DIRECTION button. The playback will
start to forward direction.
- To change the tape direction during playback, press
the PLAY/DIRECTION button.
6.
Adjust the volume, BALANCE and GRAPHIC EQUAL-
IZER controls to the desired sound level and sound
equalization.
7.
Press the STOP/EJECT button to stop playback at any
time. When the end of the tape has been reached, the
automatic stop (or automatic reverse) will be activated.
Continuous playback
(From TAPE A to TAPE B)
1.
Press the PLAY button (TAPE A side). TAPE A will begin
to play back.
2.
Press the PAUSE button (TAPE B side).
3.
Press the PLAY/DIRECTION button (TAPE B side) (TAPE B
will not move).
4.
When the end of the tape is reached on TAPE A, the
automatic stop will be activated. The PAUSE button will
be released and TAPE B will automatically begin to play
back.
5.
When the end of the tape is reached on TAPE B, the
automatic stop (or automatic reverse) will be activated.
Caution:
While playing or recording, do not press the FFWD or REW
button of the other tape mechanism, as it may result in
inferior sound quality.
Pause
Press the PAUSE button to momentarily suspend tape
travel during playback or recording. Re-press the button to
re-start playback or recording.
Fast forward and rewind
For fast winding or rewinding the tape, press the FFWD or
REW button. Press the
STOP/EJECT
button when the
desired location has been reached. When the end of the
tape has been reached, the automatic stop will be activat-
ed.
RECORDING (FOR TAPE B)
This unit has an ALC circuit and no further adjustment of
recording level is necessary.
1.
Press the desired FUNCTION switch (TUNER, PHONO
or VIDEO) according to the source to be recorded.
- For recording compact discs, refer to "RECORDING
COMPACT DISCS" section.
2.
Press the STOP/EJECT button and insert a cassette.
3.
Set the DOLBY NR switch to ON or OFF as desired.
4.
Set the TAPE B tape select (TAPE B SEL.) switch for the
type of tape being used.
5.
Set the REVERSE MODE lever to
or = as
desired.
6.
Press the
REC
button to start recording. The recording
will start to forward direction.
-
If the REC button is pressed during continuous play-
back mode ( ci ), the REVERSE MODE lever will
move automatically to the one-cycle (
) posi-
tion.
- During recording, the tape direction cannot be changed
manually, even if the PLAY/DIRECTION button is
pressed.
7.
Since you can monitor through the speakers regardless
of recording level, adjust the volume, BALANCE and
GRAPHIC EQUALIZER controls to your desired sound
level and sound equalization.
8.
Press the STOP/EJECT button to stop recording at any
time. When the end of the tape has been reached, the
automatic stop (or automatic reverse) will be activated.
Erasing
To erase the recorded tape without making a new record-
ing, press the TAPE FUNCTION switch and let the unit
operate in the recording mode.
Note:
Do not operate TAPE A mechanism while erasing.
-7-
The track 3 will be interrupted.
1
.4
) Auto reverse
Record from the beginning of a track. SIDE B
1
2
3
4
3
RECORDING COMPACT DISCS
EDIT RECORDING
Preparations
1.
Place the cassette upon which the recording is to be
made in the cassette deck (TAPE B side) then rewind
the tape to the beginning.
2.
Press the CD FUNCTION switch and place the compact
disc in the CD player. _
3.
Make sure that the CD player is in the initial stop mode.
If not, press the STOP switch of the CD player.
4.
Set the REVERSE MODE lever of the cassette deck to
)
5.
Press the REC button of the cassette deck completely
to the locked-in position. The deck is ready for record-
-
ing.
Types of edit recording
The following edit recording operations can be performed.
Backward skip edit recording
This type of recording is the easiest to perform and it does
not involve the tape length setting.
Press the EDIT switch of the CD player once.
Time edit recording
Tracks are automatically programmed by separating them
for the sides A and B of a tape so that they can be recorded
within the specified time. (Tracks are edited so that the
remaining tape time becomes to be minimum.)
Press the EDIT switch then select the tape length by
pressing the EDIT switch (within 3 seconds).
Programme edit recording
Tracks are recorded in desired order within the specified
tape length.
Press the EDIT switch, select the tape length by press-
ing the EDIT switch (within 3 seconds) then press the
MEMORY/CHECK switch (within 3 seconds).
Make a programme.
Press the PLAY/PAUSE switch.
Note:
- To prevent cut-off of recording in the leader tapes on
tape sides A and B, the recording is automatically started
after about 8 seconds.
- Material can be recorded with unrecorded blanks last-
ing about 5 seconds created automatically.
- For time edit recording or programme edit recording,
editing can be done for up to track 15. It cannot be done
for track 16 or more.
- To stop edit recording at any time, press the STOP
switch of the CD player. The CD player set to the stop
mode. The editing mode is still operational.
To release this mode, press the STOP switch once
again.
Then press the STOP/EJECT button of the cassette
deck.
-
After the edit recording has been started, the unit will not
accept the CD function switches except STOP and
OPEN/CLOSE switches.
- To record material from an interim position on the tape,
proceed with manual recording.
Example:
A disc with 8 tracks is prepared and playing times of each
track are as follows:
Track no. 1
11 min. 9 sec.
Track no. 2
7 min. 26 sec.
Track no. 3
4 min. 37 sec.
Track no. 4
9 min. 21 sec.
Track no. 5
10 min. 0 sec.
Track no. 6
3 min. 48 sec.
Track no. 7
2 min. 59 sec.
Track no. 8
1 min. 10 sec.
Backward skip edit
recording (Fig. 12)
SIDE A
The track 5 will be interrupted.
Example:
The tape to be used is 46 min (23 min./one side)
1. Press the EDIT switch once.
The CD display and CD operation indicator(s) show as:
"- -" EDIT
After about 3 seconds, recording of side A is started
automatically. The CD player will start play in sequence
from track 1 after 8 seconds waiting.
"1"
PLAY, EDIT, SIDE A
- If the REC button of the cassette deck has not de-
pressed, the player will go to pause mode. In this
case, press the REC button
completely to the locked-
in position by one time.
The edit recording will start.
Fig. 12
If the REC button is not pressed completely, proper
edit recording cannot be done.
When the automatic reverse has activated on the cas-
sette deck, a return is made to the start of the track being
played and the CD player will start play after 8 seconds
waiting.
"3"
PLAY, EDIT, SIDE B
-
If the REVERSE MODE lever of the cassette deck has
set in
, the CD player will go to pause mode at
the end of side A. In this case, turn the cassette
around and reinsert it then press the REC butt°
,
completely.
-8-.

5
8
11
4
Unrecorded blank
Auto reverse
2
3
- When the disc playing time is shorter than the sped-
fled time on the side A, the CD player will be set to the
stop mode after the end of playing.
2. When the last track has played, the player will go to stop
mode.
"- -" EDIT, SIDE A, SIDE B
The cassette deck will continue recording mode to the
end of tape (side B).
- If the disc playing time is longer than the specified
time on the side B, the player will be set to the stop
mode after the automatic stop has activated on the
cassette deck.
The editing mode remains operational even upon comple-
tion of play. To release the edit mode, press the STOP
switch of the CD player.
Time edit recording (Fig. 13)
When the track 3 is not recordable within the specified time, select any
recordable track after track 4.
Unrecorded blank
SIDE A
1
2
6
Auto reverse
7
4
3
SIDE B
Unrecorded blank
When the track 5 is not recordable within the specified time, select any
recordable track after track 6.
Fig. 13 •
Example:
The tape to be used is 46 min (23 min./one side)
1.
Press the EDIT switch.
The CD display and CD operation indicator(s) show as:
"—" EDIT
2.
To select the tape length to meet the recording tape,
press the EDIT switch within 3 seconds until "46" is
illuminated.
"46" EDIT
- Every time the switch is pressed, the tape length
display changes in the following sequence:
46
60 90 0 - - 46 . .
After this, the CD display and CD operation indicator(s)
show as:
"1"
EDIT, PROG., SIDE A
"2"
EDIT, PROG., SIDE A
"6"
EDIT, PROG., SIDE A
-
Side A: Tracks 1,2, and 6 are recorded, making a total
play time of 22 min 33 sec (including the 5-second
unrecorded blanks between each recorded track.)
"3"
EDIT, PROG., SIDE B
"4"
EDIT, PROG., SIDE
B
"7"
EDIT, PROG., SIDE B
"8"
EDIT, PROG., SIDE B
- Side
B:
Tracks 3, 4, 7 and 8 are recorded, making a
total play time of 18 min 22 sec.
"1"
PLAY, EDIT, PROG., SIDE A
Recording of side A is started automatically. The CD
player will start play after 8 seconds waiting.
3.
After the tracks to be recorded onto side A have played,
the player will go to pause mode at the beginning of the
first track to be recorded onto side B.
"3"
PLAY (flashes), EDIT, PROG., SIDE B
The cassette deck will continue recording mode to the
end of tape (side A).
4.
After the automatic reverse has activated on the cas-
sette deck, the player will play after 8 seconds waiting.
"3"
PLAY, EDIT, PROG., SIDE B
5.
When the last track has played the player will go to stop
mode.
The cassette deck will continue recording mode to the
end of tape (side
B).
"46" EDIT, PROG., SIDE A, SIDE B
Programme edit recording (Fig. 14)
SIDE A
II
i:
i
:
:
!•
:
ig
:
SIDE B
Unrecorded blank
Example:
The tape to be used is 46 min (23 min./one side) and the
order for recording is as follows:
Track 5 - 2 - 3 - 1 -
4 -
8
1. Press the EDIT switch.
The CD display and CD operation indicator(s) show as:
"- -" EDIT
Fig. 14
2.
To select the tape length to meet the recording tape,
press the EDIT switch within 3 seconds until "46" is
illuminated.
"46" EDIT
3.
Press the MEMO button on the remote controller within
3 seconds.
"1 (flashes)"
EDIT,
PROG., SIDE A
-9-
4. Press the track number button 5 on the remote control-
ler.
"5 (flashes)" EDIT, PROG., SIDE A
5. Press the MEMO button.
"5"
EDIT, PROG., SIDE A
6. Press the button 2.
"2 (flashes)" EDIT, PROG., SIDE A
7. Press the MEMO button.
"2"
EDIT, PROG., SIDE A
8. Press the button 3.
"3 (flashes)" EDIT, PROG., SIDE A
9. Press the MEMO button.
"3"
EDIT, PROG., SIDE A
10. Press the button 1.
"1 (flashes)" EDIT, PROG., SIDE A (flashes)
- This exceeds the remaining time on side A and so
the SIDE A indicator flashes.
11. Press the MEMO button.
"1"
EDIT, PROG., SIDE B
- This and subsequent tracks are recorded on side B.
12. Press the button 4.
13. Press the MEMO button.
14. Press the button 8.
15. Press the MEMO button.
"8"
EDIT, PROG., SIDE B
This completes the programming.
- If a track no. that is over the remaining time is
selected, the SIDE A or SIDE B indicator will flash.
16. Press the PLAY/PAUSE switch. Recording of side A is
started automatically. The CD player will start play after
8 seconds waiting.
17. Follow steps "3" to "5" of "Time edit recording" sec-
tion.
- The tracks can also be selected using the skip/search
button on the remote controller or skip/search switch on
the main unit.
It is impossible to check, to change and to add program-
mes.
MANUAL ECORD1NG
1.
Press the CD FUNCTION switch.
2.
Press the REC button of the cassette deck. The deck is
ready for recording.
3.
Press the PLAY/PAUSE switch of the CD player.
With normal play, play will start from track 1; with pro-
grammed play, it will start from the first programmed
track.
Note:
In this method recording will be interrupted at the end of
tape.
DUBBING OPERATION
The recording of radio programm
gramophone
records or dubbing of music tapes
'missible only
insofar as copyright or other righ'
,
jird parties are
not thereby infringed.
- This unit enables you to dub a
Drded
tape onto
another tape by using the built-in d-
- 4
e deck mecha-
nisms. It is performed only one w7;
i TAPE A (play-
back)
to
TAPE B (recording).
- During dubbing operation, the DOLBY NR switch has no
effect to the copied tape.
Dubbing
1.
Insert a recorded cassette into TAPE A and a blank
cassette into TAPE B.
2.
Press the TAPE FUNCTION switch.
3.
Set the TAPE B tape select (TAPE B SEL.) switch for the
type of tape being used.
4.
Set the REVERSE MODE lever to
) or
as
desired.
5.
Wind the tape on TAPE A to the be,„ ming of the tape or
a particular selection.
6.
Select the dubbing speed with the JUB. SPEED/BEAT
CANCEL switch.
HIGH:
For dubbing the whole tape at high speed (twice
normal speed).
NORMAL:
For dubbing with monitoring at normal speed.
7.
Press TAPE B PAUSE button and then press TAPE B
REC button.
8.
Press TAPE A PLAY button. TAPE B PAUSE button will
be released and dubbing will start automatically.
9.
To stop the dubbing operation, press both STOP/EJECT
buttons simultaneously.
To dub other selections repeat steps 5 to 9 as described
above.
Automatic stop in dubbing operation
a)
When TAPE A tape is longer than TAPE B:
After the automatic stop has been activated on TAPE B,
TAPE A will continue to play back at normal speed.
b)
When TAPE B tape is longer than TAPE A:
After the automatic stop has been activated on TAPE A,
TAPE B will not stop. The STOP/EJECT button should
then be pressed.
Note:
Do not change the dubbing speed during the dubbing
operation.
-10-

MAINTENANCE
Cleaning the heads (Fig. 15)
To ensure the continued high performance of your unit,
periodically clean the heads and pinch rollers to prevent
accumulation of dust or tape oxide deposits.
1.
Open both cassette compartment lids by pressing both
STOP/EJECT buttons.
2.
Moisten a cotton bud (1) with head cleaner or methyl-
ated spirit and apply to the faces of heads (4 and 7), rub
gently until all traces of dirt or oxide are removed. Also
clean the surfaces of the pinch rollers (3, 5 and 8) and
the capstans (2, 6 and 9).
8
9
Fig. 15
Installing the unit
Never place the unit near a source of extreme heat such as
a radiator or direct sunlight or in a moist environment.
Following this advice will safeguard the unit from damage.
Placing the unit in a well ventilated area is strongly recom-
mended.
Cleaning the unit
To retain the beauty of the control panel and cabinet,
simply wipe with a soft, freshly laundered cloth moistened
with plain lukewarm water.
-11-

Drive Belt
Fig. 17
TP-X801
PREPARATION
THIS TURNTABLE IS DESIGNED FOR USE ONLY WITH
SANYO MODEL NO. DC-X601 OR
DC-X801.
Do not plug-in the mains lead of the DC-X601 or DC-X801
stereo system until fully assembled.
1.
Carefully unpack the unit and other parts. Remove all
packing material from around the turntable.
2.
Locate the unit horizontally on a heavy duty stand or firm
level surface, and away from the speaker system to
avoid sound feedback.
3.
Make sure that the drive belt of the turntable platter is not
-
twisted, then slip the turntable platter over the turntable
spindle (Fig. 16).
Turntable Spindle
8.
Insert the hinges of the dust cover into the notches on
the turntable base (Fig. 19).
Fig. 19
9.
Connect the output lead to the PHONO input socket and
connect the power supply lead to the DC 12 V socket on
the stereo system.
Fig:16
4.
Turn the turntable platter to the right until one of the
openings of the turntable platter comes over the motor
pulley.
5.
Place the drive belt onto the motor pulley. Be sure not to
twist the belt (Fig. 17).
Motor Pulley
Note:
Do not touch the belt and motor pulley with oily hands.
6.
Place the turntable mat on the turntable platter.
7.
Attach the hinges into the notches of the dust cover
(Fig. 18).
Hinge
Fig. 18
Dust
Cover
ilM7e
CZZ;;;.-•
-12-
CONTROLS (Fig. 20)
1.
Speed select switch (SPEED)
2.
Turntable spindle
3.
Turntable platter and rubber mat
4.
45 rpm adapter
5.
Tonearm
6.
Tonearm rest and lock
7.
Headshell with cartridge
8.
Cueing switch (CUE)
9.
Reject switch (REJECT)
1
9
3
7
8
Fig. 20
OPERATION
Before you use t e turntable, disengage the tonearm lock
and carefully rer .ove the stylus cover.
1.
Make sure that the output lead and power supply lead
from the turntable are properly connected to the sockets
on the
rear of the stereo system.
2.
Depress the POWER switch on the stereo system to
switch on the system.
3.
Press the PHONO function switch on the stereo system.
4.
Place a record disc on the turntable platter. If necessary,
use the supplied 45 rpm adapter.
5.
Set the SPEED select switch for the applicable record
speed.
Depress the switch for 45 rpm records.
Release it for 33-1/3 rpm LP records.
6.
Depress the CUE switch to lift the tonearm from its rest.
Gently place the stylus over the required position on the
record. The turntable platter will begin revolving.
7.
Press the CUE switch again to release. The tonearm will
gently go down onto the record.
8.
Adjust the controls on the stereo system for the most
pleasant listening level and tonal balance.
9.
At the end of the record, the tonearm will return to its rest
and the
,
turntable platter will stop revolving.
You may stop the turntable at any time by pressing the
REJECT switch which will return the tonearm to its rest.
Do not touch the tonearm or headshell while it is return-
ing to its rest.
Note:
-
The first time you use the turntable, the tonearm may not
return to its rest. If this happens, press the REJECT
switch.
- After use, engage the tonearm lock to avoid accidental
stylus damage.
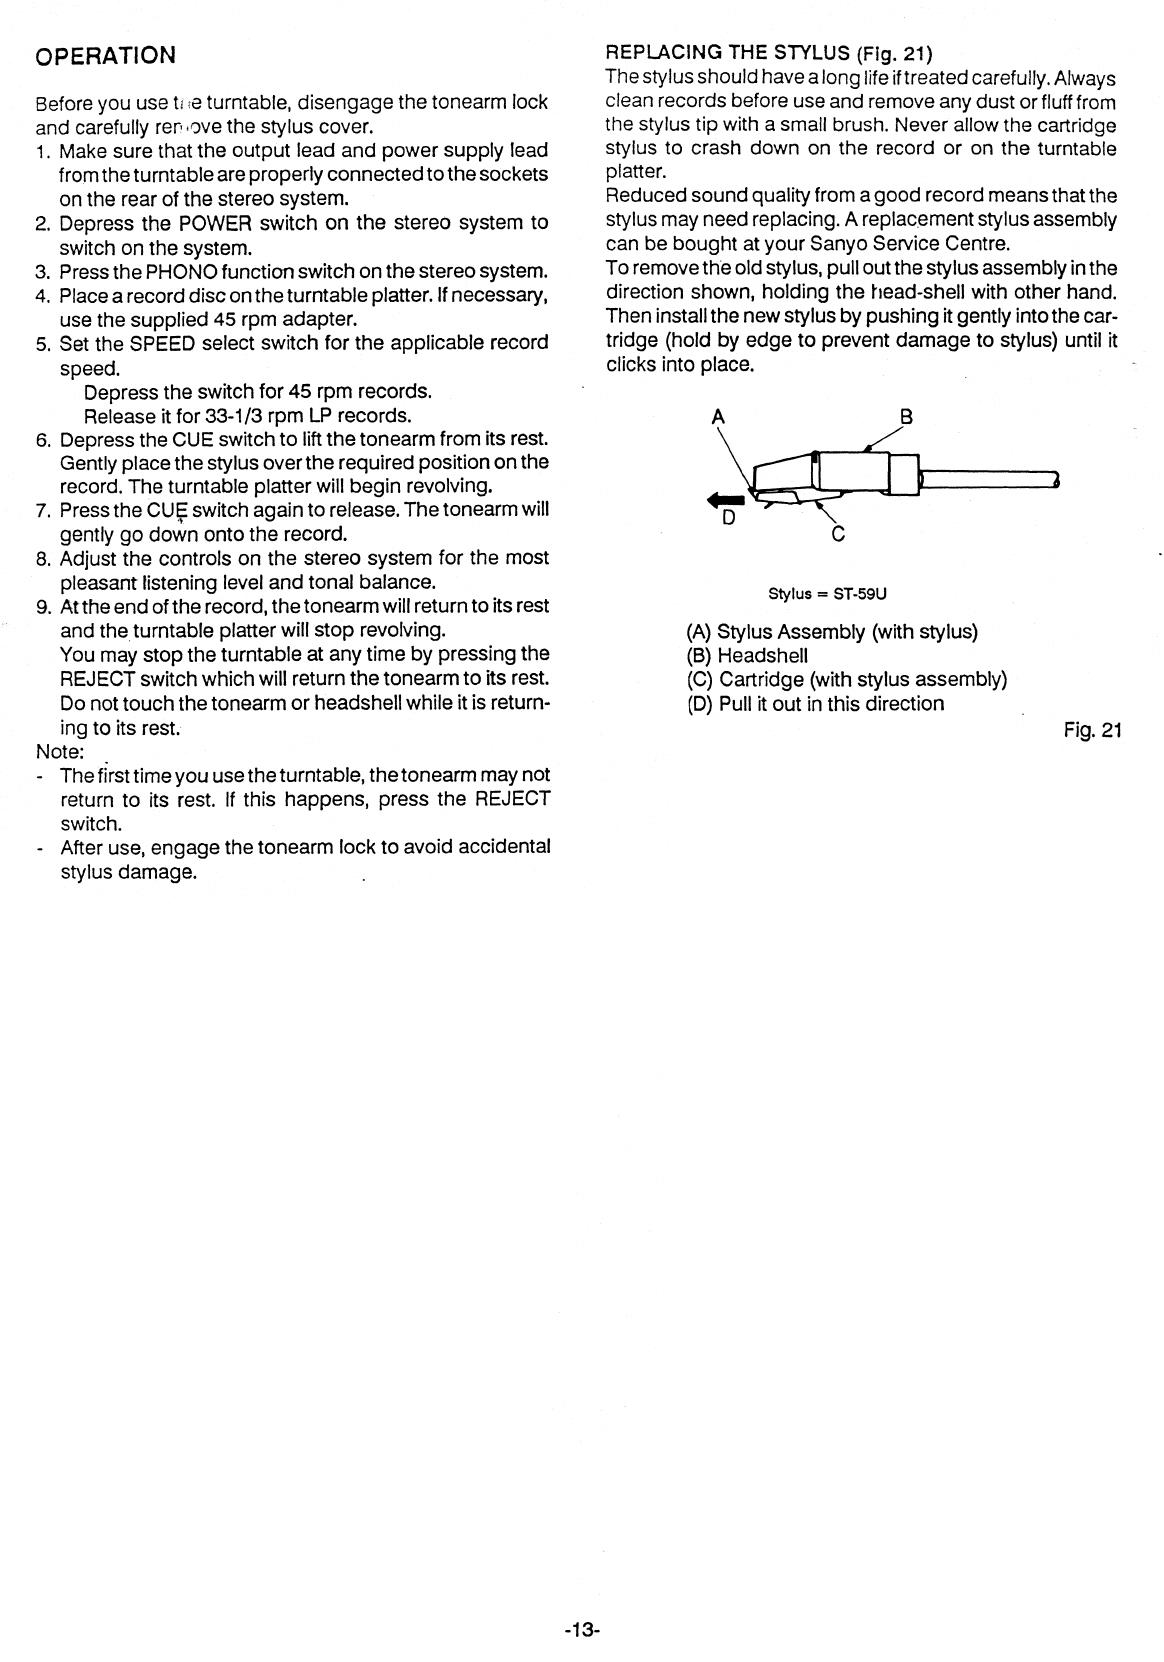
REPLACING THE STYLUS (Fig. 21)
The stylus should have a long life if treated carefully. Always
clean records before use and remove any dust or fluff from
the stylus tip with a small brush. Never allow the cartridge
stylus to crash down on the record or on the turntable
platter.
Reduced sound quality from a good record means that the
stylus may need replacing. A replacement stylus assembly
can be bought at your Sanyo Service Centre.
To remove the old stylus, pull out the stylus assembly in the
direction shown, holding the head-shell with other hand.
Then install the new stylus by pushing it gently into the car-
tridge (hold by edge to prevent damage to stylus) until it
clicks into place.
Stylus = ST-59U
(A)
Stylus Assembly (with stylus)
(B)
Headshell
(C)
Cartridge (with stylus assembly)
(D)
Pull it out in this direction
Fig. 21
-13-
SPECIFICATIONS
TP-X801
DC-X801
Tuner section
Frequency range:
FM: 87.5 - 108 MHz
AM: 531 - 1602 kHz
Cassette deck section
Recording system:
AC bias, 4-track stereo
Rewind and fast forward time:
Approx. 120 sec. (C-60)
LCD player section
Channels
2 channels
Frequency response
20 - 20,000 Hz
S/N ratio
85 dB
Channel separation
90 dB (1 kHz)
Distortion
0.12% (1 kHz)
Wow and flutter
Undetectable
Type:
Semi-Automatic Turntable, with cueing
Motor:
DC Servo Motor
Drive System:
Belt Drive
Cartridge:
Magnetic
Stylus:
Conical with Diamond (ST-59U)
Wow and Flutter:
0.15%
Power Supply:
12 V DC supplied from the DC-X601 or DC-X801
Dimensions (W x D x H):
360 x 357 x 96 mm
Specifications subject to change without notice.
General
Output power:
40 W x 2 (10% THD)
Inputs:
VIDEO: 47k ohms (280 mV)
Outputs:
SPEAKERS: 8 ohms
HEADPHONES: 8 ohms
Power requirements:
AC: 240 V, 50 Hz
Dimensions (W x D x H)
Approx. 360 x 328 x 357 mm
RB-X801 REMOTE CONTROLLER
Power requirements:
DC: 3 V, "AA/SUM-3/R6" battery x 2
Dimensions (W x D x H)
Approx. 60 x 18 x 160 mm
-14-

SANYO Electric Co., Ltd.
(As)
614-224-5682
Printed in Singapore
/