13
5) DELAY START LIGHT
This flashes when delay start has been set.
6) WASH CYCLE TIME
When a programme is selected the display automatically shows the maximum cycle duration
for a full load, which can vary, depending on the options selected. Once the programme has
started you will be kept informed constantly of the time remaining to the end of the wash.The
appliance calculates the time to the end of the selected programme based upon a standard
loading, during the cycle, the appliance corrects the time to that applicable to the size and
composition of the load.
7) WASH TIME
When a programme is selected the relevant indicator will light up to show the minimum
possible Wash time.
Selecting a greater Wash time using the special button will cause the corresponding indicator
to light up.
8) BUTTONS INDICATOR LIGHT
These light up when the relevant buttons are pressed.
If an option is selected but it is not compatible with the selected programme then the symbol
first flashes and then goes off.
9) MAXIMUM LOADING CAPACITY and DETERGENT INDICATOR
When a programme is selected on the display is shown the maximum load of laundry
suitable for that cycle and the relative detergent quantity.
Detergent:
20% of the maximum quantity
50% of the maximum quantity
maximum quantity
The detergent quantity suggested can be vary depending on how much the fabrics are soiled.
Maximum load:
Every levels shown on the display is the 10% of the
maximum loading capacity.
When a programme is selected the maximum capacity
suggested is shown on the display.
For the programmes where the KG MODE function is active,
the appliance in the first minutes it calculates the real
laundry loaded, updating the levels on the display in real
time.
12
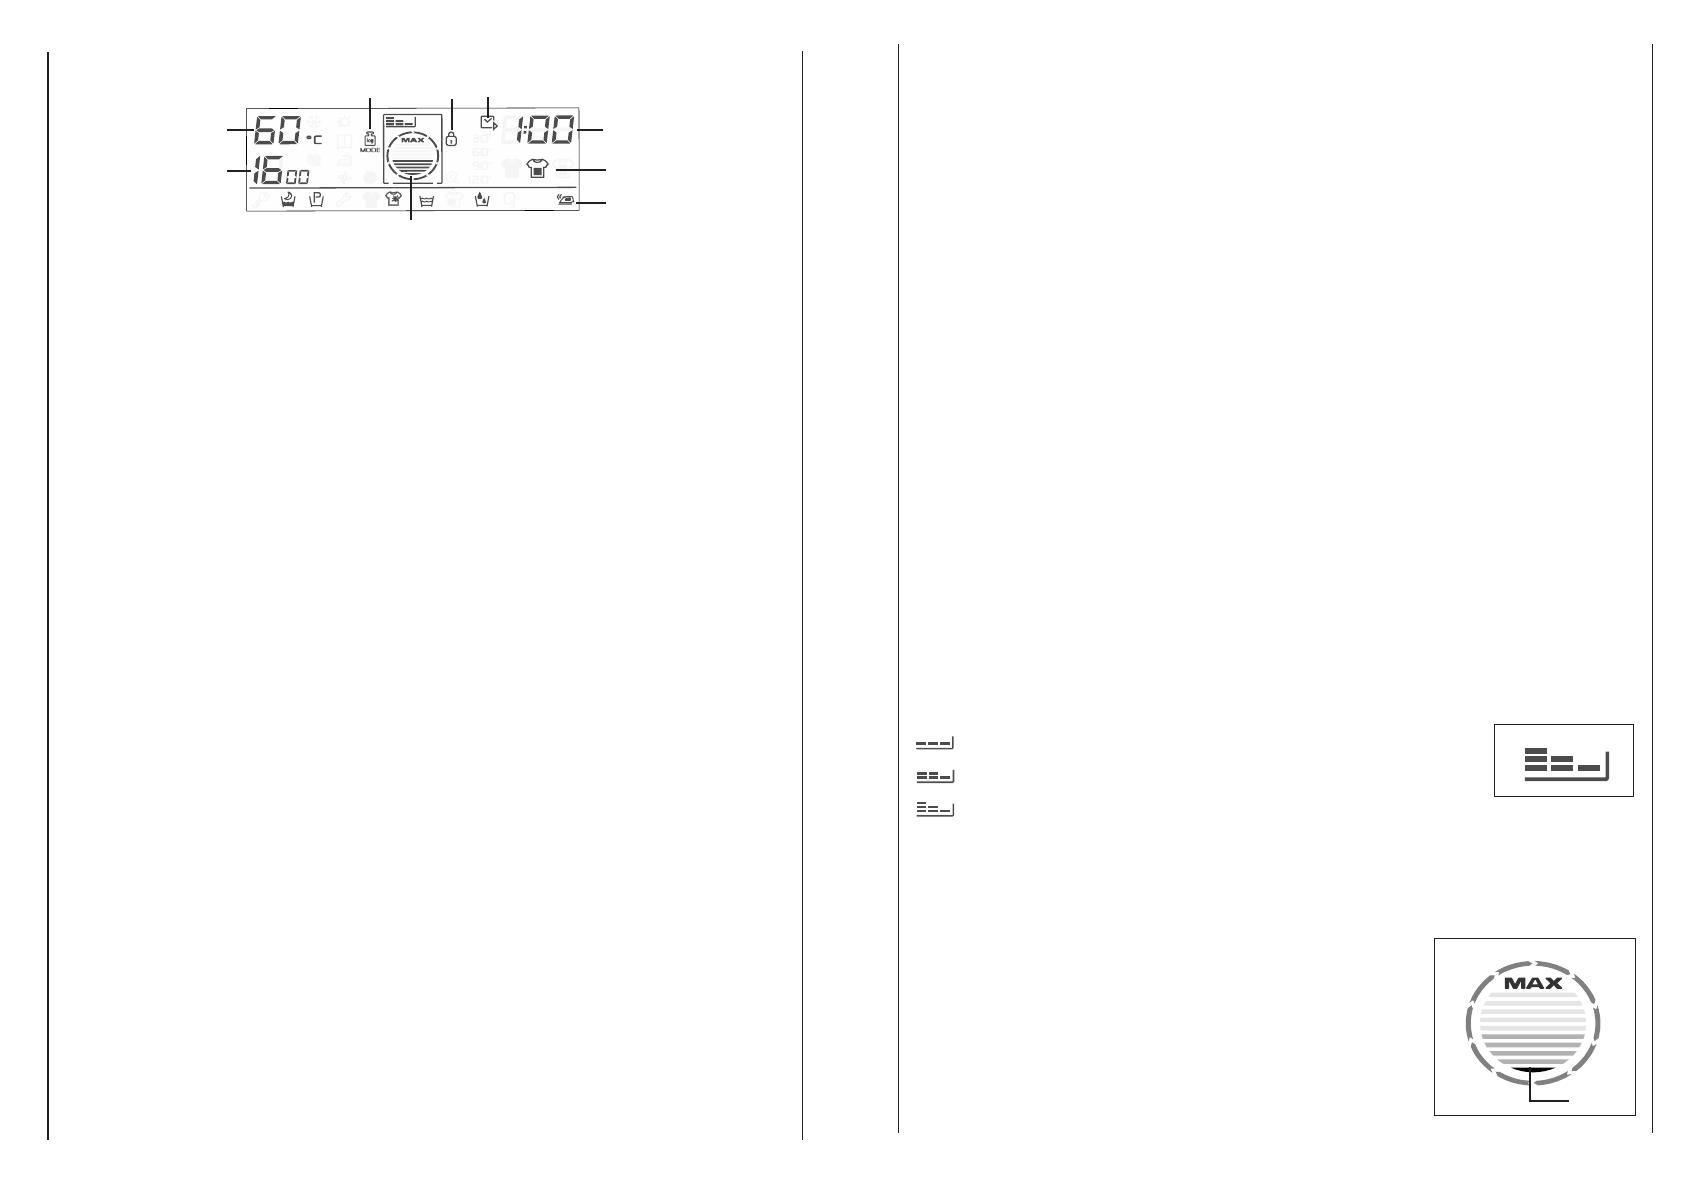
“DIGITAL” Display
The display’s indicator system allows you to be constantly informed about the status of the
machine:
1) SPIN SPEED
Once the programme has been selected, the maximum spin speed allowed for that
programme appears on the display. Pressing the spin button will reduce the speed by 100
rpm each time the button is pressed. The minimum speed allowed is 400 rpm, or it is
possible to omit the spin by pressing the spin button repeatedly.
2) WASH TEMPERATURE
When a programme is selected on the display is show the recommended wash temperature.
The temperature button can be used to decrease or increase the temperature of your chosen
wash cycle.
Each time the button is pressed, the new temperature level is shown on the display.
3)Kg MODE Indicator
(Function active only on Cotton and Synthetics programmes)
Through every wash phase “Kg MODE” allows to monitor information on the wash load in the drum.
So, as soon as the “Kg MODE” is set in motion, in the first 4 minutes of the wash, it:
- adjusts the amount of water required
- determines the length of the wash cycle
- controls rinsing
according to the type of fabric selected to be washed it:
- adjusts the rhythm of drum rotation for the type of fabric being washed
- recognises the presence of lather, increasing, if necessary, the amount of water during rinsing
- adjusts the spin speed according to the load, thus avoiding any imbalance.
In this way “Kg MODE” is able to decide, by itself, the most suitable programme for each
individual wash from the hundreds of possible wash combinations.
“Kg MODE” meets the need for easy use by permitting a simplified programme selection.
Infact, the user need only tell the machine the type of fabric in the drum and the degree of
soiling, to obtain a perfect wash with the highest level of drying possible with a spin which really
cares for your clothes.
4) DOOR LIGHT
The “Door Security” indicator light is illuminated when the door is fully closed and the
machine is ON. When "Start/Pause" is pressed on the machine with the door closed the
indicator will flash momentarily and then illuminate.
If the door is not closed the indicator will continue to flash. A special safety device prevents
the door from being opened immediately after the end of the cycle. Wait for 2 minutes after
the wash cycle has finished and the “Door Security” light has gone out before opening the
door.
S
1
9
3
4
5
6
7
8
2
10%


