LG UK G-Pad F 8.0 US Cellular Operating instructions
- Category
- Tablets
- Type
- Operating instructions
This manual is also suitable for


User Guide
• Someofthecontentsinthismanualmaydifferfromyourdevicedependingonthe
softwareversionofthedevice,OSversionoryourserviceprovider,andaresubject
tochangewithoutpriornotice.
• AlwaysusegenuineLGaccessories.Thesupplieditemsaredesignedonlyforthis
deviceandmaynotbecompatiblewithotherdevices.
• Thisdeviceisnotsuitableforpeoplewhohaveavisualimpairmentduetothe
touchscreenkeyboard.
• Allscreenshotsinthisguidearesimulated.
• Actualdisplaysandthecolorofthedevicemayvary.
• U.S.Cellular
®
CustomerCare1-888-944-9400.
ENGLISH

2
Table of contents
Table of contents
Important Notice .......................................4
Getting to know your device ....................7
Device layout ...........................................7
Connecting cables to the ports ...............10
Installing the SIM card or
microSD card.........................................12
Removing the memory card ...................13
Locking and unlocking the device ..........14
Your Home screen ...................................16
Touch screen tips ..................................16
Home screen .........................................17
Customizing the Home screen ...............18
Returning to recently-used
applications ...........................................20
Notifications panel .................................20
On-screen keyboard ..............................23
Special Features .....................................24
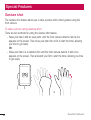
Gesture shot ..........................................24
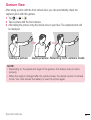
Gesture View .........................................25
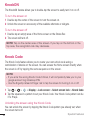
KnockON ...............................................26
Knock Code ...........................................26
Dual window..........................................27
QuickMemo+ .........................................28
QSlide ....................................................29
QuickRemote .........................................30
Google Account Setup ............................31
Connecting to Networks and Devices ....33
Wi-Fi .....................................................33
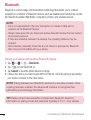
Bluetooth ...............................................34
Wi-Fi Direct ...........................................35
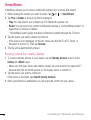
SmartShare ...........................................36
QPair .....................................................37
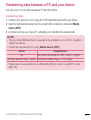
Transferring data between a PC and
your device ............................................39
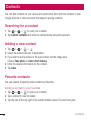
Contacts ..................................................40
Searching for a contact ..........................40
Adding a new contact ............................40
Favorite contacts ...................................40
Creating a group ....................................41
Joining and Separating Contacts ............41
Email .......................................................42
Managing email accounts ......................42
Working with account folders .................42
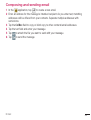
Composing and sending email ...............43
Camera and Video ...................................44
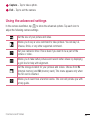
Using the advanced settings ..................45
Taking a photo .......................................46
Once you have taken a photo .................46
Recording a video ..................................47
After recording a video...........................47
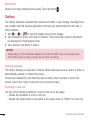
Gallery ...................................................48
Multimedia ..............................................51
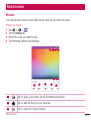
Music ....................................................51

3
Table of contents
Utilities ....................................................53
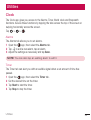
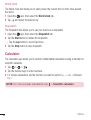
Clock .....................................................53
Calculator ..............................................54
Calendar ................................................55
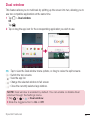
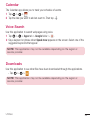
Voice Search..........................................55
Downloads ............................................55
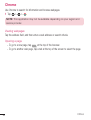
Chrome .................................................56
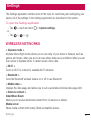
Settings ...................................................57
WIRELESS NETWORKS ...........................57
DEVICE ..................................................58
PERSONAL .............................................62
SYSTEM .................................................65
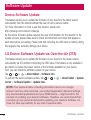
Software Update .....................................70
Device Software Update.........................70
LG Device Software Update via
Over-the-Air (OTA) .................................70
About this user guide .............................71
Trademarks .............................................72
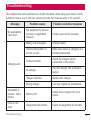
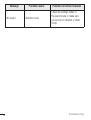
Troubleshooting ......................................73
For Your Safety........................................75

4
Important Notice
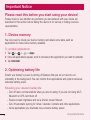
Please read this before you start using your device!
Pleasechecktoseewhetheranyproblemsyouencounteredwithyourdeviceare
describedinthissectionbeforetakingthedeviceinforserviceorcallingaservice
representative.
1. Device memory
Youmayneedtocheckyourdevicememoryanddeletesomedata,suchas
applicationstomakemorememoryavailable.
To uninstall applications:
1 Tap > > >Apps.
2 Onceallapplicationsappear,scrolltoandselecttheapplicationyouwanttouninstall.
3 TapUninstall.
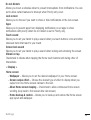
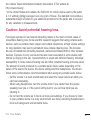
2. Optimizing battery life
Extendyourbattery'spowerbyturningofffeaturesthatyoudonotneedtorun
constantlyinthebackground.Youcanmonitorhowapplicationsandsystemresources
consumebatterypower.
Extending your device's battery life:
• Turnoffradiocommunicationswhenyouarenotusing.IfyouarenotusingWi-Fi,
BluetoothorGPS,turnthemoff.
• Reducescreenbrightnessandsetashorterscreentimeout.
• TurnoffautomaticsyncingforGmail,Calendar,Contactsandotherapplications.
• Someapplicationsyoudownloadmayconsumebatterypower.
Important Notice

5
Important Notice
• Whileusingdownloadedapplications,checkthebatterychargelevel.
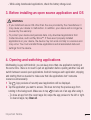
3. Before installing an open source application and OS
WARNING
• If you install and use an OS other than the one provided by the manufacturer it
may cause your device to malfunction. In addition, your device will no longer be
covered by the warranty.
• To protect your device and personal data, only download applications from
trusted sources, such as Play Store™. If there are improperly installed
applications on your device, the device may not work normally or a serious error
may occur. You must uninstall those applications and all associated data and
settings from the device.
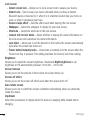
4. Opening and switching applications
MultitaskingiseasywithAndroid;youcankeepmorethanoneapplicationrunningat
thesametime.Thereisnoneedtoquitanapplicationbeforeopeninganother.Useand
switchbetweenseveralopenapplications.Androidmanageseachapplication,stopping
andstartingthemasneededtomakesurethatidleapplicationsdon'tconsume
resourcesunnecessarily.
1 Tap
.Apppreviewsofrecentlyusedapplicationswillbedisplayed.
2 Taptheapplicationyouwanttoaccess.Thisdoesnotstopthepreviousappfrom
runninginthebackground.Makesuretotap
tobackoutofanappafterusingit.
• Tocloseanappfromtherecentappslist,swipetheapppreviewtotheleftorright.
Toclearallapps,tapClear all.

6
Important Notice
5. If the screen freezes
Ifthescreenfreezesorthedevicedoesnotrespondwhenyoutrytooperateit:
PressandholdthePower/Lock Keyforabout10secondstoresetyourdevice.Toturn
yourdeviceoff,pressandholdthePower/Lock Keyforabout20seconds.Ifitstill
doesnotwork,pleasecontacttheservicecenter.

7
Getting to know your device
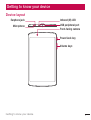
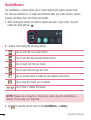
Device layout
Volume keys
Front-facing camera
USB peripheral port
Infrared (IR) LED
Power/Lock key
Earphone jack
Microphone
Getting to know your device

8
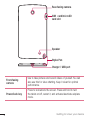
Getting to know your device
SIM card/microSD
card slot
Rear-facing camera
Speaker
Stylus Pen
Charger / USB port
Front-facing
camera
Usetotakepicturesandrecordvideosofyourself.Youcan
alsousethisforvideochatting.Keepitcleanforoptimal
performance.
Power/Lock key
Presstolock/unlockthescreen.Pressandholdtoturn
thetableton/off,restartit,andactivate/deactivateairplane
mode.

9
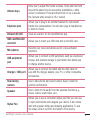
Getting to know your device
Volume keys
Allowyoutoadjustthemediavolumes.Pressandholdboth
keysatthesametimetoaccesstheQuickMemo+while
screenisunlocked.PressandholdDownorUptoaccess
theCamerawhilescreenisofforlocked.
Earphone jack
Allowsyoutopluginanoptionalheadsetforconvenient,
hands-freeconversations.Youcanalsopluginheadphones
tolistentomusic.
Infrared (IR) LED UsedasasensorfortheQuickRemoteapp.
SIM card/MicroSD
card slot
AllowsyoutoinsertyourSIMcardandamicroSDcard.
Microphone
Recordsyourvoiceandallowsuseforvoice-activated
functions.
USB peripheral
port
AllowsyoutoconnectaUSBperipheral,suchasakeyboard,
mouse,andexternalstoragetoyourtablet.Alsoallowsyou
tochargeanotherdevice.
Charger / USB port
AllowsyoutoconnectthetabletandtheUSBcablefor
usewiththechargeradapter,yourPC,orothercompatible
accessories.
Rear-facing
camera
Usetotakephotosandrecordvideos.Keepitcleanfor
optimalperformance.
Speaker
Usetolistentotheaudiofromtheselectedfunction(e.g.,
music,videos,soundclips,etc.).
Stylus Pen
Allowsyoutouseaconvenientstyluspenthatyoucanuse
toinputcommandsandnavigateyourdevice.Italsoworks
wellwithpopularwritinganddrawingapplications.Touse
thestylus,slideitoutfromthebottomofthedevice.

10
Getting to know your device
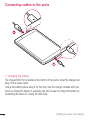
Connecting cables to the ports
1. Charging the battery
TheCharger/USBPortislocatedatthebottomofthedevice.Insertthechargerand
plugitintoapoweroutlet.
Chargethebatterybeforeusingitforfirsttime.Usethechargerincludedwithyour
devicetochargethebattery.Acomputercanalsobeusedtochargethebatteryby
connectingthedevicetoitusingtheUSBcable.

11
Getting to know your device
WARNING
Use only LG-approved chargers, batteries and cables. If you use unapproved
chargers, batteries or cables, it may cause a battery charging delay or pop up
message regarding slow charging. This can also cause the battery to explode
or damage the device, which is not covered by the warranty.
NOTE:
• Your device has an internal rechargeable battery. For your safety, do not remove
the embedded battery.
• The battery must be fully charged initially to improve battery lifetime.
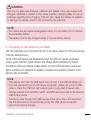
2. Connecting a USB device to your tablet
TheUSBperipheralportislocatedatthetopofthedevice.InserttheUSBportandplug
itintothedesireddevice.
SomeoftheUSBdevicesaresupportedthroughtheUSBportincludeakeyboard,
mouse,gamecontroller,digitalcamera,andstoragedevice(includinganAndroid
smartphoneactingasexternalstoragedevice).AsmostUSBkeyboards,mouseand
gamecontrollersaredesignedfordesktopcomputersandoperationsystems,some
devicesmaynotfunction.
NOTE:
• Only devices that meet the USB specs may connect to the USB peripheral port.
• If you are experiencing errors with device recognition, please use a shorter USB
cable or check the USB Hub with external power supply (Self-Powered Hub).
• Only file systems such as FAT32, exFAT, and NTFS are supported for the external
USB storage device.
• Transferring data through both USB devices at the same time is not supported.
The first device that is connected has priority. The USB device connected
second can only be charged.

12
Getting to know your device
WARNING
You cannot store the data in the USB storage when the battery level is below
15%. Please charge the battery above 15% in order to use the USB storage
function.
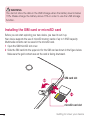
Installing the SIM card or microSD card
Beforeyoucanstartexploringyournewdevice,youneedtosetitup.
YourdevicesupportstheuseofmicroSDmemorycardsofupto128GBcapacity.
MultimediacontentscanbesavedinthemicroSDcard.
1 OpentheSIM/microSDslotcover.
2 SlidetheSIMcardintotheupperslotfortheSIMcardasshowninthegurebelow.
Makesurethegoldcontactareaonthecardisfacingdownward.
SIM card slot
microSD card slot

13
Getting to know your device
3 Ifyouwanttouseamemorycard,insertthememorycardintothelowerslot.Make
surethegoldcontactareaisfacingupwards.SlidethemicroSDcardintotheslotuntil
it“clicks”intoplaceandthenclosetheslotcover.
NOTE:
• Cards must be positioned as shown.
• MicroSD card is not included.
• Only microSIM cards work with this device.
• Depending on the memory card manufacturer and type, some memory cards
may not be compatible with your device.
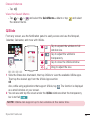
Removing the memory card
Beforeremovingthememorycard,firstunmountitforsaferemoval.
1 Tap
> > >Storage>Unmount SD card.
2 Openthecardslotcoverandpressthememorycardintounlockit.Thenpullitout
oftheslot.
WARNING
Do not remove the memory card while the device is transferring or accessing
information. Doing so can cause data to be lost or corrupted or damage to
the memory card or device. LG is not responsible for losses that result from
the misuse of damaged memory cards, including the loss of data.

14
Getting to know your device
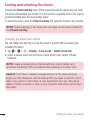
Locking and unlocking the device
PressingthePower/Lock Keyturnsoffthescreenandputsthedeviceintolockmode.
Thedeviceautomaticallygetslockedifitisnotusedforaspecifiedperiod.Thishelpsto
preventaccidentaltapsandsavesbatterypower.
Tounlockthedevice,pressthePower/Lock Keyandswipethescreeninanydirection.
NOTE: Double-tapping on the screen also can wake up the screen instead of
the Power/Lock Key.
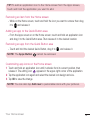
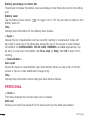
Changing the screen lock method
Youcanchangethewaythatyoulockthescreentopreventothersaccessingyour
personalinformation.
1 Tap
> > >Display>Lock screen>Select screen lock.
2 SelectadesiredscreenlockfromNone,Swipe,KnockCode,Pattern,PINand
Password.
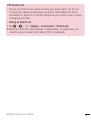
NOTE: Create a Google account before setting an unlock pattern and
remember the Backup PIN you created when creating your pattern lock.
Caution! If you haven't created a Google account on the device and you
forgot your PIN, Password, and the backup PIN, you need to perform a hard
reset. If you perform a hard reset, all user applications and user data will be
deleted. Please remember to back up any important data before performing a
hard reset.

15
Getting to know your device
TIP! Smart Lock
• You can use Smart Lock to make unlocking your device easier. You can set
it to keep your device unlocked when you have a trusted Bluetooth device
connected to it, when it's in a familiar location like your home or work, or when
it recognises your face.
• Setting up Smart Lock
1 Tap > > > Display > Lock screen > Smart Lock.
2 Before you add any trusted devices, trusted places, or trusted face, you
need to set up a screen lock (pattern, PIN, or password).

16
Your Home screen
Your Home screen
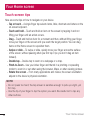
Touch screen tips
Herearesometipsonhowtonavigateonyourdevice.
• Tap or touch–Asinglefingertapselectsitems,links,shortcutsandlettersonthe
on-screenkeyboard.
• Touch and hold–Touchandholdanitemonthescreenbytappingitandnot
liftingyourfingeruntilanactionoccurs.
• Drag–Touchandholdanitemforamomentandthen,withoutliftingyourfinger,
moveyourfingeronthescreenuntilyoureachthetargetposition.Youcandrag
itemsontheHomescreentorepositionthem.
• Swipe or slide–Toswipeorslide,quicklymoveyourfingeracrossthesurface
ofthescreen,withoutpausingwhenyoufirsttapit(soyoudon'tdraganitem
instead).
• Double-tap–Double-taptozoomonawebpageoramap.
• Pinch-to-Zoom–Useyourindexfingerandthumbinapinchingorspreading
motiontozoominoroutwhenusingthebrowser,Maps,orwhenviewingpictures.
• Rotate the screen–Frommanyapplicationsandmenus,thescreenorientation
adjuststothedevice'sphysicalorientation.
NOTE:
• Do not press too hard; the tap screen is sensitive enough to pick up a light, yet
firm tap.
• Use the tip of your finger to tap the option you want. Be careful not to tap any
other buttons.

17
Your Home screen
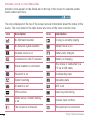
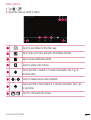
Home screen
TheHomescreenisthestartingpointformanyapplicationsandfunctions.Itallows
youtoadditemslikeappshortcutsandGooglewidgetstogiveyouinstantaccessto
informationandapplications.Thisisthedefaultcanvasandaccessiblefromanymenu
bytapping
.
Status Bar
Application Icons
Location Indicator
Quick Button Area
Home Touch Buttons
Showsthedevice'sstatusinformation,includingthetime,signalstrength,battery
statusandnotificationicons.
Tapanicon(application,folder,etc.)toopenanduseit.
IndicateswhichHomescreencanvasyouarecurrentlyviewing.
Providesone-touchaccesstothefunctionfromanyHomescreencanvas.

18
Your Home screen
Back Button
Returnstothepreviousscreen.Alsoclosespop-upitems,
suchasmenus,dialogboxesandtheon-screenkeyboard.
Home Button
ReturntotheHomescreenfromanyscreen.Touchandhold
toaccessGoogleNow.
Recent Apps
Button
Displaysrecentlyusedapplications.Ifyoutouchandhold
thisbutton,itopensamenuofavailableoptions.
Dual window
button
TaptochangetoDualwindowmode.Itallowsyouto
managetwodifferentappsatthesametimebysplittingthe
screenintwo.
Extended Home screen
TheoperatingsystemprovidesmultipleHomescreencanvasestoprovidemorespace
foraddingicons,widgetsandmore.
• SlideyourfingerleftorrightacrosstheHomescreentoaccessadditional
canvases.
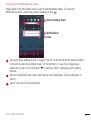
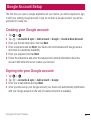
Customizing the Home screen
YoucancustomizeyourHomescreenbyaddingappsandwidgetsandchanging
wallpapers.
Adding items on your Home screen
1 TouchandholdtheemptypartoftheHomescreen.
2 TaptheWidgetstabandselecttheitemyouwanttoadd.Youthenseethisadded
itemontheHomescreen.
3 Dragittothedesiredlocationandliftyournger.

19
Your Home screen
TIP! To add an application icon to the Home screen from the Apps screen,
touch and hold the application you want to add.
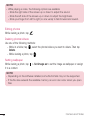
Removing an item from the Home screen
• WhileontheHomescreen,touchandholdtheiconyouwanttoremovethendrag
itto andreleaseit.
Adding an app to the Quick Button area
• FromtheAppsscreenorontheHomescreen,touchandholdanapplicationicon
anddragittotheQuickButtonarea.Thenreleaseitinthedesiredlocation.
Removing an app from the Quick Button area
• TouchandholdthedesiredQuickButton,dragitto ,andreleaseit.
NOTE: The Apps Button cannot be removed.
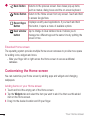
Customizing app icons on the Home screen
1 Touchandholdanapplicationiconuntilitunlocksfromitscurrentposition,then
releaseit.Theeditingicon appearsintheupper-rightcorneroftheapplication.
2 Taptheapplicationiconagainandselectthedesiredicondesignandsize.
3 TapOKtosavethechange.
NOTE: You can also tap Add new to personalize icons with your pictures.
Page is loading ...
Page is loading ...
Page is loading ...
Page is loading ...
Page is loading ...
Page is loading ...
Page is loading ...
Page is loading ...
Page is loading ...
Page is loading ...
Page is loading ...
Page is loading ...
Page is loading ...
Page is loading ...
Page is loading ...
Page is loading ...
Page is loading ...
Page is loading ...
Page is loading ...
Page is loading ...
Page is loading ...
Page is loading ...
Page is loading ...
Page is loading ...
Page is loading ...
Page is loading ...
Page is loading ...
Page is loading ...
Page is loading ...
Page is loading ...
Page is loading ...
Page is loading ...
Page is loading ...
Page is loading ...
Page is loading ...
Page is loading ...
Page is loading ...
Page is loading ...
Page is loading ...
Page is loading ...
Page is loading ...
Page is loading ...
Page is loading ...
Page is loading ...
Page is loading ...
Page is loading ...
Page is loading ...
Page is loading ...
Page is loading ...
Page is loading ...
Page is loading ...
Page is loading ...
Page is loading ...
Page is loading ...
Page is loading ...
Page is loading ...
Page is loading ...
Page is loading ...
Page is loading ...
Page is loading ...
Page is loading ...
Page is loading ...
Page is loading ...
Page is loading ...
Page is loading ...
Page is loading ...
Page is loading ...
Page is loading ...
Page is loading ...
Page is loading ...
Page is loading ...
Page is loading ...
Page is loading ...
Page is loading ...
Page is loading ...
Page is loading ...
Page is loading ...
Page is loading ...
Page is loading ...
Page is loading ...
Page is loading ...
Page is loading ...
Page is loading ...
Page is loading ...
Page is loading ...
Page is loading ...
Page is loading ...
Page is loading ...
Page is loading ...
-
 1
1
-
 2
2
-
 3
3
-
 4
4
-
 5
5
-
 6
6
-
 7
7
-
 8
8
-
 9
9
-
 10
10
-
 11
11
-
 12
12
-
 13
13
-
 14
14
-
 15
15
-
 16
16
-
 17
17
-
 18
18
-
 19
19
-
 20
20
-
 21
21
-
 22
22
-
 23
23
-
 24
24
-
 25
25
-
 26
26
-
 27
27
-
 28
28
-
 29
29
-
 30
30
-
 31
31
-
 32
32
-
 33
33
-
 34
34
-
 35
35
-
 36
36
-
 37
37
-
 38
38
-
 39
39
-
 40
40
-
 41
41
-
 42
42
-
 43
43
-
 44
44
-
 45
45
-
 46
46
-
 47
47
-
 48
48
-
 49
49
-
 50
50
-
 51
51
-
 52
52
-
 53
53
-
 54
54
-
 55
55
-
 56
56
-
 57
57
-
 58
58
-
 59
59
-
 60
60
-
 61
61
-
 62
62
-
 63
63
-
 64
64
-
 65
65
-
 66
66
-
 67
67
-
 68
68
-
 69
69
-
 70
70
-
 71
71
-
 72
72
-
 73
73
-
 74
74
-
 75
75
-
 76
76
-
 77
77
-
 78
78
-
 79
79
-
 80
80
-
 81
81
-
 82
82
-
 83
83
-
 84
84
-
 85
85
-
 86
86
-
 87
87
-
 88
88
-
 89
89
-
 90
90
-
 91
91
-
 92
92
-
 93
93
-
 94
94
-
 95
95
-
 96
96
-
 97
97
-
 98
98
-
 99
99
-
 100
100
-
 101
101
-
 102
102
-
 103
103
-
 104
104
-
 105
105
-
 106
106
-
 107
107
-
 108
108
-
 109
109


LG UK G-Pad F 8.0 US Cellular Operating instructions
- Category
- Tablets
- Type
- Operating instructions
- This manual is also suitable for
Ask a question and I''ll find the answer in the document
Finding information in a document is now easier with AI

