RQT7021
2
Dear customer
Thank you for purchasing this product.
For optimum performance and safety, please read these instructions
carefully.
The illustrations and photograph in this manual are of the SL-
1210M5G model.
Table of contents
Supplied accessories................................................................... 2
IMPORTANT SAFETY INSTRUCTIONS ....................................... 3
Features ......................................................................................... 4
Preparation of the cartridge ........................................................ 4
Controls ......................................................................................... 4
Putting the player together ......................................................... 5
Connections and installation ...................................................... 5
Connecting to an amplifier and AC power supply cord ............. 5
Connecting to an Audio Mixer (not included) ............................ 6
Installation .................................................................................. 6
Preparatory adjustments ............................................................. 6
Horizontal balance and stylus pressure .................................... 6
Anti-skating ................................................................................ 7
Armlift height .............................................................................. 7
Tone arm height ......................................................................... 7
Fit the dust cover ....................................................................... 7
Playing records ............................................................................. 8
Adjustments while using the unit ............................................... 9
Pitch control ............................................................................... 9
Adjusting tone arm horizontal weight to reduce skipping when
scratch playing. .......................................................................... 9
Adjusting the turntable brake speed .......................................... 9
Maintenance ................................................................................ 10
Product service ........................................................................... 10
Troubleshooting guide................................................................ 11
Specifications .............................................................................. 11
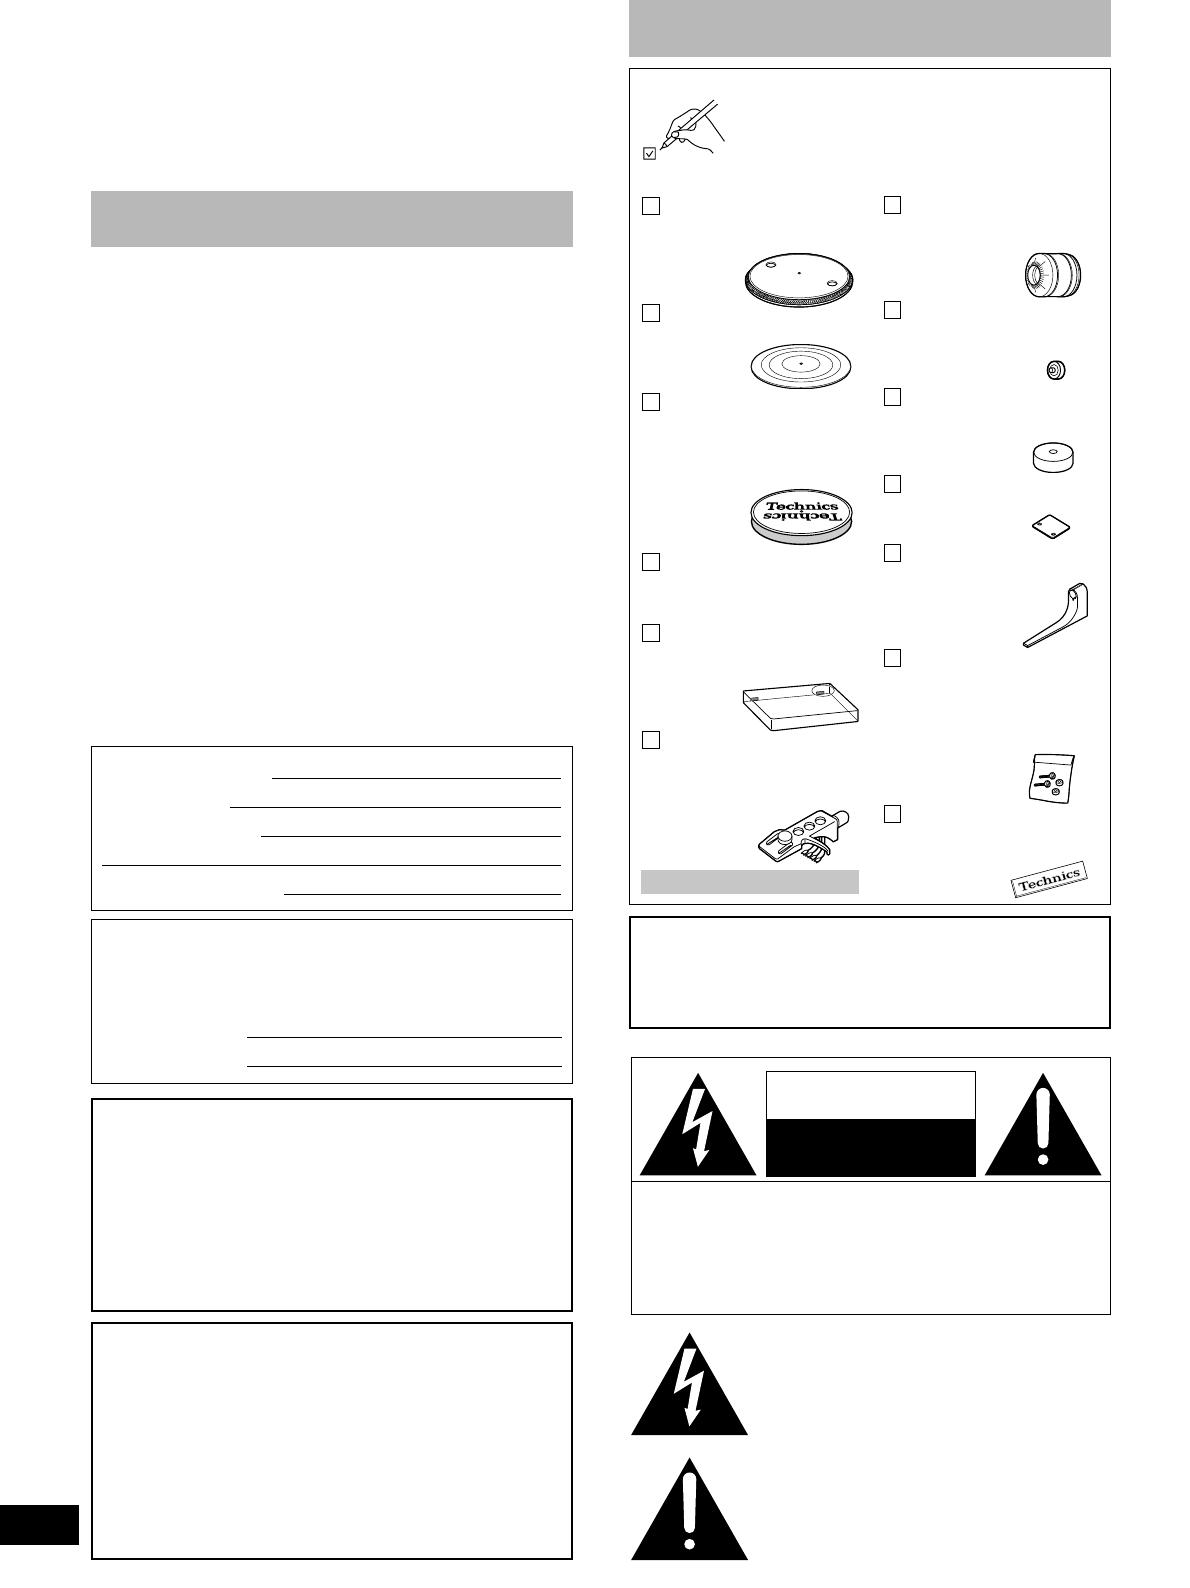
Supplied accessories
Please check and identify the supplied accessories.
Use numbers indicated in parentheses when ask-
ing for replacements parts.
(Only for U.S.A.)
To order accessories contact 1-800-332-5368 or the
website (http://www.pasc.panasonic.com).
Turntable ................. 1pc.
SL-1210M5G(SFTE172-01Z1)
SL-1200GLD(SFTE172-02Z)
Turntable mat .......... 1pc.
SL-1210M5G/SL-1200GLD
(RGS0008)
Disc slip sheet set (included
only with SL-1210M5G) ....
1
(RGS0005Z-1)
•Disc slip sheet
•Transparent sheet
Golden slip sheet (included
only with SL-1200GLD) ..
2
(RGS0012Z)
Dust cover ............... 1pc.
SL-1210M5G(RYF0370A-X)
SL-1200GLD(RGD0078AZ-T)
Head shell (with stylus
weight) ..................... 1pc.
SL-1210M5G(SFPCC31006K)
SL-1200GLD(SFPCC31007K)
A cartridge is not included.
Balance weight ....... 1pc.
SL-1210M5G(SFPWG17201BK)
SL-1200GLD
(RYQ0156-N)
Auxiliary weight ...... 1pc.
SL-1210M5G(SFPWG17202)
SL-1200GLD(RFE0024)
EP record adaptor .. 1pc.
SL-1210M5G(SFWE010A)
SL-1200GLD(SFWE010B)
Shell weight ............ 1pc.
SL-1210M5G/SL-1200GLD
(SFPZB3501)
Overhang gauge ..... 1pc.
SL-1210M5G/SL-1200GLD
(SFK0135-01)
Screw set for cartridge ..
1
SL-1210M5G/SL-1200GLD
•Nuts
(RHN26003)
•
Screws-short(SFCZV8801-1)
•
Screws-long(SFPEV9801-1)
•Washers
(SFPEW9601)
Sticker ...................... 1pc.
SL-1210M5G(RQLC0142-1)
SL-1200GLD(RQLC0111-1)
The model number and serial number of this product can be found
on either the back or the bottom of the unit.
Please note them in the space provided below and keep for future
reference.
MODEL NUMBER
SL-1210M5G/SL-1200GLD
SERIAL NUMBER
WARNING:
TO REDUCE THE RISK OF FIRE, ELECTRIC
SHOCK OR PRODUCT DAMAGE, DO NOT
EXPOSE THIS APPARATUS TO RAIN,
MOISTURE, DRIPPING OR SPLASHING AND
THAT NO OBJECTS FILLED WITH LIQUIDS,
SUCH AS VASES, SHALL BE PLACED ON THE
APPARATUS.
CAUTION!
DO NOT INSTALL OR PLACE THIS UNIT IN A
BOOKCASE, BUILT-IN CABINET OR IN
ANOTHER CONFINED SPACE. ENSURE THE
UNIT IS WELL VENTILATED. TO PREVENT
RISK OF ELECTRIC SHOCK OR FIRE HAZARD
DUE TO OVERHEATING, ENSURE THAT
CURTAINS AND ANY OTHER MATERIALS DO
NOT OBSTRUCT THE VENTILATION VENTS.
The lightning flash with arrowhead symbol, within
an equilateral triangle, is intended to alert the user
to the presence of uninsulated “dangerous voltage”
within the product’s enclosure that may be of suffi-
cient magnitude to constitute a risk of electric shock
to persons.
CAUTION
CAUTION: TO REDUCE THE RISK OF ELECTRIC
SHOCK, DO NOT REMOVE SCREWS.
NO USER-SERVICEABLE PARTS
INSIDE.
REFER SERVICING TO QUALIFIED
SERVICE PERSONNEL.
The exclamation point within an equilateral triangle
is intended to alert the user to the presence of
important operating and maintenance (servicing)
instructions in the literature accompanying the
appliance.
RISK OF ELECTRIC SHOCK
DO NOT OPEN
User memo:
DATE OF PURCHASE
DEALER NAME
DEALER ADDRESS
TELEPHONE NUMBER
The following mark and symbols are located on bottom of the unit.
Although the AC power switch is in the “off” position, the
unit is not completely disconnected from the mains.
Remove the plug from the main electrical outlet if you will
not be using the unit for an extended period of time. Place
the unit so the plug can be easily removed.


