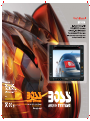
Boss Audio Systems BV9350 User manual
- Category
- Car media receivers
- Type
- User manual
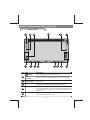
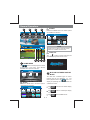
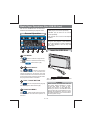
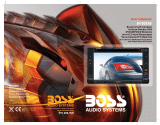
Boss Audio Systems BV9350 is a mobile DVD player designed for in-car entertainment. It features a 9-inch LCD screen and supports playback of various media formats, including DVDs, CDs, USB drives, and SD cards. The device also has built-in Bluetooth connectivity, allowing you to stream music wirelessly from your smartphone or other Bluetooth-enabled devices. Additionally, the BV9350 includes a built-in FM tuner, so you can listen to your favorite radio stations. For added convenience, the device comes with a remote control, making it easy to operate from the comfort of your seat.
Boss Audio Systems BV9350 is a mobile DVD player designed for in-car entertainment. It features a 9-inch LCD screen and supports playback of various media formats, including DVDs, CDs, USB drives, and SD cards. The device also has built-in Bluetooth connectivity, allowing you to stream music wirelessly from your smartphone or other Bluetooth-enabled devices. Additionally, the BV9350 includes a built-in FM tuner, so you can listen to your favorite radio stations. For added convenience, the device comes with a remote control, making it easy to operate from the comfort of your seat.


-
 1
1
-
 2
2
-
 3
3
-
 4
4
-
 5
5
-
 6
6
-
 7
7
-
 8
8
-
 9
9
-
 10
10
-
 11
11
-
 12
12
-
 13
13
-
 14
14
-
 15
15
-
 16
16
-
 17
17
-
 18
18
-
 19
19
-
 20
20
-
 21
21
-
 22
22
-
 23
23
-
 24
24
-
 25
25


Boss Audio Systems BV9350 User manual
- Category
- Car media receivers
- Type
- User manual
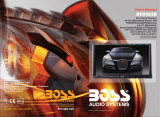
Boss Audio Systems BV9350 is a mobile DVD player designed for in-car entertainment. It features a 9-inch LCD screen and supports playback of various media formats, including DVDs, CDs, USB drives, and SD cards. The device also has built-in Bluetooth connectivity, allowing you to stream music wirelessly from your smartphone or other Bluetooth-enabled devices. Additionally, the BV9350 includes a built-in FM tuner, so you can listen to your favorite radio stations. For added convenience, the device comes with a remote control, making it easy to operate from the comfort of your seat.
Ask a question and I''ll find the answer in the document
Finding information in a document is now easier with AI
Related papers
-
 Boss Audio Systems BV9355B User manual
-
 Boss Audio Systems BV7975 User manual
-
 Planet Aaudio PI9746B User manual
-
 Boss Audio Systems BV9561B User manual
-
 Boss Audio Systems BV9557 User manual
-
 Boss Audio Systems BV9564BI Owner's manual
-
 Planet Audio P9734B User manual
-
Boss Audio Systems BV9758BI Owner's manual


Other documents
-
Fujitsu E7703AVX User manual
-
Jensen Mobile Multimedia AM/FM/DVD Receiver VM9410 Operating instructions
-
Curtis DVD5036 User manual
-
Varta V-DV800BT User manual
-
-
VIETA VPC55BT User guide
-
Caliber MCD 795 Owner's manual
-
Philips CED1600/98 User manual
-
Caliber RDD802BT Owner's manual
-
Clarion NZ502 User manual