Page is loading ...

FOR YOUR SAFETY - This product must be installed in accordance with the proce-
dures in this manual, local codes and ordinances, and in accordance with the latest
edition of the National Fuel Gas Code, ANSI Z223.1. In Canada, the installation must be
in accordance with CAN1-B149.1 or .2 and local codes. Improper installation and/or
operation could create carbon monoxide gas in flue gases which could cause
serious injury, property damage, or death. Improper installation and/or operation
will void the warranty.
H0244100-
Installation and Operation Data
WARNING: If these instructions are not followed exactly, a fire or explosion may
result, causing property damage, personal injury, or death.
Do not store or use gasoline or other flammable vapors and liquids in the vicinity
of this or any other appliance.
WHAT TO DO IF YOU SMELL GAS
• Do not try to light any appliance.
• Do not touch any electrical switch; do not use any phone in your building.
• Immediately call your gas supplier from a nearby phone. Follow the gas
supplier’s instructions.
• If you cannot reach your gas supplier, call the fire department.
Installation and service must be performed by a qualified installer, service agency, or
the gas supplier.
Installation and
Operation Manual
Hot Shot™
Above Ground Pool
and Spa Heater
Model LHS
Natural Gas or LP Gas
For Outdoor Use Only

TABLE OF CONTENTS
SECTION 1.
General Information
1A. Introduction ................................................... 1
1B. Description .................................................... 1
1C. Warranty ....................................................... 2
1D. Technical Assistance .................................... 2
SECTION 2.
Installation Instructions
2A. General Information ....................................... 2
2B. Field Assembly ............................................. 2
2C. Site Location ................................................. 2
2C-1. Installation Information................................... 2
2C-2. Outdoor Installation ....................................... 2
2D. Gas Supply and Piping.................................. 3
2D-1. General Instructions ...................................... 3
2D-2. Special Precautions for Propane Gas ............ 4
2F. Water Flow System ...................................... 4
2F-1. Flange Installation ......................................... 4
2F-2. Valve Installation ........................................... 5
2F-3. Water Chemistry ........................................... 5
2F-4. Adjusting the Pressure Switch ...................... 5
2F-5. Automatic Flow Control Valve ........................ 5
3F-6 Wiring Diagram ............................................. 6
SECTION 3.
Operating Instructions
3A. General Information ....................................... 7
3B. Lighting and Shutdown Procedures ............... 7
3C. Setting the Temperature Control .................... 7
3D. Seasonal Care ............................................... 7
3D-1. Spring and Fall Operation .............................. 7
3D-2. Winterizing.................................................... 7
3D-3. Spring Startup ............................................... 9
3E. Swimming Pool Energy Saving Tips .............. 9
3F. Periodic Inspection........................................ 9
3F-1. Owner Inspection .......................................... 9
SECTION 4.
Parts List for Laars Lite 2 Heater
4A. General Information .................................... 10
4B. Parts List................................................... 10
4C. Exploded View........................................... 11
Warranty...................................... Back Cover

SECTION 1.
General Information
1A. Introduction
This manual provides installation and operation
instructions for the Laars Hot Shot, Model LHS
above ground pool heater. Read these installation and
operation instructions completely before proceeding
with the installation. Consult the Laars factory, or local
factory representative, with any questions regarding
this equipment. Experience has shown that most
operating problems are caused by improper installation.
The Laars Hot Shot heater is design certified by
the CSA, International (Canadian Standards Associa-
tion), formerly IAS (International Approval Services),
as complying with the latest edition of the Unified
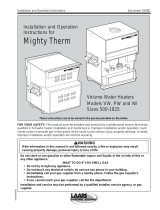
Figure 1. General Configuration.
Standard for Gas-Fired Pool Heaters, ANSI Z21.56 in
the United States, and CAN1-4.7-M85 in Canada.
Certain sections of this manual are specific to
either United States or Canadian installations, and are
labeled as such.
1B. Description
The Laars Hot Shot heater is specifically de-
signed for heating above ground swimming pools. Do
not use it as a general service water heater. There are
specially designed models of Laars pool heaters for
heating in ground pools, salt water pools. An acces-
sory kit is available so that temperature rise may be
measured and adjusted for spa applications. Consult
your dealer for the appropriate Laars products for
these applications.
Notes:
1. The Laars Hot Stot heater is designed for optimun efficiency at altitudes of 0-3000 feet (0-915m) above sea level for
natural gas heaters and 0-5000 feet (0-1525) for LPG. In Canada regulations limit optimun efficieny use to 0-2000 ft
(0-610m) above sea level for natural gas and 0-4500 feet (0-1370m) for LPG.
2. The Laars Hot Shot is constructed for 75 psi working pressure.
INLETOUTLET
Model LHS Above Ground Pool & Spa Heater Page 1

1C. Warranty
The Laars Hot Shot heater is sold with a limited
factory warranty. Details are specified on page 14 of
this manual.
Make all warranty claims to an authorized Laars
representative or directly to the factory. Claims must
include the heater serial number and model (this
information can be found on the rating plate), installa-
tion date, and name of the installer. Labor and shipping
costs are not included in the warranty coverage.
Damage caused by improper installation or
assembly, or to the heat exchanger by corrosive water,
is NOT covered by the Warranty. See Section 2F-3
for maintaining proper pool water chemistry.
NOTE: Keep this manual in a safe place for
future reference when inspecting or servicing the
heater.
1D. Technical Assistance
Consult Water Pik Technologies or your local
distributor of Laars products with any questions or
problems involving the specifications, installation, and
operation of your Laars equipment. An experienced
technical support staff is ready to assist in assuring the
proper performance and application of Laars products.
For technical support call (707) 776-8200.
SECTION 2.
Installation Instructions
2A. General Information
Install the Laars Hot Shot heater in accordance
with the procedures in this manual, local codes and
ordinances, and in accordance with the latest edition of
the National Fuel Gas Code, ANSI Z223.1. In Canada,
the installation must be in accordance with CAN1-
B149.1 or .2 and local codes. Any changes to the
heater, gas controls, gas orifices, wiring, or improper
installation may void the warranty. If field conditions
require change to any of the above, consult the
factory.
All gas-fired products require correct installation
to assure safe operation. The requirements for pool
heaters include the following:
1. Field assembly (if required)
2. Appropriate site location (clearances)
3. Sufficient combustion and ventilation air
4. Properly sized gas meter and piping
5. Adequate water flow
This manual provides the information needed to
meet these requirements. Review all application and
installation procedures completely before continuing
the installation.
2B. Field Assembly
The Laars Hot Shot heater is shipped from the
factory ready for outdoor installation in the U.S. and
Canada.
The only preparation needed is the connection for
the gas line and the water connection.
2C. Site Location
WARNING
Improper installation or maintenance can cause
nausea or asphyxiation from carbon monoxide
in flue gases which could result in severe injury,
or death.
2C-1. Installation Information
All Hot Shot pool heaters are designed and
certified for installation on a combustible floor. For
added safety, Water Pik Technologies recommends
placing the heater on a cement or other non combus-
tible surface. Ensure that the heater is level from all
sides. NEVER store objects on or around the heater.
The heater must NEVER be installed on any type of
carpeting.
Avoid placing the heater in locations where it can
cause damage by water or condensate leakage. If this
is not possible, provide a suitable drain pan to catch
and divert any leakage. The pan must not block natural
flow of air around the heater.
Locate the heater so the clearances from
combustible surfaces shown in Table 1 are met.
Table 1. Minimum Heater Clearances From
Combustible Surfaces
Inches Centimeters
Sides 4 10
Piping
(Rear) 12 30
Top
Front 18 45
Distance From
Combustible Surface
Side of
Heater
Open Unroofed Area
Model LHS Above Ground Pool & Spa HeaterPage 2

2C-2. Outdoor Installation
Laars Hot Shot heaters are design certified only
for outdoor installation. The heater should be installed
as received from the factory, in accordance with this
manual and following all federal, state and local codes.
Any attempt to modify the heater may cause personal
injury, property loss or death and will void the war-
ranty.Locate the heater in an open, unroofed area.
Do not install the heater under a deck. Do not locate
the heater below or adjacent to any doors, glass
openings, louvers, grills, etc., which connect in any
way with an inhabited area of a building, even though
the access might be through another structure (e.g., a
garage or utility room. In the United States there must
be a minimum of 4 feet (1.2 m) horizontally or verti-
cally between the heater and any door, glass opening,
or gravity inlet to a building. In Canada this distance
must be at least 10 feet (3.0 m) (see Figure 2).
Be sure that the heater is installed away from
traffic areas such as walkways or pool ladders. It is
recommended that the heater be enclosed by protec-
tive fencing to prevent accidental contact with hot
surfaces.
WARNING
United States
Do not install the heater with the top within 4
feet (1.2 m) of any opening into a building.
Canada
Do not install the heater with the top within 10
feet (3.0 m) of any opening into a building.
If the heater is installed under an overhang, there
must be a minimum clearance of 5 feet (1.5 m) above
the top of the heater and the structure should not
overhang the heater more than 12 inches (0.3 m). The
area under the overhang must be open on three sides.
This prevents combustion gases from being diverted
into living areas through doors, windows, or gravity
inlets.
If the heater is installed close to a structure,
protect it from rain water runoff with rain gutters on
the roof or other measures. Do not locate the heater
near sprinkler systems that could spray water on it. Be
sure to locate the heater where oversplash from the
pool will not damage the heater.
Avoid locations where wind deflection off nearby
structures might cause downdraft conditions. Where
downdraft conditions exist, locate the heater at least 3
feet (0.9 m) from vertical surfaces (e.g., nearby
buildings and walls). WARNING
Laars Hot Shot heaters are design certified only
for outdoor installation. Any attempt to modify
the heater for any other use may cause per-
sonal injury, property damage or death and will
void the warranty.
2D. Gas Supply and Piping
2D-1. General Instructions
Review the following general instructions before
continuing the installation.
WARNING
Do not convert this heater from natural gas to
propane gas, or propane to natural. Field
conversion could create carbon monoxide gas
which can cause property damage, serious
injury, or death.
1. Gas piping installation must be in accordance
with the latest edition of ANSI Z223.1 and all
local codes. In Canada, the installation must be in
accordance with CAN- B149.1 or .2 and all local
codes that apply.
2. Check the rating plate to make sure the heater is
fitted for the type of gas being used. Laars
heaters, as shipped from the factory, are certified
to operate within a specific altitude range.
a) In the United States, the altitude range speci-
fied is 0 to 3000 feet (0 to 915 m) above sea level
for natural gas and 0 to 5000 feet (0 to 1525 m)
for propane gas.
b) In Canada, the heater rating plate is marked
for specific altitude requirements: 0 to 2,000 feet
(0 to 610 m) above sea level for natural gas and
0 to 4500 feet (0 to 1370 m) for propane gas.
3. Use the figures in Table 2 to size the gas inlet
piping from the gas meter to the heater. Check
all local codes for compliance before installing
the heater.
Figure 2. Outdoor Heater Installation.
Model LHS Above Ground Pool & Spa Heater Page 3

Caution
Permanent damage to the gas valve will occur
if the following procedures are not followed.
7. If the gas supply pressure is less than required,
check for undersized pipe between the meter
and the heater, a restrictive fitting, or an under-
sized gas meter. Gas supply pressures to the
heater are listed in Table 3.
NOTE: The maximum inlet gas pressure must
not exceed the specified value. The minimum value
listed is for the purpose of input adjustment. Refer
to Table 3.
8. Before operating the heater, test the complete
gas supply system and all connections for leaks
using a soap solution. Do not use an open flame.
Caution
Some leak test solutions (including soap and
water) may cause corrosion or stress
cracking. Rinse the piping with water after
testing.
2D-2. Special Precautions for Propane
Gas Caution
Liquefied petroleum (LP) gas is heavier than
air. Therefore, do not install pool heaters using
LP gas in pits or locations where gas might
collect. Locate heaters a safe distance from
LP gas storage and filling equipment. Consult
local codes and fire protection authorities
about specific installation restrictions.
2E. Water Flow System
2E-1. Flange Installation
The water inlet/outlet header has PVC connec-
tions designed for 1-1/2" PVC schedule 40 pipe. A
reducing adapter must be used to decrease the
connection to the diameter of the flexible hose used to
plumb the other components of your filter system.
4. Install a sediment trap (drip leg) ahead of the gas
controls (see Figure 3). Fit the trap with a
threaded cap which can be removed for cleaning.
5. Install an AGA approved manual gas shutoff
valve on the outside of the heater jacket for
service and safety. Do not use a restrictive gas
cock.
WARNING
The use of a flexible connection is not
recommended as they cause high gas
pressure drops.
6. Disconnect the heater and its individual shutoff
valve from the gas supply system during pressure
testing of the system at pressures higher than 1/2
pounds per square inch (psi) (3.45 kilopascals
[kPa]). If the test pressure is equal to or less
than 1/2 psi (3.45 kPa), close the manual shutoff
valve on the heater during the pressure test.
Table 2. Natural Gas Pipe Size Requirements
Distance from Gas Meter
0-50 feet 50-100 feet 100-200 feet
(0-15 m) (15-30 m) (30-60 m)
in. (mm) in. (mm) in. (mm)
3/4 (19) 1 (25.4) 1 (25.4)
Notes:
1. These numbers are for natural gas (0.65 Sp. Gr.) and are
based on 1/2 inch (13 mm) water column pressure drop.
Check supply pressure with a manometer, and local code
requirements for variations.
2. Check supply pressure and local code requirements
before proceeding with work.
3. Pipe fittings must be considered when determining gas
pipe sizing.
Table 3. Gas Supply Pressure Requirements
Supply Pressure Natural Gas Propane Gas
Water Column "W.C. "W.C.
Minimum 5.5 10.0
Maximum 10.0 14.0
NOTE: For LP gas use a minimum pipe size of
3/4 inch diameter pipe and a minimum 20 lb fuel tank.
A 20 lb fuel tank will provide approximately four
hours of firing time for the heater.
AGA approved
Manual Shutoff
Valve
Gas Supply
Inlet
To
Equipment
Inlet
Union
Cap
T-Fitting
3" Min.
(76 mm) Nipple
Figure 3. The proper design for a sediment trap / drip leg.
Model LHS Above Ground Pool & Spa HeaterPage 4

Note: Due to various diameters of filter system flexible
hose, PVC reducers are not supplied with this
heater.
To install the flexible plumbing:
1. Using a suitable PVC primer and adhesive, glue
the reducing adapter into the coupling of the
water connection. Check the adhesive
manufacturer's instructions for proper application
and curing times.
2. Use a hose clamp to attach the filter system
flexible hose to the reducing adapters.
2E-2. Check Valve Installation
Install a check valve if there is any chance of
back-siphoning when the pump stops. Do not install any
other valve in the piping between the heater outlet and
the pool, unless it is being used as a diverter valve.
2E-3. Water Chemistry
Proper chemical balances are necessary for
sanitary bathing conditions as well as ensuring your
heater's long life. Be sure to keep your chemical levels
within the values indicated in Table 4. Water Pik
Laars does not warrant heat exchangers dam-
aged by corrosive chemical levels or excess
dissolved solids in pool water.
2F-E. Adjusting the Pressure Switch
Caution
The pressure switch should be adjusted to turn
the heater off when the pump is off. Setting the
switch to close at too low of a flow can damage
the appliance. Adjust the switch to turn the
heater off, not on.
The pressure switch is preset at the factory for
activation at 2 psi (14 kPa). Adjust the pressure switch
only if any part of the filter system piping is 3 feet
(0.9 m) or more above the top of the heater jacket.
Table 4. Mineral Concentration Levels
Test Recommended Level
Free chlorine 1.0 to 3.0 ppm
Bromine 3.0 to 5.0 ppm
pH 7.2 to 7.8
Total alkalinity (TA) 80 to 120 ppm
Calcium hardness (CH) 200 to 400 ppm
Langelier saturation index (LSI)
-0.5 to +0.5
Total dissolved solids (TDS) Less than 2000 ppm
Cyanuric acid 30 to 150 ppm
Copper 0 ppm
Do not adjust the pressure switch if the heater is
installed more than 15 feet (4.5 m) below or 6 feet
(1.8 m) above the pool surface. Consult your local
Water Pik Laars representative for recommendations.
On some installations, the piping from the heater
to the pool is very short. The back pressure could be
too low to trigger the pressure switch. If this happens,
it may be necessary to install a directional fitting or
elbows where the return line enters the pool. This will
increase back pressure enough for the heater to operate
properly.
Make sure the pool filter is clean before making
any pressure switch adjustment: A dirty filter will
restrict the water flow and the pressure switch cannot
be adjusted properly. To adjust the pressure switch:
1. Set the control panel rocker switch to the OFF
position (see Figure 4).
2. Set the temperature control to the HIGH position.
3. Turn filter pump on.
4. Turn rocker switch to ON. Heater should start.
5. Pry out the top rubber dust plug on the top of the
pressure switch.
6. Use a 7/32 inch (5.55 mm) Allen wrench to turn
the adjustment screw very slowly clockwise until
the heater goes off (see Figure 5).
7. Slowly turn the pressure switch adjustment
screw counterclockwise one-quarter turn. The
heater should come back on.
Figure 5. Pressure switch adjustment.
Figure 4. Temperature Control Panel.
Model LHS Above Ground Pool & Spa Heater Page 5

Figure 6. LHS Connection/Schematic Wiring Diagram.
2E-6. Wiring Diagram
Model LHS Above Ground Pool & Spa HeaterPage 6

8. Check the adjustment by turning the filter pump
OFF. The heater should shut off immediately. If
it does not, restart the filter pump immediately
and repeat Steps 6 and 7. Check the adjustment
again.
9. Return the pool temperature control to the
desired temperature.
2E-5. Automatic Flow Control Valve
The flow control valve automatically maintains
the proper flow through the system.
SECTION 3.
Operating Instructions
3A. General Information
With any new pool or spa installation, and at
spring startup, operate the filter pump with the heater
off long enough to completely clean the water. This will
remove any installation residue from the water. Clean
the filter at the end of this operation before starting the
heater.
Caution
Do not use this heater if any part has been
under water. Immediately call a qualified
service technician to inspect the heater and
replace any part of the control system and any
gas control which has been under water.
Attention
N'utilisez pas cet appareil s'il a été plongé dans
l'eau, même partiellement. Faites inspecter
l'appareil par un technicien qualifié et
remplacez toute partie du système de contrôle
et toute commande qui ont été plongés dans
l'eau.
Caution
Should overheating occur or the gas supply fail
to shut off, turn off the manual gas control valve
to the heater.
Attention
En cas de surchauffe ou si l'alimentation en
gaz ne s'arrête pas, fermez manuellement le
robinet d'arrêt de l'admission de gaz.
Caution
Keep all objects off the top of the heater.
Blocking air flow could damage the heater, and
may void the warranty.
WARNING
For your safety, when starting the heater,stand
away from the front of the heater and keep your
head and face well away from the firebox
opening to prevent any risk of personal injury.
3B. Lighting and Shutdown Procedures
(See page 8)
NOTE: If your LP tank runs out of fuel, turn off
gas at the heater. After the tank is refilled, the
heater must be relit following the instructions
found on the heater. DO NOT attempt repairs on
the gas control or heater. Tampering is danger-
ous and voids all warranties.
3C. Setting the Temperature Control
The temperature control (see Figure 4) is cali-
brated at the factory and covers a range from approxi-
mately 70°F to 104°F (21°C to 40°C). Use an accu-
rate pool thermometer to determine the best water
temperature for your uses.
IMPORTANT: The temperature controls cannot
be calibrated in the field. If the control is faulty, shut
down the heater and have a qualified service technician
replace the control. DO NOT use the thermostat switch
to completely shut down the heater.
3D. Seasonal CareCaution
Do not operate this heater outdoors at
temperatures below 20 degrees Fahrenheit (°F)
(-7 degrees Celsius [°C]).
3D-1. Spring and Fall Operation
During periods when the pool is only going to be
used occasionally, turn the temperature control down
to the MIN setting. This prevents the pool from water
from becoming chilled, and minimizes the time re-
quired to raise the pool water back up to the desired
temperature.
In areas subject to only short freeze periods, turn
off the heater and run the pump continuously for the
length of the freeze period.
If the heater is not going to be used for a long
period of time, shut it down completely. Follow the
instructions found on the inside of the heater, or page 8
of this manual.
Model LHS Above Ground Pool & Spa Heater Page 7

FOR YOUR SAFETY READ BEFORE OPERATING
A. This appliance has a pilot which must be
lighted by a push button sparker. When
lighting the pilot, follow these instructions
exactly.
B. BEFORE OPERATING, smell all around the
appliance area for gas. Be sure to smell
next to the floor because LP gas is heavier
than air and will settle on the floor.
WHAT TO DO IF YOU SMELL GAS
• Do not try to light any appliance
• Do not touch any electric switch; do not
use any phone in your building.
• Immediately call your gas supplier from
a neighbor's phone. Follow the gas
supplier's instructions.
WARNING: If you do not follow these instructions exactly, a fire or explosion
may result, causing property damage, personal injury or loss of life.
OPERATING INSTRUCTIONS
• If you cannot reach your gas supplier, call
the fire department.
C. Use only your hand to push in or turn the
gas control knob. Never use tools. If the
knob will not push in or turn by hand,
don't try to repair it. Call a qualified
service technician. Force or attempted
repair may result in a fire or explosion.
D. Do not use this appliance if any part has
been under water. Immediately call a
qualified service technician to inspect
the appliance and to replace any part of
the control system and any gas control
which has been under water.
TO TURN OFF GAS TO APPLIANCE
1. Set the thermostat to lowest setting and
turn appliance ON/OFF switch to "OFF". 2. Turn gas control knob clockwise until it
stops at "PILOT". Then press down slightly
on knob while turning clockwise to
"OFF". Do not force
1. STOP! Read the safety information above.
2. Set the thermostat to lowest setting and
turn appliance ON/OFF switch to "OFF".
3. Turn gas control knob clockwise until
it stops at "OFF" position.
4. Wait five (5) minutes to clear out any gas.
If you then smell gas, STOP! Follow "B" in
the safety information above. If you don't
smell gas go to the next step.
5. To find pilot—follow gas
line from gas valve to
pilot location.
6. Turn knob on gas valve
counterclockwise to
"PILOT" then push control
knob all the way and hold
down.
7. Push the button of the sparker, repeating
until confirming that pilot lights, by
observing reflection on burner tray mirror.
8. Continue to hold the control knob down for
about one (1) minute after the pilot is lit. If
it goes out, repeat steps 3 through 8.
• If knob does not pop out when released,
stop and immediately call your service
technician or gas supplier.
• If the pilot will not stay lit after several
tries, turn the gas control knob to "OFF"
and call your service technician or gas
supplier.
9. Turn gas control knob counterclockwise
to "ON".
10. After replacing control compartment
access panel, set thermostat to desired
setting and turn appliance ON/OFF switch
to "ON". Valve has built-in delay before
coming on.
11. If the appliance will not operate, check
that the filter pump is on, that the filter is
clean and water is flowing to the pool.
Otherwise, follow the instructions "To Turn
Off Gas To Appliance" and call your
service technician or gas supplier.
PILOT
BURNER
TO VALVE
Water Pik Technologies Inc.
GAS VALVE IN
"ON" POSITION
DIRECTION OF
GAS FLOW
LHS GAS VALVE
PUSH-BUTTON
PIEZO IGNITER
OFF
PILOT
ON
Model LHS Above Ground Pool & Spa HeaterPage 8

2. Carefully monitor the water temperature of your
pool in the summertime. You can reduce heater
usage due to warmer air temperatures.
3. Find the proper setting on the pool heater tem-
perature control and use the TEMP-LOK to
discourage further adjustments.
4. Set the filter time clock to start the pump no
earlier than 6:00 AM during the pool heating
season. This is the time when nightly heat loss
balances.
5. If the pool is only going to be used on weekends,
reduce the heater temperature control setting by
8 or 10 degrees during the week. Reset it to the
78°F (25°C) level a day or so before you plan to
use the pool.
6. During the winter or when on vacation for longer
than a week, shut down the heater by following
the shutdown instructions found on the inside of
the heater.
7. Where possible, shelter the pool from prevailing
winds with well-trimmed hedges or other land-
scaping, cabanas, or fencing.
8. Always use a pool cover when practical. Besides
providing a valuable safety feature, a pool cover
will reduce heat loss, conserve chemicals, and
reduce the load on filter systems.
3F. Periodic Inspection
3F-1. Owner Inspection
Water Pik designs and constructs the Laars Hot
Shot heater to provide long performance life when
installed and operated properly under normal condi-
tions. The following basic guidelines are suggested for
your inspection:
1. Keep the top and surrounding area of the heater
clear of all debris.
2. Keep the heater area clean and free of all
combustible materials, flammable liquids and
vapors, as well as sanitization chemicals.
3. Do not use the heater if any part has been under
water. Immediately call a qualified professional
technician to inspect the heater and replace any
part of the control system which has been
submerged.
N'utilisez pas cet appareil s'il a été plongé dans
l'eau, même partiellement. Faites inspecter
l'appareil par un technicien qualifié et remplacez
toute partie du système de contrôle et toute
commande qui ont été plongés dans l'eau.
3D-2. Winterizing
In areas where freezing temperatures occur in
winter, and the pool or spa will not be used, it is best to
store your heater in a dry environment such as a shed
or garage. Perform the following steps:
1. Shut down the heater following the shutdown
instructions found on the heater.
2. Turn off the main gas supply valve to the heater,
outside the heater jacket.
3. Disconnect the heater from the gas line and
cover the end of the gas line to prevent debris
from entering the pipe.
4. Disconnect the water connections at the reducing
adapters on the header.
5. Allow the water to drain from the heater.
6. Store the heater in a dry place until its next use.
In milder climates where freezing does not occur,
but the pool will not be used for an extended
period, follow these steps:
1. Shut down the heater following the shutdown
instructions found on the heater.
2. Turn off the main gas supply valve to the heater,
outside the heater jacket.
3. Drain the water from the system.
4. Cover the heater and other components with a
tarp.
3D-3. Spring Start-up
1. Secure all connections as discussed in the
installation section of this manual.
2. Turn on the filter pump and circulate water until
the water is clean. Check for leaks while
circulating.
3. Turn on the main gas supply valve to the heater,
outside the heater jacket.
4. Turn on the heater following the lighting instruc-
tions found on the heater, or page 8 of this
manual.
3E. Swimming Pool Energy Saving Tips
Water Pik offers the following recommenda-
tions to help conserve fuel and minimize the cost of
operating your pool heater without sacrificing com-
fort.
1. The American Red Cross recommends a maxi-
mum water temperature of 78°F (25°C). Use an
accurate pool thermometer. A difference of 4F°
(3C°) , between 78°F and 82°F (25°c and 28°C),
will use as much as 40% more gas.
Model LHS Above Ground Pool & Spa Heater Page 9

4. Be sure all combustion air and ventilation open-
ings are not blocked.
SECTION 4.
Parts List for Hot Shot Heater
4A. General Information
To purchase parts for the Laars Hot Shot
heater, contact your nearest Laars dealer or
distributor. If they cannot supply you with what you
need, contact the Customer Service Manager, Water
Pik Technologies, Telephone (707) 776-8200
extension 245.
Caution
Label all wires prior to disconnection when
servicing controls. Wiring errors can cause
improper and dangerous operation.
Attention
Au moment de l'entretien des commandes,
étiquetez tous les fils avant de les débrancher.
Des erreurs de câblage peuvent entraîner un
fonctionnement inadéquat et dangereux.
Verifiy proper operation after servicing.
S'assurer que l'appareil fonctionne adéquatement
une fois l'entretien terminé.
4B. Parts List
The following page shows an exploded view to
aid in parts identification. Please refer to this pages
when ordering parts for your Laars Hot Shot heater.
GAS SYSTEM
1 Burner Tray Assembly, Natral Gas R0367800
1 Burner Tray Assembly, LP Gas R0367900
2 Gas Valve, Natural Gas R0368000
2 Gas Valve, LP Gas R0368100
3 Pilot Assembly, Natural Gas R0368200
3 Pilot Assembly, LP Gas R0368300
4 Pilot Generator W0036901
ELECTRICAL SYSTEM
5 Thermosat Assembly R0367700
6 On/Off Switch R0099800
7 Temperature Control Knob R0010700
8 Stop Plate, "Temp-:Lok" 10583100
9 High Limit Switch, 135°F R0368400
10 High Limit Switch, 150°F, (Not shown) R0368500
11 Pressure Switch, 2 PSI R0013200
12 Fusible Link R0012200
WATER SYSTEM
13 I/O Header Assy R0368600
OPTIOAL
Touch-up Spray Paint, Pewter X0022700
Key ORDER
No Description PART NO
Model LHS Above Ground Pool & Spa HeaterPage 10

1
2
3
4
5
6
4C. Exlpoded View
12
7
8
9 (135°F), 10 (150°F ON OPPOSITE END OF
HEAT EXCHANGER)
11
13
Model LHS Above Ground Pool & Spa Heater Page 11

NOTES
Model LHS Above Ground Pool & Spa HeaterPage 12

NOTES
Model LHS Above Ground Pool & Spa Heater Page 13

LAARS HOT SHOT
LIMITED WARRANTY
Your Laars Hot Shot pool heater is backed by this warranty
to assure your complete satisfaction.
All parts are warranted against defects in materials and workmanship for one (1) year from
date of purchase.
6000 Condor Dr., Moorpark, CA 93021 USA* 707.776.8200
480S. Service Road West, Oakville, Ontario, Canada L6K 2H4 905.844.8233
The above warranty applies only if the installation and
operating instructions applicable to the model purchased
are expressly and completely followed. Water Pik does
not warrant heat exchanger damage due to
corrosive water or freezing. These instructions are
furnished with the unit and are also available by writing
to the Laars factory. The liability of Water Pik
Technologies shall not exceed the repair or replacement
of defective parts, and shall not include transportation to
or from factory, any labor costs, and consequential or
incidental damages. Ship inoperative parts or complete
heater with Serial number, Model number and purchase
date, transportation prepaid, directly to address below,
attention Customer Service, for evaluation and warranty
consideration.
This warranty gives you specific legal rights. You may also
have other rights which vary from state to state, and by
province. Some states do not allow the exclusion or limitation
of incidental or consequential damages, so the above
limitation or exclusion may not apply to you.
*6000 Condor Drive, Moorpark, CA, USA 93021 •707.776.8200 FAX 707.763.7785
480 S. Service Road West, Oakville, Ontario, Canada L6K 2H4 •905.844.8233 FAX 905.844.2635
Litho in U.S.A. © Water Pik Technologies 0301
H0244100A
*
Model LHS Above Ground Pool & Spa Heater Page 14
/