Page is loading ...

A
A
V
V
e
e
r
r
M
M
e
e
d
d
i
i
a
a
®
®
A
A
V
V
e
e
r
r
V
V
i
i
s
s
i
i
o
o
n
n
1
1
3
3
0
0
User Manual
AVerMedia
®
Document Camera


FCC NOTICE
This device has been tested and found to comply with the limits for a digital device, pursuant
to Part 15 of the FCC Rules. These limits are designed to provide reasonable protection
against harmful interference in a commercial, industrial or business environment. This
equipment can generate, use and radiate radio frequency energy and, if not installed and
used in accordance with the instruction, may cause harmful interference to radio
communications. However, there is no guarantee that interference will not occur in a particular
installation. If this equipment does cause harmful interference to radio or television reception,
which can be determined by turning the equipment off and on, the user is encouraged to try to
correct the interference by one or more of the following measures :
• Reorient or relocate the receiving antenna.
• Increase the separation between the equipment and receiver.
• Connect the equipment into an outlet on a circuit different from that to which the receiver is
connected.
• Consult the dealer or an experienced radio/TV technician for help.
This device complies with Part 15 of the FCC Rules. Operation is subject to the following two
conditions: (1) this device may not cause harmful interference, and (2) this device must
accept any interference received, including interference that may cause undesired operation.
CAUTION ON MODIFICATIONS
To comply with the limits for the digital device, pursuant to Part 15 of the FCC Rules, this
device must be installed in computer equipment certified to comply with the limits. All cables
used to connect the computer and peripherals must be shielded and grounded. Operation with
non-certified computers or non-shielded cables may result in interference to radio or television
reception.
Any changes or modifications not expressly approved by the grantee of this device could void
the user's authority to operate the equipment.
CE NOTICE
This is a product, complied with the CE limits.
DISCLAIMER
No warranty or representation, either expressed or implied, is made with respect to the
contents of this documentation, its quality, performance, merchantability, or fitness for a
particular purpose. Information presented in this documentation has been carefully checked
for reliability; however, no responsibility is assumed for inaccuracies. The information
contained in this documentation is subject to change without notice.

In no event will AVerMedia be liable for direct, indirect, special, incidental, or consequential
damages arising out of the use or inability to use this product or documentation, even if
advised of the possibility of such damages.
TRADEMARKS
AVerMedia and AVerVision130 are registered trademarks of AVerMedia TECHNOLOGIES,
Inc. IBM PC is a registered trademark of International Business Machines Corporation.
Macintosh is a registered trademark of Apple Computer, Inc. Microsoft is a registered
trademark and Windows is a trademark of Microsoft Corporation. All other products or
corporate names mentioned in this documentation are for identification and explanation
purposes only, and may be trademarks or registered trademarks of their respective owners.
COPYRIGHT
© 2005 by AVerMedia TECHNOLOGIES, Inc. All rights reserved. No part of this publication
may be reproduced, transmitted, transcribed, stored in a retrieval system, or translated into
any language in any form by any means without the written permission of AVerMedia
TECHNOLOGIES, Inc.

i
T
T
a
a
b
b
l
l
e
e
o
o
f
f
C
C
o
o
n
n
t
t
e
e
n
n
t
t
s
s
Introduction......................................................................... 1
Package Contents ............................................................. 2
Optional Accessories ........................................................................... 3
Technical Specifications.................................................... 4
Installing and Setting Up the Hardware............................ 5
Connecting the Power Adapter............................................................ 6
Connecting a VGA, Mac Display Monitor or LCD/DLP Projector ........ 6
Connecting a TV .................................................................................. 7
Connecting an IBM Compatible PC or Macintosh Computer .............. 7
Connecting a Computer via USB Connection ..................................... 8
Installing the Optional Light Box .......................................................... 8
Connecting a Microscope .................................................................... 9
Adjusting the AVerVision130............................................. 10
Camera Head ...................................................................................... 10
Flexible Gooseneck and Mechanical Arm ........................................... 10
L
L
i
i
g
g
h
h
t
t
a
a
n
n
d
d
D
D
o
o
c
c
u
u
m
m
e
e
n
n
t
t
P
P
o
o
s
s
i
i
t
t
i
i
o
o
n
n
i
i
n
n
g
g
P
P
o
o
i
i
n
n
t
t
e
e
r
r
s
s
(
(
O
O
p
p
t
t
i
i
o
o
n
n
a
a
l
l
)
)
.
.
.
.
.
.
.
.
.
.
.
.
.
.
.
.
.
.
.
.
.
.
.
.
.
.
.
.
.
.
.
.
.
.
.
.
.
.
.
.
.
.
.
.
.
.
.
.
.
.
.
.
.
.
1
1
1
1
Anti-glare Sheet ................................................................................... 11
Touch Button Control Panel .............................................. 12
LED Panel .......................................................................... 13
Using the AVerVision Application..................................... 14

ii
Installing the Software ......................................................................... 14
Application User interface.................................................................... 15
OSD Navigation Tree .........................................................17
Menu Functions .................................................................18
Troubleshooting ................................................................20
Limited Warranty ...............................................................22

1
I
I
n
n
t
t
r
r
o
o
d
d
u
u
c
c
t
t
i
i
o
o
n
n
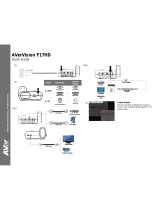
Thank you for purchasing the AVerMedia
®
AVerVision130. This document
camera displays any documents, negatives, transparencies and 3D objects
onto a TV, LCD or DLP projector making presentations a snap.
The AVerVision 130’s advanced features, including 4 times (400%) digital zoom,
negative to positive, B&W to color image, dynamic image capture and image
freezing function, making presentation easy. When connect the AVerVision
130 to a PC via USB cable, you can capture and save still images and video
clip to your PC. Come with a full featured control panel, AVerVision 130 is an
ideal presentation tool for academic, business, medical and the scientific
community.

2
P
P
a
a
c
c
k
k
a
a
g
g
e
e
C
C
o
o
n
n
t
t
e
e
n
n
t
t
s
s
User Manual
Driver CD
AVerMedia
®
AVerVision130
with LED Light Module
RCA Cable
S-Video Cable
Power Adapter
Computer Extension cable
(VGA Cable)
USB Cable
Power Cord
* The power cord will vary depending on the
standard power outlet of the country where it is
sold.
Anti-glare Sheet

3
O
O
p
p
t
t
i
i
o
o
n
n
a
a
l
l
A
A
c
c
c
c
e
e
s
s
s
s
o
o
r
r
i
i
e
e
s
s
34mm Coupler
28mmCoupler
Light Box
Monitor Adapter
(for MAC)
Computer Adapter
(for MAC)

4
T
T
e
e
c
c
h
h
n
n
i
i
c
c
a
a
l
l
S
S
p
p
e
e
c
c
i
i
f
f
i
i
c
c
a
a
t
t
i
i
o
o
n
n
s
s
Image
Sensor 1/2” CMOS
Effective Pixels 790K 1024 (H) x 768 (V)
Frame Rate 12 fps
White Balance Auto / Manual
Exposure Auto / Manual / Flicker
Image mode Text / Graphics
Effect Color / B/W / Negative;
Analog RGB output XGA 75 Hz; SVGA 60 Hz; VGA 60 Hz
H Sync. Signal 60 K / 37.879 K / 31.469 KHz, TTL level
V Sync. Signal 75 Hz / 60Hz / 60 Hz, TTL level
Image Signal Level 0.7 Vpp
S-Video, Composite Video Output NTSC / PAL
Image Capture 4 Frames Dynamic
Optics
Lens F3.0; fl=9.6mm
Focusing Manual
Shooting Area 360mm x 270mm (max.);
Zooming Digital: 4X
Power Source 100-220V ~ 1.8A, 50-60 Hz
Consumption 6 Watts (lamp off); 9 Watts (Lamp on)
Lighting
Lamp type LED lamp
Input/Output
VGA Input 15-Pins D-sub (VGA)
VGA Output 15-Pins D-sub (VGA)
S-Video Mini-DIN Jack
Composite Video RCA Jack
USB USB1.1
DC 6V Output (Light Box) Power Jack
Dimension
Operating 220mm x 140mm x 570mm
Folded 380mm x 170mm x 55mm
Weight 3.8 lb

5
I
I
n
n
s
s
t
t
a
a
l
l
l
l
i
i
n
n
g
g
a
a
n
n
d
d
S
S
e
e
t
t
t
t
i
i
n
n
g
g
U
U
p
p
t
t
h
h
e
e
H
H
a
a
r
r
d
d
w
w
a
a
r
r
e
e
The ports on the back and side panel of the AVerVision130 enable you to connect the
unit to a computer, graphics display monitor or LCD / DLP projector, TV or other device.
Illustrated below are the ports that are located at the back and side panel of the
AVerVision130 with their corresponding labels.
Port Description
1.Security Slot Use this port to connect a Kensington compatible security lock.
2.DC 12V (input) Plug the power adapter into this port.
3.DC 6V (output) Plug the optional light box into this port.
4.USB1.1 Port This port enables you to use AVerVision130 as PC Camera, capture the
images or video to your PC.
5.VIDEO Port The VIDEO Port enables you to output your camera or playback a picture
from the built-in dynamic memory on your TV.
6.S-VIDEO Port The S-VIDEO Port enables you to output your camera or playback a picture
from the built-in dynamic memory on your TV.
7.VGA OUT Port Use this port to connect to a VGA/ Mac monitor, LCD/DLP projector for your
camera, PC presentation, or playback a picture from built-in dynamic
memory.
8.PC IN Port Use this port to connect the AVerVision130 to the VGA output port of your
computer. This enables you to input your computer video signal and pass it
through to the VGA out port.

6
C
C
o
o
n
n
n
n
e
e
c
c
t
t
i
i
n
n
g
g
t
t
h
h
e
e
P
P
o
o
w
w
e
e
r
r
A
A
d
d
a
a
p
p
t
t
e
e
r
r
You can connect the power adapter to a standard 100V~240V AC power source.
C
C
o
o
n
n
n
n
e
e
c
c
t
t
i
i
n
n
g
g
a
a
V
V
G
G
A
A
,
,
M
M
a
a
c
c
D
D
i
i
s
s
p
p
l
l
a
a
y
y
M
M
o
o
n
n
i
i
t
t
o
o
r
r
o
o
r
r
L
L
C
C
D
D
/
/
D
D
L
L
P
P
P
P
r
r
o
o
j
j
e
e
c
c
t
t
o
o
r
r
AVerVision130 enables you to display a presentation on a VGA /MAC display monitor,
or LCD/DLP projector with an outstanding video quality.

7
C
C
o
o
n
n
n
n
e
e
c
c
t
t
i
i
n
n
g
g
a
a
T
T
V
V
To display a presentation on TV, connect AVerVision130 and TV by using the Video
Cable or S-Video cable, switch the output mode to TV system by pressing VGA/TV
button on the control panel. If you are using a SCART RGB monitor, connect it by using
the RCA to SCART Cable. (The SCART RGB Cable is provided as an optional
accessory cable with AVerVision130.)
C
C
o
o
n
n
n
n
e
e
c
c
t
t
i
i
n
n
g
g
a
a
n
n
I
I
B
B
M
M
C
C
o
o
m
m
p
p
a
a
t
t
i
i
b
b
l
l
e
e
P
P
C
C
o
o
r
r
M
M
a
a
c
c
i
i
n
n
t
t
o
o
s
s
h
h
C
C
o
o
m
m
p
p
u
u
t
t
e
e
r
r
You can connect the AVerVision130 to an IBM compatible PC, Macintosh, or notebook
(laptop) computer. After physically connecting the unit to your PC, you can display an
image from your computer by pressing the PC button on the unit’s control panel.

8
C
C
o
o
n
n
n
n
e
e
c
c
t
t
i
i
n
n
g
g
a
a
C
C
o
o
m
m
p
p
u
u
t
t
e
e
r
r
v
v
i
i
a
a
U
U
S
S
B
B
c
c
o
o
n
n
n
n
e
e
c
c
t
t
i
i
o
o
n
n
To access the software application as a PC Camera via the USB cable, just connect the
USB cable to a computer. (Refer to the section, using the AVerVision Application, for
more
details.)
I
I
n
n
s
s
t
t
a
a
l
l
l
l
i
i
n
n
g
g
t
t
h
h
e
e
O
O
p
p
t
t
i
i
o
o
n
n
a
a
l
l
L
L
i
i
g
g
h
h
t
t
B
B
o
o
x
x
Connecting an optional light box enables you to view x-rays, transparencies and
negative slides.

9
C
C
o
o
n
n
n
n
e
e
c
c
t
t
i
i
n
n
g
g
t
t
o
o
a
a
M
M
i
i
c
c
r
r
o
o
s
s
c
c
o
o
p
p
e
e
Connecting the AVerVision130 to a microscope enables you to examine microscopic
objects on a big screen without straining your eyes.
AVerMedia AVerVision130
Microscope
Coupler
Press the latch here to detach
the light module
from the camera head.
LED Light
Module

10
A
A
d
d
j
j
u
u
s
s
t
t
i
i
n
n
g
g
t
t
h
h
e
e
A
A
V
V
e
e
r
r
V
V
i
i
s
s
i
i
o
o
n
n
1
1
3
3
0
0
This section provides useful tips on how to adjust the AVerVision130 to meet your
needs.
C
C
a
a
m
m
e
e
r
r
a
a
H
H
e
e
a
a
d
d
The camera head can be rotated 135 degrees from left to right. You can also manually
adjust the focus from here to improve the quality of the pictures.
F
F
l
l
e
e
x
x
i
i
b
b
l
l
e
e
G
G
o
o
o
o
s
s
e
e
n
n
e
e
c
c
k
k
a
a
n
n
d
d
M
M
e
e
c
c
h
h
a
a
n
n
i
i
c
c
a
a
l
l
A
A
r
r
m
m
The flexible gooseneck and Mechanical arm design allows you to position the camera
head from any angle.

11
L
L
E
E
D
D
L
L
i
i
g
g
h
h
t
t
M
M
o
o
d
d
u
u
l
l
e
e
Then LED light module provides white light and it is best use when presenting in low
lighting condition.
A
A
n
n
t
t
i
i
-
-
g
g
l
l
a
a
r
r
e
e
S
S
h
h
e
e
e
e
t
t
The anti-glare sheet is a special coated film that helps eliminate any glare you may
encounter when you are displaying very shiny object or glossy surfaces such as
magazines, pictures, etc. Simply place the anti-glare sheet on top of the shiny document
to reduce reflected light.

12
T
T
o
o
u
u
c
c
h
h
B
B
u
u
t
t
t
t
o
o
n
n
C
C
o
o
n
n
t
t
r
r
o
o
l
l
P
P
a
a
n
n
e
e
l
l
The touch button control panel located on the top side of the
AVerVision130 provides quick access to commonly used functions.
7
9
1
8
6
4
2
5
3
10
Function
Description
1
CAMERA MODE
Switches to Camera mode and displays the image from the
AVerVision130’s built-in digital video camera.
2
PC MODE
Switches to PC mode and displays the video signal coming from the
PC IN port.
3
PLAYBACK
MODE
Switches to PLAYBACK mode and displays 4-thumbnail images
captured in AVerVision130’s built-in memory.
4
VGA/TV
Switches between VGA (VGA Out) or TV (Composite Video/S-Video)
output.
5
EFFECT
In Camera mode, press to convert and view the video in Black and
White, Negative or Color.
6
FREEZE
Press this button to hold the image picked up by the camera and to
release the image that has been retained.
7
CAPTURE
In Camera mode, press to capture an image. The captured image is
automatically stored in the built-in dynamic memory at 1024 x 768
resolution. AVerVision130 could save up to 4 frames.
In Playback Mode, press this button to delete the saved frame.

13
8 & 10
MENU/
◄▲►▼
- Press MENU to call the OSD menu and then use the ▲, ►, ▼ and
◄ around the menu button to make a selection and adjustment.
- In playback mode, use the ▲, ►, ▼ and ◄ to make a selection and
then press PLAYBACK to display the image in full-size. You may
also use PLAYBACK button to revert back to display 4-thumbnail
pictures.
- In zoom-in mode, use the ▲, ►, ▼ and ◄ to pan up , down , left and
right
9
ZOOM +/ -
Press “+” or “–” to digitally zoom in and zoom out the picture up to
400%.
L
L
E
E
D
D
P
P
a
a
n
n
e
e
l
l
The LED on the front panel of AVerVision130 indicates the status of the unit.
Color Description
Green The unit is operated with VGA output.
Orange The unit is operated with TV output
Red The unit is in standby mode.

14
U
U
s
s
i
i
n
n
g
g
t
t
h
h
e
e
A
A
V
V
e
e
r
r
V
V
i
i
s
s
i
i
o
o
n
n
A
A
p
p
p
p
l
l
i
i
c
c
a
a
t
t
i
i
o
o
n
n
Use the AVerVision PC Camera applications provided to control the AVerVision130 to
save any captured images or video clips to your PC, or send them via emails.
Note: When a USB cable is connected between the document camera and the PC, the
document camera features are controlled by the application software directly instead on
the control panel.
I
I
n
n
s
s
t
t
a
a
l
l
l
l
i
i
n
n
g
g
t
t
h
h
e
e
S
S
o
o
f
f
t
t
w
w
a
a
r
r
e
e
Minimum System Requirements
! Pentium
®
-class processor
! Windows2000 Professional with Service Pack 2 or above, Windows XP
Professional or Home, or Windows XP Tablet PC
! 32 MB of RAM (64 MB recommended)
! 60 MB of available hard-disk space
To install PC Camera Applications:
1. Insert your Software CD into your CD-ROM drive, and click on "PC Camera
Applications” and follow the instructions.
/