Page is loading ...

• Ensuring that the
tool is used only
when the operator
and all other person-
nel in the work area
are wearing ANSI Z87 eye protec-
tion equipment, and when
required, other appropriate protec-
tion equipment such as head, hear-
ing and foot protection equipment.
Serious eye or permanent hearing
loss could result.
• Assuring that the tool is kept in safe
working order as described in this
manual.
Danger indicates
an imminently
hazardous situation which, if not
avoided, WILL result in death or serious
injury.
Read and understand
tool labels and manual.
Failure to follow
warnings, dangers, and
cautions could result in
DEATH or SERIOUS
INJURY.
Do not use any type
of reactive gases,
including, but not lim-
ited to, oxygen and
combustible gases, as
a power source. Use
filtered, lubricated,
regulated compressed air only. Use
of a reactive gas instead of com-
pressed air may cause the nailer to
explode which will cause death or
serious personal injury.
Use only a pressure-
regulated com-
pressed air source to
limit the air pressure
supplied to the tool.
The regulated pres-
!
DANGER
sure must not exceed 110 PSI. If the
regulator fails, the pressure deliv-
ered to the tool must not exceed
200 PSI. The nailer could explode
which will cause death or serious
personal injury.
Never use gasoline
or other flammable
liquids to clean the
nailer. Never use the
nailer in the presence
of flammable liquids or gases.
Vapours could ignite by a spark and
cause an explosion which will result
in death or serious personal injury.
Always remain in
a firmly balanced
position when
using or handling
the nailer.
Table of Contents
General Safety . . . . . . . . . . .1 – 3
Specifications . . . . . . . . . . . . . . .2
Operating The Nailer . . . . . .3 – 5
Operational Mode . . . . . . . . . . .4
Troubleshooting . . . . . . . . . . . . .7
Warranty . . . . . . . . . . . . . . . . . . .8
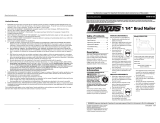
Description
This nailer is designed for decorative
trim, molding, window casings, furni-
ture trim and picture frame assembly.
Features include: convenient rear load-
ing magazine which holds up to 100
nails, no-mar tip, adjustable exhaust,
single sequential trigger, quick clear
nose, and an adjustable depth of drive
mechanism.
General Safety
Information
This manual contains safety, opera-
tional and maintenance information.
OPERATOR’S RESPONSIBILITY:
The tool operator is responsible for:
• Reading and understanding tool
labels and manual.
• Selecting an appropriate tool actua-
tion system, taking into considera-
tion the work application for which
the tool is used.
• The safe use of the tool.
Operating Instructions
Air-Powered
Finishing Nailer
Please read and save these instructions. Read carefully before attempting to assemble, install, operate or maintain the product described.
Protect yourself and others by observing all safety information. Failure to comply with instructions could result in personal injury, death and/or
property damage! Retain instructions for future reference.
IN296700AV 2/04
See Warranty on page 8 for important information about commercial use of this product.
REMINDER: Keep your dated proof of purchase for warranty purposes! Attach it to this manual or file it for safekeeping.
Locate model and vendor date code
on tool magazine and cap and record
below:
Model No. ________________________
Vendor Date Code ________________
Retain these numbers for
future reference.
Instructions d’utilisation
8-Fr
Garantie Limitée
Cet article Mastercraft comprend aussi une garantie de réparation de trois (3) ans contre les défauts de fabrication et de
matériau(x). Mastercraft Canada consent, à sa discrétion, à réparer ou à remplacer toute pièce défectueuse sans frais au
cours de la période de garantie convenue lorsque l’article, accompagné de la preuve d’achat, est retourné par l’acquéreur
initial. Exclusion : usure ou bris causés par un usage abusif ou inapproprié.
Si cet article est utilisé à des fins commerciales, industrielles ou locatives, la garantie sera en vigueur pendant
quatre-vingt-dix (90) jours à compter de la date d’achat.
O
CO
2
PSI

7-Fr
Instructions d’utilisation
Fuite d’air à l’endroit de la
soupape de la gâchette
Fuite d’air entre le carter et
l’avant de l’appareil
Fuite d’air entre le carter et
le capuchon
La cloueuse saute un clou
pendant l’expulsion
La cloueuse fonctionne
lentement ou a une perte
de puissance
Blocage des clous
Fuite d’air à la tige de
soupape de la gâchette
Joints toriques endommagés dans le
carter de la soupape de la gâchette
Vis desserrées dans le carter
Joints toriques endommagés
Amortisseur endommagé
Vis desserrées
Joint d’étanchéité endommagé
Amortisseur usé
Saleté dans la pièce avant
Saleté ou dommage qui empêche le
fonctionnement libre des clous ou du
poussoir dans le chargeur
Ressort de poussoir endommagé
Circulation d’air insuffisante à la
cloueuse
Joint torique du piston usé ou manque
de lubrification
Joint torique de la soupape de gâchette
endommagé
Fuites d’air
Fuite du joint d’étanchéité du capuchon
Graissage insuffisant de la cloueuse
Rupture du ressort du capuchon de cylindre
Orifice d’échappement du capuchon obstrué
Guide du poussoir usé
Clous de mauvaise taille
Clous courbés
Vis du chargeur ou de l’avant desserrées.
Poussoir endommagé
Joint toriques ou joints d’étanchéité
endommagés
Guide de dépannage
Cesser l’utilisation de la cloueuse immédiatement au casoù les problèmes suivants
surviendraient car cela risque de causer des blessures graves. Toutes les réparations doivent
être effectuées par un technicien qualifié ou par un centre de service autorisé.
!
AVERTISSEMENT
Problème Cause Solution
Remplacer les joints toriques et vérifier le fonction-
nement du mécanisme de déclenchement par con-
tact
Serrer les vis
Remplacer les joints toriques
Remplacer l’amortisseur
Serrer les vis
Remplacer le joint d’étanchéité
Remplacer l’amortisseur
Nettoyer la rainure du poussoir
Nettoyer le chargeur
Remplacer le ressort
Inspecter le raccord, le tuyau ou le compresseur
Remplacer les joints toriques. Graisser.
Remplacer les joints toriques
Serrer les vis et raccords
Remplacer le joint d’étanchéité
Graisser la cloueuse
Remplacer le ressort
Remplacer les pièces internes endommagées
Remplacer le guide
Utiliser les clous de taille recommandée
Remplacer les clous
Serrer les vis
Remplacer le poussoir
Remplacer les joints toriques ou les joints
d’étanchéité
2
General Safety
Information (Continued)
Do not remove,
tamper with, or
otherwise cause
the Work Contact
Element (WCE) or
trigger to become
inoperable. Do not operate any tool
which has been modified in a like
fashion. Death or serious personal
injury could result.
Do not touch
the trigger
unless driving
nails. Never
attach air line
to nailer or
carry nailer while touching the trig-
ger. The tool could eject a fastener
which will result in death or serious
personal injury.
Warning indicates
a potentially
hazardous situation which, if not avoid-
ed, COULD result in death or
serious injury.
Always discon-
nect the tool
from the power
source when
unattended,
performing any
maintenance or
repair, clearing a jam, or moving the
tool to a new location. Always
reconnect the air line BEFORE load-
ing any fasteners. Do not load the
tool with fasteners when either the
!
WARNING
trigger is depressed or the Work
Contact Element (WCE) is engaged.
The nailer could eject a fastener
causing death or serious personal
injury.
Always fit tool
with a fitting or
hose coupling on
or near the tool in
such a manner
that all com-
pressed air in the
tool is discharged at the time the fit-
ting or hose coupling is disconnect-
ed. Do not use a check valve or any
other fitting which allows air to
remain in the nailer. Death or serious
personal injury could occur.
Never place hands or
any other body parts in
the nail discharge area
of the nailer. The nailer
might eject a fastener
and could result in
death or serious personal injury.
Never carry the
nailer by the air
hose or pull the
hose to move the
nailer or a com-
pressor. Keep
hoses away from
heat, oil and sharp edges. Replace
any hose that is damaged, weak or
worn. Personal injury or tool dam-
age could occur.
Always assume the nailer contains
nails. Respect the tool as a working
implement; no horseplay. Always
keep others at a safe distance from
the work area in case of accidental
discharge of nails. Do not point the
tool toward yourself or anyone
whether it contains fasteners or not.
Accidental triggering of the nailer
could result in death or serious per-
sonal injury.
Do not drive a
nail on top of
other nails. The
nail could glance
and cause death
or a serious punc-
ture wound.
Do not operate
or allow anyone
else to operate
the nailer if any
warnings or
warning labels
are not legible.
Warnings or warning labels are locat-
ed on the nailer magazine and body.
Do not drop or throw the tool.
Dropping or throwing the tool can
result in damage that will make the
tool unusable or unsafe. If the tool
has been dropped or thrown, exam-
ine the tool closely for bent, cracked
or broken parts and air leaks. STOP
and repair before using or serious
injury could occur.
Caution indicates
a potentially haz-
ardous situation which, if not avoided,
MAY result in minor or moderate
injury.
!
CAUTION
Operating Instructions
• REQUIRES: 1.7 SCFM with 10 nails
per minute @ 90 PSI
• AIR INLET: 1/4” NPT
• NAIL SIZE RANGE: 1” to 2
1
/
2
”
• MAGAZINE CAPACITY:
100 Nails per load, 16 gauge
• WEIGHT: 3 lbs, 14 oz
• LENGTH: 12
1
/
2
”
• HEIGHT: 11”
• MAXIMUM PRESSURE: 110 PSI
• PRESSURE RANGE: 70 – 110 PSI
Nailer Components And Specifications
Adjustable exhaust
Warning Labels (top and back side)
Pusher
Nail Loading
Slot
No-mar tip
Storage
(back side)
Magazine
Trigger
Work
contact
element (WCE)
No-mar tip
Quick-clear catch
Depth adjustment
wheel
CAMPBELL
PROFESSIONAL
PROFESSIONAL
HAUSFELD
O I L
!
WARNING

Instructions d’utilisation
6-Fr
Attaches
Peut utiliser les clous de finition conçus pour les cloueuses de finition suivantes : SB1664FN de Bostitch
MD
, NB0064 de Campbell
Hausfeld
MD
, D51256K de DeWalt
MD
, T250-F16 de Paslode
MD
, FN250B de Porter Cable
MD
et Finish Pro
MC
de Senco
MD
.
Bostitch
MD
est une marque déposée de The Stanley Works.
Campbell Hausfeld
MD
est une marque déposée de Campbell Hausfeld/Scott Fetzer Co.
DeWalt
MD
est une marque déposée de Black & Decker Corp.
Paslode
MD
est une marque déposée de Illinois Tool Works, Inc.
Porter Cable
MD
est une marque déposée de Porter-Cable Corp.
Senco
MD
est une marque déposée de Senco Products, Inc.
Finish Pro
MC
est une marque commerce de Senco Products, Inc.
Utilisation de la
cloueuse (suite)
Support technique
Pour tout renseignement sur le fonc-
tionnement ou la réparation de cette
cloueuse ou pour obtenir d’autres
copies de ce manuel, veuillez utiliser
notre numéro d’assistance télé-
phonique sans frais : 1 866 220 2097.
Attaches et Pièces
de Rechange
N’utiliser que des clous Nº 16 (ou un
équivalent). La performance de l’outil,
sa sécurité et sa durabilité pourraient
être réduites si l’on utilise de mauvaises
attaches. Lors d’une commande de
pièces de rechange ou de clous, préciser
le numéro de pièce.
!
AVERTISSEMENT
Attaches et réparation de la
cloueuse
Seul un personnel qualifié doit réparer
l'outil en utilisant seulement des acces-
soires et des pièces de rechange d'ori-
gine ou des pièces et accessoires qui
fonctionnent de manière équivalente.
Méthode d’assemblage pour
les joints d’étanchéité
Les pièces internes doivent être net-
toyées et graissées pendant la répara-
tion d’une cloueuse. Utiliser de la
graisse sur tous les joints toriques.
Chaque joint torique doit être enrobé
de graisse avant l’assemblage.
Recommended Hookup
Quick-plug
Quick-coupler
Air
Hose
Quick-plug
(Optional)
Quick-coupler
(Optional)
Oiler
Regulator
Filter
3
General Safety
Information (Continued)
Do not make any modifications to the
tool. Do not use the nailer if any
shields or guards are removed or
altered. Do not use the nailer as a
hammer. Personal injury or tool
damage may occur.
Avoid long extended periods of
work with the nailer. Stop using the
nailer if you feel pain in hands or
arms.
Always check that the work contact
element (WCE)
is operating
properly. A nail
could acciden-
tally be driven
if the WCE is
not working
properly.
Personal injury
may occur (See "Checking the Work
Contact Element" Section).
Disconnect air supply and release
tension from the pusher before
attempting to clear jams because
fasteners can be ejected from the
front of the nailer. Personal injury
may occur.
Notice indicates
important infor-
mation, that if not followed, MAY
cause damage to equipment.
Avoid using the nailer when the
magazine is empty. Accelerated
wear on the nailer may occur.
Clean and check all air supply hoses
and fittings before connecting the
nailer to an air supply. Replace any
damaged or worn hoses or fittings.
Tool performance or durability may
be reduced.
NOTICE
RECOMMENDED HOOKUP
The illustration below shows the
recommended hookup for the nailer.
1. The air com-
pressor must be
able to main-
tain a minimum
of 70 PSI when
the nailer is
being used. An inadequate air sup-
ply can cause a loss of power and
inconsistent
driving.
2. An oiler can be
used to provide oil
circulation through
the nailer. A filter
can be used to
remove liquid and solid impurities
which can rust or “gum up” internal
parts of the nailer.
3. Always use air supply hoses with a
minimum working pressure rating
equal to or greater than the pres-
sure from the power source if a reg-
ulator fails, or 150 PSI, whichever is
greater. Use 3/8” air hose for runs
up to 50’. Use 1/2” air hoses for 50’
run or longer. For better perfor-
mance, install a 3/8” quick-plug
(1/4” NPT threads) with an inside
diameter of 5/16” (8mm) on the
nailer and a 3/8” quick-coupler on
the air hose.
Operating The Nailer
LUBRICATION
This air-powered finishing nailer
requires lubrication before using the
nailer for the first time and before
each use. If an inline oiler is used, man-
ual lubrication through the air inlet is
not required on a daily basis.
The work surface
can become dam-
aged by excessive lubrication. Proper
lubrication is the owner’s responsibili-
ty. Failure to lubricate the nailer prop-
erly will dramatically shorten the life
of the nailer and void your warranty.
1. Disconnect the
air supply from
the nailer to
add lubricant.
2. Turn the nailer
so the air inlet
is facing up.
Place 4-5 drops
of 30 W non-
detergent oil
into air inlet. Do not use detergent
oils, oil additives, or air tool oils. Air
tool oils contain solvents which will
damage the nailer's internal com-
ponents.
3. After adding oil,
run nailer briefly.
Wipe off any
excess oil from
the cap exhaust.
NOTICE
Operating Instructions
OIL
70 PSI
Min.
110 PSI
Max.
150 psi or greater
3/8” I.D.

Utilisation de la
cloueuse (suite)
CHARGEMENT/DÉCHARGEMENT DE
LA CLOUEUSE
1. Toujours brancher l’outil à la
source d’air avant le chargement
des attaches.
2. Retirer le poussoir (B) jusqu'à ce que
le suiveur de clous tombe derrière
les clous. Insérer une bande de clous
à l'arrière du chargeur (A).
3. Ne pas charger lorsque la gâchette
ou le dispositif de sécurité est
enfoncé.
4. Toujours retirer tous les clous du
chargeur avant de ranger la
cloueuse. L’opération de décharge-
ment s’effectue à l’inverse de
l’opération de chargement mais il
faut toujours débrancher le tuyau
d’air comprimé AVANT le décharge-
ment.
RÉGLAGE DE PÉNÉTRATION DES
CLOUS
Cette cloueuse de finition pneuma-
tique est muni d’un réglage de péné-
tration des clous. Ceci permet de déter-
miner à quel profondeur les clous
doivent être enfoncés.
1. Régler la pression de fonction-
nement de manière à ce que la
force d’éjection des clous soit con-
stante. Ne pas dépasser la pression
de fonctionnement maximum de
758 kPa.
2. Pour faire pénétrer un clou moins
profondément, tourner la roue (C)
vers la droite jusqu'à la profondeur
recherchée.
3. Pour enfoncer un clou plus pro-
fondément, tourner la roue (C) vers
la gauche jusqu'à la profondeur
recherchée.
4. Après chaque
réglage, s’assurer
que le mouvement
de la gâchette et du
mécanisme de
déclenchement par
contact (WCE) peut s’effectuer vers
le haut ou vers le bas sans difficulté.
AJUSTEMENT DE LA DIRECTION
D’ÉCHAPPEMENT
Cette cloueuse de
finition pneuma-
tique est équipe
d’un déflecteur
d’échappement ori-
entable. Ceci per-
met le changement de direction de
l’échappement. Orienter le déflecteur à
la position désirée.
DÉBLOCAGE DE LA CLOUEUSE
1. Débrancher la
cloueuse de la
source d’air.
2. Ôter tous les
clous du
chargeur (voir
chargement /
décharge-
ment). Si cette
précaution n’est pas prise, l’éjection
accidentelle de clous peut se pro-
duire.
3. Enlever le
loquet en le
retirant et le
baissant. Le
loquet s’en-
levera des cro-
chets sur la pièce moulée de l’avant
de l’appareil.
4. La porte peut
alors être
relevée, lais-
sant voir le
clou bloqué.
5. Enlever l’at-
tache grippée
en utilisant
des pinces ou
un tournevis si
nécessaire.
6 Rabaisser la
porte en posi-
tion fermée.
7. Tirer sur le
loquet et le
placer sur les
crochets situés
sur la pièce
moulée de l’a-
vant.
8. Fermer le
loquet en pous-
sant celui-ci
vers le haut et
vers l’intérieur
jusqu’à ce qu’il s’enclenche en
place.
9. S’assurer que le
mouvement de
la gâchette et
du mécanisme
de déclenche-
ment par contact (WCE) peut s’ef-
fectuer vers le haut ou vers le bas
sans difficulté.
5-Fr
Instructions d’utilisation
Operating The Nailer
(Continued)
4. Use a pressure regulator on the
compressor, with an operating pres-
sure of 0 — 125 PSI. A pressure reg-
ulator is required to control the
operating pressure of the nailer
between 70 and 110 PSI.
OPERATIONAL MODE
Always know the
operational mode
of the nailer before using. Failure to
know the operational mode could
result in death or serious personal
injury.
SINGLE SEQUENTIAL MODE
This mode
requires the trig-
ger to be pulled
each time a nail is
driven. The nailer
can be actuated
by depressing the WCE against the
work surface followed by pulling the
trigger.
The trigger must be released to reset
the tool before another nail can be dri-
ven.
WORK CONTACT ELEMENT (WCE)
Check the opera-
tion of the Work
Contact Element (WCE) trip mechanism
before each use. The WCE must move
freely without binding through its
entire travel distance. The WCE spring
must return the WCE to its fully extend-
ed position after being depressed. Do
not operate the nailer if the WCE trip
mechanism is not operating properly.
Personal injury may occur.
1. Disconnect the
air supply from
the nailer.
2. Remove all
nails from the
magazine (see
Loading/
Unloading).
!
CAUTION
!
WARNING
LOADING/UNLOADING THE NAILER
1. Always connect the tool to the air
supply before loading fasteners.
2. Pull pusher (B) back until the nail
follower falls behind the nails. Insert
strip of nails into rear of magazine
(A).
3. Do not load with the safety or trig-
ger depressed.
4. Always unload all fasteners before
removing tool from service.
Unloading is the reverse of loading,
except always disconnect the air
hose before unloading.
ADJUSTING THE NAIL PENETRATION
The air-powered finishing nailer is
equipped with an adjustable depth of
drive feature. This allows the user to
determine how deep a fastener will be
driven into the work surface.
1. Adjust operating pressure so nails
are driven consistently. Do not
exceed 110 PSI.
2. To drive the nail shallower, turn the
wheel (C) to right to the extent
desired.
3. To sink a nail deeper, turn the wheel
(C) to left to the extent desired.
3. Make sure the
trigger and
work contact
element (WCE)
move freely up
and down without sticking or bind-
ing.
4. Reconnect air
supply to the
nailer.
5. Depress the
work contact
element (WCE)
against the
work surface
without pulling
the trigger. The nailer MUST NOT
OPERATE. Do not use the tool if it
operates without pulling the trig-
ger. Personal injury may result.
6. Remove the
nailer from the
work surface.
The work con-
tact element
(WCE) must
return to its original down position.
The nailer MUST NOT OPERATE.
Do not use the tool if it operates
while lifted from the work surface.
Personal injury may result.
7. Pull the trig-
ger and
depress the
work contact
element
(WCE) against
the work surface. The nailer MUST
NOT OPERATE.
8. Depress the
work contact
element
(WCE) against
the work sur-
face. Pull the
trigger. The nailer MUST OPERATE.
An improperly
functioning tool
must not be used. Do not actuate the
tool unless the tool is placed firmly
against the work piece.
!
WARNING
Operating Instructions
4
1
1 2
1 2
CAMPBELL
PROFESSIONAL
HAUSFELD
movement
(B)
(A)
(C)
Rotate
Tourner
(B)
(A)
(C)
Mouve-
ment

Utilisation de la
cloueuse (suite)
l’utilisation de la cloueuse.
L’alimentation d’air insuffisante
peut réduire la puissance de la
cloueuse et peut affecter l’efficacité
de l’enfoncement.
2. Un graisseur
peut être uti-
lisé pour
fournir la circu-
lation d’huile à
travers la
cloueuse. Un filtre peut être utilisé
pour enlever les matières liquides et
solides qui peuvent encrasser les
pièces internes de la cloueuse.
3. Toujours utiliser des tuyaux d'ad-
mission d'air d'une pression nomi-
nale minimum égale ou plus grande
que la pression de la source d'ali-
mentation, si un régulateur cesse de
fonctionner correctement ou de 1
034 kPa, selon la pression la plus
élevée. Utiliser un tuyau d'air de 9,5
mm (3/8 po) pour les longueurs
allant jusqu'à 15 m (50 pieds).
Utiliser des tuyaux d’air de 12,7 mm
(1/2 po) pour 15 m ou plus. Pour un
meilleur rendement, installer un
bouchon rapide de 9,5 mm (3/8 po)
avec (filets d’1/4 po NPT) d’un
diamètre intérieur de 5/16 po (8
mm) sur la cloueuse et un raccord
rapide de 9,5 mm (3/8 po) sur le
tuyau.
4. Utiliser un régulateur de pression
sur le compresseur avec une pres-
sion de service de 0 à 862 kPa. Un
régulateur de pression est indis-
pensable pour maintenir la pression
de service de la cloueuse entre 483
et 758 kPa.
4. Brancher à
nouveau la
source d’air à
la cloueuse.
5. Appuyer le
mécanisme de
déclenchement
par contact
(WCE) sur la
surface de tra-
vail sans actionner la gâchette. La
cloueuse NE DOIT PAS FONCTION-
NER. Si l’éjection d’un clou se pro-
duit sans que l’on actionne la
gâchette, ne pas utiliser cet
appareil. Il y a risque de blessures.
6. Ôter la
cloueuse de la
surface de tra-
vail. Le méca-
nisme de
déclenchement
par contact (WCE) doit redescendre
à sa position initiale. La cloueuse NE
DOIT PAS FONCTIONNER. Si l’éjec-
tion d’un clou se produit lorsqu’on
relève la cloueuse, ne pas utiliser
celle-ci. Il y a risque de blessures.
7. Actionner la
gâchette.
Appuyer le
mécanisme de
déclenchement
par contact
(WCE) sur la surface de travail. La
cloueuse NE DOIT PAS FONCTION-
NER.
8. Appuyer le
mécanisme de
déclenchement
par contact
(WCE) sur la
surface de travail. Actionner la
gâchette. La cloueuse DOIT FONC-
TIONNER.
Un outil
qui ne
fonctionne pas correctement ne doit
pas être utilisé. Ne pas activer l'outil à
moins qu'il soit placé bien fermement
sur la pièce.
!
AVERTISSEMENT
MODE D’EMPLOI
Toujours
détermi-
ner le mode d’opération avant d’utilis-
er la cloueuse. Sinon, il y a risque de
mort ou de blessures graves.
MODE SÉQUENTIEL UNIQUE
La gâchette doit
être tirée chaque
fois qu’un clou est
enfoncé. La
cloueuse peut être
actionnée en plaçant le mécanisme de
déclenchement WCE contre la surface
de travail et ensuite en tirant sur la
gâchette.
La gâchette doit être relâchée afin de
rajuster l’outil avant d’enfoncer un
autre clou.
MÉCANISME DE DÉCLENCHEMENT
PAR CONTACT (WCE)
Vérifier le
fonction-
nement du mécanisme de déclenche-
ment par contact (WCE) avant chaque
usage. Le WCE doit fonctionner avec un
mouvement libre, sans restrictions. Le
ressort WCE doit se retourner au WCE à
sa position complètement allongée
après sont fonctionnement. Ne pas
faire fonctionner la cloueuse si le
mécanisme de déclenchement WCE ne
fonctionne pas correctement. Ceci peut
résulter en des blessures personnelles.
1. Débrancher la
source d’air de
la cloueuse.
2. Enlever tous les
clous du
chargeur (voir
Chargement-
Déchargement)
3. S’assurer que
la gâchette et
le mécanisme
de déclenche-
ment (WCE)
fonctionnent avec un mouvement
libre sans restrictions.
!
ATTENTION
!
AVERTISSEMENT
Instructions d’utilisation
4-Fr
Operating The Nailer
(Continued)
4. Make sure trigger
and work contact ele-
ment (WCE) move
freely up and down
without binding or
sticking after each
adjustment.
ADJUSTING THE DIRECTION OF THE
EXHAUST
The air-powered
finishing nailer is
equipped with an
adjustable direc-
tion exhaust
deflector. This is
intended to allow the user to change
the direction of the exhaust. Simply
twist the deflector to any direction
desired.
CLEARING A JAM FROM THE NAILER
1. Disconnect the
air supply from
the nailer.
2. Remove all
nails from the
magazine (see
Loading/
Unloading).
Failure to do so will cause the nails
to eject from the front of the tool.
3. Undo latch by
pulling out and
down. The wire
latch will disen-
gage from the
hooks on the nose.
4. The door can
now be rotat-
ed, exposing
the jammed
fastener.
5. Remove the
jammed fasten-
er, using pliers
or a screwdriv-
er if required.
6 Rotate door back into the closed
position.
7. Extend the wire
latch and place
over the hooks
on the nose.
8. Close the latch
by pushing the
latch up and in
until the latch
snaps into
place.
9. Make sure the
trigger and
work contact
element (WCE)
move freely up
and down
without sticking or binding.
Technical Support
Please call our Toll Free Helpline at
1-866-220-2097 with any questions
regarding the operation or repair of
this nailer or for additional copies of
this manual.
Fastener And Replacement
Parts
Use only
16 gauge fasteners
(or equivalent - see Fastener
Interchange Information). Tool perfor-
mance, safety and durability could be
reduced if improper fasteners are used.
When ordering replacement parts or
fasteners, specify by part number.
Nailer Repair
Only qualified personnel shall repair
!
WARNING
the tool and they shall use genuine
Campbell Hausfeld replacement parts
and accessories, or parts and acces-
sories which perform equivalently.
Assembly Procedure For
Seals
When repairing a nailer, the internal
parts must be cleaned and lubricated.
Grease must be used on all o-rings.
Each o-ring must be coated with grease
before assembling.
Operating Instructions
5
movement
Rotate
1
Mouve-
ment
1 034 kPa ou plus
9,5 mm (3/8 po) D.I.
CAMPBELL
PROFESSIONAL
PROFESSIONAL
HAUSFELD
1 2
1 2
/