
Bedienungsanleitung/Garantie 04
Gebruiksaanwijzing 11
Mode d’emploi 17
Instrucciones de servicio 23
Istruzioni per l’uso 29
Instruction Manual 35
Instrukcja obsługi/Gwarancja 41
Használati utasítás 48
Інструкція з експлуатації
54
Руководство по эксплуатации
60
STEREO KÜCHEN-
RADIO MIT CD
KRC 4355 CD
D Stereo Küchenradio mit CD
NL Stereo keuken radio met CD
F Radio CD stéréo de cuisine
E Radio estéreo de cocina con reproductor de CD
I Radio stereo da cucinacon CD
GB Stereo kitchen radio with CD
PL Radio kuchenne stereo z CD
H Stereo kitchen radio with CD
UA
Стереорадіо для кухні з програвачем компакт-дисків
RUS
Stereo kitchen radio with CD

Inhalt
2
Deutsch
Inhalt
Übersicht der Bedienelemente .......................................Seite 3
Bedienungsanleitung ........................................................Seite 4
Technische Daten ...............................................................Seite 9
Garantie ................................................................................Seite 9
Entsorgung ..........................................................................Seite 10
Nederlands
Inhoud
Overzicht van de bedieningselementen. ..........................blz 3
Gebruiksaanwijzing. ...............................................................blz 11
Technische gegevens ............................................................blz 16
Verwijdering ............................................................................ blz 16
Français
Sommaire
Liste des différents éléments de commande. ..............Page 3
Mode d’emploi ...................................................................Page 17
Données techniques .........................................................Page 22
Élimination ...........................................................................Page 22
Español
Indice
Indicación de los elementos de manejo. ...................Página 3
Instrucciones de servicio. ...............................................Página 23
Datos técnicos .................................................................Página 28
Eliminación .......................................................................Página 28
Italiano
Indice
Elementi di comando. ....................................................Pagina 3
Istruzioni per l’uso............................................................Pagina 29
Dati tecnici ........................................................................Pagina 34
Smaltimento .....................................................................Pagina 34
English
Contents
Overview of the Components .........................................Page 3
Instruction Manual..............................................................Page 35
Technical Data .....................................................................Page 40
Disposal ................................................................................Page 40
Język polski
Spis treści
Przegląd elementów obłsugi .........................................Strona 3
Instrukcja obsługi ..............................................................Strona 41
Dane techniczne ...............................................................Strona 46
Ogólne warunki gwarancji ..............................................Strona 46
Usuwanie ............................................................................Strona 47
Magyarul
Tartalom
A kezelőelemek áttekintése ............................................ Oldal 3
Használati utasítás ............................................................. Oldal 48
Műszaki adatok ..................................................................Oldal 53
Hulladékkezelés .................................................................Oldal 53
Українська
Зміст
Огляд елементів управління ......................................стор. 3
Інструкція з експлуатації .............................................стор. 54
Технічні параметри ......................................................стор. 59
Русский
Содержание
Обзор деталей прибора ................................................стр. 3
Руководство по эксплуатации ......................................стр. 60
Технические данные .....................................................стр. 65
Page is loading ...
Page is loading ...
Page is loading ...
Page is loading ...
Page is loading ...
Page is loading ...
Page is loading ...
Page is loading ...
Page is loading ...
Page is loading ...
Page is loading ...
Page is loading ...
Page is loading ...
Page is loading ...
Page is loading ...
Page is loading ...
Page is loading ...
Page is loading ...
Page is loading ...
Page is loading ...
Page is loading ...
Page is loading ...
Page is loading ...
Page is loading ...
Page is loading ...
Page is loading ...
Page is loading ...
Page is loading ...
Page is loading ...
Page is loading ...
Page is loading ...
Page is loading ...

English
35
Instruction Manual
Thank you for selecting our product. We hope that you will
enjoy use of the appliance.
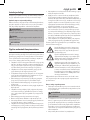
Symbols in these Instructions for Use
Important information for your safety is specially marked. It is
essential to comply with these instructions in order to avoid
accidents and prevent damage to the machine
WARNING:
This warns you of dangers to your health and indicates pos-
sible injury risks.
CAUTION:
This refers to possible hazards to the machine or other
objects.
NOTE:
This highlights tips and information.
General Safety Instructions
Read the operating instructions carefully before putting the
appliance into operation and keep the instructions including
thewarranty,thereceiptand,ifpossible,theboxwiththein-
ternal packing. If you give this device to other people, please
also pass on the operating instructions.
• Toavoidtheriskofreoranelectricshock,youshould
notexposethedevicetorainormoisture.Consequently,
do not use the device in the immediate vicinity of water
-forexamplenearabathtub,aswimmingpoolorina
damp cellar.
• Donotusethedeviceinextremelyhot,cold,dustyor
damp places.
• Onlyusethedeviceforprivateuseandtheintended
purpose. This device is not intended for commercial use.
• Ensurethatthepowercordisnotkinked,trappedor
brought into contact with heat sources.
• Ensurethatthepowercorddoesnotpresentatripping
hazard.
• Nevertouchthepowerplugorthecablewithwethands.
• Onlyconnectthedeviceataproperlyinstalledplug
socket. Pay attention that the specified voltage corre-
sponds to the voltage of the plug socket.
• Thepowercordmustalwaysbeeasilyaccessible.
• Alwaysinsertthebatteriescorrectly.
• Donotcoverupanyventilationopeningswithobjects
such as newspapers, tablecloths, curtains, etc.
• Thisapplianceshallnotbeexposedtodrippingor
splashing water and that no object filled with liquids such
as vases shall be placed on apparatus.
• Exposedignitionsourcessuchasburningcandlesmay
not be placed onto the device.
• Neveropenthehousingofthedevice.Incorrectrepairs
can constitute a considerable risk for the user. Should the
device become damaged, in particular the mains supply
cable, do not operate the device any longer, but rather
haveitrepairedbyanexpert.Checkthemainssupply
cable regularly for damage.
• Forsafetyreasonsabrokenordamagedmainsleadmay
only be replaced by an equivalent lead from the manu-
facturer, our customer service department or a similary
qualified person.
• Ifthedeviceisnotusedforalongerperiod,removethe
plug connector from the plug socket or take out the bat-
teries.
These symbols may be found on the machine and are
intended to indicate the following:
The lightning symbol should advise the user
of parts in the inside of the device which carry
dangerously high voltage levels.
Thesymbolwithanexclamationmarkshould
advise the user of important operation or
maintenance instructions in the accompany-
ing documentation.
Devices bearing this symbol work with a
“class 1 laser” for tracing the CD. The built-in
safety switches should prevent the user being
exposedtodangerouslaserlight,whichis
invisible to the human eye, when the CD
compartment is opened.
These safety switches must not be bypassed or altered;
otherwisethereisariskofbeingexposedtothelaserbeam.
Children and Frail Individuals
• Inordertoensureyourchildren’ssafety,pleasekeepall
packaging(plasticbags,boxes,polystyreneetc.)outof
their reach.
WARNING!
Caution! Do not allow small children to play with the
foil as there is a danger of suffocation!
• Thisdeviceisnotintendedtobeusedbyindividuals
(including children) who have restricted physical, sensory
or mental abilities and/or insufficient knowledge and/or
experience,unlesstheyaresupervisedbyanindividual
who is responsible for their safety or have received
instructions on how to use the device.
• Childrenshouldbesupervisedatalltimesinorderto
ensure that they do not play with the device.
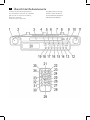
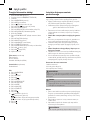
Overview of the Components
1 VOLUME control (volume)
2 IR Infrared sensor (REMOTE SENSOR)
3 CD tray
4 MEM/PROG button (memory)
5 REP button (repeat)
6 REW button (scan backwards)

English
36
7 F.FWD button (scan forwards)
8 STOP button (stop)
9 OPEN/CLOSE button (open/ close CD tray)
10 PLAY/PAUSE button (play/pause)
11 TUNING control
12 STANDBY/AL.OFF button (on/standby / alarm off)
13 FUNCTION button (function)
14 MUTE button (mute)
15 ALARM SET button (set alarm)
16 TIME SET button (set time)
17 SLEEP/SNOOZE button (sleep timer/ snooze)
18 M button (memory upwards)
19 M button (memory downwards)
20 LCD display
Rear side (not shown)
Power cord
Wire antenna
AUXINjack(2xRCA)
Bottom side (not shown)
Battery compartment
Remote control
21 MEM/PROG button
22
button
23 REPEAT button
24 button
25 AL.SET button
26 OPEN/CLOSE button
27 FUNCTION button
28 SLEEP button
29 SNOOZE button
30 TIME SET button
31 M button
32 M button
33 (increase volume)
(decrease volume)
/
(scanforward/nextsong)
/
(scan backwards/ previous song)
34 button
35 button
Sub-structure assembly instructions
If you don’t want to use the device as a standalone appliance,
then please assemble it as follows:
• Removeallobjectsfromthecupboardandanything
which is fragile in the adjacent cupboards.
• Fortheinstallationthecupboardmustfullthefollowing
conditions:
Thicknessofthecupboardoor
between 16 mm and 20 mm.
• Thewallmountingofthecupboardmustbestableand
anchored firmly in the wall with at least 2 screws.
• Important! Do not install the device above a cooker!
• Wheninstallingthedeviceitmustbeensuredthatthere
is a power socket within reach.
• Themainssocketmustbewithineasyreach,sothatthe
plug can be quickly removed in an emergency.
• Important! Do not connect the device to the mains
power supply until after installation!
• Thedevicecannotbeinstalledundercupboardsunder
which there is a lighting strip.
• Formounting,youmayneedthefollowingsupplies:
Reamer or nail, screwdriver, measuring tape, adhesive
tape, scissors, safety goggles.
Supplied mounting accessories
1 Drilling template
3x3screws(differentlengths)
3x3spacers(differentsizes)
WARNING:
Screws that are driven in too far (screws that are too long)
can damage the device or can result in danger to life.
CAUTION:
• Pleaseadheretothedimensionsstatedintheinstalla-
tion instructions.
• Youshoulduseonlytheinstallationaccessoriessup-
plied.
Installation
1. Tape the template into the cabinet with adhesive tape.
With the help of a gimlet or nail pierce the crosses at the
attachment points and use it to mark the holes.
2. Remove the template and drill the holes into the wall-
mounted cabinet.
3. Stick the spacers into the provided mounting brackets on
the device.
NOTE:
Adequate ventilation is only guaranteed with spacers.
4. Countersink the screws into the holes in the cabinet.
5. Select the screws according to the spacers used. Fasten
the kitchen radio to the bottom of the cabinet with the 3
screws and the spacers.
6. Tighten the screws finger tight with a screwdriver.
CAUTION:
Use a screwdriver and not a cordless screwdriver.
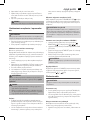
Start-up of the device / Introduction
NOTE:
You will find some buttons on both the device and the
remote control. Identical buttons fulfil the same function.

English
37
• Readtheoperatinginstructionsthoroughlybeforethe
start-up!
• Ifapplicable,removetheprotectivelmfromthedisplay.
Inserting the power reserve batteries
(Batteries not included)
In case of a power failure or if the power plug of the device
is disconnected from the outlet, then the settings will be
retained if the power reserve batteries have been inserted.
1. Open the battery compartment on the bottom.
2. Insert 2 AAA/R03 1.5 V type batteries. Pay attention to the
correct polarity (see bottom of battery compartment)!
3. Close the battery compartment again.
4. If the device is not used for a long period of time, then
remove the batteries from the device to prevent the
battery acid from leaking.
WARNING:
Thebatteriesshallnotbeexposedtoexcessiveheatsuch
as sunshine, fire or the like. Danger of explosion!
CAUTION:
• Differentbatterytypesornewandusedbatteriesmay
not be used together.
• Batteriesdonotbelonginthehouseholdwaste.
Dispose of spent batteries at the designated collection
points or at the dealer.
Power supply
• Inserttheplugintoaproperlyinstalled230V,50Hzpower
socket. Please ensure that the mains voltage corresponds
to the information on the type plate.
• Ifyouhavenotinsertedanypowerreservebatteries,the
preset time and radio stations are lost as soon as the
power supply has been interrupted.
Switching the Device on/off (12/35)
Switch the device to the standby mode with the STANDBY/
AL.OFF (
) button (the time is displayed). If this button is
pressed once more, the device switches on again.
NOTE: In CD mode
To keep the power consumption to a minimum, the device
has an automatic switch-off. If the device is in stop mode,
forexampleaftertheplaybackofaCDhasbeenstopped,
the device will automatically shut off after about 11 minutes.
Setting of the Clock (in Standby Mode)
• Youmustselectthesettingswiththe
REW/F.FWD
buttons (6/7), or with the
/
/
/
buttons (33).
• AlwaysconrmyoursettingswiththeTIMESETbutton
(16/30).
1. KeeptheTIMESETpresseddownforapprox.3seconds.
Theseconddisplaywillstarttoash.
2. You may now select the settings for the hours, minutes,
and the display format (24H or 12H) one by one.
NOTE:
“PM” will show for afternoons in the 12 hour display.
Volume adjusting
The desired volume can be sent using the VOLUME regula-
tor (1). To adjust the volume with the remote control, press
the
/ buttons (33).
Listening to the radio
NOTE:
The preset stations will be lost if the power is interrupted.
Scanning stations
• TuneintothedesiredstationwiththeTUNINGcontrol(11).
The display will show the respective frequency.
• Ifthereisinterferenceonthereceivedstation,tryto
improve the reception by rotating, winding or unwinding
the wire antenna.
Presetting radio stations
The device can preset up to 20 radio stations. To preset a
station, follow the steps below:
1. Search for a station as described in “Scanning stations”.
2. Press the MEM/PROG button (4/21). The storage space
willstarttoashonthedisplay.
3. Use the M
(18/32) and M (19/31) buttons to choose
the preset location for the corresponding station.
4. Press the MEM/PROG button again. The station will be
preset. The frequency of the preset radio station will be
displayed.
Recalling preset radio stations
1. Choose the preset location with the M
(18/32) and M
(19/31) buttons.
Automatic station scan
When holding down the MEM/PROG button (4/21) for ap-
prox.3seconds,thedevicewillstarttheautomaticstation
scan searching the entire frequency range automatically for
stations. The stations found will be stored on the preset loca-
tions 1- 20 in ascending order.
NOTE:
• Thescanwillonlystopafterall20presetlocationshave
been filled.
• Theordercannotbechangedonceset.

English
38
Playing CDs
NOTE:
Observe the following operation for the replay of CD’s in
the MP3 format! The device is not MP3 capable. The CD
will however start to turn, but the sound cannot be repro-
duced.
This is how you play a CD
1. Select the CD mode with the FUNCTION button (13/27).
The following will appear in the display “- -”.
2. Press the OPEN/CLOSE button (9/26) to open the CD
tray.
3. Place the CD into the CD tray with the label side up.
Press the OPEN/CLOSE button once more to close the
CD tray again.
4. After a few seconds the total number of songs/tracks is
shown in the display.
5. Press the PLAY/PAUSE (
) button (10/24). The CD will
play from the first title. The current title number and the
notification “ ” are shown on the display.
6. In order to remove a CD, please press the STOP (
)
button (8/34), open the CD compartment and lift the CD
out carefully.
Always keep the CD tray closed.
NOTE:
• Ifadiscisinsertedthewrongwayaround,respectivelyif
no disc is inserted, then the message “- -” will blink and
“NO” appears on the display.
• PlaybackofCDsproducedbytheusercannotbe
guaranteed due to the large variety of software and CD
media available.
• Pleasenote:
There are many burning and compression methods,
as well as quality differences between CDs and burned
CDs.
The music industry furthermore does not observe any
xedstandards(copyrightprotection).
For these reasons, in rare cases there may be problems
when playing CDs. This is not a malfunction of the
device.
Description of the CD buttons
PLAY/PAUSE ( ) (10/24)
Youcanbrieyinterruptandresumeplaybackusingthisbut-
ton. The symbol “
”willashonthedisplay.Pressingagain
continues playback.
F.FWD
/
REW (
/
/
/
) (6/7/33)
With F.FWD
(
/
)youcanjumptothenextorprevious
track etc.
• Ifthebuttoniskeptpresseddown,themachinestartsto
search through the tracks.
The
REW (
/
) button can be used as follows:
Pressonce= Thisstartsthecurrenttrackagainfromthe
beginning.
Presstwice= Thisjumpsbacktotheprevioustrack.
Pressthreetimes=Thisplaysthesongbeforeetc.Ifthebut-
ton is kept pressed down, the machine
starts to search through the tracks.
STOP (
) (8/34)
The CD stops.
REPEAT (5/23)
With a CD currently playing:
Pressonce= (the
emitsaxedlight)thecurrent
track is repeated continuously.
Presstwice= (theALL emitsaxedlight)thewhole
CD is played continuously.
Pressthreetimes=allfunctionsarecancelled.Thenormal
play mode is resumed.
Programmed Play
This can be used to program any desired sequence of tracks.
1. Press the STOP (
) button (8/34).
2. Press the MEM/PROG button (4/21). The memory
location “01” and the notification “PROG” will blink
in the display. Use the F.FWD / REW (
/
/
/
)
buttons (6/7/33) to select the desired track and then press
the MEM/PROG button again. The display changes to
memory slot 02.
3. SelectthenexttrackwiththeF.FWD / REW (
/
/
/
) buttons and press the MEM/PROG button again.
Repeat the procedure until all the desired tracks are
selected.
NOTE:
If the storage capacity of the titles to be programmed
has been reached, all the programmed titles will be
shown in sequence.
4. Press the PLAY/PAUSE (
) button (10/24). The playback
starts. The current title number, the notification “ ” and
“PROG” will be shown in the display.
5. Press once the STOP ( ) button to stop the playback
while retaining the program.
6. To play the programme back again, press the PLAY/
PAUSE ( ) button.
7. To delete the program, press the STOP ( ) button twice.
The PROG control lamp goes out.
The device stops automatically after all programmed titles
have been played. The indication PROG goes out and the
programmed sequence is deleted from the memory.

English
39
Alarm function (in standby mode)
Setting of the Alarm
You can set two alarm times. Proceed as follows:
1. Switch the device into standby mode with the STANDBY/
AL.OFF (
) button (12/35).
2. Keep the AL SET button pressed for ca. 3 seconds. The
hoursofthecurrentlysetalarmtimestarttoash.
3. Use the buttons /F.FWD and /REW (6/7/33) for
setting.
4. Press the AL SET button for confirmation. The minutes
starttoash.
5. Use the buttons /F.FWD and /REW for setting.
6. Press the AL SET button to confirm. Then select how you
want to be awakened. Select from:
• (Buzzer):
A buzzer sounds when the alarm time is reached.
The buzzer interval increases from slow to fast. The
volume cannot be adjusted.
• FM:
As soon as your set alarm time is shown, the radio
switches on. The last set station is played.
• CD:
As soon as your specified alarm time has been
reached, the device will start in CD mode. The inser-
ted CD will be played starting with the first title.
7. Finally, press the AL SET button again. You will reach the
setting of the second alarm time. To set it, proceed as
described above.
NOTE:
If you only want to set the first alarm time, press the ALM
SET button until the time is displayed again.
Activating alarm time
You may activate the first or the second alarm time, or both.
1. BrieypresstheALSETbutton(15/25).“AL1”andthe
symbol of the selected alarm mode will appear in the
display.
2. Press the AL SET button again. “AL 2” and the symbol of
the selected alarm mode will appear in the display.
3. Press the AL SET button one more time to activate both
alarm times.
Snooze function
The automatic alarm can be switched off using the SLEEP/
SNOOZEbutton(17/29)forapprox.9minutes.Thesymbol
“
” will appear in the display.
Switch off the buzzer
In order to switch off the alarm until the following day please
press the STANDBY/AL.OFF /
button.
Disabling the alarm
To deactivate the alarm, press the AL SET button (15/25) until
the alarm symbol is no longer shown in the display.
Delayed Shut-Off (SLEEP)
The unit is switched off automatically when the selected time
is reached.
• Selectthetimeafterwhichtheunitisswitchedoffby
repeatedly pressing the SLEEP/SNOOZE button (17/28).
The following selections can be made: 120, 90, 60, 45, 30,
and 15 minutes. The notification “SLEEP” will appear in
the display.
• ThisfunctioncanbecancelledwiththeSTANDBY/
AL.OFF (
) button (12/35).
AUX IN socket
To connect analogue replay devices. Via this socket you can
also hear the sound of other playback devices such as MP3
players, CD players etc. through the loudspeakers.
1. ConnectanexternaldevicetotheAUXINjacks(2xRCA)
on the back of the device. Use a suitable adapter cable
(not supplied).
2. Turn on the device with the STANDBY/AL.OFF (
) button
(12/35).
3. Use the FUNCTION button (13/27) to select the AUX
mode. “AV” will appear on the display.
4. Through the loudspeakers you can hear the playback of
thesoundfromtheexternaldevice;withtheVOLUME
control (1) you can change the volume. The CD buttons
are not functional.
5. For the remaining procedure please see the operating
instructionsoftheexternalsoundsource.
NOTE:
Adjustthevolumeoftheexternaldevicetoacomfortable
level.
Cleaning
CAUTION:
• Donotdiptheapplianceinwater.
• Donotuseawirebrushorotherabrasiveobjects.
• Donotuseanycausticorabrasivecleaningagents.
• Removetheplugbeforecleaning.
• Cleantheappliancewithaslightlyhumidclothwithout
any additives.

English
40
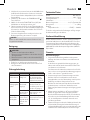
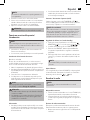
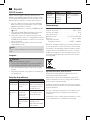
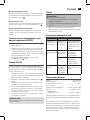
Troubleshooting
Symptoms Cause Solution
The unit cannot
be operated.
The unit is
blocked and
“hangs”.
Pull the mains plug for
approximately5seconds.
Then connect the unit
again.
CD cannot be
played back.
CD is not
inserted or is
not inserted
correctly.
Ensure that the CD is
inserted with the label
side up.
This is a CD in
MP3 format.
The device is not MP3-
capable. Insert an audio
CD.
CD skips during
playing.
Check the CD
for fingerprints,
dirt, or
scratches.
Clean it with a soft cloth
starting from the center.
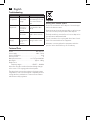
Technical Data
Model: .........................................................................KRC 4355 CD
Power supply: .............................................................230 V~, 50 Hz
Power consumption:.................................................................12 W
Protection class: ................................................................................II
Battery Power reserve: ...........................2x1.5V,TypeAAA,R03
Net weight: ..............................................................approx.1.28kg
Radio section
Frequency ranges: ..................................FM 87.5 ~ 108 MHz
We reserve the right to make technical and design changes
in the course of our ongoing product development.
This device has been tested according to all relevant current
CE guidelines, such as electromagnetic compatibility and low
voltage directives, and has been constructed in accordance
with the latest safety regulations.
Disposal
Meaning of the “Dustbin” Symbol
Protect our environment: do not dispose of electrical equip-
ment in the domestic waste.
Please return any electrical equipment that you will no longer
use to the collection points provided for their disposal.
This helps avoid the potential effects of incorrect disposal on
the environment and human health.
This will contribute to the recycling and other forms of reutili-
sation of electrical and electronic equipment.
Information concerning where the equipment can be dis-
posed of can be obtained from your local authority.
Page is loading ...
Page is loading ...
Page is loading ...
Page is loading ...
Page is loading ...
Page is loading ...
Page is loading ...
Page is loading ...
Page is loading ...
Page is loading ...
Page is loading ...
Page is loading ...
Page is loading ...
Page is loading ...
Page is loading ...
Page is loading ...
Page is loading ...
Page is loading ...
Page is loading ...
Page is loading ...
Page is loading ...
Page is loading ...
Page is loading ...
Page is loading ...
Page is loading ...
Page is loading ...
-
 1
1
-
 2
2
-
 3
3
-
 4
4
-
 5
5
-
 6
6
-
 7
7
-
 8
8
-
 9
9
-
 10
10
-
 11
11
-
 12
12
-
 13
13
-
 14
14
-
 15
15
-
 16
16
-
 17
17
-
 18
18
-
 19
19
-
 20
20
-
 21
21
-
 22
22
-
 23
23
-
 24
24
-
 25
25
-
 26
26
-
 27
27
-
 28
28
-
 29
29
-
 30
30
-
 31
31
-
 32
32
-
 33
33
-
 34
34
-
 35
35
-
 36
36
-
 37
37
-
 38
38
-
 39
39
-
 40
40
-
 41
41
-
 42
42
-
 43
43
-
 44
44
-
 45
45
-
 46
46
-
 47
47
-
 48
48
-
 49
49
-
 50
50
-
 51
51
-
 52
52
-
 53
53
-
 54
54
-
 55
55
-
 56
56
-
 57
57
-
 58
58
-
 59
59
-
 60
60
-
 61
61
-
 62
62
-
 63
63
-
 64
64
-
 65
65
-
 66
66


Ask a question and I''ll find the answer in the document
Finding information in a document is now easier with AI
in other languages
- italiano: AEG KRC 4355 CD Manuale del proprietario
- français: AEG KRC 4355 CD Le manuel du propriétaire
- español: AEG KRC 4355 CD El manual del propietario
- Deutsch: AEG KRC 4355 CD Bedienungsanleitung
- русский: AEG KRC 4355 CD Инструкция по применению
- Nederlands: AEG KRC 4355 CD de handleiding
- polski: AEG KRC 4355 CD Instrukcja obsługi
Related papers
-
AEG SR 4352 User manual
-
-
-
-
-
-
-
-
AEG DVD 4611 HC Owner's manual
-
Other documents
-
Auna 10032462 User manual
-
Silvercrest KH2307 Owner's manual
-
Roadstar HIF-6880USMPT User manual
-
Silvercrest SWED 100 B1 - IAN 270812 Owner's manual
-
Clatronic SR 7028 User manual
-
TechniSat Transita 30 User manual
-
Medion LIFE E64074 MD 43198 Owner's manual
-
Silvercrest SWDR 500 B1 Operating Instructions And Safety Instructions
-
Silvercrest SUP 128 A1 Operating instructions
-
Reflexion HRA19DAB Owner's manual