Giorbello G3910-SMPL User manual

Type
User manual
1. Be sure to clean the surface you are installing tile on to. Any dirt
or debris can affect the adhesive’s ability to adhere your Subway
Tiles to the substrate.
2. Measure and mark the
center points of both the
vertical and horizontal
dimensions of your wall.
3. Snap a chalk line between
these points to create your
centerlines. Check the
intersection of the chalk
lines with a carpenter’s square to ensure that it is fully square.
4. Layout your tiles without adhesive from your intersection point
towards the end of the wall. If your layout results in pieces that
are too small to cut along the edges, then adjust your centerlines
accordingly and resnap chalk lines.
Mixing Thin-set
1. Be sure to follow mixing directions on bag on all points. You need
allow the thin-set to sit between mixings – as the instructions
describe - because it is during that time that the cement slakes. If
you do not do this, the bonds will be weak and the thin-set will not reach maximum adhesive performance.
2. DO NOT ADD EXTRA WATER ONCE MIXED. This will weaken the adhesive strength of the MAPEI Adesilex
P10 specifically formulated for glass tile applications. If the thin-set is drying up, then remixing will return some
of its fluidness.
3. Placing a damp towel over the bucket used to mix the thin-set will extend its “pot life”.
Applying Thin-set
1. Using the flat side of the trowel spread the adhesive onto the working area.
2. Only apply as much area as you can tile in the next 15 to 20 minutes (The open time for Adesilex P10 is 25 to 35
minutes). If you are not able to tile over thin-set that you have applied within this period, then you must scrape the
adhesive off the surface and reapply.
3. Comb the notched side of the trowel across the thin-set. This ensures that an even and proper amount of thin-set is
applied to your substrate.
4. Take the flat side of the trowel and knock down the ridges of thin-set so that the surface is covered evenly with
adhesive.
5. This ensures that shadows from the ridges are not seen through the tile after installation.
HOW TO INSTALL GLASS
SUBWAY TILE
Preparation
Installation
Materials
Adesilex P10 (Thin-set)
Keracolor U (Grout)
Keracaulk U (Caulk)
Tools
Setting Each Tile
1. When setting the tiles, butt them up to the adjacent tiles, and then press and twist the tile into the thin-set away
from the already set tiles. This prevents thin-set from squeezing up into the grout lines. The less thin-set that dries
in the grout lines, the less clean up will be required before grouting.
2. Place tile spacers where tiles butt up next to one another. You
should place at least two along each edge to ensure straight,
uniform grout lines.
Cutting Tile
1. Make an outline of the cut on a piece of paper or cardboard.
Then, cut it out and trace the pattern onto the back of the tile.
Make sure to flip the pattern 180° when translating the pattern
to the tile so that it installs correctly when right side up.
2. Push tile through your tile saw face down. This prevents the
inevitable chipping from removing the painted back. When
this happens, you can see straight through the tile to the thin-
set.
3. For curved cuts you will need a band or ring saw specifically
designed for glass tile.
4. Use a smoothing stone to remove any excess chipping or burrs
left on the tile from the cutting process.
Grouting
Preparation
We recommend using our unsanded Keracolor U Grout for glass
tile installation. Grout joints of 1/8” or less require unsanded
grout because the sand grains are too large to create a strong
bond in sanded grouts.
1. Allow thin-set to cure for 48 to 96 hours (2 to 4 days) prior to
grouting. The humidity and temperature of the installation
environment will affect curing time.
2. Examine the grout lines, and using a Grout Scraper remove
any thin-set that has dried in the grout line in excess of 40% of
the thickness of the tile.
Mixing
1. Be sure to follow mixing directions on bag on all points. You
need allow the grout to sit between mixings as the
instructions describe - because it is during that time that the
cement slakes. If you do not do this, the bonds will be weak
and the grout will not reach maximum adhesive performance
and color consistency.
2. DO NOT add extra water once mixed. This will dilute the
grout and possibly bleed the color. Remixing the grout should
return some of its fluidness.
Applying
1. Use a Grout Bag to spread grout directly into the joint or use a
Grout Float diagonally across the face of the tiles. You can use
an old toothbrush handle or your finger to spread the grout in
those hard to reach areas. Make sure that all grout joints are
completely filled, leaving no air pockets or voids. Only apply
up to 25 sq. ft. at a time.
2. Grout dries very quickly and is difficult to squeeze out of the Grout Bag within an hour. Therefore, mix small
batches at a time to prevent wasting the grout.
Cleaning
Do not over wet the sponge. It will discolor
the grout and remove it from the joint.
CUTTING
Make sure to cut with the backing face up
Outlining
After tracing your paper/cardboard to the
size of your cut, flip the pattern 180° when
translating onto the tile.
Cleaning
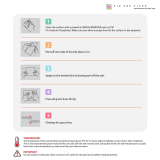
1. Wipe off excess grout with your Grout Float, held at a 45° angle, diagonally in relation to the grout joints. This will
prevent the float from digging the grout out of the joints. Be sure to remove as much as possible.
2. Wait 15 to 20 minutes after using the Grout Float to wipe the surface before cleaning.
3. Soak a Grouting Sponge with clean water, then wring thoroughly. It should be barely damp. Remove the
remaining grout by wiping diagonally in relation to the joint lines, and be sure to rinse the sponge often. DO NOT
OVERWET THE SPONGE. IT WILL DISCOLOR THE GROUT.
4. Repeat until the grout joints are smooth and level with the tiles.
5. The grout will dry to haze on the face of the installed tiles. Take a soft, dry cloth or cheesecloth and polish this haze
off the surface of the tiles.
6. Do not allow water near the grout for 48 hours.
Sealing
1. Though not required, sealing your grout joints is highly recommended. It prevents liquid absorption and thus the
possibility of staining.
2. Follow the grout lines with a small paintbrush or cloth dipped into the grout sealer while wiping off any excess
that may spill onto the tiles. Make sure to wipe the tiles or you will be left with a haze that will take away from the
clear beauty of the Glass Subway Tiles.
3. Grout Sealer is not a permanent protector, and will
need to be reapplied. However, this length of time is
dictated by the amount of foot traffic/wear and tear
that the tile is subjected to. For example, a kitchen
backsplash may not need to be sealed at all, or if it is,
then only once. On the other hand, a floor tile in a
foyer may need sealer reapplied every 6 to 12
months.
Caulking
Use color-coordinating caulk in the grout joints where:
There is a change of plane.
Two walls or a wall and a floor meet
Tile butts up next to a non-tile material i.e.
countertops, cabinets
Glossary
Adesilex P10 A pure white, polymer-modified thin-set that has been specifically formulated for use with
glass tile installations. The true white color prevents the discoloration of the tiles by the thin-set.
Curing – The process of becoming hard or solid by cooling, drying, or crystallization; "the hardening of
concrete". 3”x6” glass subway tile requires roughly twice the curing time as glass mosaic tiles because of their
large surface area. We recommend 2 to 4 days curing time vs. the usual 1 to 2 days for MAPEI Adesilex P10.
Grout - A thin, coarse mortar poured into joints between tiles to fill them and consolidate the adjoining tiles
into a solid mass. Available in unsanded and sanded varieties. We recommend unsanded grout for glass tile
because of the small – less than 1/8” – grout joints and to prevent scratching of the tiles’ surface.
Notched Trowel – Designed to apply tile adhesive to vertical or horizontal surfaces quickly and evenly
without mess.
Open Time – Amount of time that thin-set will remain usable if left on the wall/floor i.e. MAPEI Adesilex P10
has an open time of 25 to 35 minutes.
Pot Life – Amount of time that mixed cement will remain usable if left in the bucket i.e. MAPEI Adesilex P10
has a pot life of 3 to 4 hours.
Slaking – The process that cements undergo as they interact with water that gives it strength. Allowing grout
or thin-set to sit and slake after mixing is very important in ensuring maximum adhesive strength.
Giorbello, Inc. provides this information as general
advice to benefit the customer, but in no way assumes
responsibility for the application of the information,
nor do we guarantee the results of its use.
Giorbello, Inc.
4660 New Design Rd., Suite I
Frederick, MD 21703
Website: www.Giorbello.com
E-mail: sales@giorbello.com
Toll Free: (877) 465-6008
Fax: (202) 536-5746
  • Page 1 1
  • Page 2 2
  • Page 3 3

Giorbello G3910-SMPL User manual

Type
User manual

Ask a question and I''ll find the answer in the document

Finding information in a document is now easier with AI