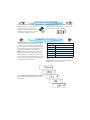
Bauknecht EMCCE 8145 PT User guide
- Category
- Microwaves
- Type
- User guide
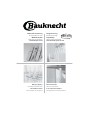
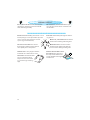
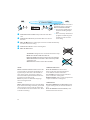
Bauknecht EMCCE 8145 PT is a versatile microwave oven that offers a range of cooking options. It features a grill function for crispy results, a crisp plate for healthier frying, and a steamer for preserving nutrients. The auto functions with adjustable doneness levels simplify cooking various food types, while the start protection ensures safe operation.
Bauknecht EMCCE 8145 PT is a versatile microwave oven that offers a range of cooking options. It features a grill function for crispy results, a crisp plate for healthier frying, and a steamer for preserving nutrients. The auto functions with adjustable doneness levels simplify cooking various food types, while the start protection ensures safe operation.


-
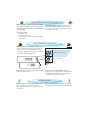
 1
1
-
 2
2
-
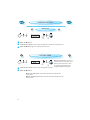
 3
3
-
 4
4
-
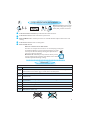
 5
5
-
 6
6
-
 7
7
-
 8
8
-
 9
9
-
 10
10
-
 11
11
-
 12
12
-
 13
13
-
 14
14
-
 15
15
-
 16
16
-
 17
17
-
 18
18
-
 19
19
-
 20
20
-
 21
21
-
 22
22
-
 23
23
-
 24
24
-
 25
25
-
 26
26
-
 27
27
-
 28
28


Bauknecht EMCCE 8145 PT User guide
- Category
- Microwaves
- Type
- User guide
Bauknecht EMCCE 8145 PT is a versatile microwave oven that offers a range of cooking options. It features a grill function for crispy results, a crisp plate for healthier frying, and a steamer for preserving nutrients. The auto functions with adjustable doneness levels simplify cooking various food types, while the start protection ensures safe operation.
Ask a question and I''ll find the answer in the document
Finding information in a document is now easier with AI
Related papers
-
Whirlpool EMCHD 8145/SW User guide
-
Whirlpool EMCHE 8145 ES Owner's manual
-
Whirlpool EMCCE 8145 PT User guide
-
-
-
-
-
Bauknecht EMCHD 8145/PT Owner's manual
-
-
Whirlpool EMCCS 8660 SW Owner's manual
Other documents
-
Whirlpool AMW 834/IXL User guide
-
KitchenAid KMPC 3610 IX User guide
-
Whirlpool AMW842 Owner's manual
-
IKEA MWP T00 AN User guide
-
-
Bruynzeel 9BRCM4502A Program Chart
-
Whirlpool AMW 836 IX User guide
-
Whirlpool AMW 7096 IX Owner's manual
-
Whirlpool AMW 842 IX User guide
-